How to Connect APIs in OpenClaw
OpenClaw is an open-source framework designed for building autonomous personal AI assistants that run locally on your own hardware. To function properly, OpenClaw relies on APIs to connect with external AI models and services.
This guide walks you through what APIs are, why they matter in OpenClaw, and how to connect an AI provider by adding API keys through the OpenClaw UI.
What is an API?
An API (Application Programming Interface) allows different software systems to communicate with one another. In OpenClaw, APIs serve as the bridge between the local agent running on your machine and the external intelligence, services, and tools it needs to perform tasks.
Why APIs Matter in OpenClaw
APIs are essential to OpenClaw’s flexibility and functionality. They enable the platform to operate as a powerful, extensible AI agent in the following ways:
- Access to AI Intelligence
OpenClaw is model-agnostic, meaning it can work with different large language models (LLMs). Through APIs, it can connect to providers such as OpenAI (GPT), Anthropic (Claude), and Google (Gemini), allowing the agent to reason, plan tasks, and understand user intent.
- Autonomous Actions
Using tool‑calling APIs, OpenClaw can interact with both digital and physical systems. For example, REST APIs can be used to manage calendars, organize inboxes, execute workflows, or control connected hardware.
- Multi-Platform Messaging
Messaging APIs allow OpenClaw to communicate with users across platforms such as WhatsApp, Telegram, Slack, and Discord, enabling seamless cross‑platform interaction.
- Direct API Consumption
OpenClaw follows an API‑first approach, consuming APIs directly rather than relying on intermediary protocols like the Model Context Protocol (MCP). This makes OpenClaw a universal agent capable of integrating with nearly any existing API.
- Scalability and Flexibility
APIs make it easy to switch between providers based on cost, performance, or features without changing the core agent logic. Services like OpenRouter allow access to multiple models through a single unified API.
How to Connect OpenClaw to an AI Provider
To enable your agent to generate responses, you must connect at least one AI model provider. The setup process typically takes about five minutes.
Step 1: Get an API Key
Obtain an API key from your preferred provider:
You may also use any other supported LLM provider.
Step 2: Open the Config Editor
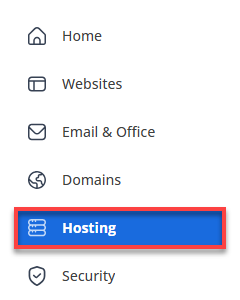
- Log in to your Bluehost Portal.
- Click Hosting in the left-hand menu.
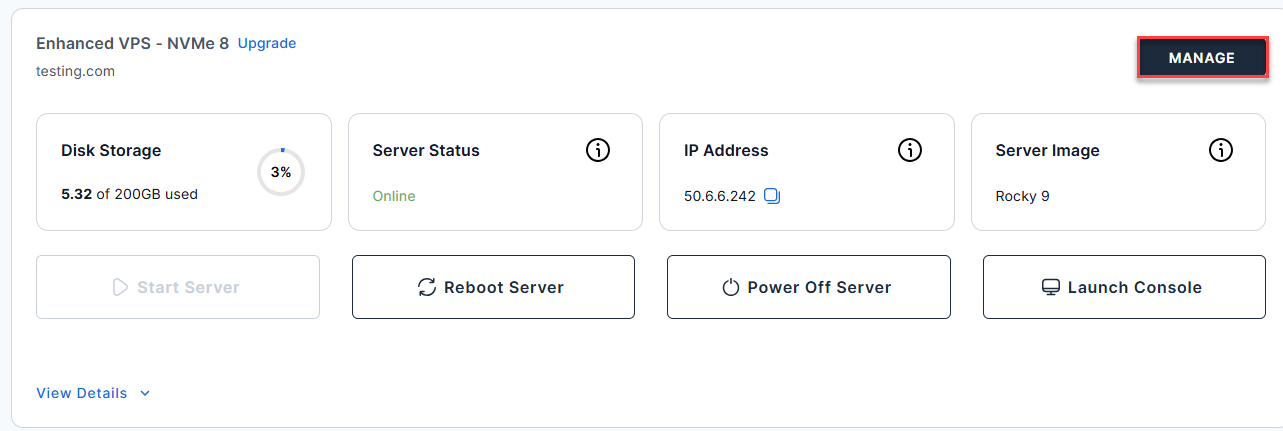
- Click the Manage button on the Self-Managed VPS package.
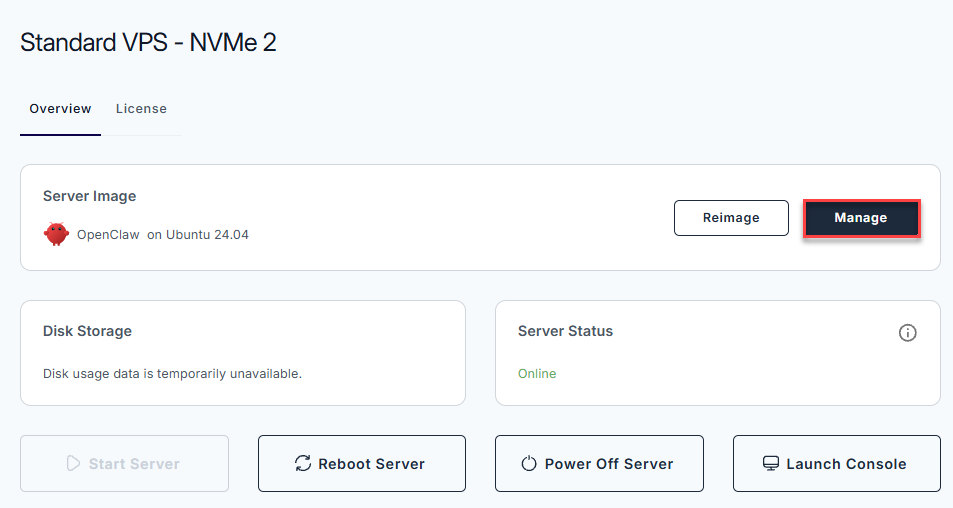
- Sign in to your OpenClaw dashboard by clicking Manage.
- Inside the dashboard, go to Config in the left sidebar under Settings.
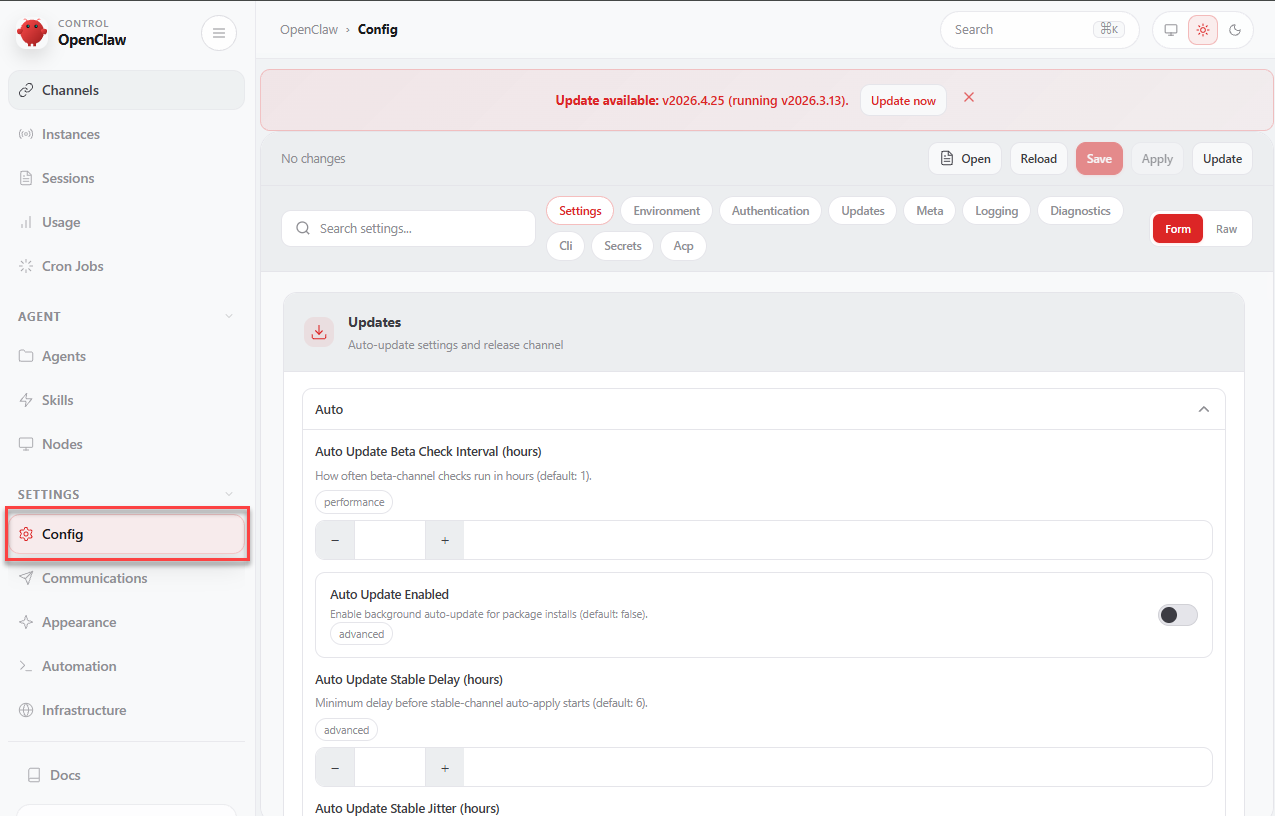
- This opens the JSON configuration editor. Click Raw in the top-right corner.
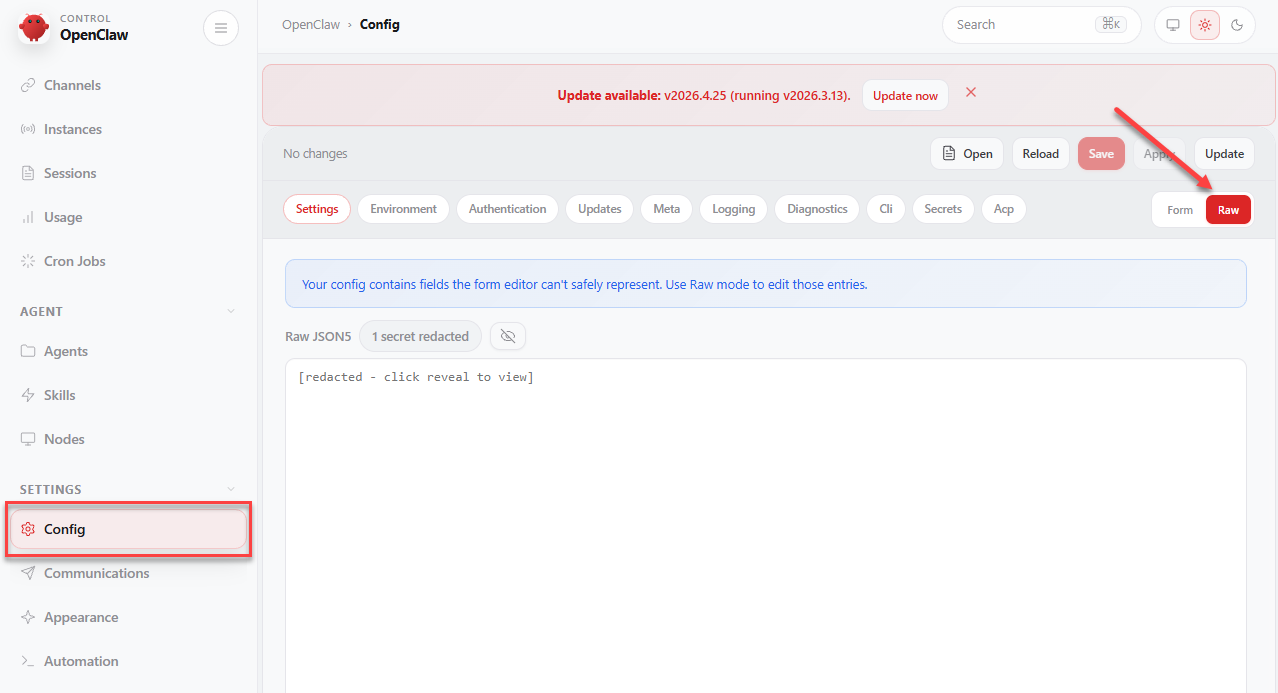
- If the raw config is redacted, click the reveal icon to view the config.

- If the raw config is redacted, click the reveal icon to view the config.
Step 3: Add Your API Key
At the top level of the configuration file (before the acp or agents section), add an env block:
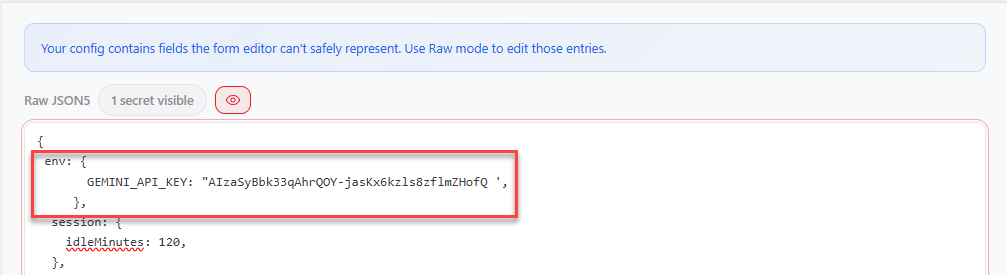
          env: {
              ANTHROPIC_API_KEY: "sk-ant-your-key-here"
          }
Replace ANTHROPIC_API_KEY with the correct variable name for your provider:
- OpenAI:
OPENAI_API_KEY - Google Gemini:
GEMINI_API_KEY - OpenRouter:
OPENROUTER_API_KEY
Step 4: Set a Default Model
Inside the agents → defaults section, define the primary model:
          model: {
            primary: "anthropic/claude-opus-4-6"
          }
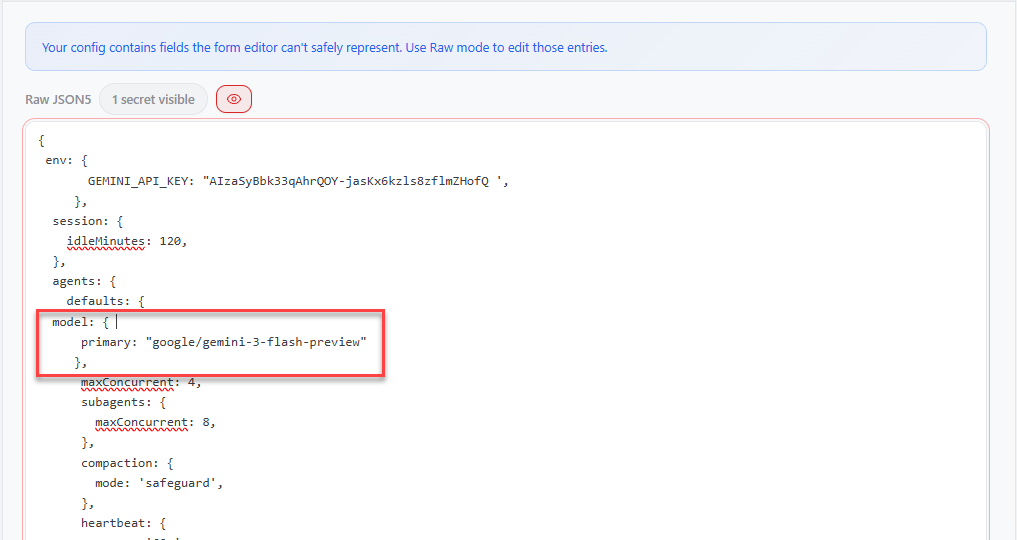
Popular model options include:
anthropic/claude-opus-4-6openai/gpt-4ogoogle/gemini-3-flash-preview
You may use any supported model that best fits your needs.
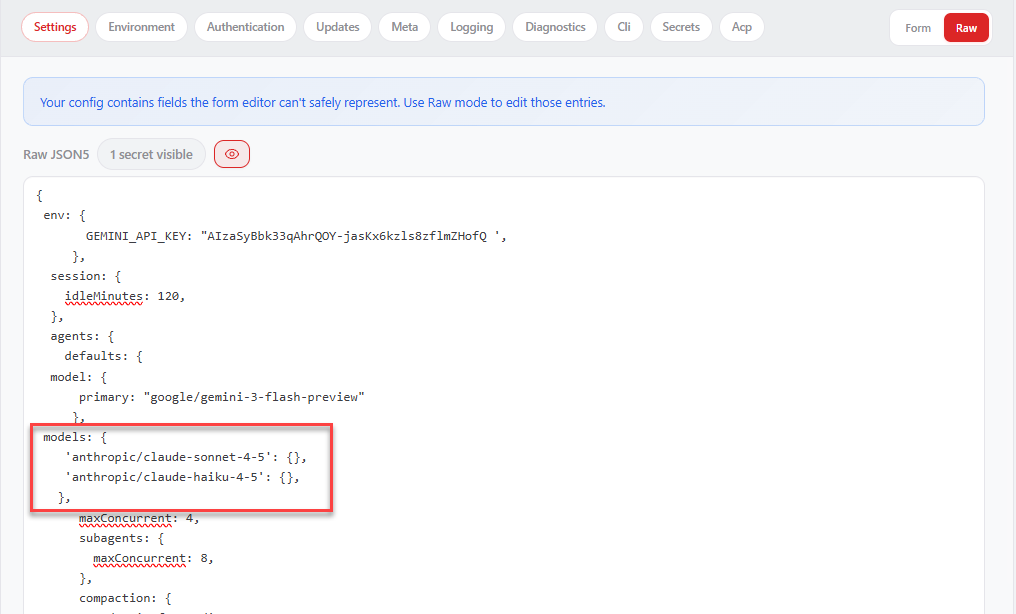
Step 5: Add Additional Models (Optional)
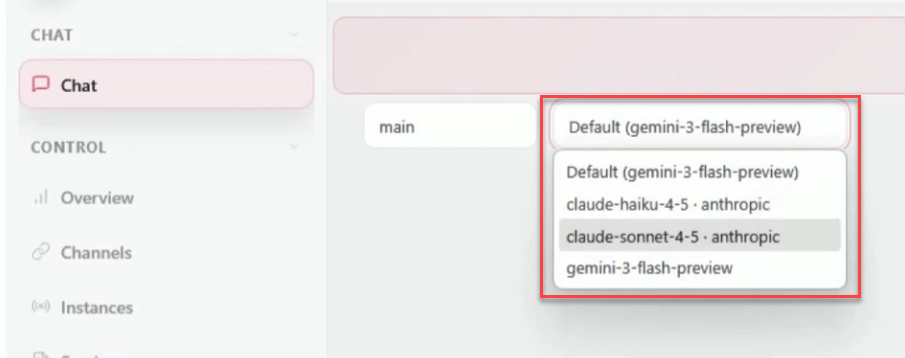
To make multiple models available, add a models allowlist under agents → defaults. This allows you to switch models using the /model command in chat.
          models: {
            'anthropic/claude-sonnet-4-5': {},
            'anthropic/claude-haiku-4-5': {},
          }
Notes for your model(s) and OpenClaw:
- Once one model is configured, you can ask OpenClaw to set up additional models from the same provider.
- If you add models from different providers (for example, Claude and Gemini), you must add an API key for each provider.
Step 6: Save and Apply Changes
Click Save, then select Apply to update your configuration.

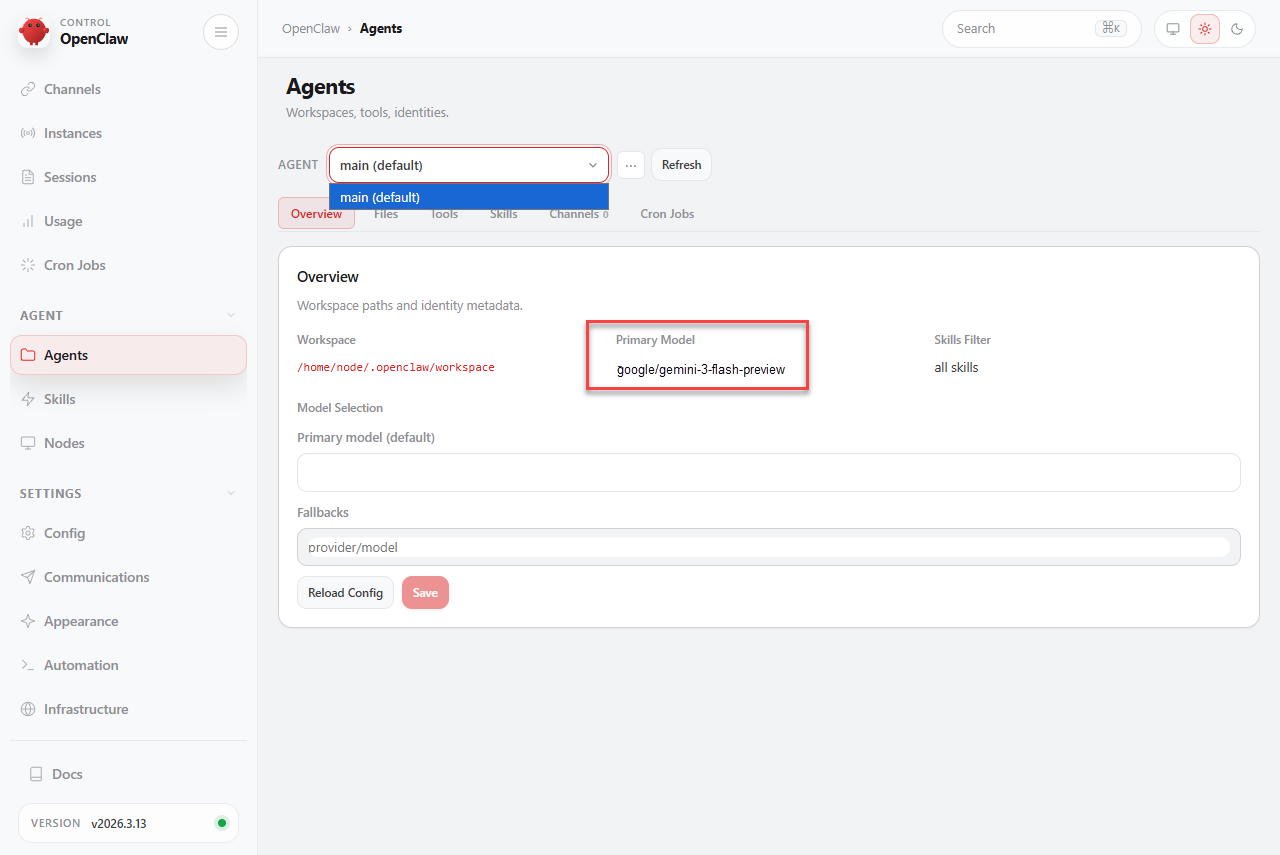
You can check the primary model once you go to the Agents tab.
Once you have one model set up, you can also ask OpenClaw to set up another model of the same provider. Like, yeah, just literally ask OpenClaw, "Hey, can you set up the Claude Sonnet model for me?" And it will do it!
Step 7: Test Your Setup
Go to Chat and send a test message to confirm that your agent is responding correctly.
Summary
Connecting APIs in OpenClaw unlocks its full potential as a flexible, autonomous AI agent. By following the steps above, you can integrate your preferred AI models and services, enabling advanced reasoning, tool use, and cross-platform communication. OpenClaw, a powerful AI-driven tool, is crafted for developers using Bluehost Self-Managed VPS.