All About Websites Tab
Welcome to the Websites Tab in your BH Portal—your central hub for managing all your websites. This intuitive tool allows you to add new websites, reset site content, or permanently delete sites you no longer need. Think of it as your website control panel, giving you quick access to essential settings and tools to keep your online presence running smoothly.
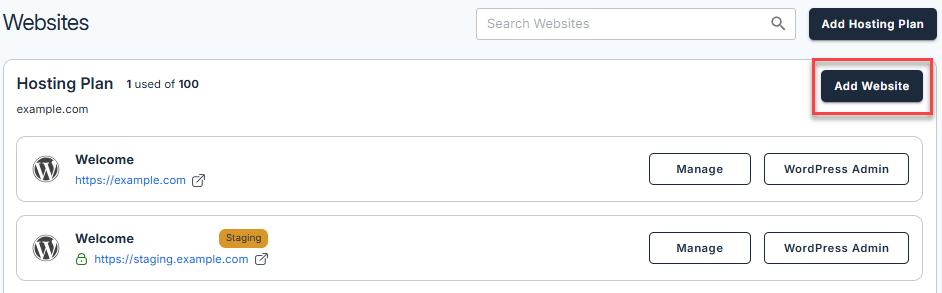
Add Website
- Log in to your Bluehost Portal.
- In the left-hand menu, click Websites.
- Click the Manage button located next to the website you want to manage.

- Click the Add Website button.
- Select WordPress from the options.
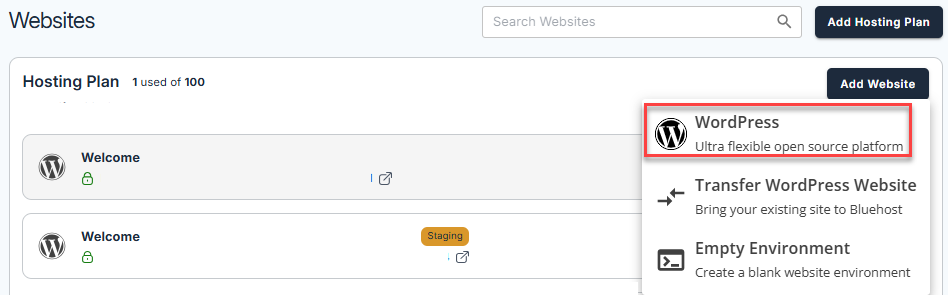
- A new WordPress instance will automatically be installed in your account.
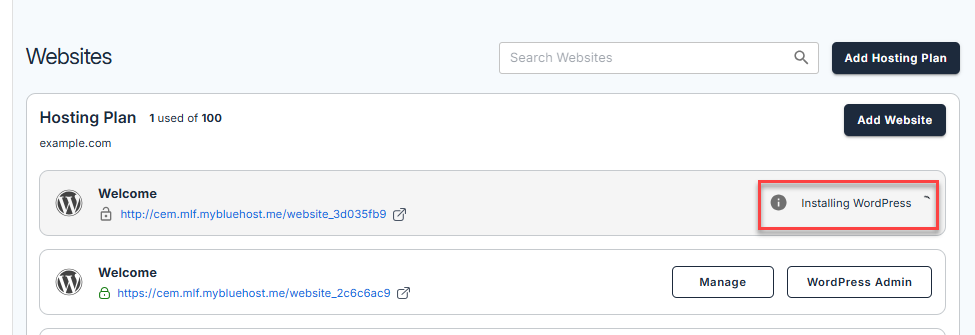
- Once WordPress is installed, you can now proceed with setting up your new WordPress site from the Websites tab. Just click the Manage button for the website you are working on.
- Under the Overview tab, enter your preferred Website name.
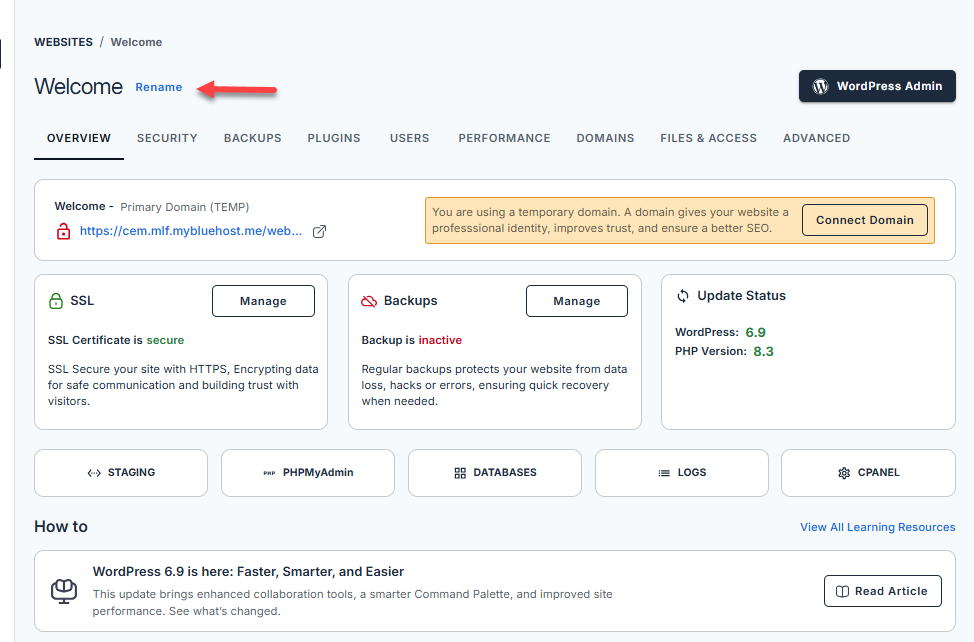
- Click Connect Domain.
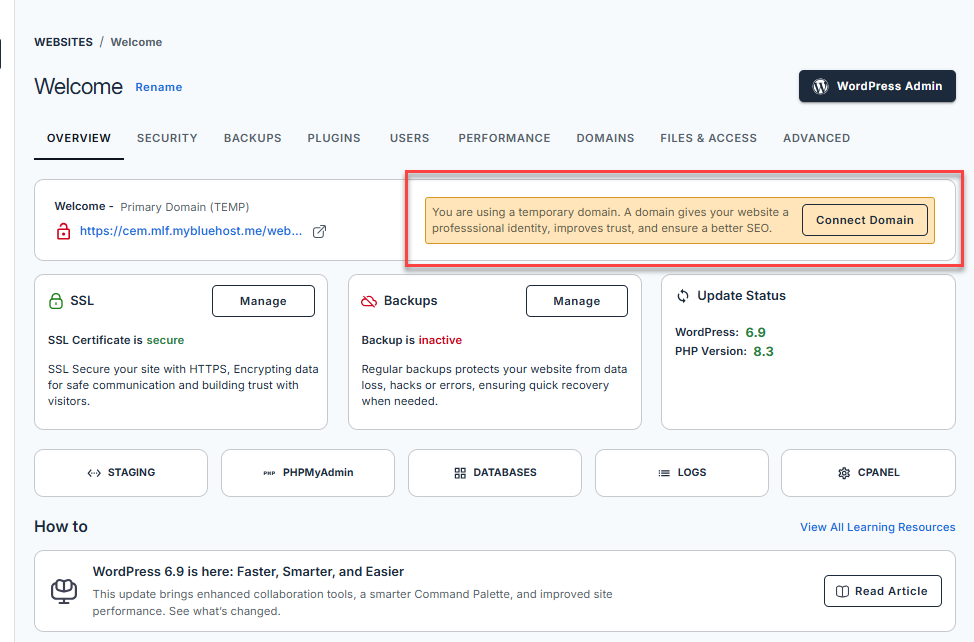
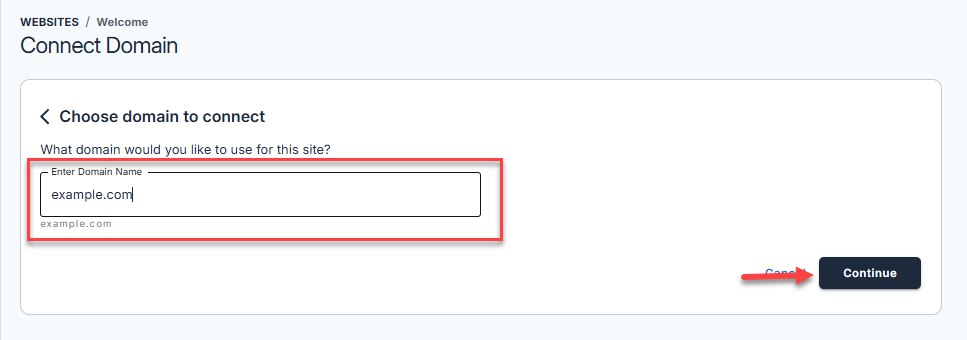
- Enter the domain name you want to use. Then, click Continue.
- If you don’t have a domain yet, you can skip this step and use the temporary domain that was automatically assigned to your website when you installed WordPress. It can be changed to your domain at any time.
-
A registered domain is required for your website to function properly.
-
A confirmation message will appear on the screen that you have successfully connected your domain to your website.

For complete details on installing WordPress and using the WonderStart AI onboarding assistant, refer to the Bluehost support guide:
Delete Content Only
This option allows you to reset your website by permanently removing all posts, pages, media, users, and comments—making the site inaccessible. Be sure to back up your site before proceeding.
- Log in to your Bluehost Portal.
- In the left-hand menu, click Websites.
- Click the Manage button located next to the website you want to manage.
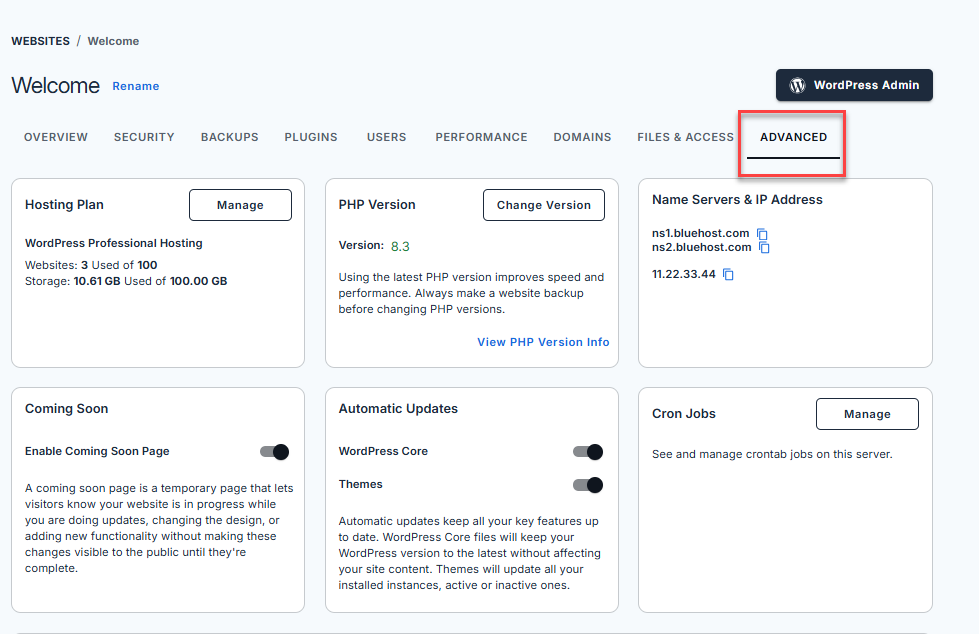
- From the horizontal menu, click the Advanced tab.
- Navigate to the Site Management section and locate the Delete content only option.
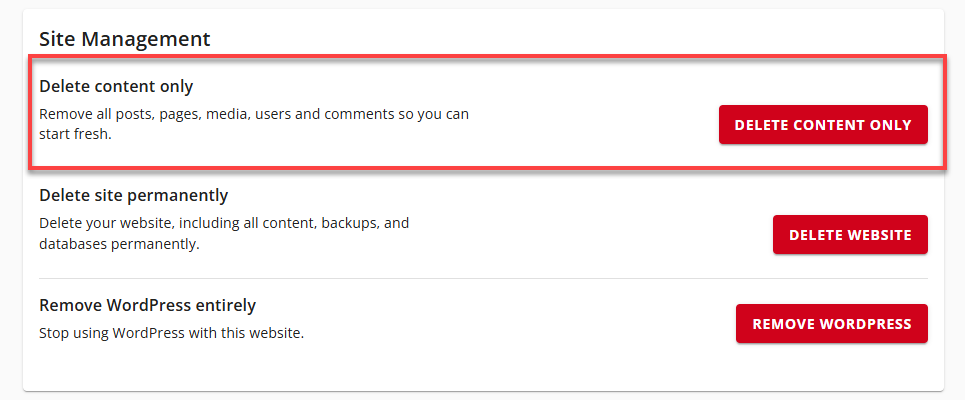
- Click the Delete Content Only button.
- To confirm, copy the site URL (displayed in red), paste it into the provided field, and click the Delete button.
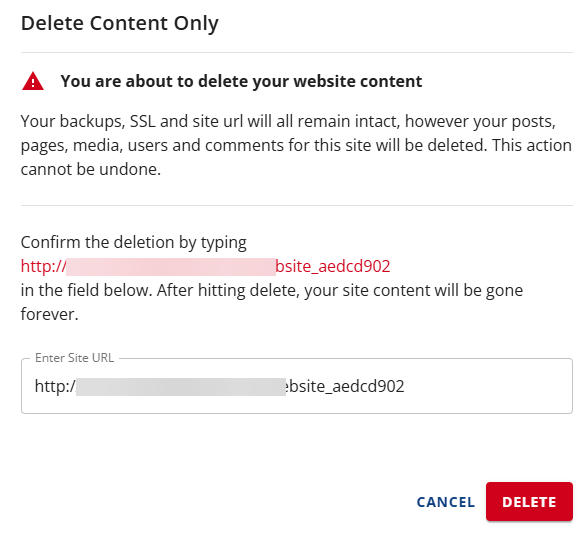
- A confirmation message will appear at the top of the screen indicating that your site content is being deleted.
Delete Site Permanently
This action permanently deletes your website, including all content, backups, databases, folders, and directories. This cannot be undone, so proceed with caution.
- Log in to your Bluehost Portal.
- In the left-hand menu, click Websites.
- Click the Manage button located next to the website you want to manage.
- From the horizontal menu, click the Advanced tab.
- Navigate to the Site Management section and locate the Delete site permanently option.

- Click the Delete Website button.
- To confirm, copy the site URL (displayed in red), paste it into the provided field, and click the Delete button.
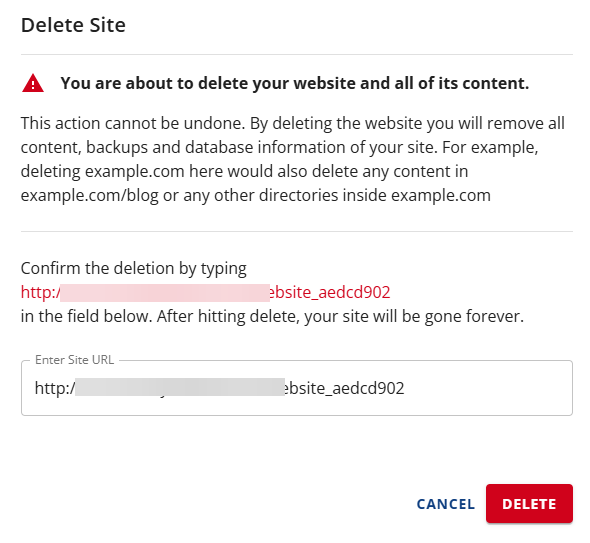
A confirmation message will appear at the top of the screen indicating that your site is being deleted.
Remove WordPress Entirely
This option stops using WordPress on this website.
- Log in to your Bluehost Portal.
- In the left-hand menu, click Websites.
- Click the Manage button located next to the website you want to manage.
- From the horizontal menu, click the Advanced tab.
- Navigate to the Site Management section and locate the Remove WordPress entirely option.
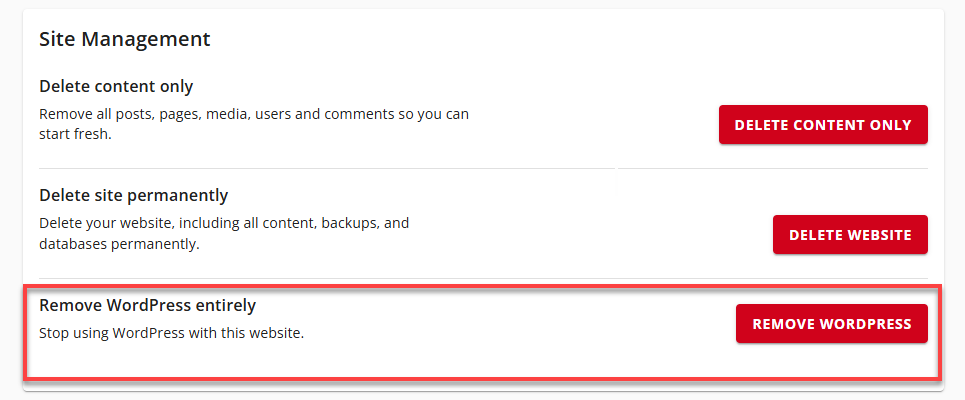
- Click the Remove WordPress button.
- To confirm, acknowledge the removal of existing files and confirm that you have saved backups locally or externally for important data, and click the Remove WordPress button.
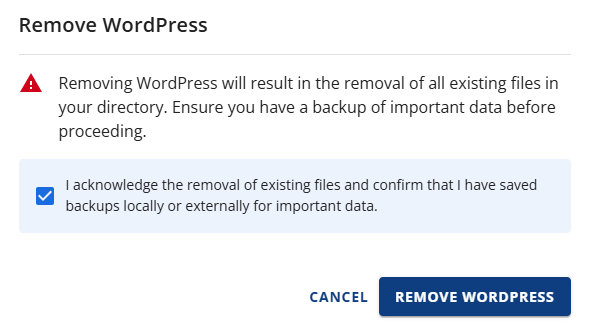
A confirmation message will appear at the top of the screen indicating that your site is being deleted.
Summary
The Bluehost Websites Tab is your all-in-one solution for managing your websites. Whether you're adding a new WordPress site, resetting site content, or permanently removing a website, this tool gives you full control over your hosting environment. With just a few clicks, you can keep your websites organized, secure, and running smoothly.
If you need further assistance, feel free to contact us via Chat or Phone:
- Chat Support - While on our website, you should see a CHAT bubble in the bottom right-hand corner of the page. Click anywhere on the bubble to begin a chat session.
- Phone Support -
- US: 888-401-4678
- International: +1 801-765-9400
You may also refer to our Knowledge Base articles to help answer common questions and guide you through various setup, configuration, and troubleshooting steps.