Purchase a Self-Managed VPS with aaPanel Installation
aaPanel is a free and open-source web hosting control panel designed to simplify server management for users of all skill levels. It provides an intuitive graphical interface for managing websites, databases, FTP accounts, and more, making it easy to deploy and maintain web projects on your own VPS. With aaPanel, you can install popular software stacks, monitor server performance, and automate routine tasks without needing to use the command line.
Why Use aaPanel?
aaPanel offers a user-friendly control panel that streamlines the process of launching and managing websites, applications, and databases on your private server. It eliminates the complexity of manual server configuration, providing a smooth experience similar to commercial hosting platforms but at a fraction of the cost. With aaPanel, you gain full control over your server environment, enabling you to run multiple projects efficiently and securely.
Uses of aaPanel
aaPanel’s features are widely applicable in web development and server management:
- Website Hosting: Deploy and manage websites built with WordPress, Joomla, Drupal, or custom frameworks.
- Database Management: Easily create, configure, and back up databases such as MySQL, MariaDB, and PostgreSQL.
- FTP Management: Set up and manage FTP accounts for secure file transfers.
- Software Stack Installation: Install and manage web server stacks like LAMP, LNMP, or custom configurations with a single click.
- Server Monitoring: Monitor CPU, RAM, disk usage, and network activity in real time.
- Security Tools: Configure firewalls, SSL certificates, and automatic backups to protect your data.
How to Purchase a Self-Managed VPS with aaPanel Installation
To deploy and manage aaPanel efficiently, start by purchasing a Self-Managed VPS Hosting from Bluehost. Follow these steps:
 New to VPS or not sure where to start? No worries! At the top of the Self-Managed VPS purchase page, you’ll see the Pre-configured Setup section. This handy feature is perfect if you’re feeling a bit unsure—just pick the type of project you want, like WordPress Site, AI Agent/Claude Code, Dev/Staging, or eCommerce Store. We’ll take care of the rest by automatically filling in the best plan, operating system, and template for you.
- Super simple for beginners or anyone who just wants a quick setup
- Instantly get the recommended settings for your project
- Skip the guesswork and save time
- You can still customize things later if you want
- In your browser, go to https://www.bluehost.com/vps-hosting.
- Click the Choose Plan button under your preferred VPS hosting plan.
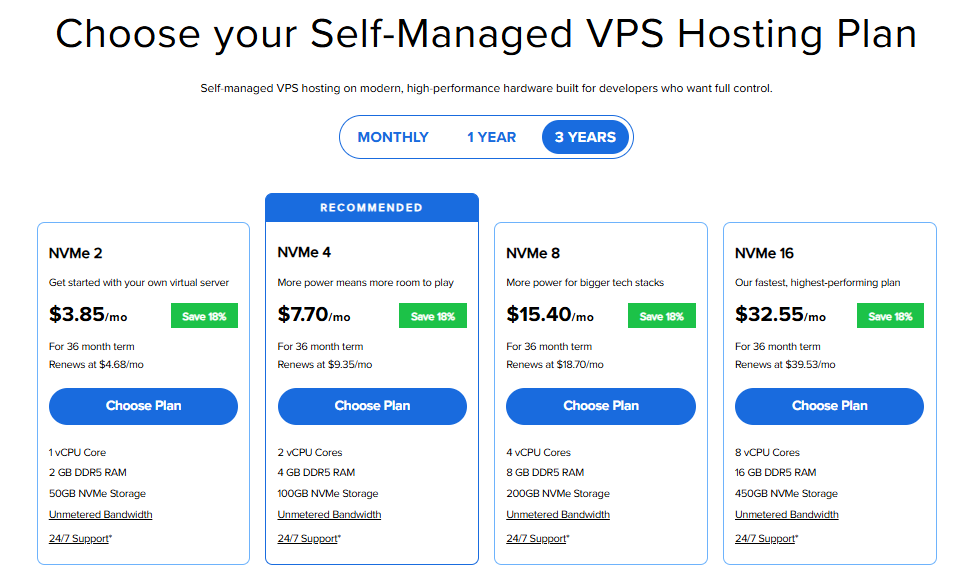
Important: Pricing is subject to change—please visit https://www.bluehost.com/vps-hosting for the current introductory/sign-up offer for Bluehost VPS Hosting. For the most up-to-date renewal pricing, visit your Bluehost Portal Renewal Center.
- Select your preferred Data Center location.

- On the Cart page, you can configure your server to fit your needs in the following section:
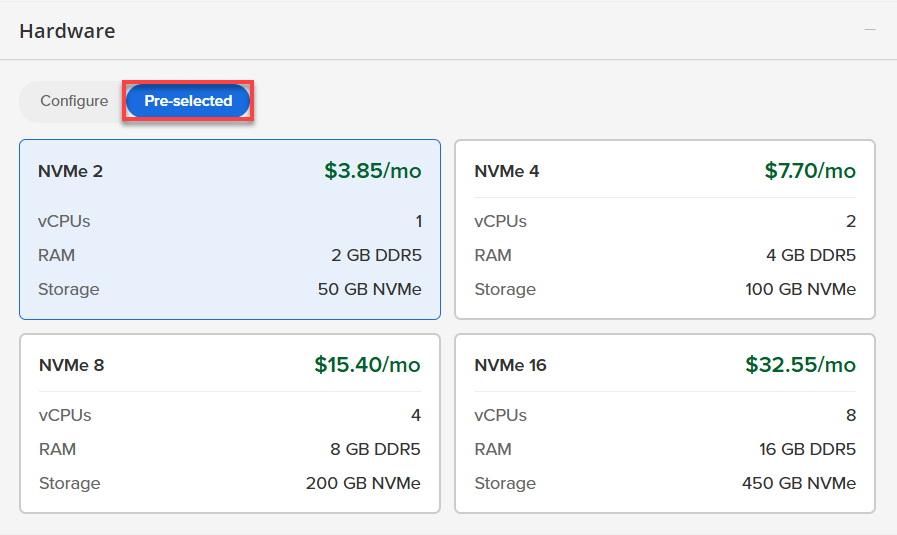
- Hardware:
- Pre-selected:
You can select a different Self-Managed VPS plan in this section.
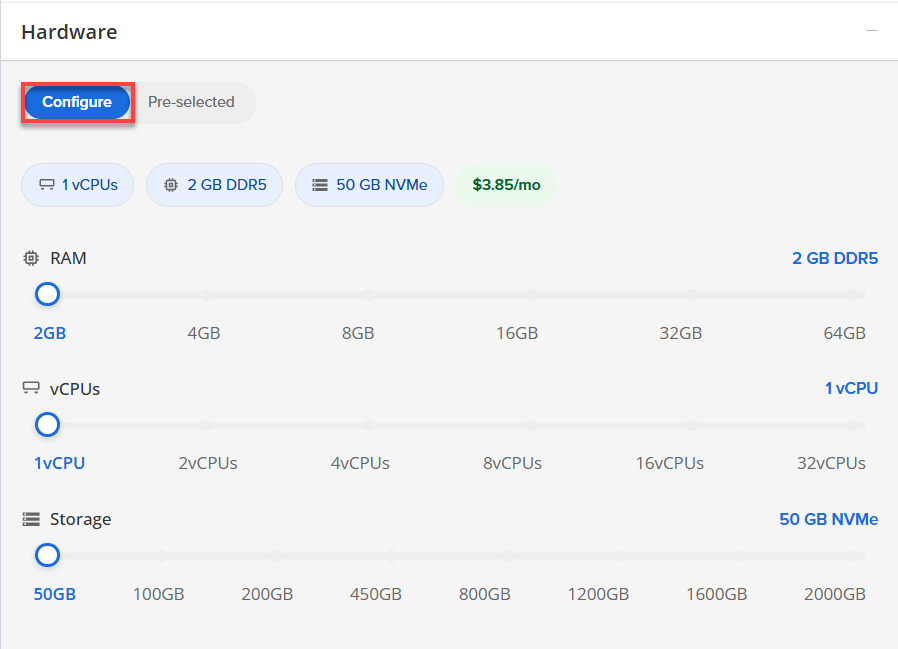
- Configure:
Click Configure to customize your package.
Note that your changes help customize your plan, and the overall cost will adjust accordingly to fit your needs.
- Pre-selected:
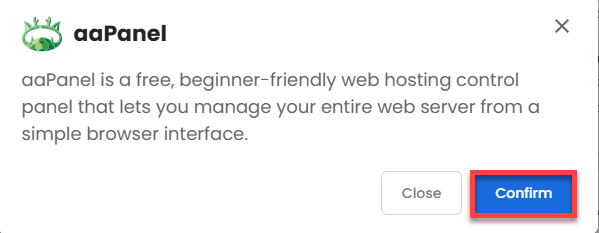
- Software:
- Click on the Application tab.
- Choose aaPanel.
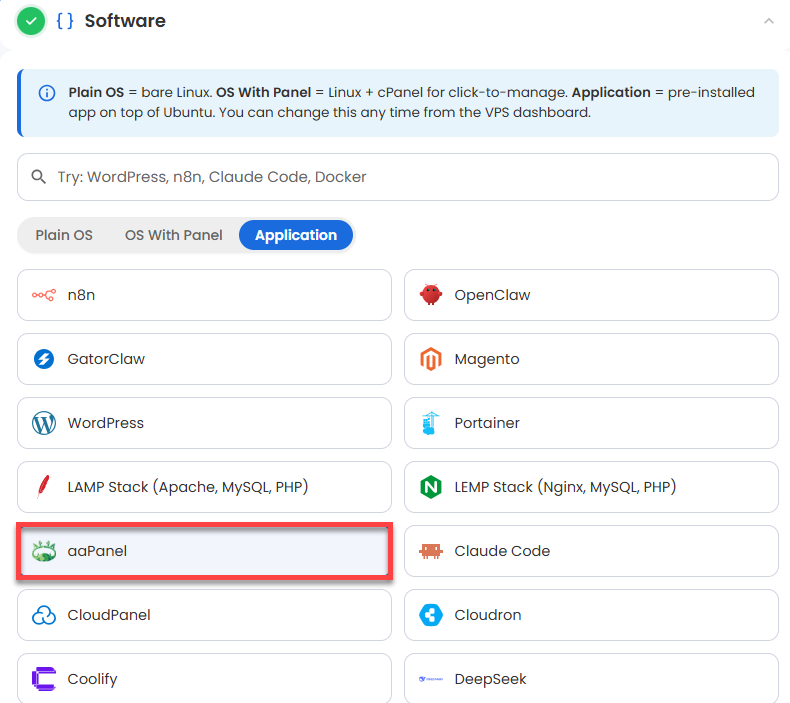
- Click Confirm to continue.
- Hardware:
- Add-Ons:
- Premium Support:
This service provides you with priority access to our expert team for faster responses and personalized assistance whenever you need it.

- Premium Support:
- In the Advanced options:
- Extra IP's: You can add extra IP addresses for an additional fee.
Pricing changes based on how many IPs you add. - Hostname: Assign a custom hostname to easily identify your server. This is optional.
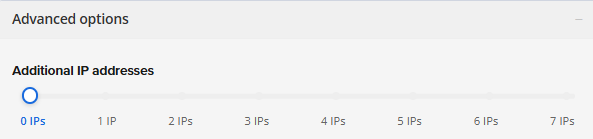
- Extra IP's: You can add extra IP addresses for an additional fee.
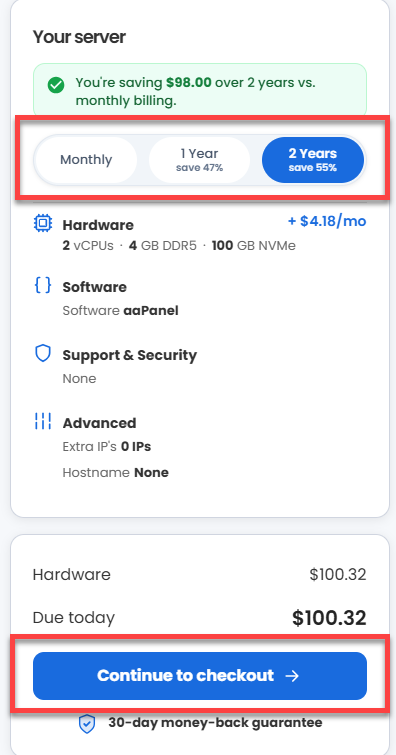
- Select your preferred billing term and view your Order Summary. Click the Continue to Checkout button to proceed.
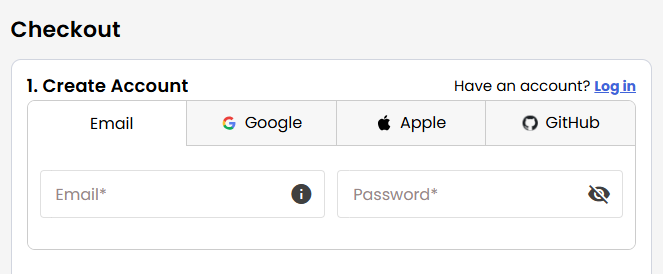
- Do the following on the Checkout page:
If you're new with Bluehost:
- Create your Bluehost account by using your email address or by connecting with your Google, Apple, or GitHub account — whichever you prefer!
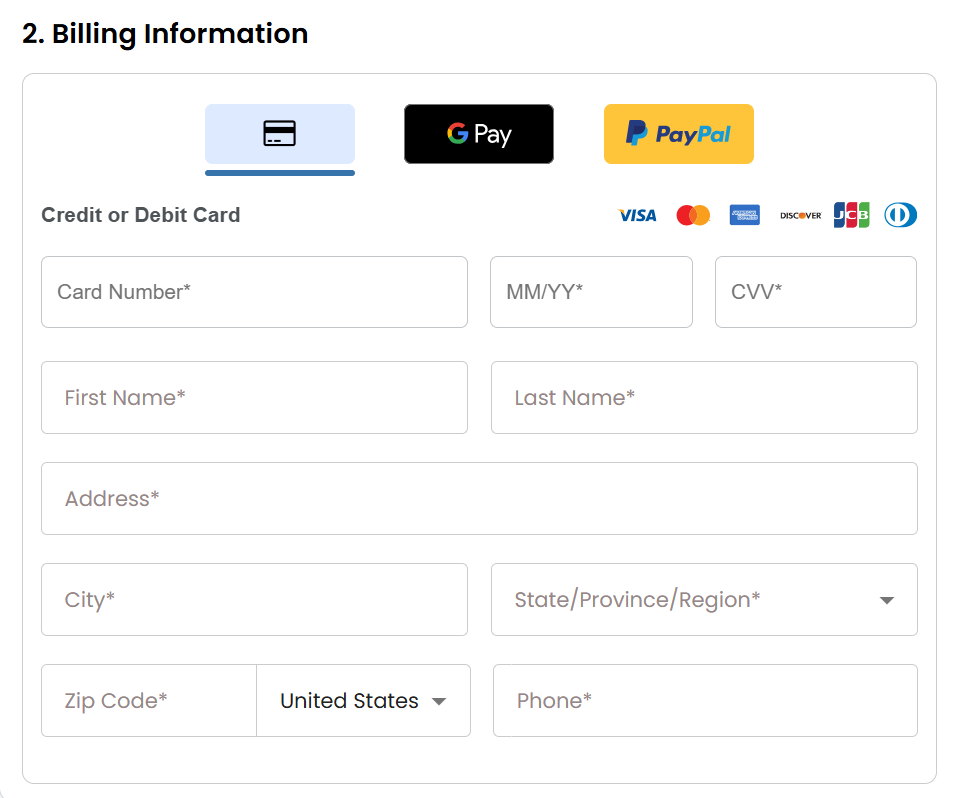
- Select your preferred payment method: credit card, Google Pay, or PayPal. Enter your billing information.
If you have an account with us, you will see your Bluehost login details when you are logged into your Bluehost Portal. If you are not logged in, please click the Log In link.
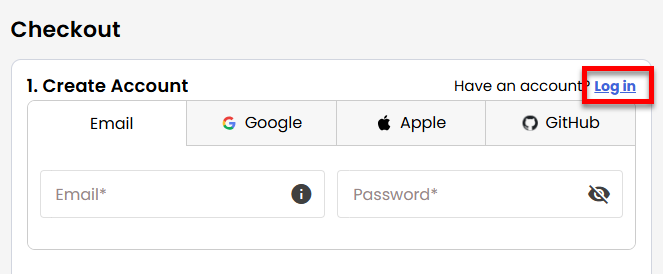
- Create your Bluehost account by using your email address or by connecting with your Google, Apple, or GitHub account — whichever you prefer!
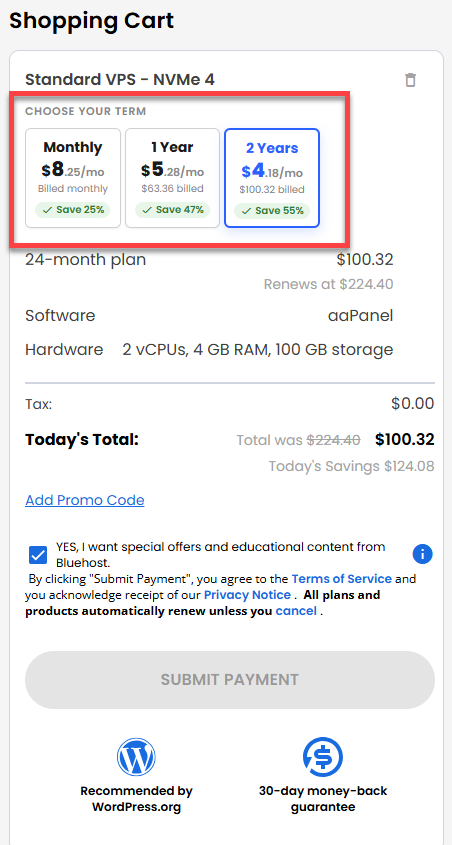
- In the Shopping Cart section, you can still adjust your billing term if needed.
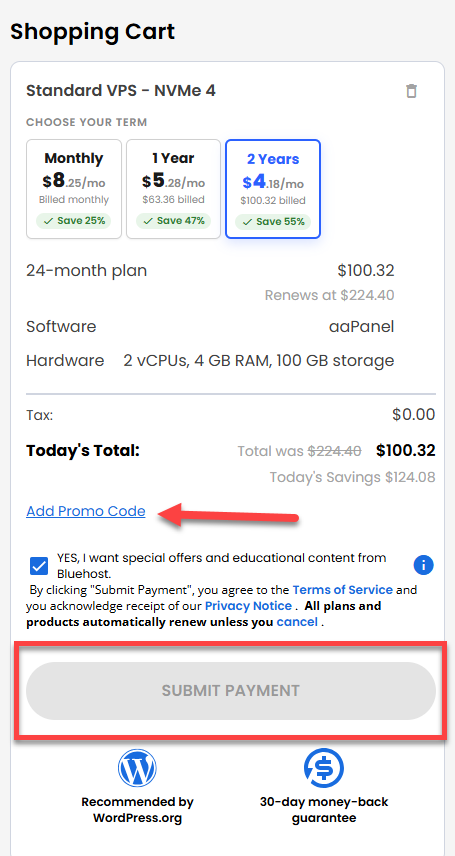
- Review the items in your cart, add a Promo Code if you have one, and then click Submit Payment to complete the purchase.
After checkout, your Self-Managed VPS will begin setting up. Once it’s ready, you can find it under the Hosting tab in your Bluehost Portal.
Access your aaPanel Dashboard
After installation completes:
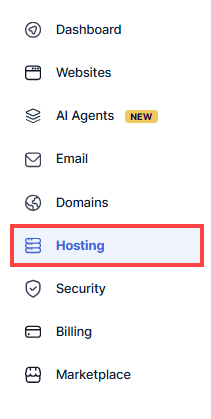
- Log in to your Bluehost Portal.
- In the left-hand menu, click the Hosting tab.
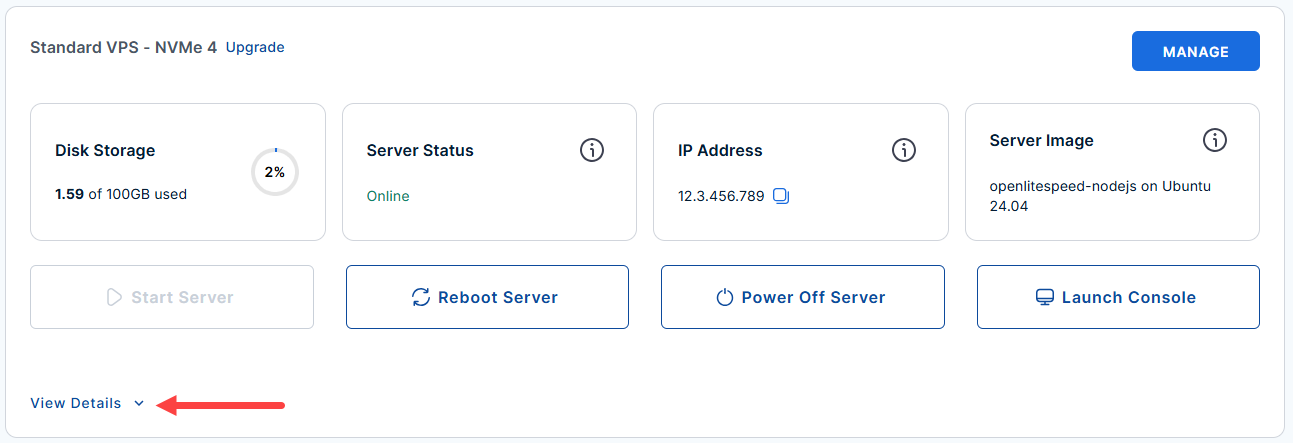
- Look for the server you want to manage then click the View Details to see more options.
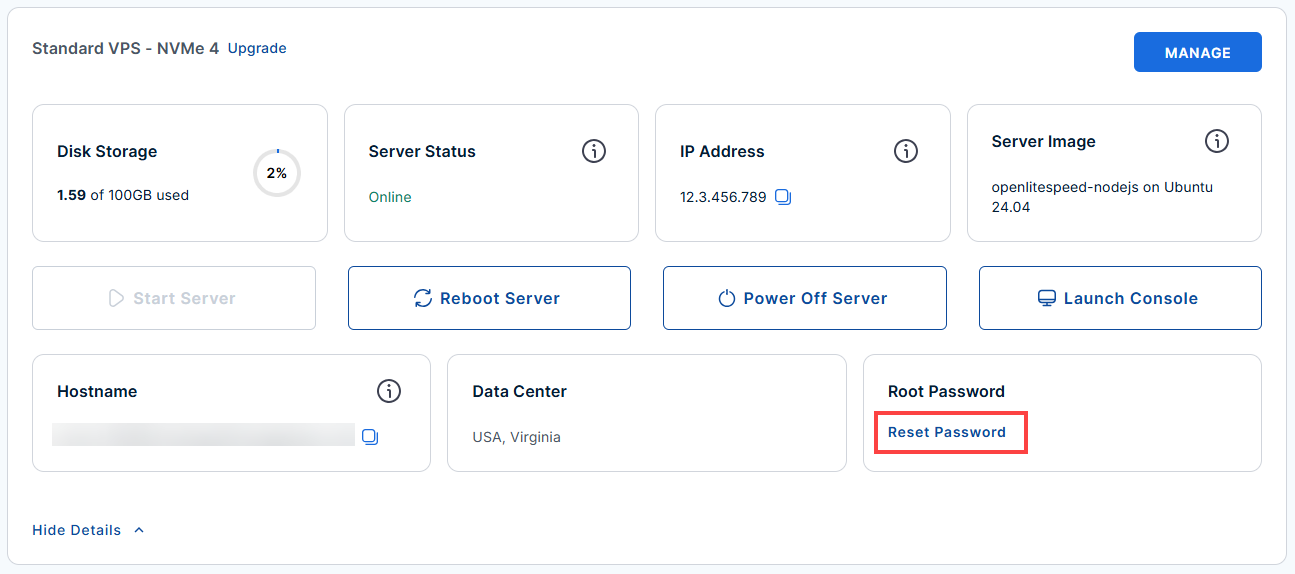
- Click the Reset Password.
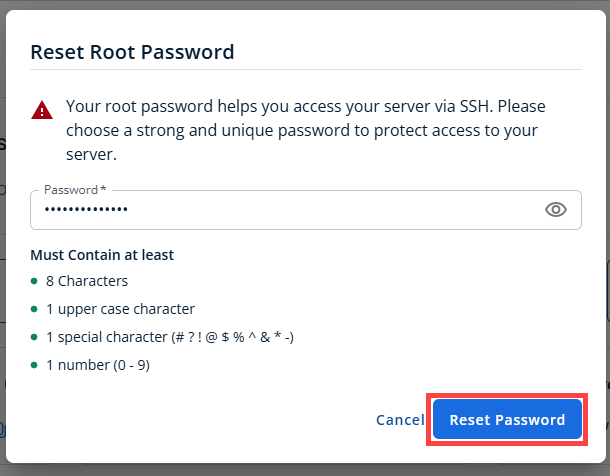
- In the pop-up window, type your new root password, then click Reset Password again to confirm and save the changes.
- Connect to your VPS via SSH.
Use your VPS IP and credentials with an SSH client, follow the prompts, and enter your root password when asked:ssh root@your_server_ipExample Output:
Welcome to Ubuntu 24.04.4 LTS (GNU/Linux 6.8.0-124-generic x86_64) ******************************************************************************** aaPanel : active - Admin Credentials --------------------------- Username : zamuarko Password : sudo cat /opt/aapanel/.env - Access ---------------------------------------- Panel URL : https://21.6.6.123:7800/ecd2bc1d/ - Firewall ---------------------------------------- Ports open : 22 (SSH) 80 (HTTP) 443 (HTTPS) 7800 (Panel) For full details refer: /root/README.md - Retrieve Your Credentials:
cat /opt/aapanel/.envExample Output
Last login: Mon Jun 15 23:00:22 2026 from 110.110.10.26 root@server-123456:~# cat /opt/aapanel/.env # aaPanel runtime credentials # Read this file on first boot to get your panel password: # cat /opt/aapanel/.env PANEL_PORT=7800 PANEL_PATH=/ecd2bc1d/ PANEL_USER=zamuarko PANEL_PASSWORD=jXWnyyynT8ymMGDu9xt9abc1 - Log In via Your Browser:
https://your-server-ip:7800/PANEL_PATH/Important!- Make sure you use https:// and include the trailing slash after your panel path.
- If your website URL will not reload, it is likely because the server rebooted unexpectedly without safely shutting down the NetWorker service. This causes the dashboard to act up and stops running jobs from showing real-time updates. To fix this and get your interface working properly again, please follow these two steps:.
- Refresh Your System Configuration
Run this command:
sudo systemctl daemon-reload - Restart the aaPanel Service
Next, apply the changes safely by restarting the aaPanel service with this command:
sudo systemctl restart bt
- Refresh Your System Configuration
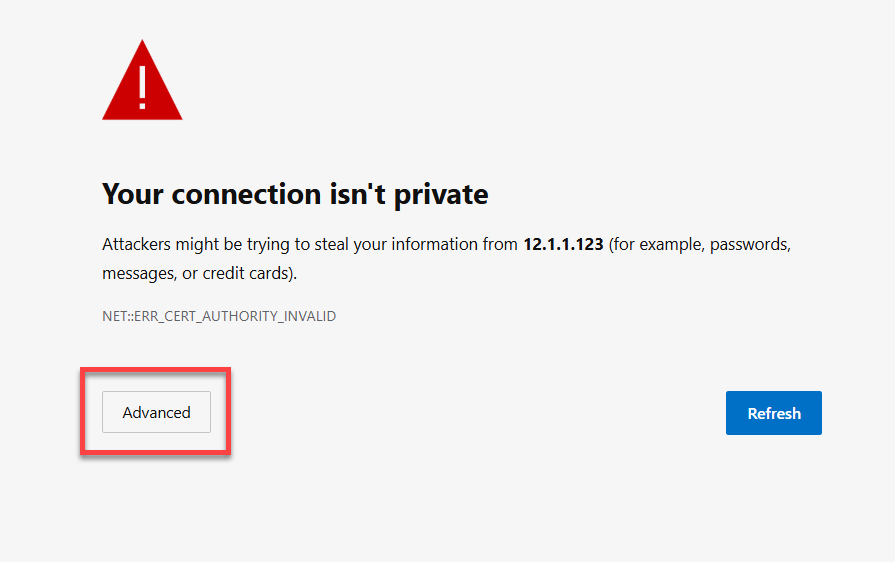
- Bypass the Browser Security Warning.
aaPanel uses a temporary self-signed SSL certificate, your browser will flag it. Click Advanced and then Proceed/Continue to bypass it safely.
- Log in to your aaPanel dashboard.
Use the log in credentials from step 7.

Initial aaPanel Configuration
Once you are logged into aaPanel, here is what to do next.
| Stack | Includes |
|---|---|
| LNMP | Nginx + MySQL + PHP |
| LAMP | Apache + MySQL + PHP |
| OpenLiteSpeed | LiteSpeed + MySQL + PHP |
- Install a web server stack.
- Add your first website.
aaPanel will automatically create the web directory, database, and Nginx/Apache config for you.

- Install WordPress or another app (optional).
- Set up a real SSL certificate (optional).
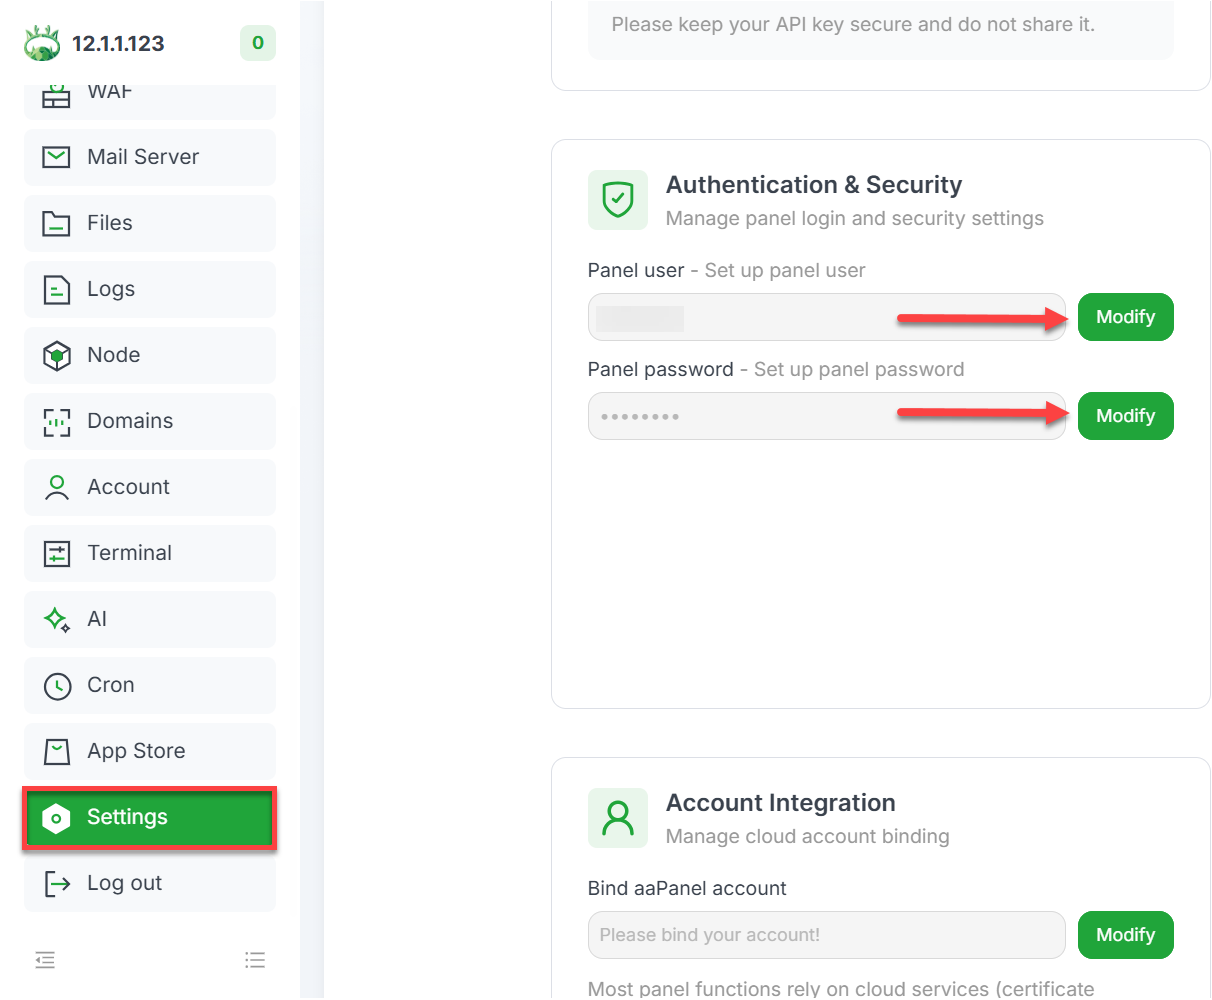
- Change your panel password.
You can easily update your login details at any time! Just head over to your Settings, click on Authentication & Security, and click Modify to enable changes. From there, set up your new username and password, and save your updates.
Additional Information & Example Documentation Output
You can run cat /root/README.md to see more information and useful commands:
root@server-123456:~# cat /root/README.md
# aaPanel

## Description

aaPanel is a free, beginner-friendly web hosting control panel that lets you manage your entire web server from a simple browser interface.

With a few clicks you can install WordPress, PHP, MySQL, Nginx, or Apache - no command-line experience needed.

This image comes with aaPanel pre-installed and ready to use.
On first boot, a secure password is automatically generated for you.

---

## Quick Start

Follow these three steps to get up and running.

### Step 1 - Wait for first boot to complete

After launching your instance, wait 2-3 minutes for the first-boot setup to finish.

The setup runs automatically in the background. It generates your admin password and starts the panel service.

You do not need to do anything during this time.

### Step 2 - Get your login credentials

SSH into your server and run:

```bash
cat /opt/aapanel/.env
```

You will see output like this:

```
PANEL_PORT=7800
PANEL_PATH=/abc12345/
PANEL_USER=youruser
PANEL_PASSWORD=YourGeneratedPassword
```

Save these details - you will need them to log in.

### Step 3 - Open the panel in your browser

Using the values from Step 2, open your browser and go to:

```
https://:7800//
```

For example:

```
https://203.0.113.10:7800/abc12345/
```

> **Browser warning:** aaPanel uses a self-signed SSL certificate by default.
> When your browser shows a security warning, click **Advanced** then **Proceed** to continue.
> This is expected and safe for initial setup.

Log in with the `PANEL_USER` and `PANEL_PASSWORD` from Step 2.

---

## Next Steps

Once you are logged into aaPanel, here is what to do next.

### 1. Install a web server stack

On the aaPanel dashboard, click **One-Click** and choose your stack:

| Stack | Includes |
|-------|---------|
| LNMP | Nginx + MySQL + PHP |
| LAMP | Apache + MySQL + PHP |
| OpenLiteSpeed | LiteSpeed + MySQL + PHP |

Click **Install** and wait for the installation to complete (5-10 minutes).

### 2. Add your first website

Go to **Website** then **Add Site**.

Enter your domain name or server IP and click **Submit**.

aaPanel will automatically create the web directory, database, and Nginx/Apache config for you.

### 3. Install WordPress or another app (optional)

Go to **App Store** in the left menu.

Search for **WordPress** and click **Install**.

Follow the on-screen wizard to complete the installation.

### 4. Set up a real SSL certificate (optional)

Go to **Website**, click your site, then click **SSL**.

Click **Let's Encrypt** and enter your domain to get a free trusted certificate.

This replaces the self-signed certificate and removes the browser warning.

### 5. Change your panel password

For security, change your panel password after first login:

- Go to the top-right user icon then **Change Password**
- Or run from the server: `bt 5`

---

## Access

| URL | Purpose |
|-----|---------|
| `https://:7800//` | aaPanel control panel |

> The panel path (e.g. `/abc12345/`) is unique to your instance and is a security feature.
> Always read it from `/opt/aapanel/.env` - it is different on every deployment.

---

## Credentials

All credentials are stored in:

```bash
cat /opt/aapanel/.env
```

| Field | Description |
|-------|-------------|
| `PANEL_PORT` | Panel port (default: 7800) |
| `PANEL_PATH` | Unique URL path to the panel |
| `PANEL_USER` | Admin username (randomized at install) |
| `PANEL_PASSWORD` | Admin password (generated at first boot) |

To view the first boot setup log:

```bash
grep -A 6 "First Boot Credentials" /var/log/cloud-init-output.log
```

---

## Managing the Server

### aaPanel Service

```bash
# Check if panel is running
systemctl status bt

# Restart the panel
systemctl restart bt

# Stop the panel
systemctl stop bt
```

### bt CLI Quick Reference

```bash
bt        # Show panel URL, port, and path
bt 5      # Change admin password
bt 8      # Change panel port
bt 10     # Show panel error logs
bt 16     # Restart panel
```

### Firewall

```bash
# View open ports
ufw status verbose

# Open a new port (e.g. MySQL for remote access)
ufw allow 3306/tcp
```

### Logs

```bash
# Panel error log
tail -f /www/server/panel/logs/error.log

# First boot setup log
cat /var/log/cloud-init-output.log
```

---

## Troubleshooting

### Panel URL not opening in browser

1. Check the panel is running: `systemctl status bt`
2. Check port 7800 is listening: `ss -tlnp | grep 7800`
3. Check firewall allows port 7800: `ufw status | grep 7800`
4. Make sure you are using `https://` not `http://`

### Password not working

Run this on the server to reset your password:

```bash
bt 5
```

Enter a new password when prompted, then try logging in again.

### First boot did not run

If `/opt/aapanel/.env` still shows `CHANGEME_ON_BOOT`, run the setup manually:

```bash
sed -i 's/\r//' /var/lib/cloud/scripts/per-instance/001_onboot
bash /var/lib/cloud/scripts/per-instance/001_onboot
```

Then read your credentials:

```bash
cat /opt/aapanel/.env
```

---

## Security

| Feature | Detail |
|---------|--------|
| Firewall | UFW enabled - only ports 22, 80, 443, 7800 open by default |
| SSH | Rate limited on port 22 to block brute force attempts |
| Panel password | Never baked into the image - randomly generated at first boot |
| Credentials file | `/opt/aapanel/.env` is readable by root only (mode 0600) |
| Panel URL | Random path (e.g. `/abc12345/`) obscures the admin login page |
| Panel SSL | HTTPS enabled by default with a self-signed certificate |

---

## Services

| Service | Port | Purpose |
|---------|------|---------|
| aaPanel (bt) | 7800 | Web hosting control panel |
| OpenSSH | 22 | Remote server access |

Additional services such as Nginx, Apache, MySQL, and PHP are installed
and managed through the aaPanel interface after first boot.

---
## Links
- Manage: [https://:7800/](https://:7800/)
- aaPanel Official Documentation: [https://www.aapanel.com/reference.html](https://www.aapanel.com/reference.html)
- aaPanel Install Guide: [https://www.aapanel.com/new/install.html](https://www.aapanel.com/new/install.html)
- Ubuntu 24.04 LTS Release Notes: [https://wiki.ubuntu.com/NobleNumbat/ReleaseNotes](https://wiki.ubuntu.com/NobleNumbat/ReleaseNotes)root@server-123456:~#
Summary
aaPanel empowers users to efficiently manage and deploy websites, applications, and databases on their own servers. Its intuitive interface and broad compatibility make it a valuable tool for web developers and businesses seeking greater control and flexibility. By combining automated workflows with self-managed VPS hosting, aaPanel offers a reliable, scalable, and cost-effective solution for modern web projects.