How to Install a Third-Party SSL Certificate in cPanel
Securing your website with an SSL certificate is a crucial step in protecting user data, improving search engine rankings, and building trust with your visitors. For websites hosted on shared hosting platforms, cPanel provides a straightforward way to install third-party SSL certificates.
Learn how to install a third-party SSL certificate in cPanel by following the steps below.
Steps to Generate a Certificate Signing Request in cPanel
To successfully purchase an SSL certificate, you need to provide a CSR (Certificate Signing Request) to your CA (Certificate Authority). The CA may have specific requirements for the information that must be included in the request form, particularly if you use an Apache web server. It's always good to check with the CA about their CSR requirements beforehand.
Learn how to generate a CSR code for cPanel SSL installation by following the steps below.
- Log in to your Bluehost Portal.
- Click Hosting in the left-hand menu.
- In the hosting details page, click the cPanel button.
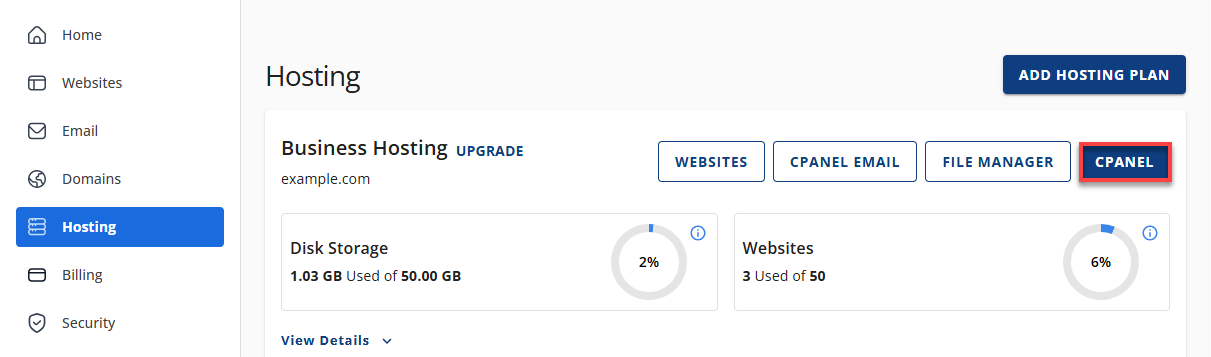
- Your cPanel will open in a new tab.
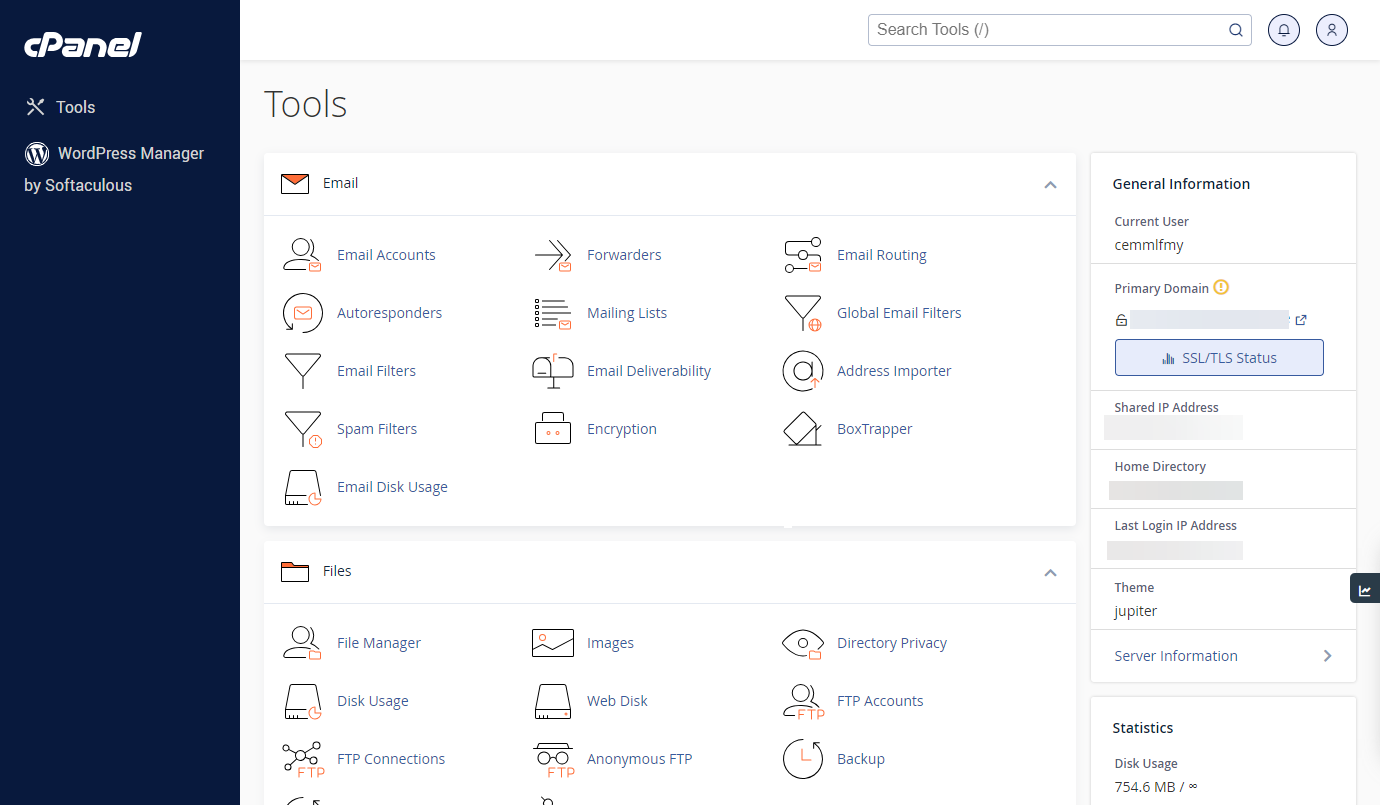
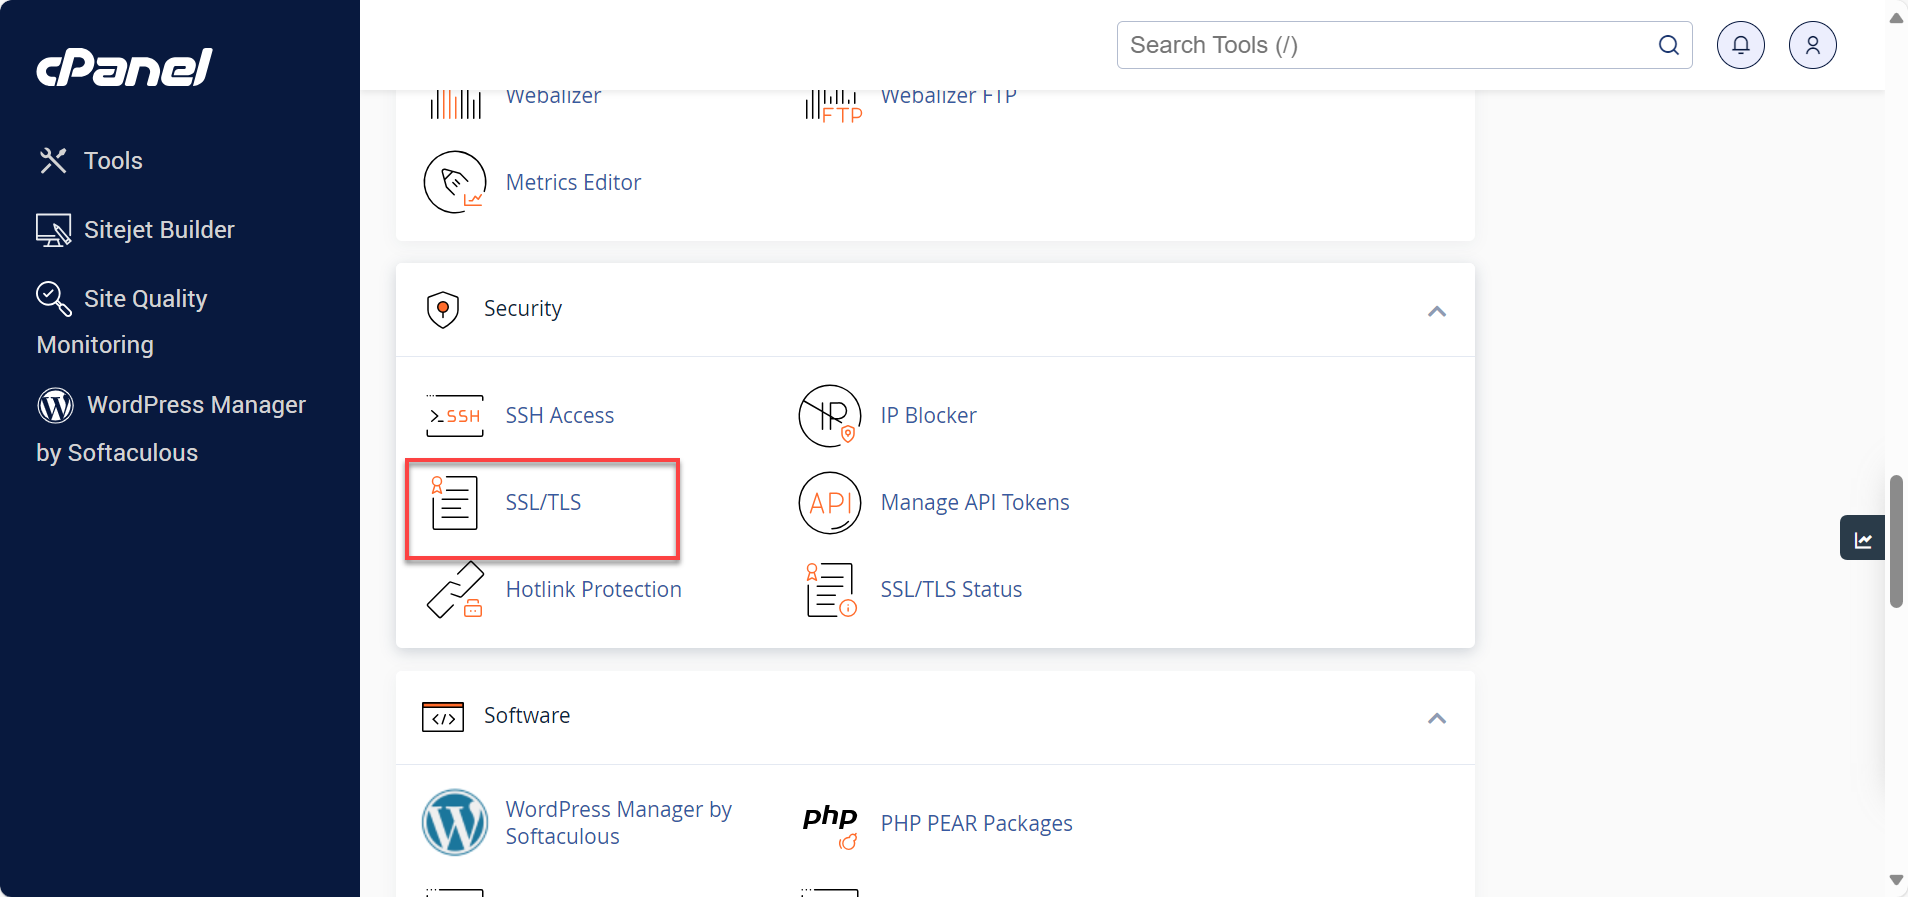
- Within cPanel, go to the Security section and click SSL/TLS to open the SSL/TLS Manager.
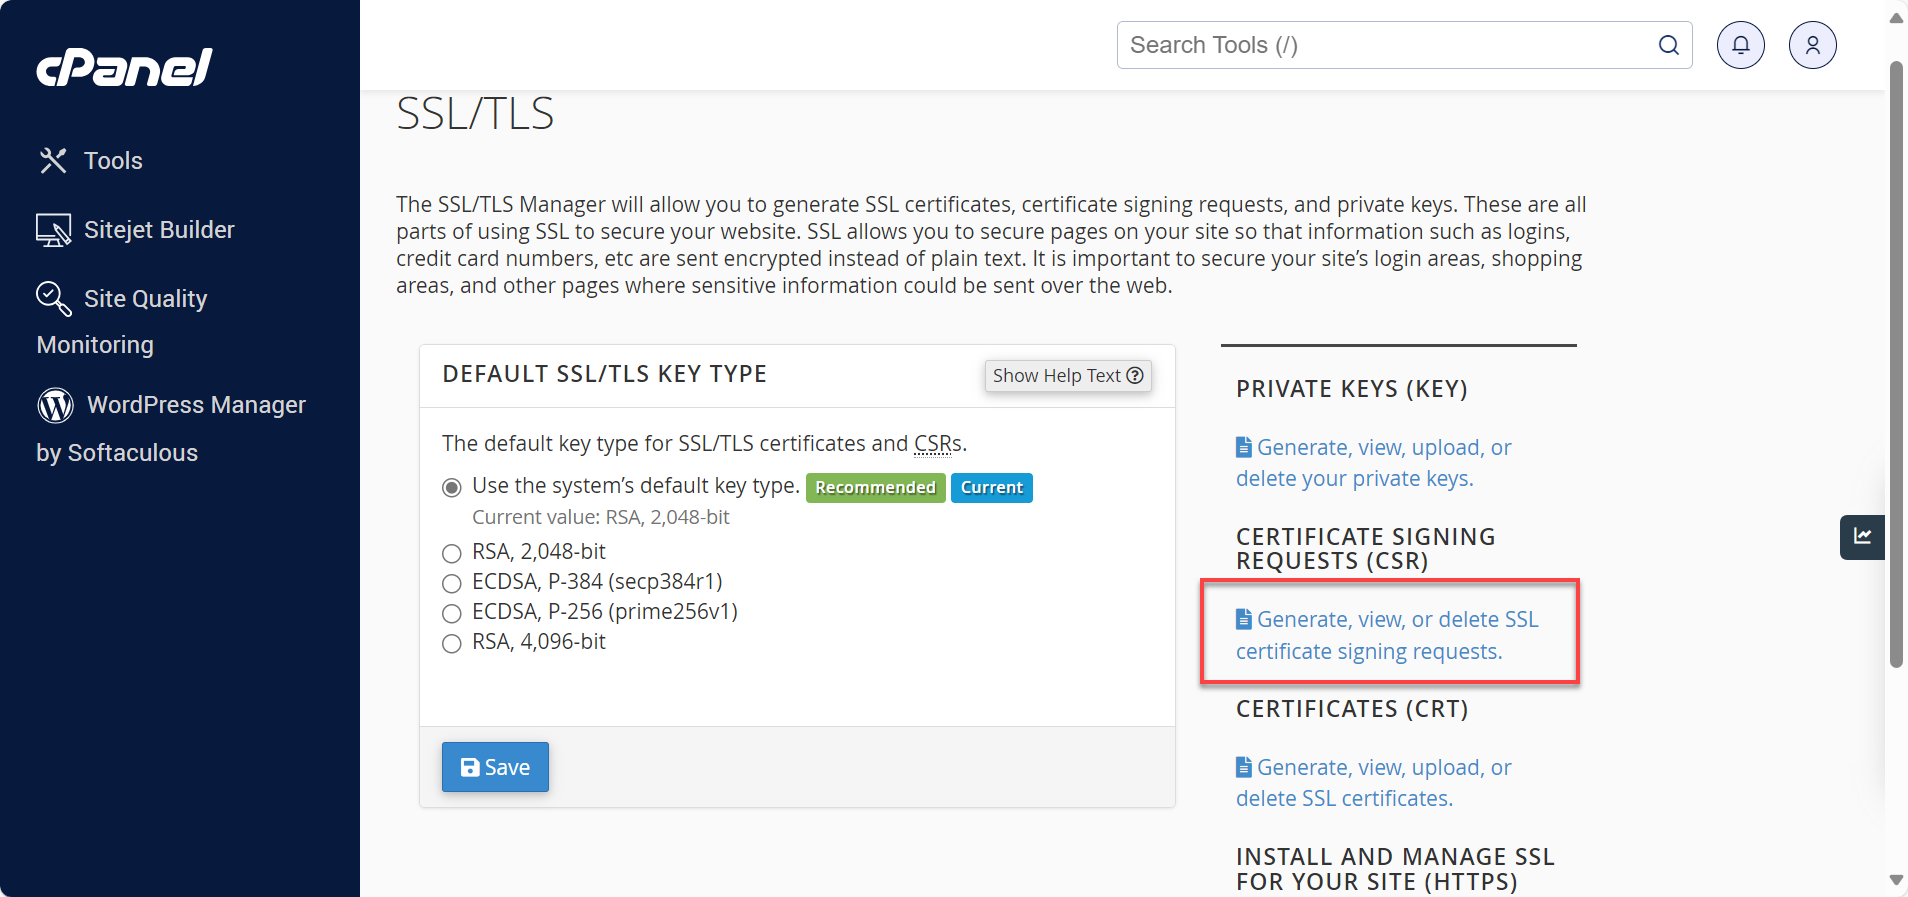
- Under Certificate Signing Requests (CSR), click the Generate, view, or delete SSL certificate signing requests link.
- Fill out the required fields (*). Each field will have a description to serve as your guide. Select Generate a New 2048-bit key to generate a new key. If you have already generated a key, you can choose it from the drop-down.

- Click the Generate button.
- Your code has been generated. Provide the CSR code to your SSL provider, and they will exchange it for a CRT file.
Steps to Install a Third-Party SSL in cPanel
To install or upload your SSL certificate in cPanel, follow the steps below:
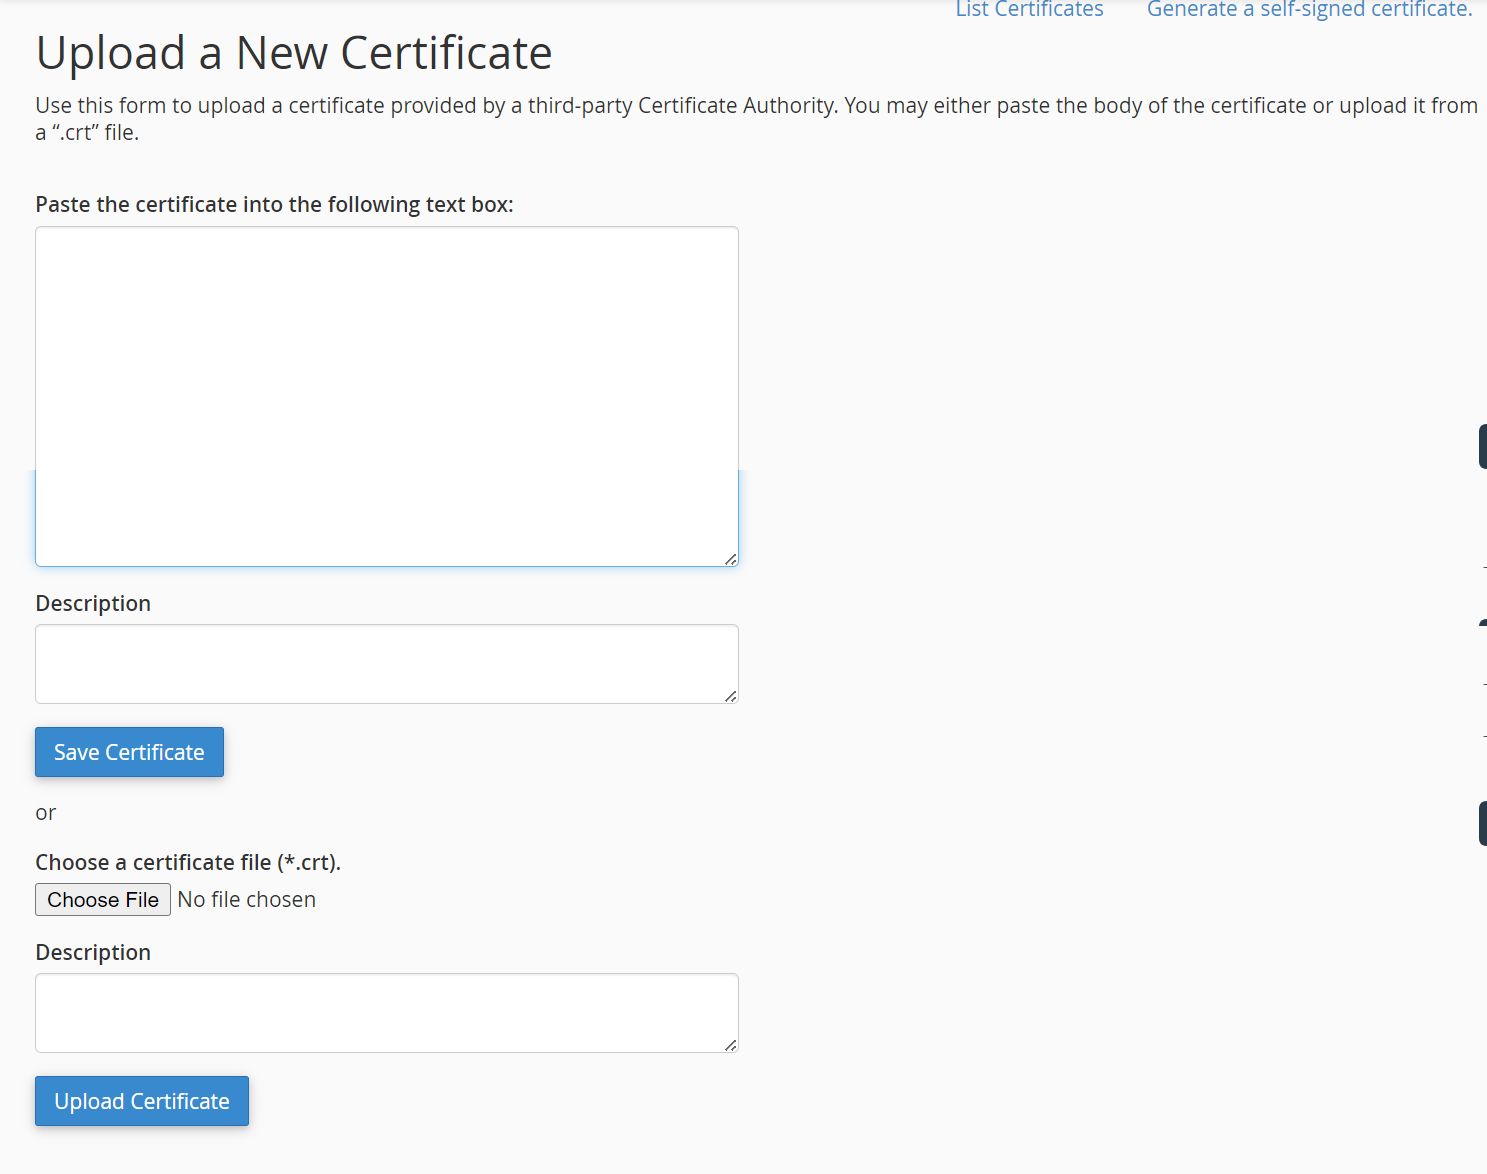
- Within the SSL/TLS Manager, click the Generate, view, upload, or delete SSL certificates link.

- Paste the provided CRT file or browse your computer for the .crt file. Repeat for the CA Bundle file if received as well.
- Contact us via phone or live chat to request that your KEY and CRT be installed on the server.
SSL Help
Summary
You need to follow a few steps to install a third-party SSL certificate in cPanel for shared hosting users. First, you must generate a CSR (Certificate Signing Request) in cPanel. To do this, access the SSL/TLS Manager and fill out the required fields. Once the CSR code is generated, submit it to the SSL provider. They will then provide you with your certificate file and CA bundle. The next step is to upload your SSL certificate in cPanel by uploading the CRT file and CA bundle. You should keep a backup copy of your KEY and CRT files.
If you need further assistance, Bluehost Chat Support is available 24 hours a day, 7days a week while Bluehost Phone Support is available 7 days a week from 7 am-12 midnight EST.
- Chat Support - While on our website, you should see a CHAT bubble in the bottom right-hand corner of the page. Click anywhere on the bubble to begin a chat session.
- Phone Support -
- US: 888-401-4678
- International: +1 801-765-9400
You may also refer to our Knowledge Base articles to help answer common questions and guide you through various setup, configuration, and troubleshooting steps.