How to Update Contact Information
Accurate contact information is essential for proper account management. Correct details ensure you have the correct info—like your name, phone number, and address—and help us contact you quickly about important updates and service offerings. Follow these steps to update your contact details with confidence and keep full control of your Bluehost account.
Update Your Contact Information
- Editing Name fields may be restricted (greyed out) if the domain is under Legal lock and special status (e.g., pending transfers or verification issues). For more details, refer to The Different Types of Domain Locks.
- The Company Name field is available only for Organizational Accounts.
- You'll only see fields for Full Name, Email, Phone Number, and Address for Personal Accounts.
- EU Organizational Accounts will also see a Tax Certificate Number field used for Value Added Tax (VAT) purposes.
Here are the steps to update your contact information in your Bluehost Portal.
- Log in to your Bluehost Portal.
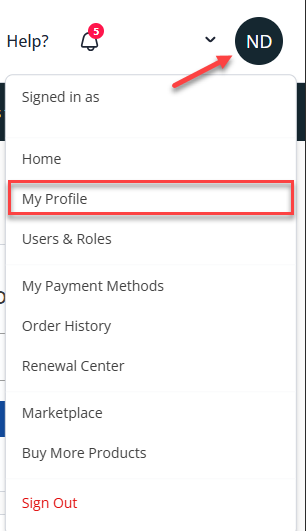
- Click your profile icon in the top-right corner, then select My Profile from the list of options.
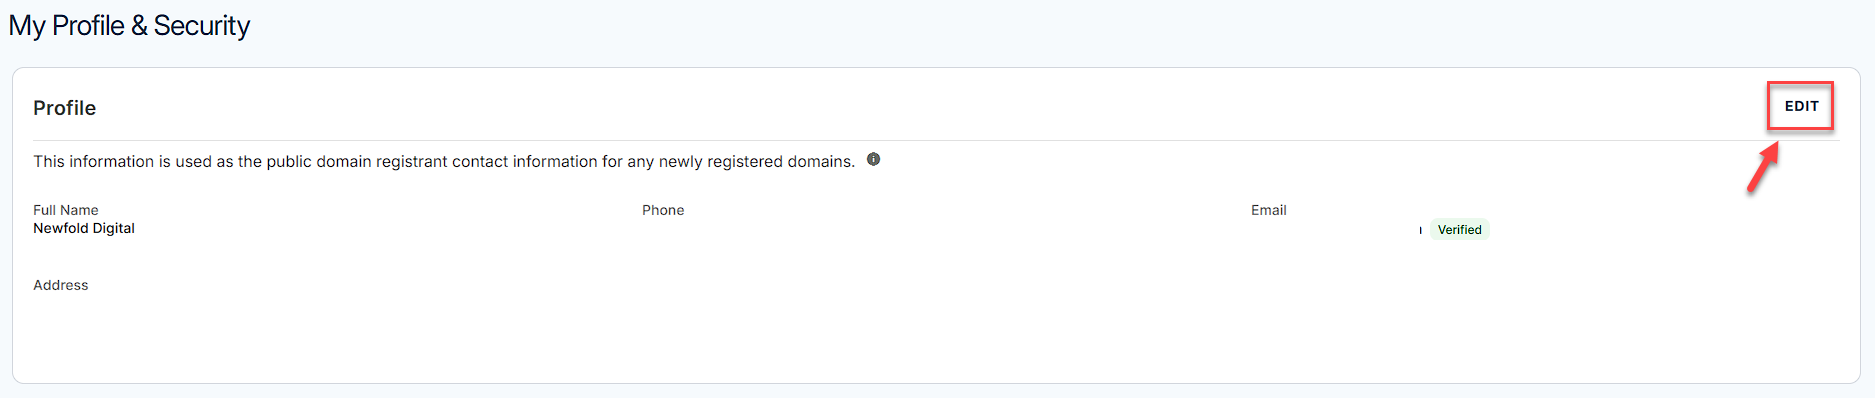
- In the Profile section, click Edit.
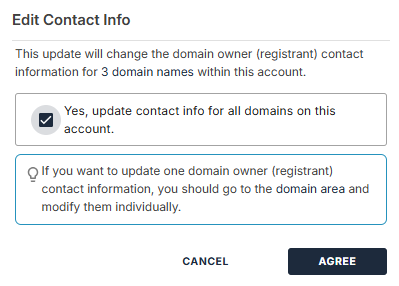
- If you are not the Primary contact of the account, you may see a pop-up informing you that updating your profile will also change the domain owner's (registrant's) contact information. Select the check box, then click Agree to proceed.
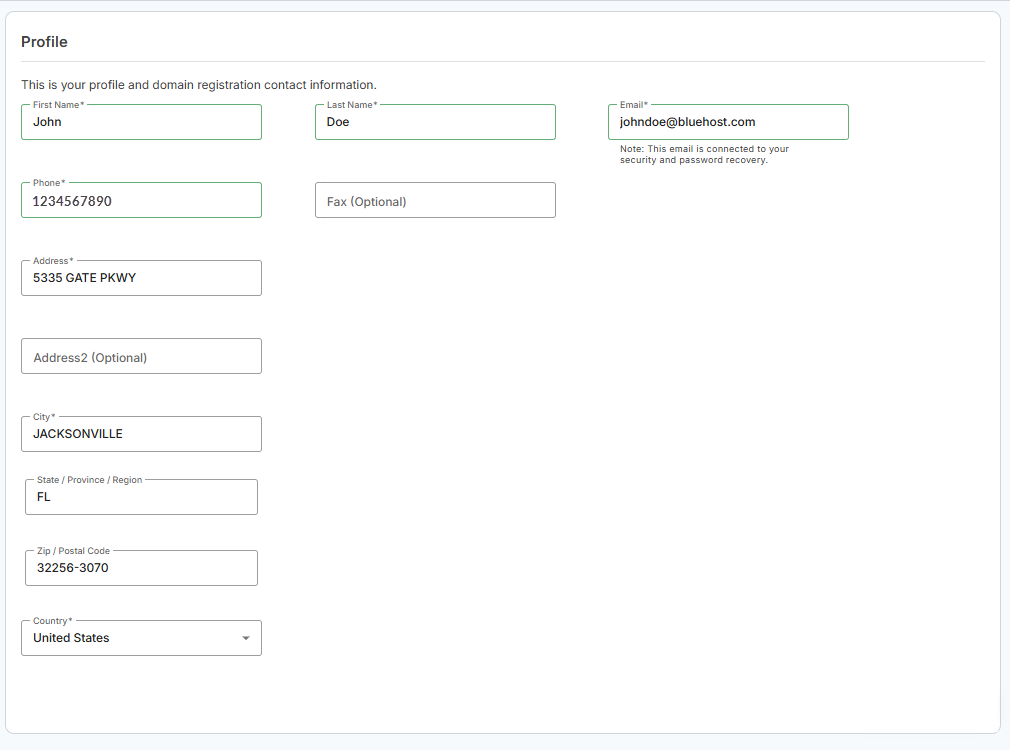
- Update your profile information, then click Save.
Please note that updating your profile information will also change your domain registration contact details, which will trigger the domain lock.
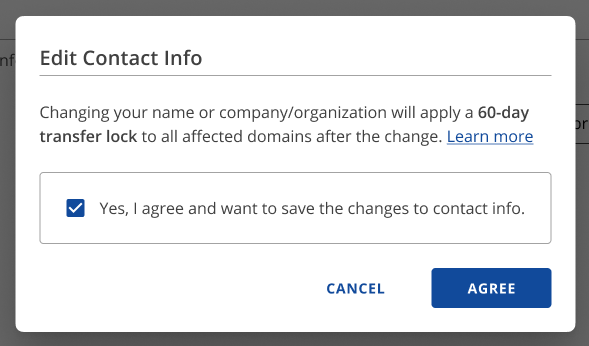
- If you're updating your Name or Organization Name, a confirmation pop-up will appear. You must consent to the 60-day transfer lock that may apply. Click Agree to proceed.
- Once saved, your updated contact information will be applied to your Bluehost hosting account and associated domains.
Summary
Updating your contact information in Bluehost—including your name, company name, phone number, or physical address—is simple in the My Profile or Accounts & Users sections. Keeping these details accurate ensures smooth billing, security, and domain management.
If you need further assistance, Bluehost Chat Support is available 24 hours a day, 7days a week while Bluehost Phone Support is available 7 days a week from 7 am-12 midnight EST.
- Chat Support - While on our website, you should see a CHAT bubble in the bottom right-hand corner of the page. Click anywhere on the bubble to begin a chat session.
- Phone Support -
- US: 888-401-4678
- International: +1 801-765-9400
You may also refer to our Knowledge Base articles to help answer common questions and guide you through various setup, configuration, and troubleshooting steps.