Website Builder (for WordPress) - How to Add and Manage Sections in Website Builder
Sections in a website builder are pivotal in creating a smooth, organized user experience. They make content management a breeze and boost your site's visual appeal and functionality. With sections, you can craft a site that's not just easy to navigate but also ranks well on search engines, thanks to improved structure. They're essential for responsive design, too, ensuring your site looks flawless on any device.
In your Bluehost Website Builder, most of your website will be built in sections. You can add an element for each section and then choose a template to create your content. If you want to change the look or layout of a section you have already added, you can change to a different template, re-order it, or use design tools to customize your sections at any time.
- Adding Sections
- Editing Sections
- Re-ordering Sections
- Changing a Section's Template
- Copying Sections
- Deleting Sections
- Summary
Adding Sections to Bluehost Website Builder (for WordPress)
To begin, you will need to access the Bluehost Builder Editor.
- Navigate to the page or post to which you wish to add a section.
- Click the + icon (Add Section), which appears between the existing sections throughout your page. The Sections menu will open, displaying all of the sections you can add.
- Choose the section type you want to add, and the builder will display the different layout sections available for that section.
Please note: The options you see here are determined by the plugins you have installed. To install new plugins, you will need to switch to the WordPress editor. Please see Website Builder (for WordPress) - WordPress Editor to learn more about switching between editors.
- Select the layout you want, and the new section will appear on your page in the split where you selected the + icon (Add Section). In addition, stock images and filler text will be displayed as placeholders for your content.
You can also add a section by selecting Sections from the menu on the left to reveal the section and layout options. After you choose a section and a layout, you'll see the new section on your page.
Editing Sections
To edit a section anytime, click on the section you wish to update. You should see that the section/element's design options appear to the right. If you do not see it, you may need to move your mouse to your screen's far right to pop it out. You can also re-order your section on the page or change the template it uses.
Re-ordering Sections
To re-order a section, click the ^ or the v icons to move the section up or down on your page.

Changing a Section's Template in Bluehost Website Builder for WordPress
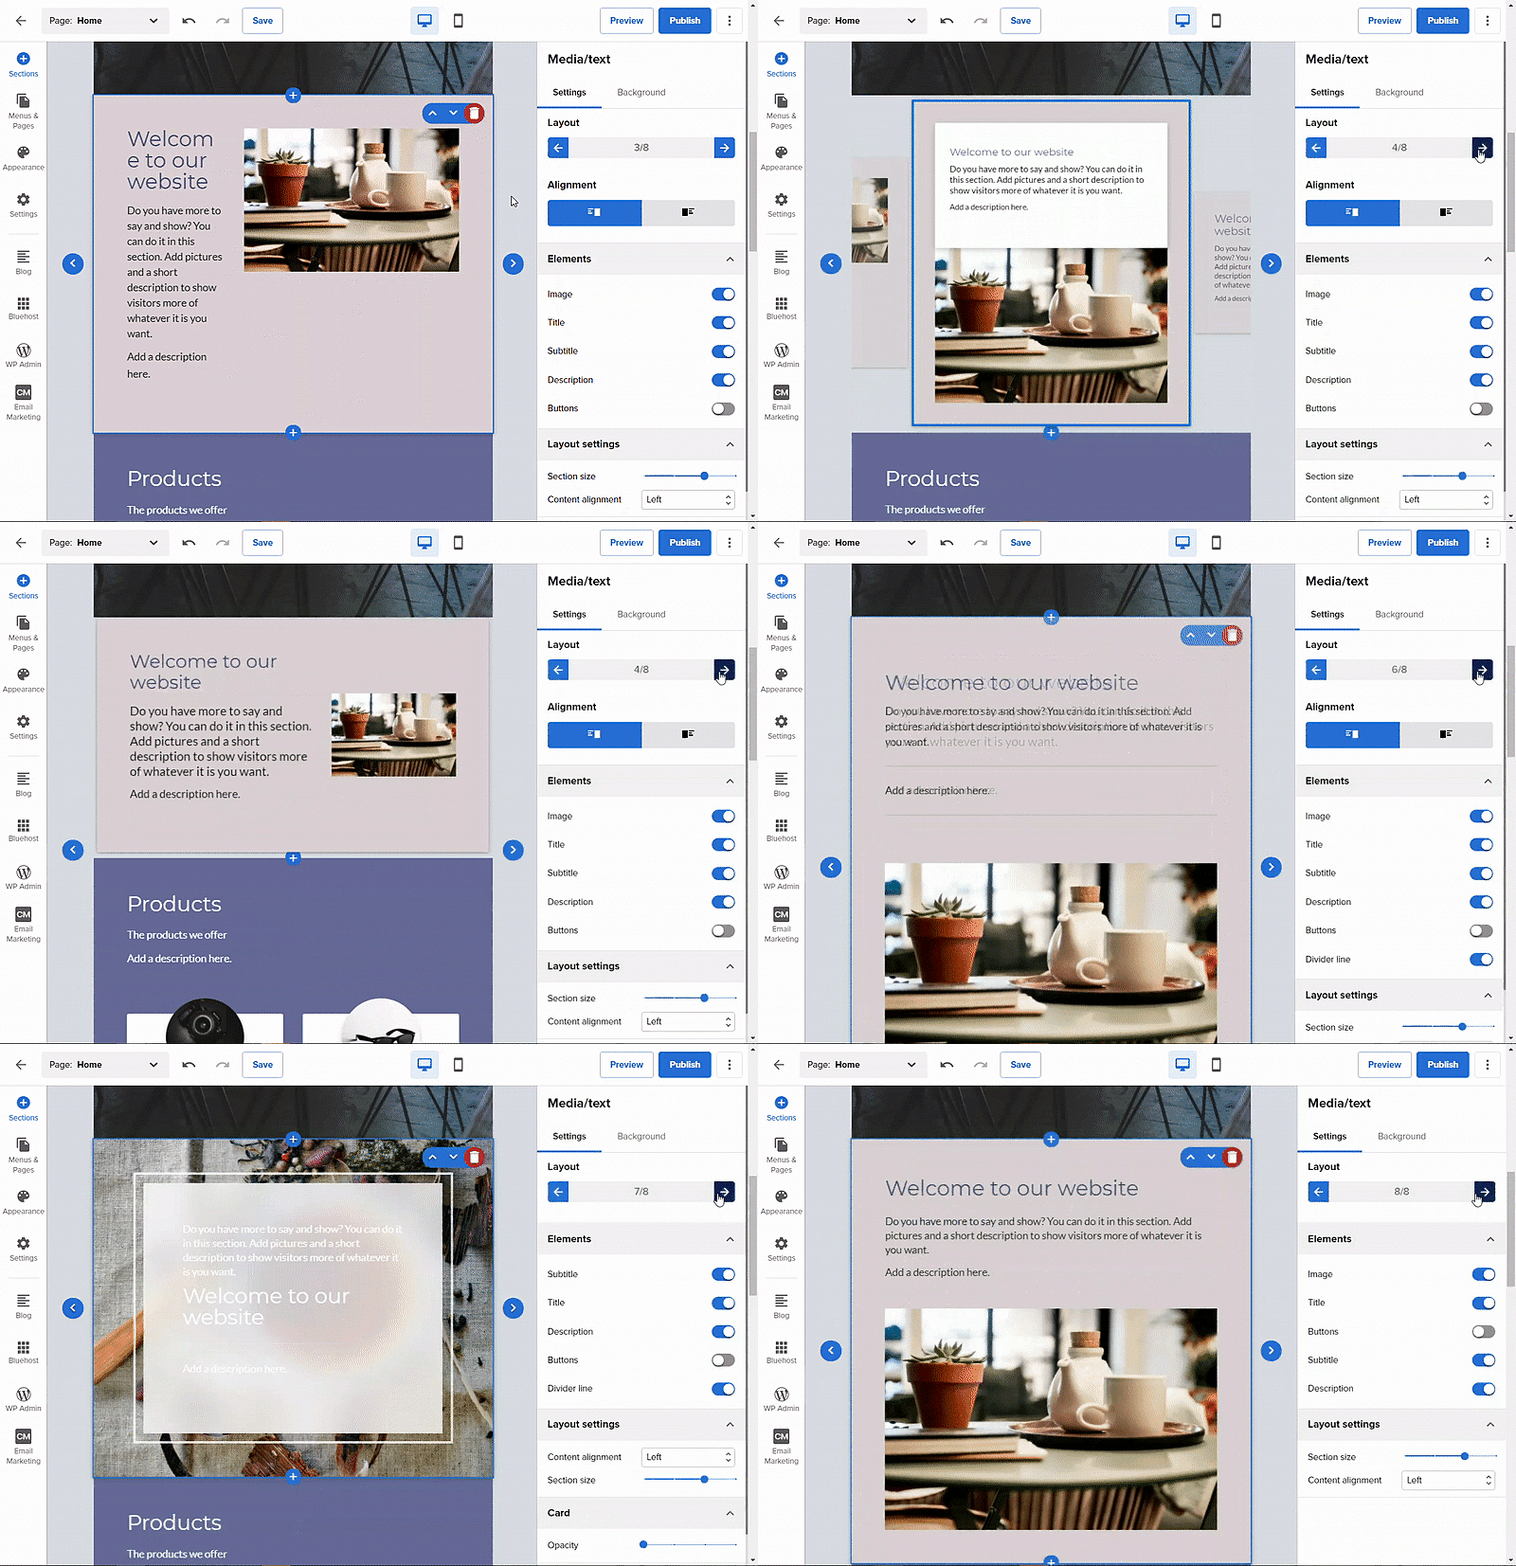
- To change the template to any particular section, select the section to edit the layout. The option will appear on the right-hand side of the navigation with options to edit.
- Under Layout, click the right or left arrow to change the Section's template. Here is an example below:

Copying Sections in Bluehost Website Builder for WordPress
- Click on the section you want to edit.
- From the upper right corner. Click the Duplicate icon to copy the section on your webpage.

Deleting Sections in Bluehost Website Builder for WordPress
To delete a section, click on the section you would like to remove, then click the 'Delete' (trash can) icon.

Note: Your edits and updates are reflected instantly in Website Builder, but remember to hit Save or Publish to save your work.
Summary
Effectively adding and managing sections in the Bluehost Website Builder, now enhanced to Wondersuite for WordPress, is key to creating a standout website. Through organizing content, enriching visual appeal, and optimizing for search engines, sections provide a foundation for a dynamic and responsive online presence.
You can add and get creative with adding sections and elements to your website. This guide will show you how to edit, move, and delete sections for your Bluehost Website Builder. Check out our great tips for building a website with Bluehost Website Builder at our blog: Quickstart Bluehost Website Builder Tutorial: Using Mixed Mode and How To Build a Website on Bluehost.
If you need further assistance, feel free to contact us via Chat or Phone:
- Chat Support - While on our website, you should see a CHAT bubble in the bottom right-hand corner of the page. Click anywhere on the bubble to begin a chat session.
- Phone Support -
- US: 888-401-4678
- International: +1 801-765-9400
You may also refer to our Knowledge Base articles to help answer common questions and guide you through various setup, configuration, and troubleshooting steps.