How to Change the WordPress URL
There are a few reasons you might need to change your Site URL or Home URL. For instance, if you have moved your WordPress site or plan to move to a new domain or directory, you'll need to update these URLs to reflect the new location. Similarly, if you're setting up a staging site or testing your website on a different server, you may need to adjust the URLs accordingly.
In this guide, we'll walk you through the process of changing your Site URL and Home URL in WordPress, ensuring that your website remains accessible and functional with the updated configurations.
Check out our blog to learn more about URLs: What is a URL?: Learn About The Structure, Syntax, and Best Practices.
Understanding WordPress Home and Site URL: Key Differences
- The Home URL is the actual web address people type in to visit your website. It's what appears in the address bar of your browser.
- The Site URL is the address where all your WordPress files are stored. It tells WordPress where to look for things like themes, plugins, and media files. On the other hand, the Home URL is the actual web address people type in to visit your website. It's what appears in the address bar of your browser.
Changing the Site URL
You can update your WordPress site URL in several ways. Click a link below to jump to the section you need:
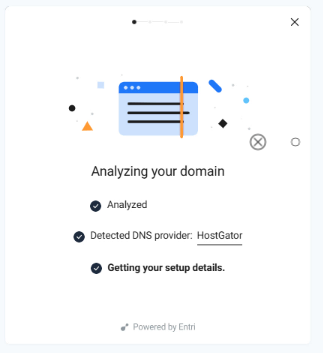
Using a Domain from Bluehost
Here is a short video on how to change your Site URL using a domain from Bluehost:
- Log in to your Bluehost Portal.
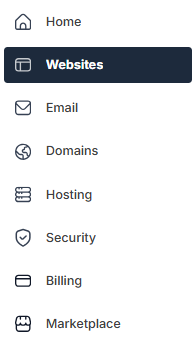
- In the left-hand menu, click Websites.
- Click the Manage button located next to the website you want to manage.

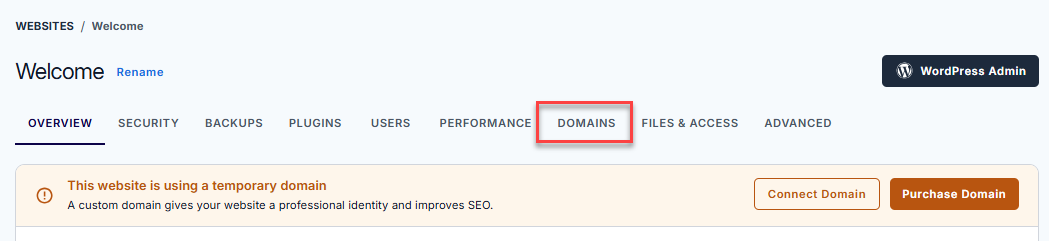
- Navigate to the Domains tab.
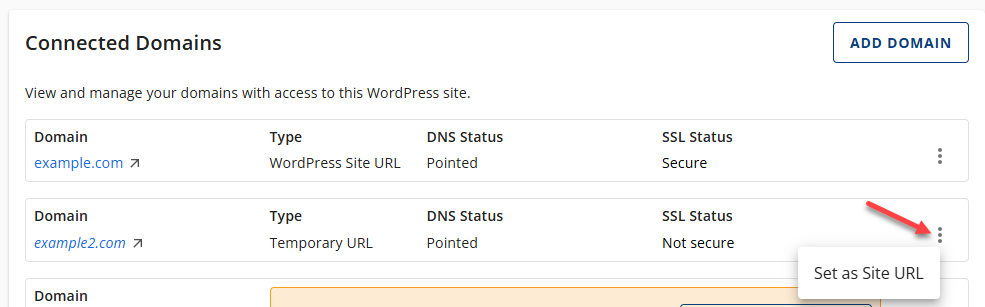
- Click the vertical ellipsis on the far right, then select Set as Site URL.
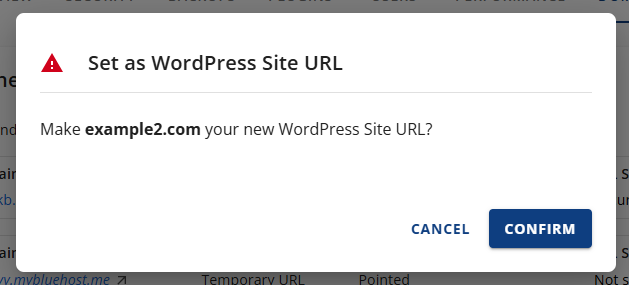
- Click Confirm to complete the changes.
Using a Domain from Another Provider
Here is a short video on how to change your Site URL using a domain from another provider:
- Log in to your Bluehost Portal.
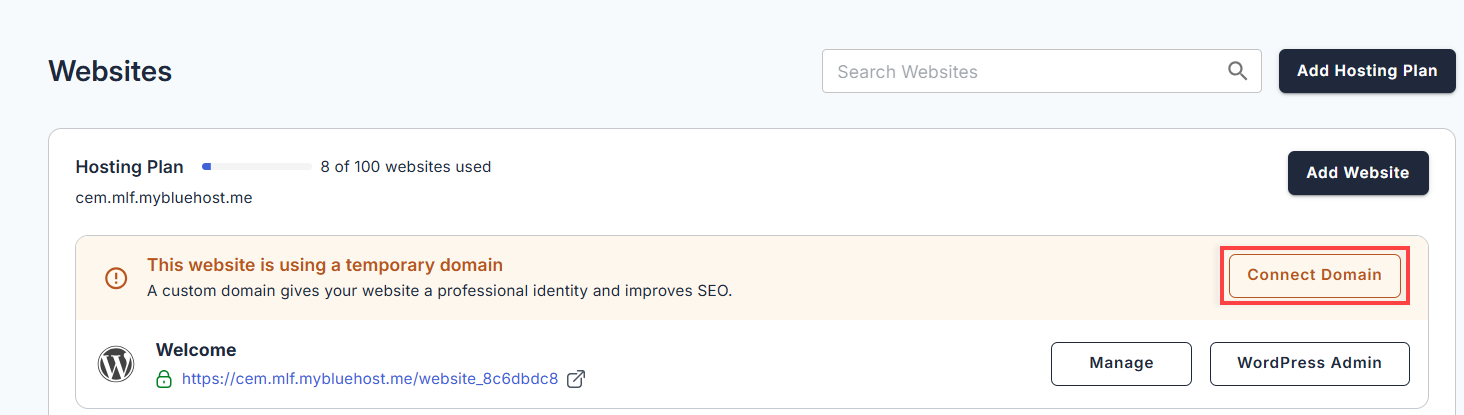
- In the left-hand menu, click Websites.
- Find the site you want to update, then click Connect Domain.
- Choose a domain from the list.
- If your domain isn’t listed, click the Use a Domain not Listed option.
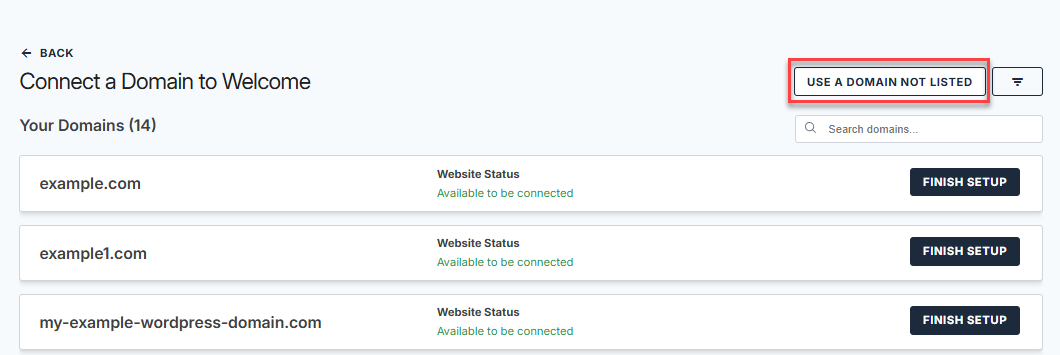
- If your domain isn’t listed, click the Use a Domain not Listed option.
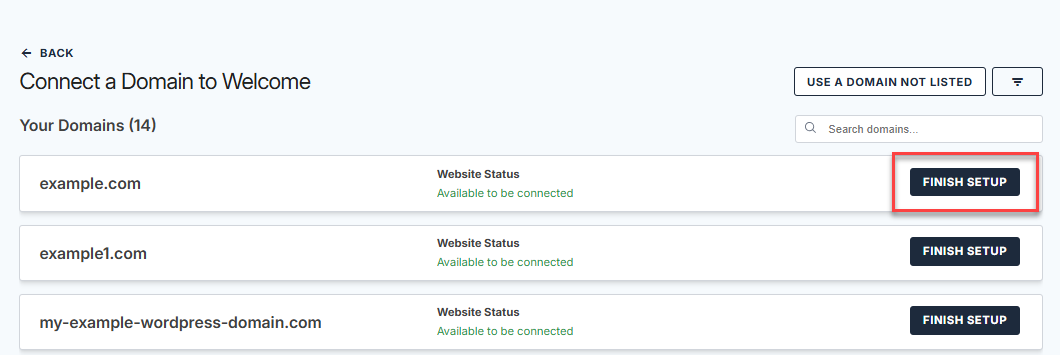
- Click the Finish Setup button.
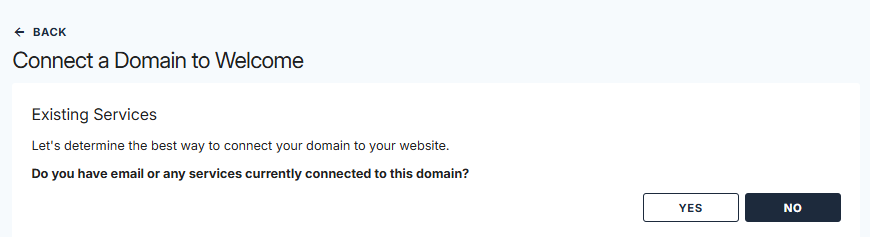
- Follow the on-screen prompts and confirm any services linked to your domain. The following actions will initiate an update to your DNS settings.
- The system will automatically detect your domain's registrar and redirect you to its login page.
- Enter your account details.
- Follow the on-screen instructions to add the required DNS records in your registrar’s DNS management section.
- After adding the records and allowing time for propagation, return to your Bluehost account to complete the site URL setup, same as the steps above (Using a Domain from Bluehost).
Changing the Home & Site URL in WordPress
In case you are unable to access your Bluehost account or prefer to update it directly in your WordPress dashboard, you have the option to update the Home and Site URL settings directly on your WordPress site.
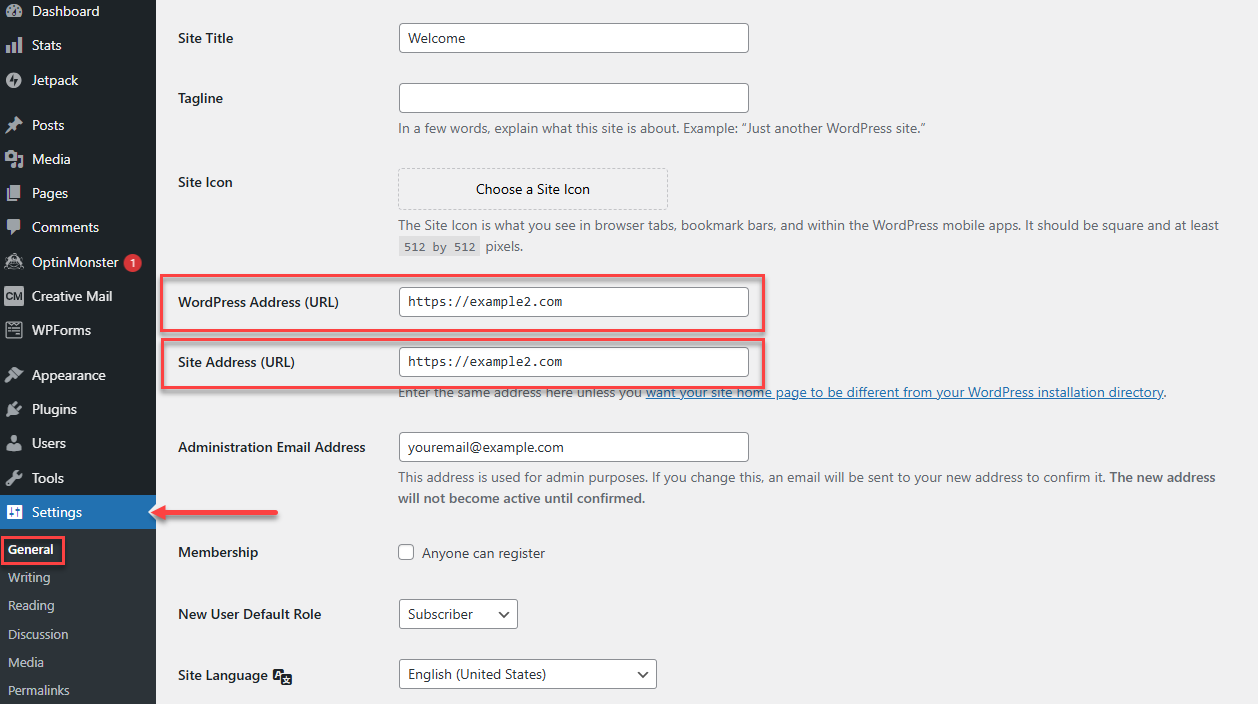
- Click the Settings link on the left side.
- Select the General tab.
- Enter the new WordPress and Site Address URL. It is important to note that you should enter the exact address unless you want your site's homepage to differ from the directory where your WordPress installation is located.
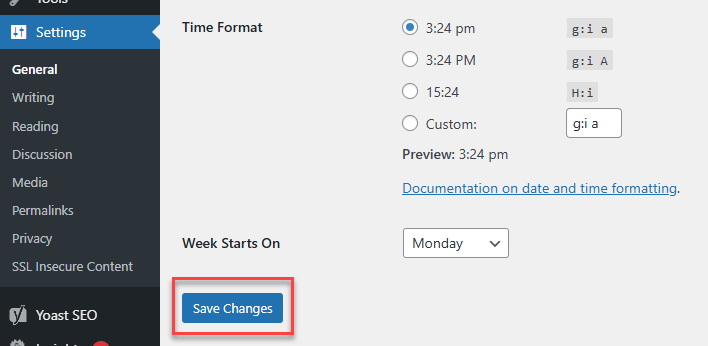
- Once you're done, scroll down to the bottom and hit Save Changes.
The site URL is now set in the WordPress database. You can review your site and make sure it works correctly.
Manually Changing WordPress Domain in phpMyAdmin (Site & Home URLs)
Would you like to manually update the domain name in WordPress? Manually changing the domain name requires advanced WordPress knowledge, specifically of phpMyAdmin and the wp-config file. Proceed with caution.
For instructions on changing your Site and Home URLs via phpMyAdmin, refer to How to Manually Change Your Domain Name in WordPress.
Keep your website data and files protected in the event of accidents, data loss, injections, and hackers. Make sure you have a daily full backup of your website files and databases, or create a full backup of your website (files and databases) for easy restoration.
Learn how to create backups with these guides: Getting CodeGuard Set Up for Backups and How to Backup & Restore WordPress using Jetpack.
Summary
To ensure your website properly loads, make sure your Site URL and Home URL in WordPress are correct. If you have changed a domain name or moved your WordPress website, temporarily modifying the Site URL and Home URL can help with the transition while you perform tasks like migrating your website.
If you need further assistance, Bluehost Chat Support is available 24 hours a day, 7days a week while Bluehost Phone Support is available 7 days a week from 7 am-12 midnight EST.
- Chat Support - While on our website, you should see a CHAT bubble in the bottom right-hand corner of the page. Click anywhere on the bubble to begin a chat session.
- Phone Support -
- US: 888-401-4678
- International: +1 801-765-9400
You may also refer to our Knowledge Base articles to help answer common questions and guide you through various setup, configuration, and troubleshooting steps.