Agency Staging Site – Manage and Test Updates Easily
The Agency Staging Site serves as a private copy of your live website, also known as the production site. This controlled environment allows users to experiment with design modifications, content updates, plugins, and other changes without affecting the live site.
This article guides you in managing your Agency Staging Site, from accessing phpMyAdmin and WP Admin to handling backups, domains, and more. By following these steps, you can make changes easily without disrupting your live site.
- While our staging software aids in developing and testing eCommerce sites, larger sites may face challenges. Cloning an extensive database can lead to data integrity issues, performance impacts, and differences between staging and production environments.
- We advise caution and thorough testing of all features before updating your production site.
How to Manage Changes in agency Staging
With the Agency Staging Site, you can test and process updates before making them live. This feature helps to provide a smooth user experience, lowers the risk of errors, and keeps your website secure and performing at its best.
- Accessing the Staging Site
- Accessing phpMyAdmin
- Accessing WP Admin
- Connecting Domains
- Scanning Malware
- Viewing Backups
- Viewing Plugins
- Viewing Themes
- Adjusting Storage Allocation
- Changing WordPress Version
- Changing PHP Version
- Turning ON/OFF the WordPress Static 404 Handler
Accessing the Staging Site
Below are the steps you can follow to create a staging site in Agency for your development needs:
- Log in to your Bluehost Portal.
- Go to the Staging Dashboard. There are two options for doing this:
- Websites Tab
- In the left-hand menu, click Websites.
- Click the Manage button located next to the website you want to manage.
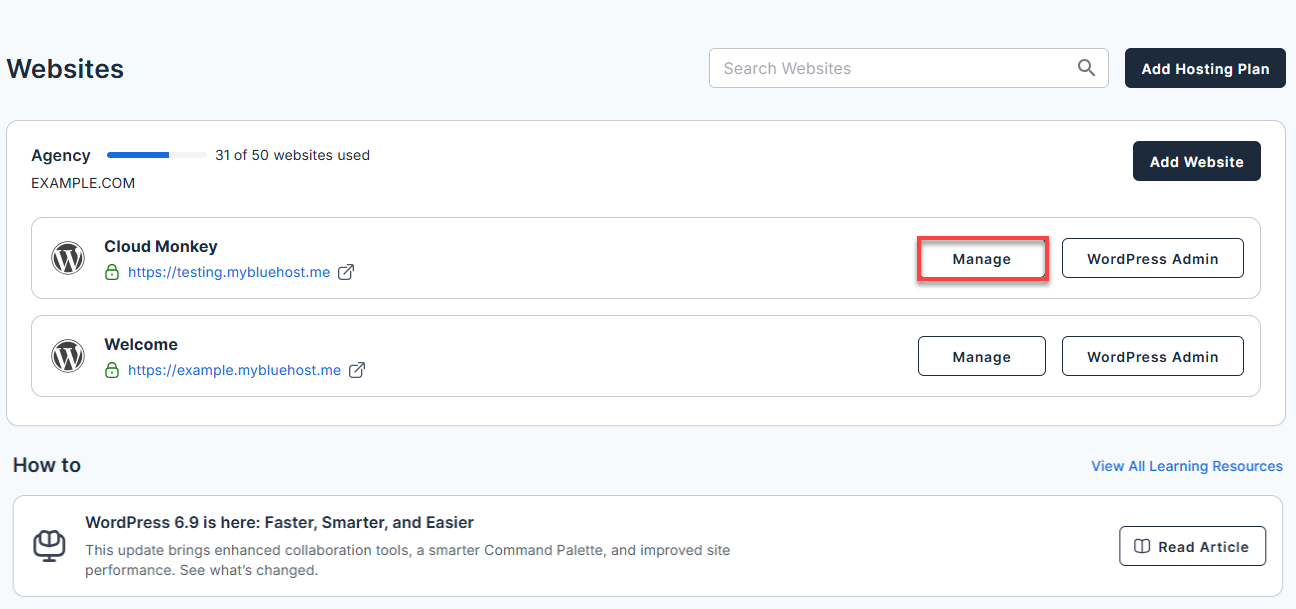
- In the left-hand menu, click Websites.
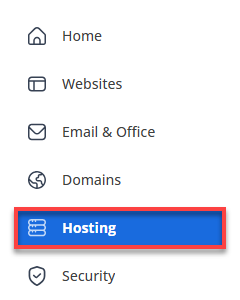
- Hosting Tab
- Click Hosting in the left-hand menu.
- Click on the Websites button.
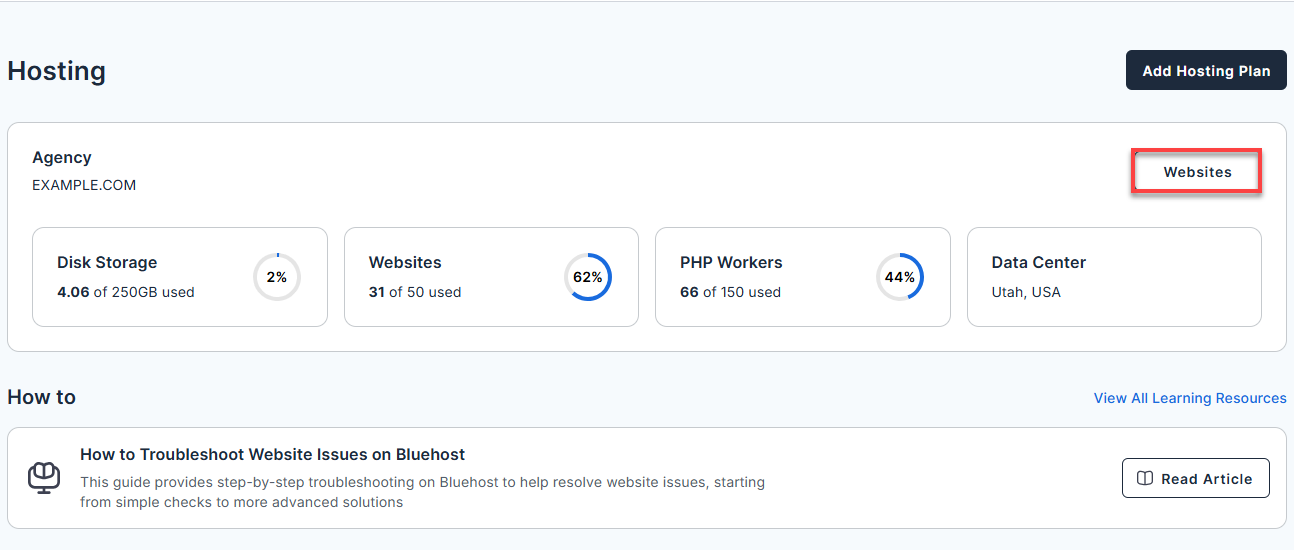
- Click the Manage button located next to the website you want to manage.
- Click Hosting in the left-hand menu.
- Websites Tab
- On the website details page, click the Staging tab.

Accessing phpMyAdmin
Provided that you have already accessed your Staging Site, please follow the steps below:
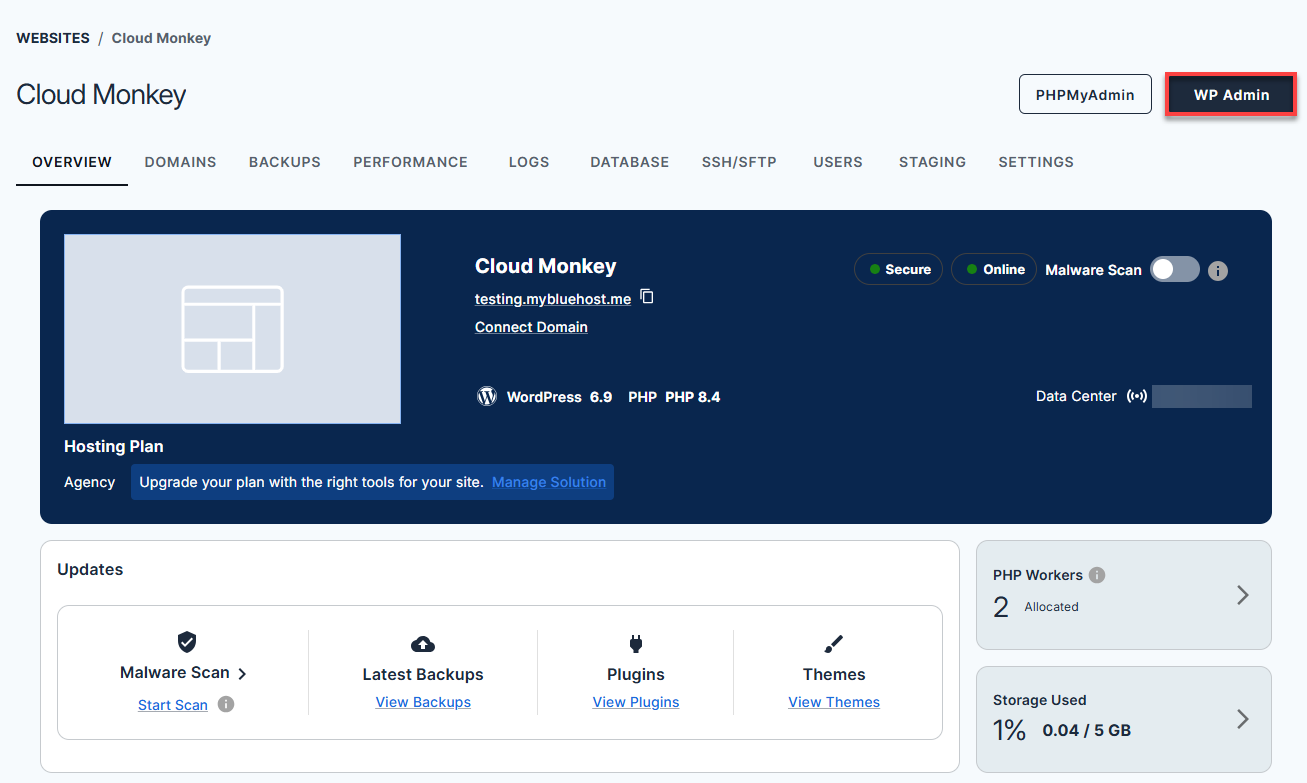
- On the Overview page, please click the PHPMyAdmin button.

Accessing WP Admin
Provided that you have already accessed your Staging Site, please follow the steps below:
- On the Overview page, please click the WP Admin button.
Connecting Domains
Provided that you have already accessed your Staging Site, please follow the steps below:
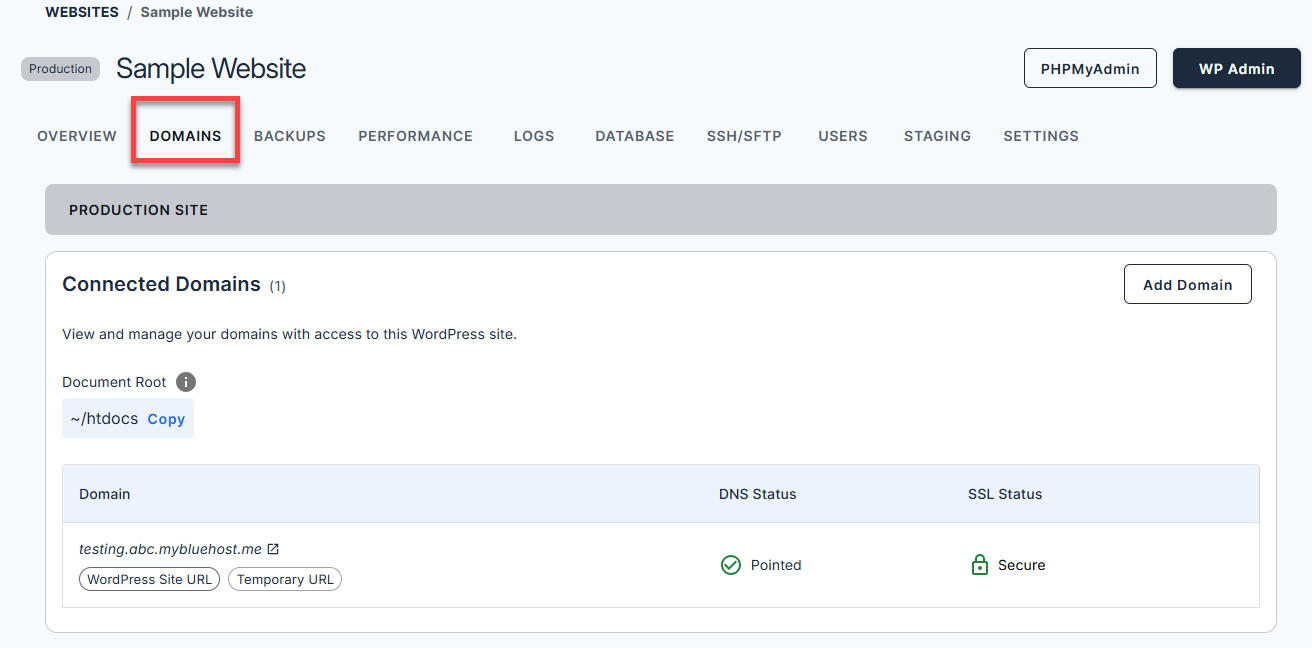
- Click the Domains tab.
- Click the Add Domain button.

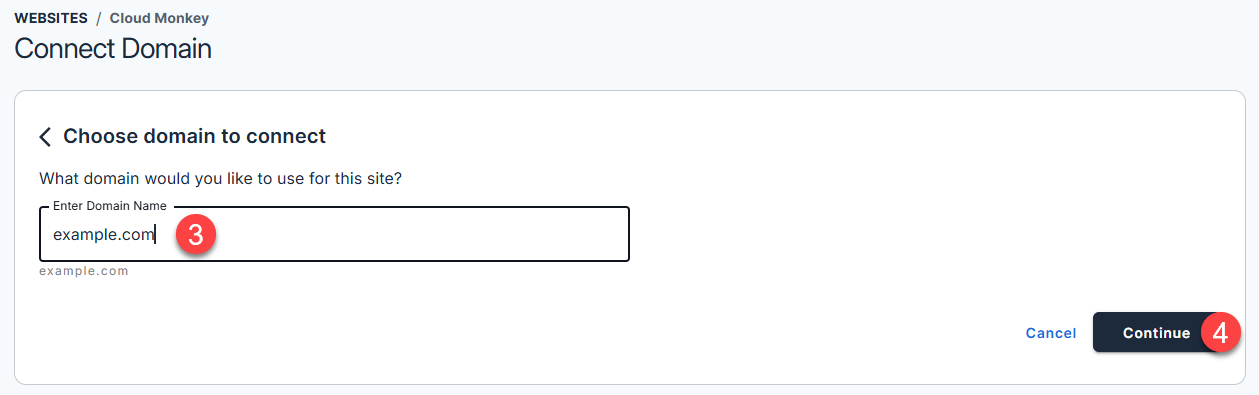
- Enter the desired domain name in the Enter Domain Name text field.
- Lastly, click the Continue button.
Scanning Malware
Provided that you have already accessed your Staging Site, please follow the steps below:
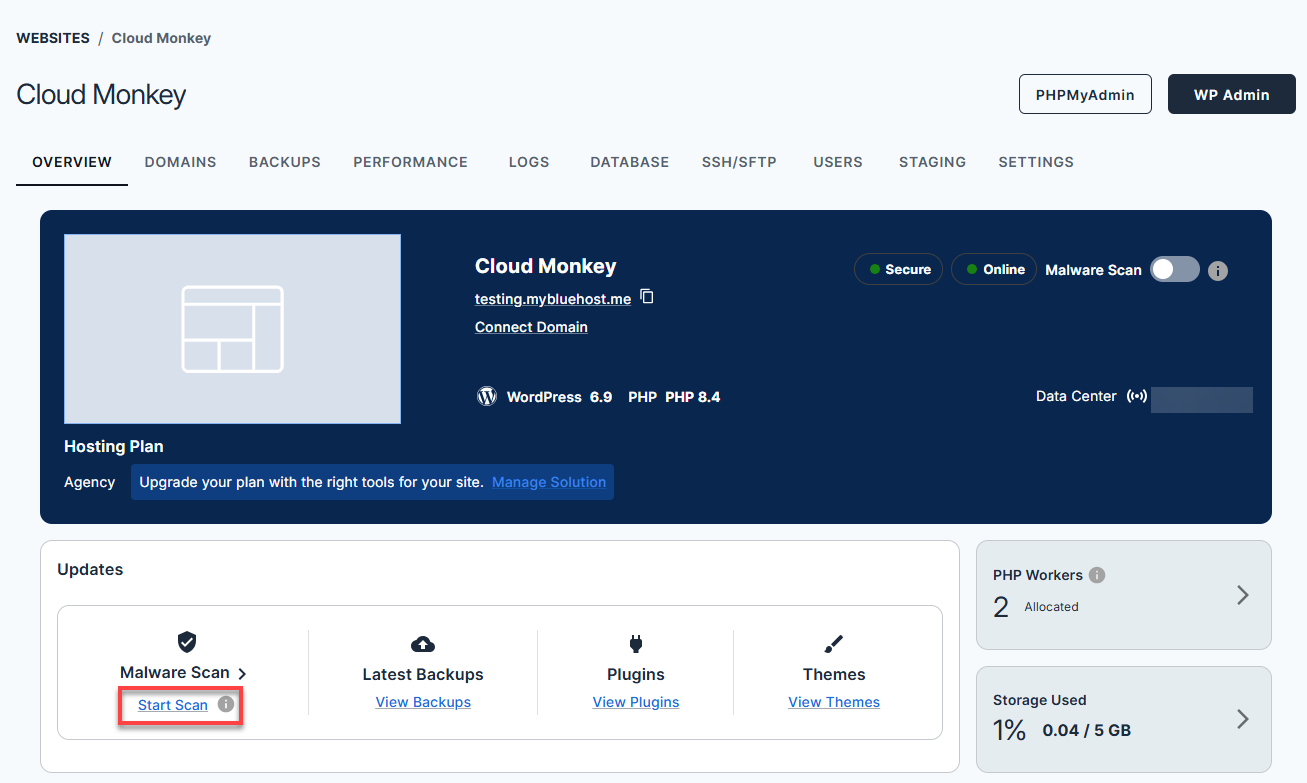
- On the Overview page, click the Start Scan link under Malware Scan.
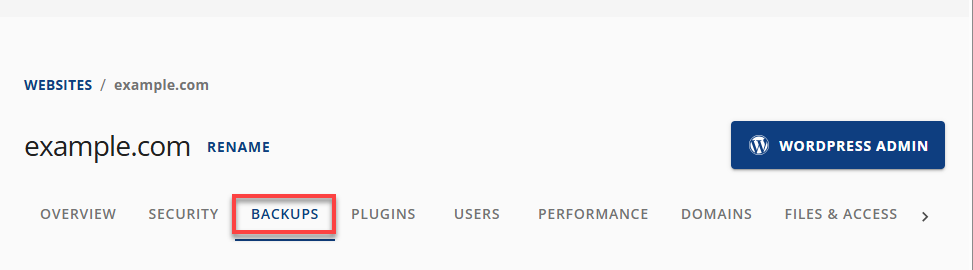
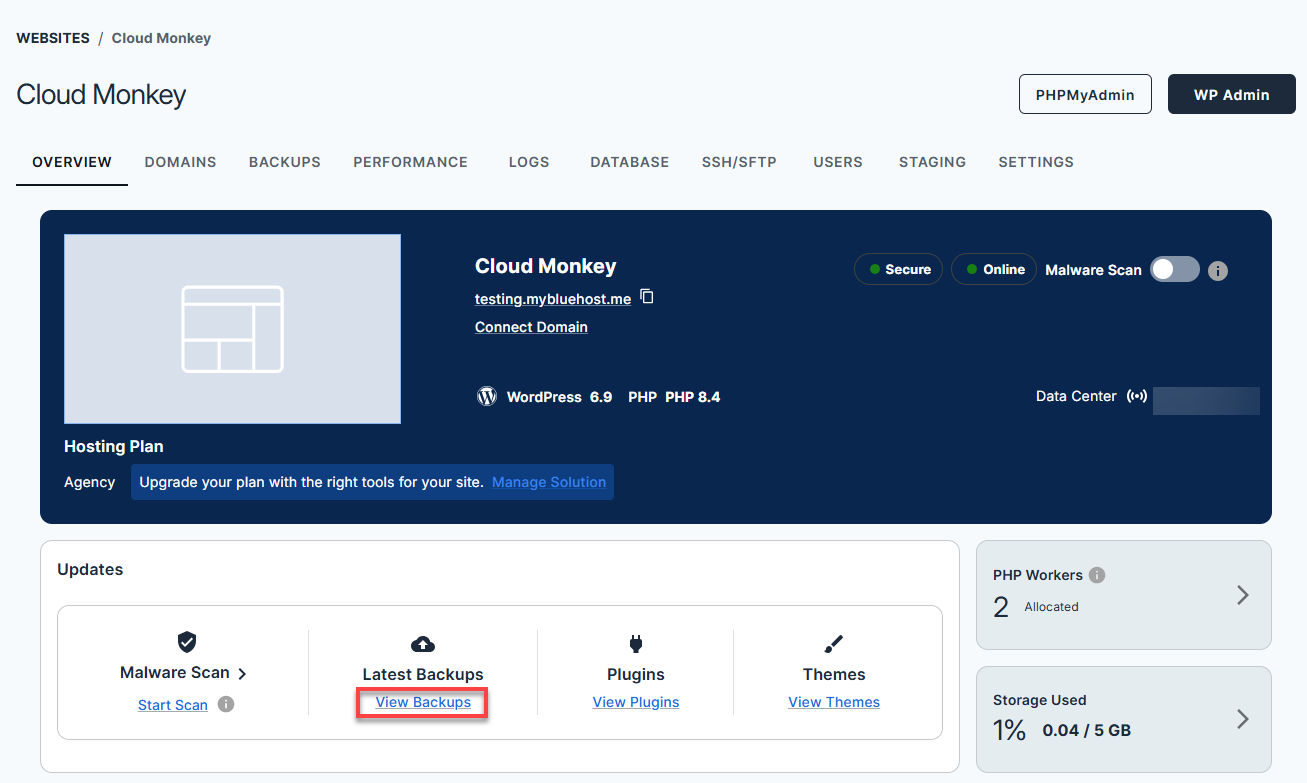
Viewing Backups
Provided that you have already accessed your Staging Site, please follow the steps below:
- Access the Backups section of your Staging Site by following either of the steps below:
- Click the Backups Navigation tab.
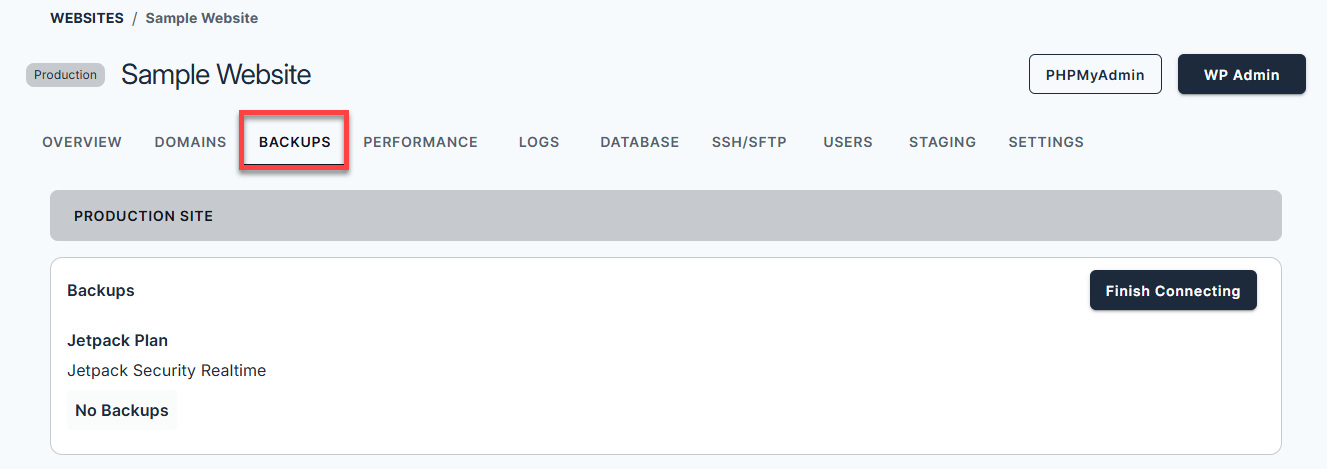
- -OR-
- Click the View Backups link under Latest Backups.
- Click the Backups Navigation tab.
- Click the Finish Connecting button.
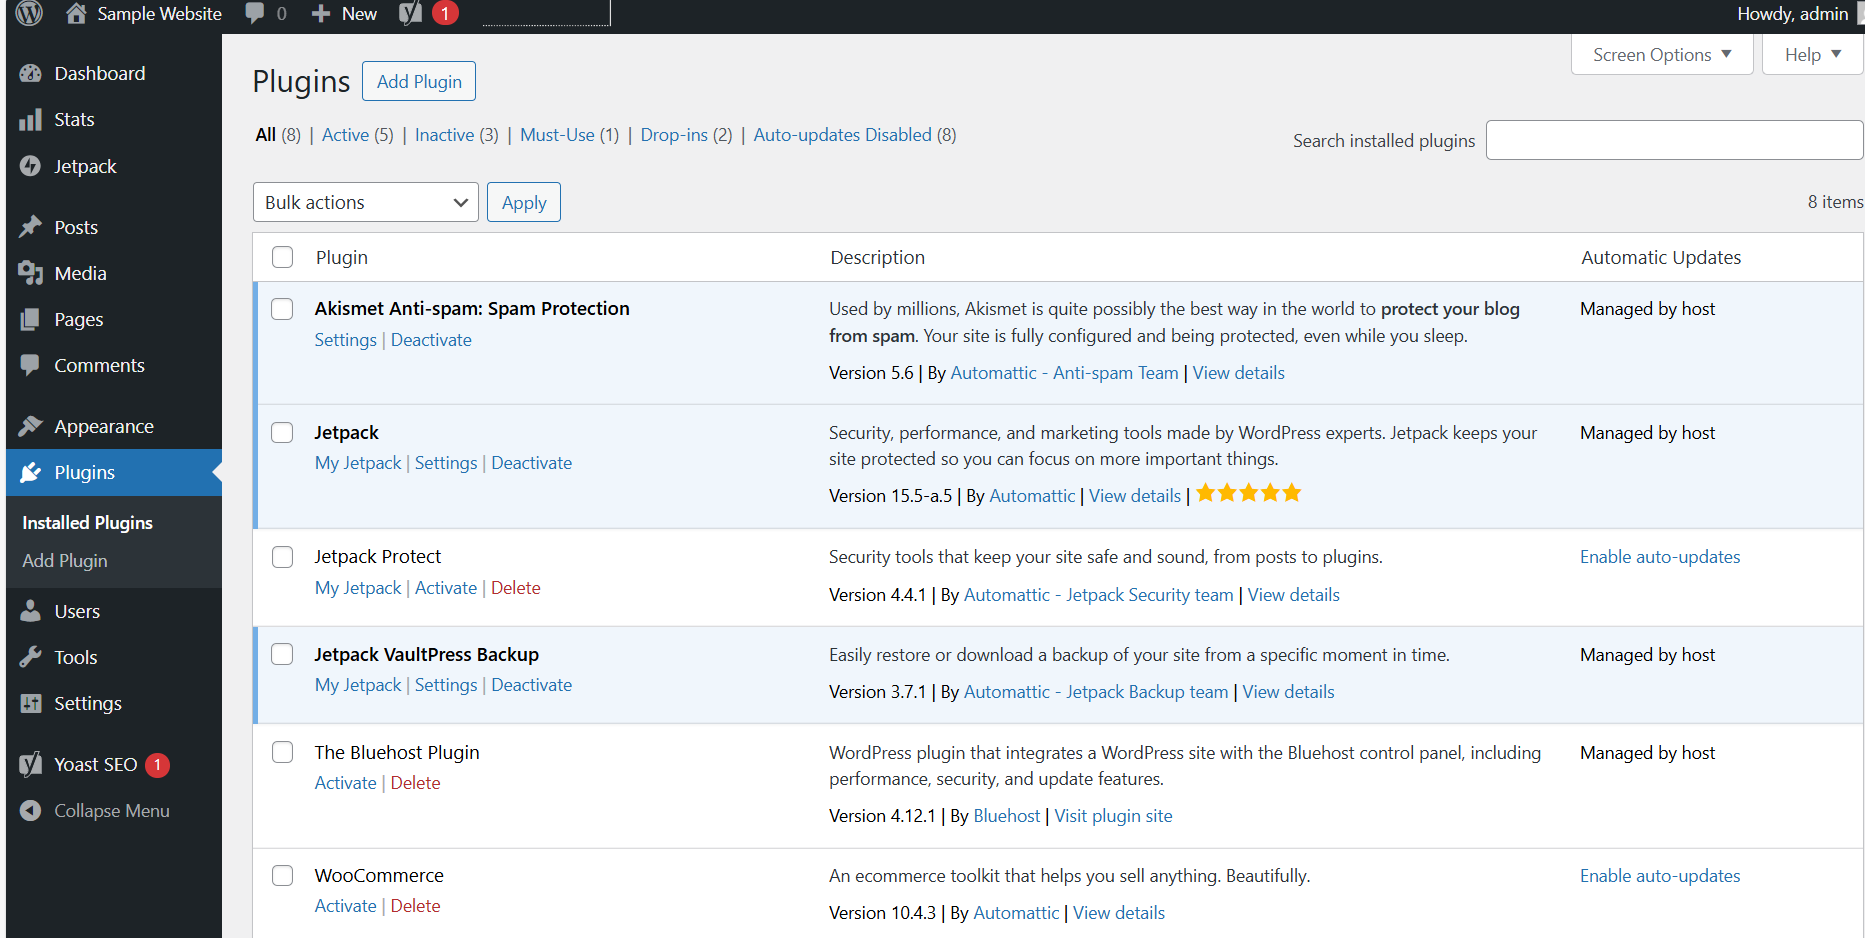
Viewing Plugins
Provided that you have already accessed your Staging Site, please follow the steps below:
- Click the View Plugins link under Plugins.

- After clicking the View Plugins link, you will be rerouted to the Plugins page, where you can add, delete, deactivate, and update plugins.
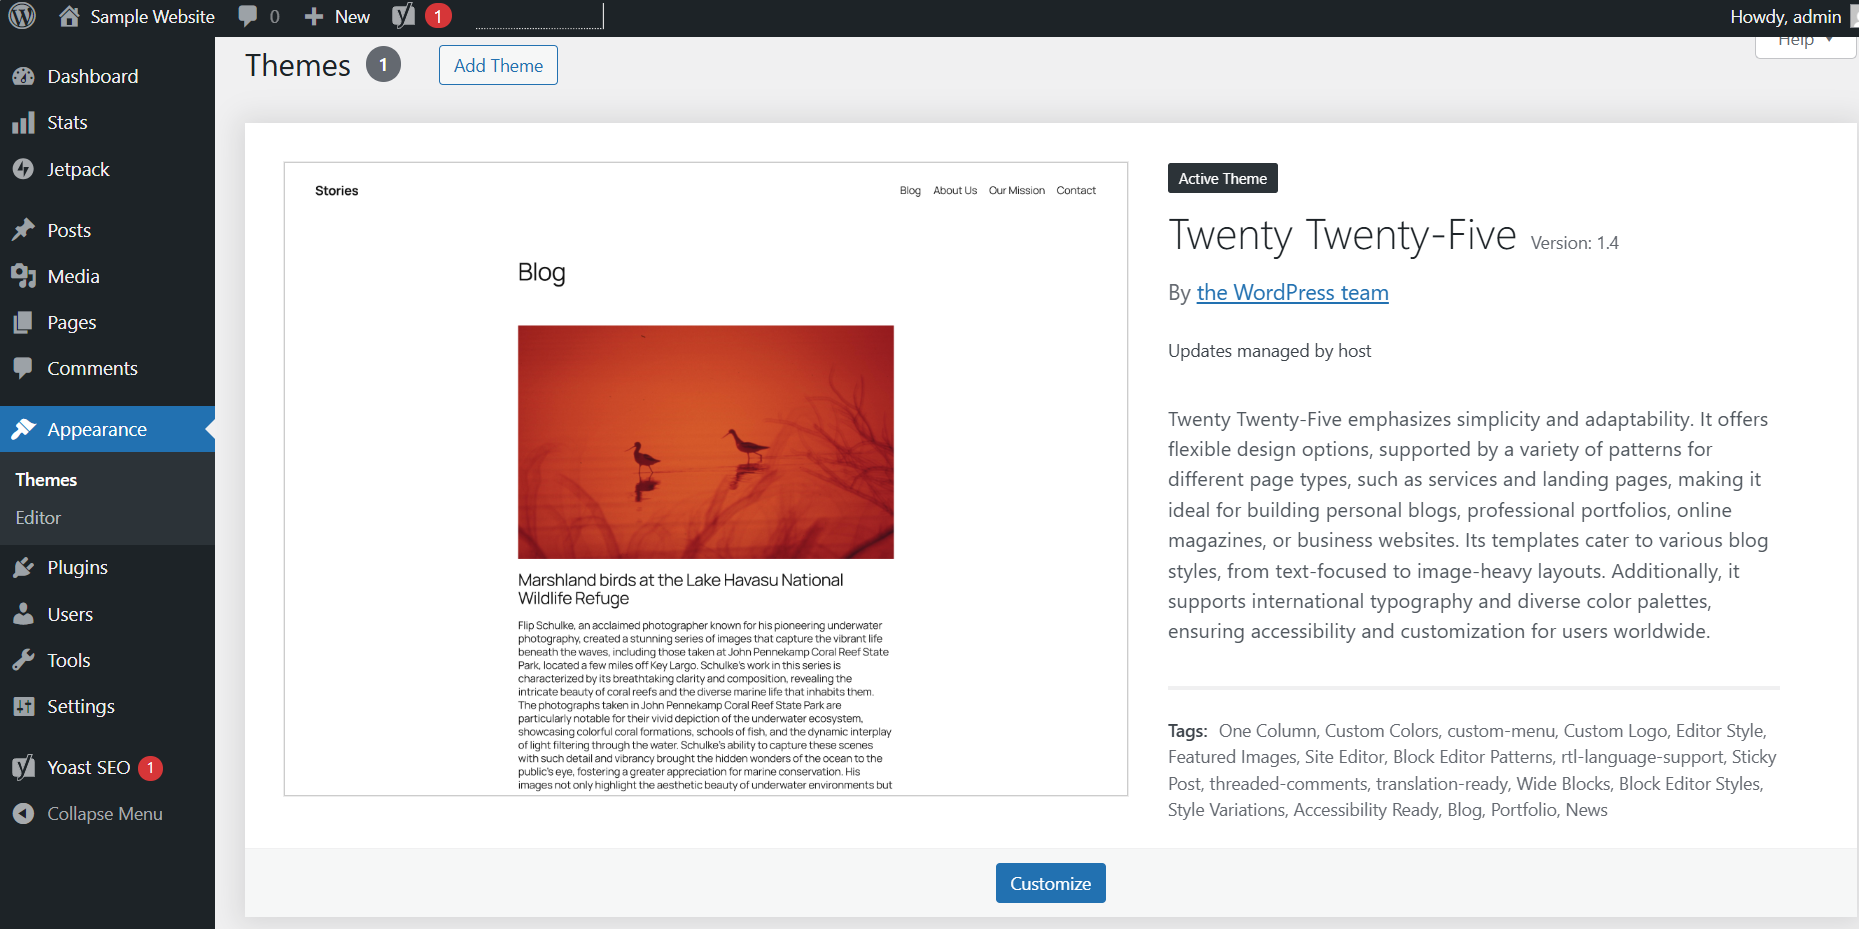
Viewing Themes
Provided that you have already accessed your Staging Site, please follow the steps below:
- Click the View Themes link under Themes.
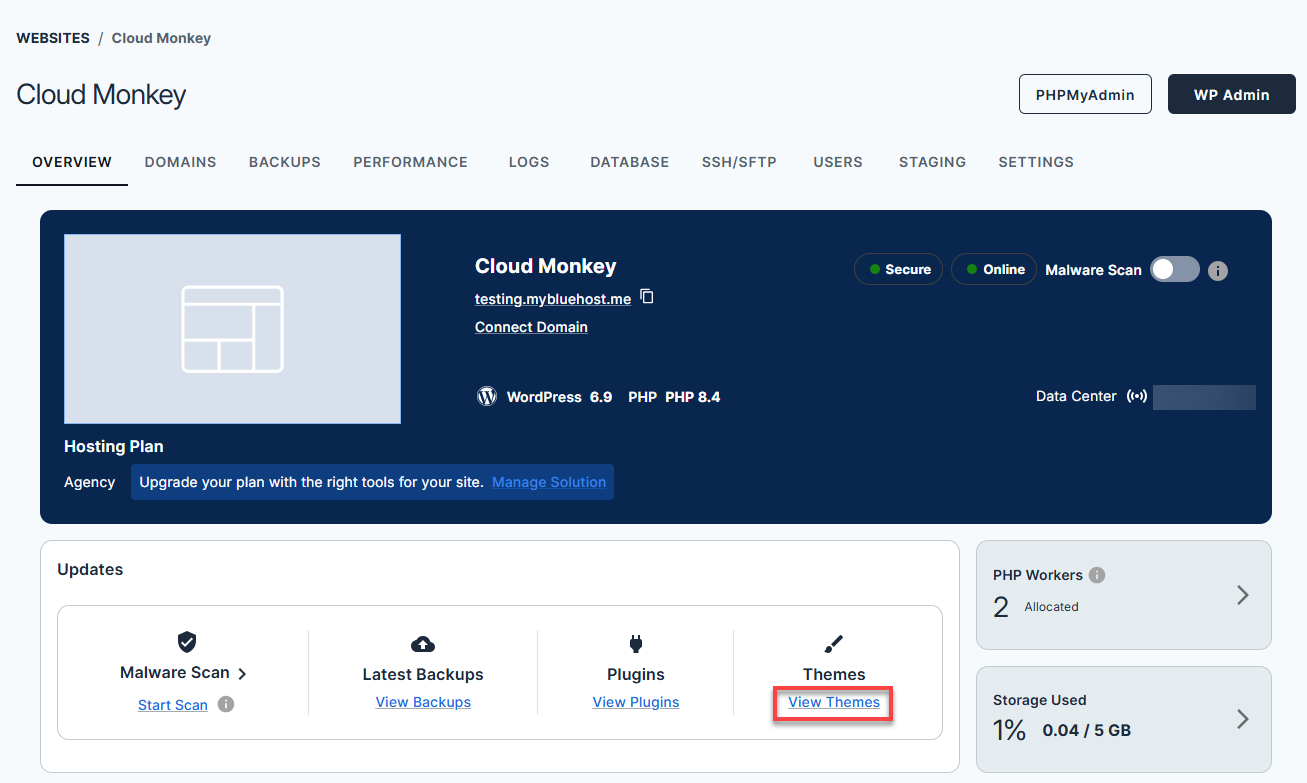
- After clicking the View Themes link, you will be rerouted to the Themes page, where you can add, install, customize, and upload themes.
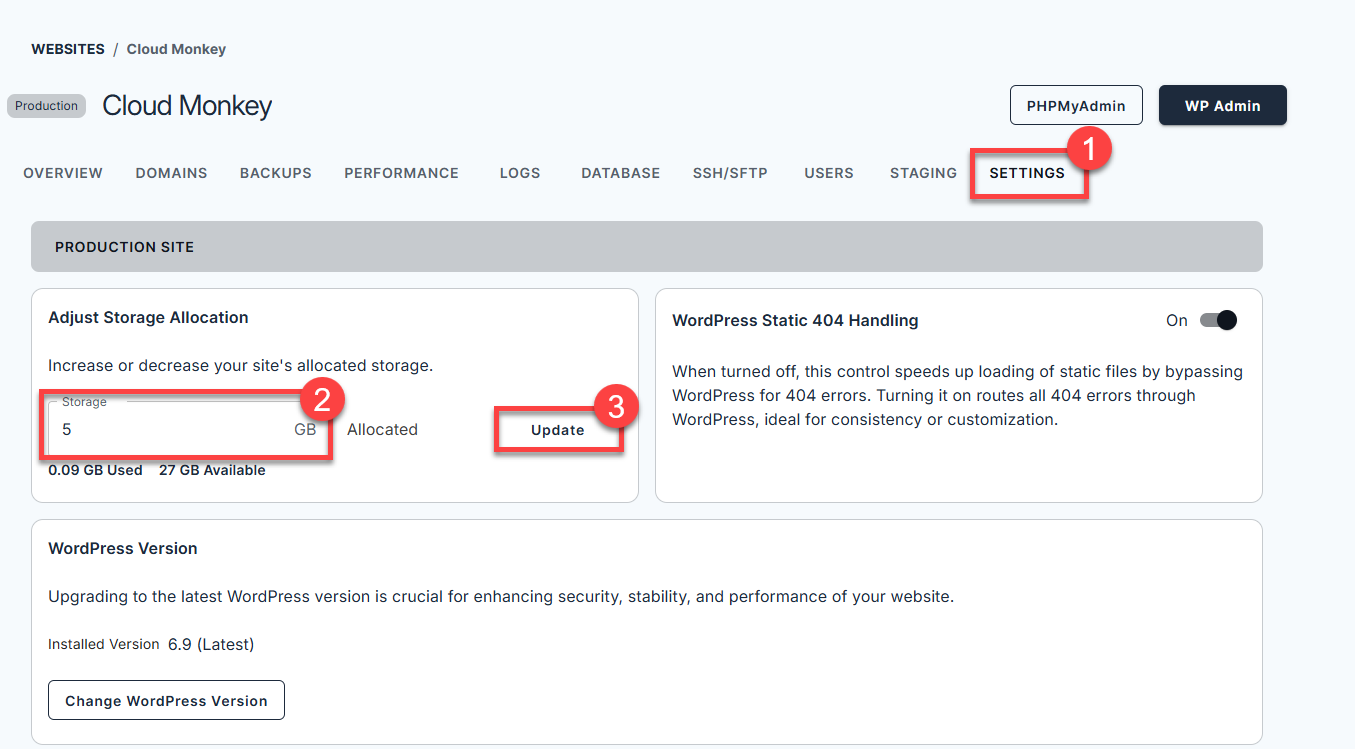
Adjusting Storage Allocation
Provided that you have already accessed your Staging Site, please follow the steps below:
- Click the Settings navigation tab.
- Set the desired storage that you want to allocate in the Storage text field.
- Lastly, click the Update button.
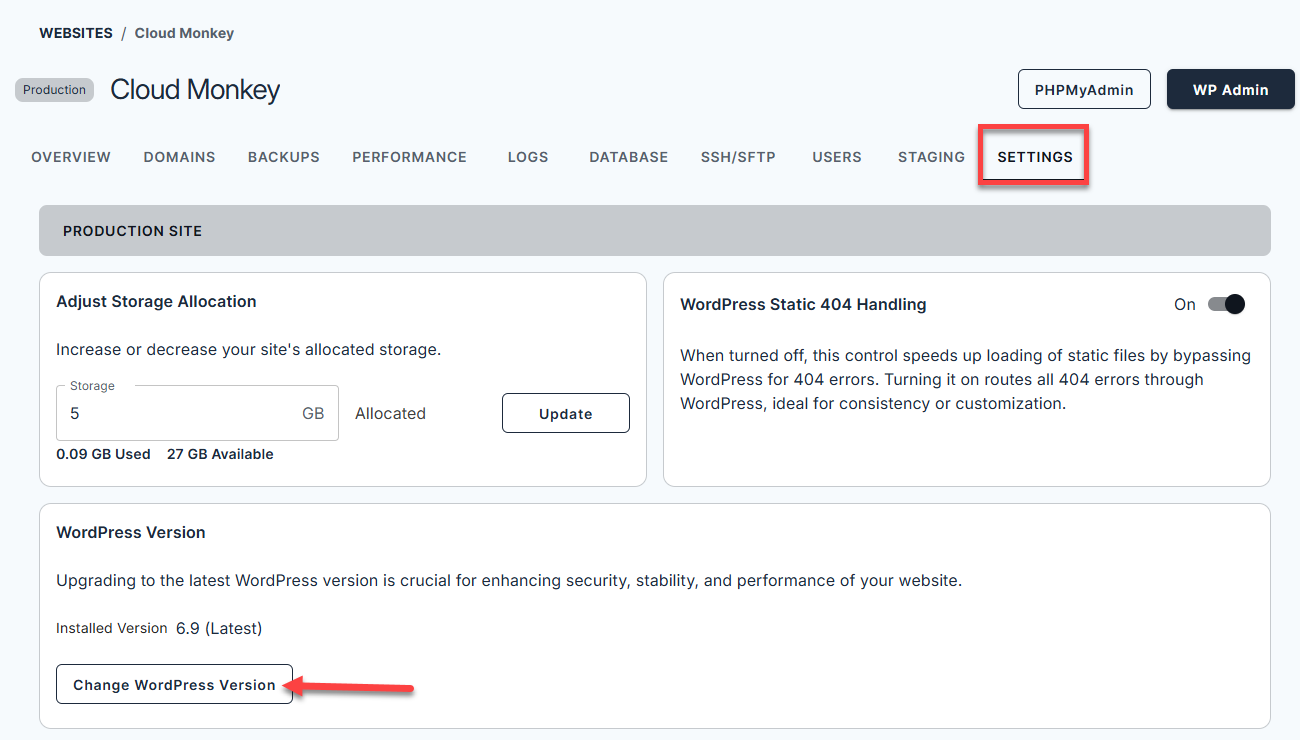
Changing WordPress Version
Provided that you have already accessed your Staging Site, please follow the steps below:
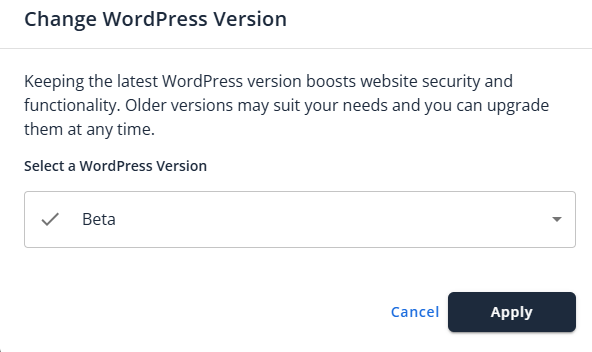
- We recommend that you keep the latest WordPress version in order to boost website security and functionality.
- You may select the older versions of WordPress that suit your needs, and you can upgrade them at any time.
- Click the Settings navigation tab.
- Click the Change WordPress Version button.
- Lastly, click the Apply button.
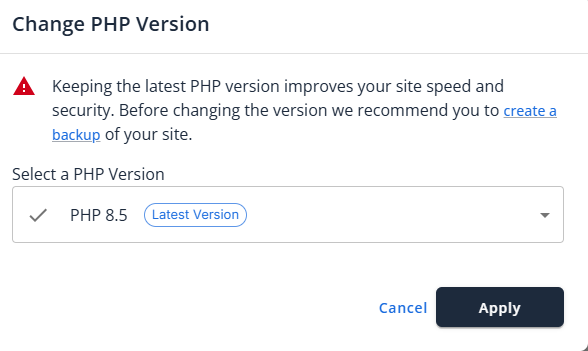
Changing PHP Version
Provided that you have already accessed your Staging Site, please follow the steps below:
Important:
- Before changing the version, we strongly recommend that you create a backup of your site.
- We recommend that you keep the latest PHP version in order to improve site speed and security.
- Click the Settings navigation tab.
- Click the Change PHP Version button.
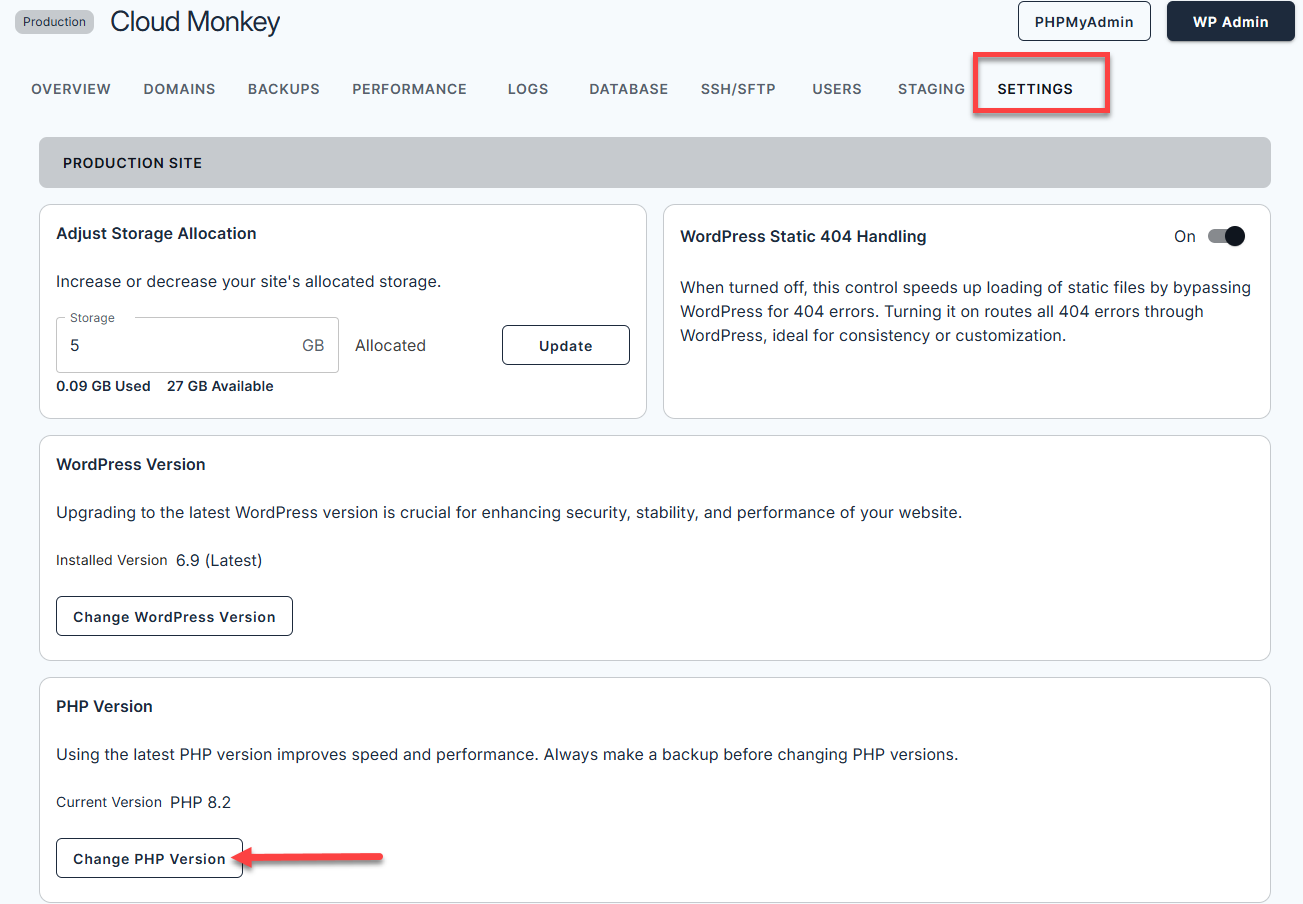
- Lastly, click the Apply button.
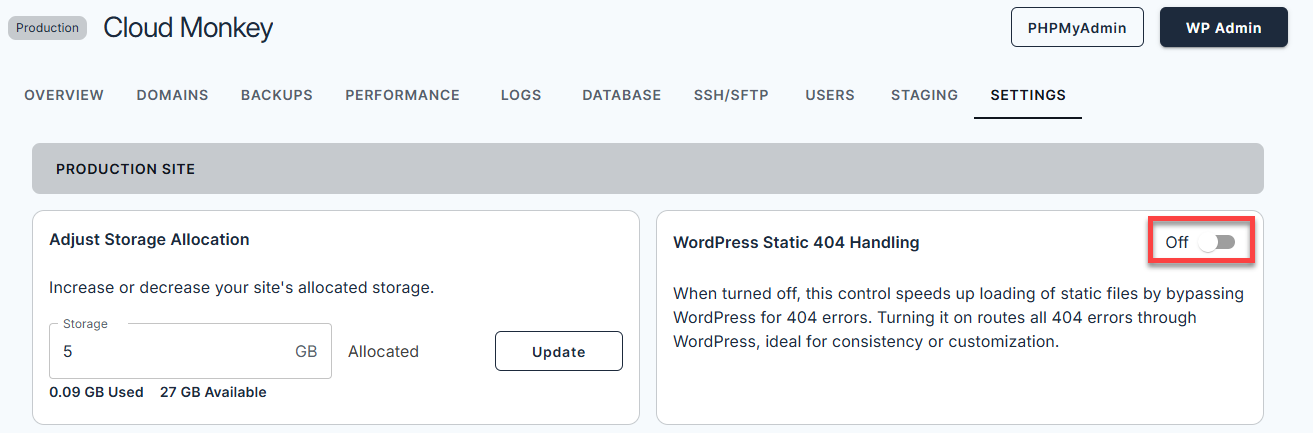
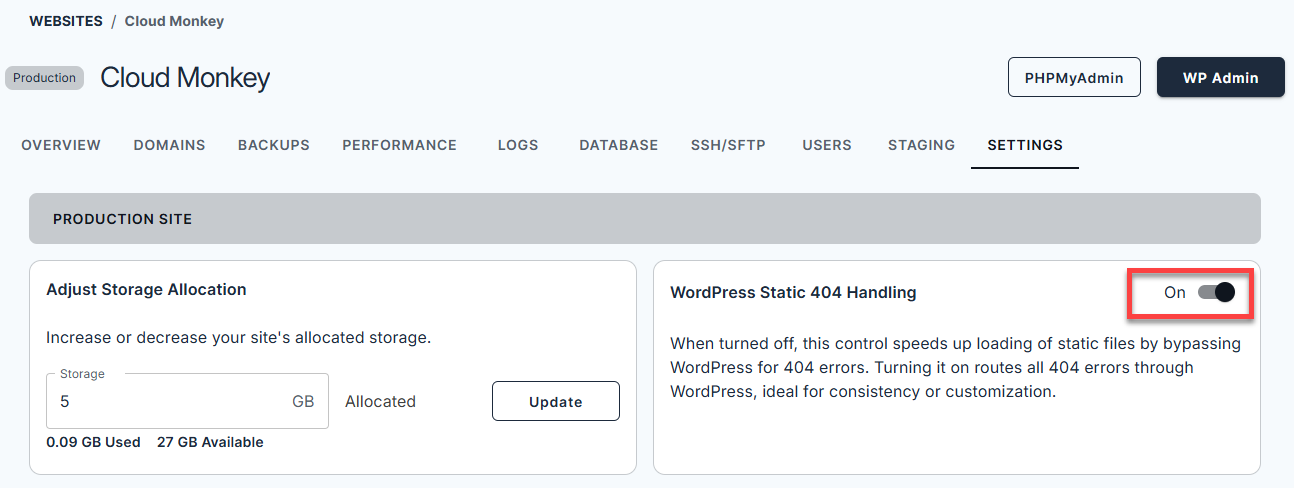
Turning ON/OFF the WordPress Static 404 Handler
Provided that you have already accessed your Staging Site, please follow the steps below:
- Click the Settings navigation tab.
- Toggle the switch to turn ON/OFF the WordPress Static 404 Handler feature of your Cloud Staging Site.
OFF
ON
Related Agency Staging Articles
Summary
With the Agency Staging Site, you can safely test updates, plugins, and design changes before applying them to your live website. This staging environment gives you full control to experiment without worrying about breaking your site.
To ensure smooth performance and safeguard your website:
- Update WordPress and PHP versions regularly to improve security and performance.
- Run a test on all changes thoroughly before pushing them live, especially for large or complex websites.
- Back up your site before making any major modifications to avoid potential data loss.
By making the most of your Bluehost staging site, a smooth experience for your visitors is guaranteed, while minimizing risks. Go through the steps in this guide to manage your WordPress staging environment confidently and keep your website running at its best.
If you need further assistance, Bluehost Chat Support is available 24 hours a day, 7days a week while Bluehost Phone Support is available 7 days a week from 7 am-12 midnight EST.
- Chat Support - While on our website, you should see a CHAT bubble in the bottom right-hand corner of the page. Click anywhere on the bubble to begin a chat session.
- Phone Support -
- US: 888-401-4678
- International: +1 801-765-9400
You may also refer to our Knowledge Base articles to help answer common questions and guide you through various setup, configuration, and troubleshooting steps.
- Click the View Plugins link under Plugins.