How to Configure SiteLock SMART Scanner
SiteLock is a cloud-based security service that scans websites for malware and vulnerabilities. It offers protection against threats like hackers and DDoS attacks, ensuring website safety and uptime. SiteLock also provides solutions for website acceleration and performance improvement.
The SMART (Secure Malware Alert and Removal Tool) is integral to the Essentials, Prevent, Prevent Plus plans, designed to enhance website security. It actively scans the website's file structure to identify and eliminate malware. This scanning occurs continuously for those subscribed to the Prevent Plus plan, ensuring round-the-clock protection. Upon subscribing to any of these plans, the SMART feature is typically configured automatically, facilitating ease of use and immediate protection.
However, in certain circumstances, such as migrating your website to a different server, you may need to reconfigure the SMART scanner manually. This ensures the tool functions optimally and safeguards your website against malware threats even after significant changes to its hosting environment.
If you need help preventing malicious traffic from accessing your website, including bad bots and known malicious IP addresses, check out our guide on configuring the SiteLock TrueShield Firewall.
Configure SiteLock SMART Scanner
To configure the SiteLock SMART scanner, specific steps must be followed to ensure the tool is properly set up to continue providing its protective measures.
Step 1: Launch SiteLock Dashboard
- If you purchased the SiteLock services through us, follow the steps below:
- Log in to your Bluehost Portal.
- In the left-hand menu, click Websites.
- Click the Manage Site button located next to the website you want to manage.

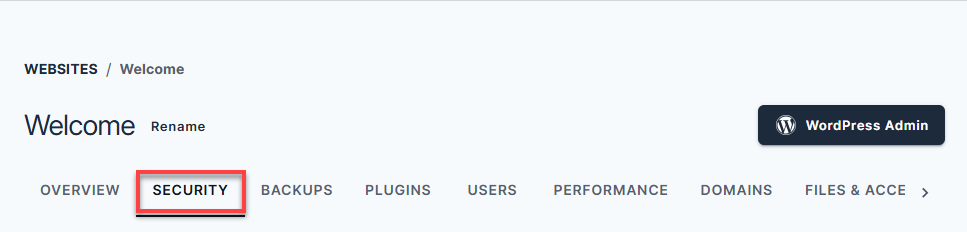
- Navigate to the Security section in the horizontal menu.
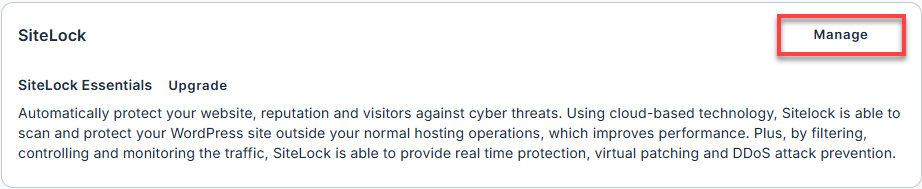
- Click the Manage button to access your SiteLock dashboard.
- If you purchased the service directly from SiteLock, you can go to sitelock.com and click the LOGIN button at the top right-hand corner.
- The username will be the email address you used to sign up for the service.
- You may need to request a password reset if you cannot sign in.
Step 2: Configure SiteLock SMART
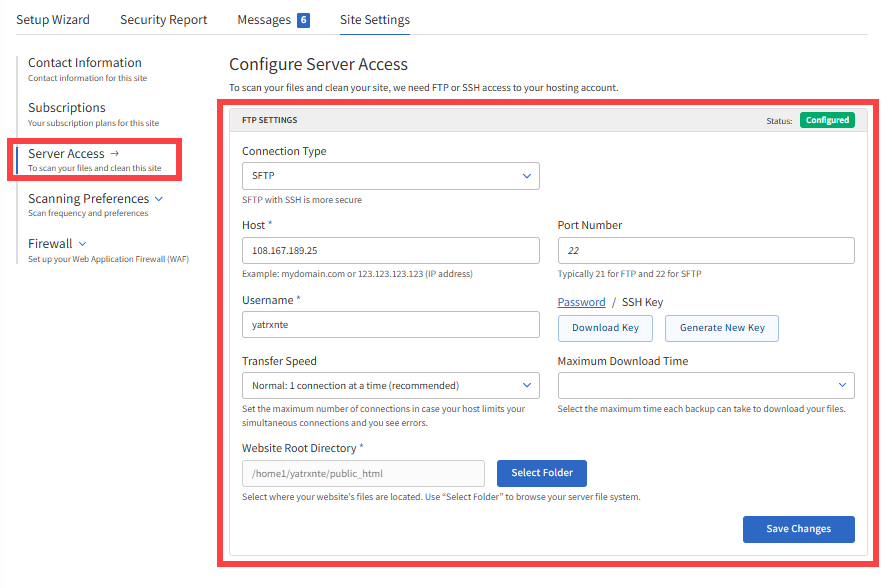
- Once logged into your dashboard, click Server Access to set up the FTP Settings. Click Save Changes.
- Next, click the Scanning Preferences drop-down and select SMART File Scan.
- Select the Scan Frequency (Daily scan is recommended), select Yes under Automatically remove malware?, then click Save Changes.
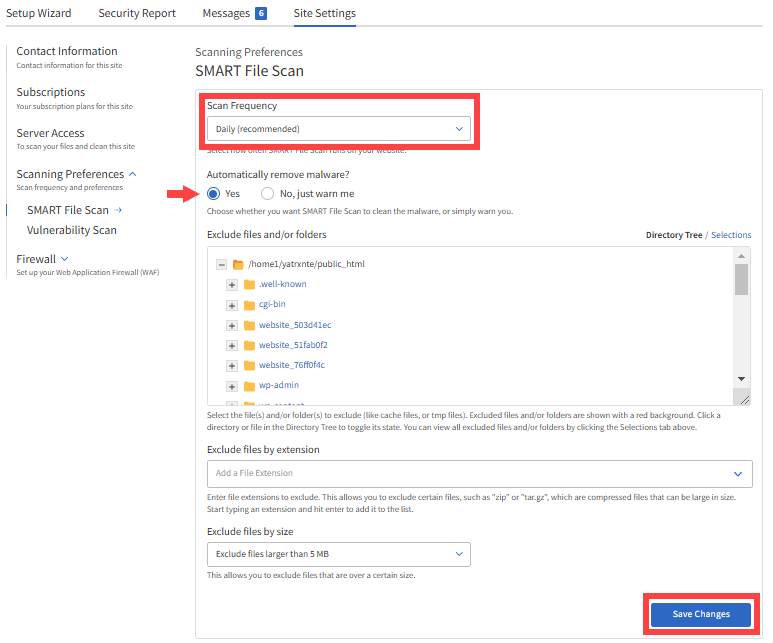
By default, this SMART setting is set to No, just warn me. But you can opt to select Yes, automatically remove the malware found.
Summary
Learning how to configure SiteLock SMART Scanner manually involves a straightforward process. You must access the SiteLock Dashboard via Bluehost Portal or the SiteLock website. Configuration requires logging into the dashboard, where a configuration pop-up will guide you through connecting to your server using FTP details and selecting your website's file directory. You can enable automatic malware removal or opt for alerts only. The final step is saving the configuration to ensure continuous protection.
The SMART tool is essential for maintaining website security by detecting and eliminating malware. It supports ease of use through automatic setup. Still, the manual configuration also offers flexibility for situations like server migrations. This ensures that websites remain protected under varying circumstances, maintaining the integrity and security of the user's online presence.
If you need further assistance, Bluehost Chat Support is available 24 hours a day, 7days a week while Bluehost Phone Support is available 7 days a week from 7 am-12 midnight EST.
- Chat Support - While on our website, you should see a CHAT bubble in the bottom right-hand corner of the page. Click anywhere on the bubble to begin a chat session.
- Phone Support -
- US: 888-401-4678
- International: +1 801-765-9400
You may also refer to our Knowledge Base articles to help answer common questions and guide you through various setup, configuration, and troubleshooting steps.