How to Configure SiteLock TrueShield Firewall
SiteLock TrueShield Firewall/CDN is a modern protection solution for your website. It functions by defensively halting malicious internet traffic from causing any harm. This is done through two main mechanisms: firstly, by detecting and blocking malicious bots, and secondly, through an expansive database that stops access from IPs that have a reputation of malicious activities. Understanding how to configure SiteLock TrueShield Firewall offers a strong line of defense against various cyber threats, ultimately helping to keep your website secure and running smoothly.
If you need help reconfiguring your SiteLock Smart scanner after migrating your website to a different server, check out our guide on configuring the SMART scanner manually.
Configure SiteLock TrueShield Firewall
To configure your TrueShield firewall in the new Sitelock Dashboard, follow the steps outlined below:
Step 1 - Launch SiteLock Dashboard
- If you purchased the SiteLock services through us, follow the steps below:
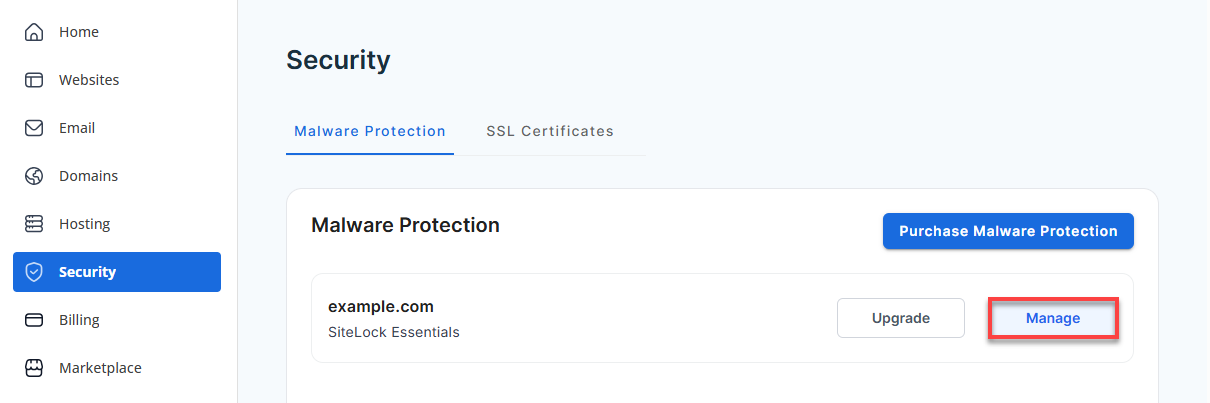
- Log in to your Bluehost Portal.
- Click Security on the left-side menu.
- Under the Malware Protection tab, locate the SiteLock plan you want to manage, and then click the Manage button next to it.
- If you purchased the service directly from SiteLock, you can go to sitelock.com and click the MANAGE button at the top right-hand corner.
- The username will be the email address you used to sign up for the service.
- You may need to request a password reset if you cannot sign in.
Step 2 - Manage Certificate
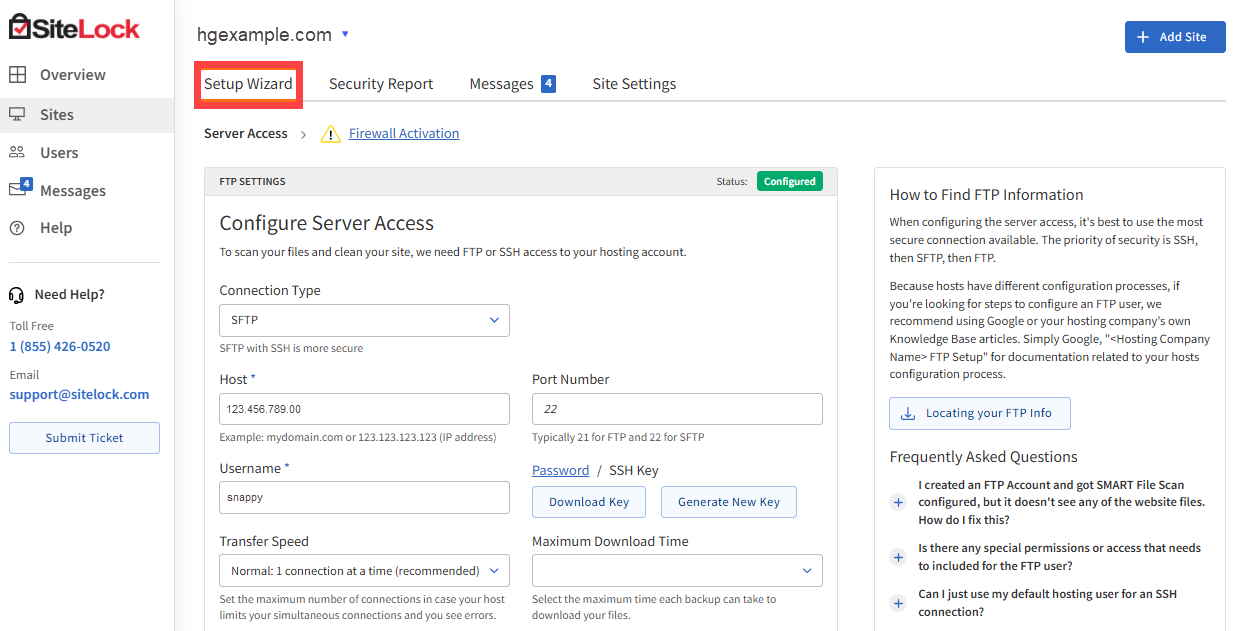
- Once logged into your dashboard, click Setup Wizard.
- Click on the Firewall Activation tab, and copy the TXT Value shown in the Validating Domain Ownership section.
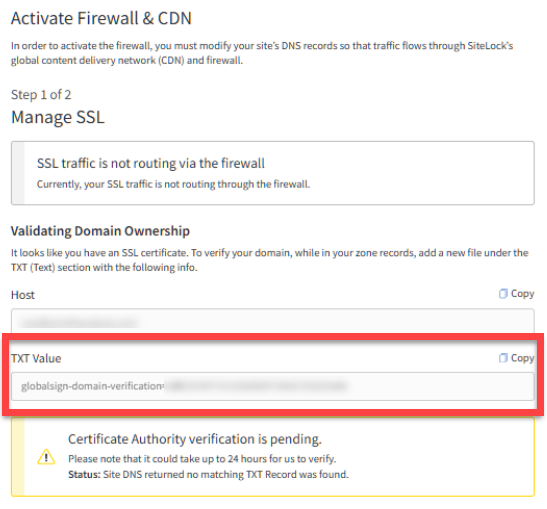
- You need to be logged into the location your DNS is managed (generally your hosting account). Please refer to the DNS Management article for more information.
- Add the provided value as a TXT record in your zone file. This will begin the SSL validation, which usually takes up to 24 hours.
- Once your domain is verified, the Firewall & CDN section will show that SSL traffic is routing through the firewall.
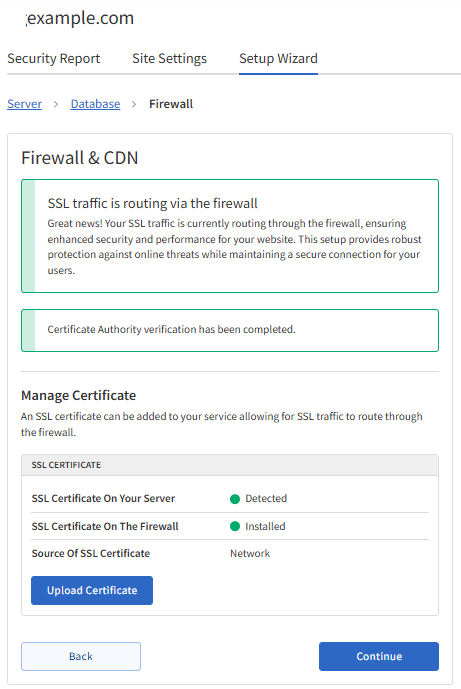
- Click Continue to proceed.
Step 3 - Manage Routing
Update your DNS records for your website to route your traffic through SiteLock's CDN.
- In the Setup Wizard, look for the Remove DNS records table and delete the specified records from your domain.
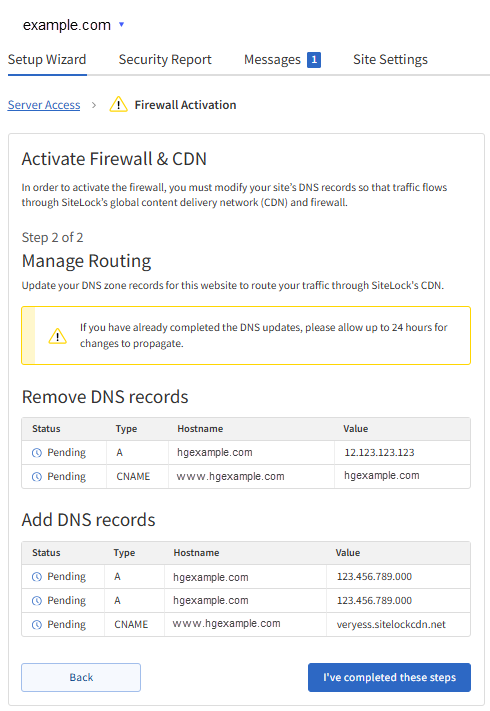
The values displayed in the tables in the image above are sample values only. Your SiteLock Dashboard will provide the exact DNS record values you need to remove and add to your domain. - Click the I've completed these steps button to finalize the task.
- Allow propagation to take place, which usually takes 24-48 hours.
The SiteLock Trust Seal lets visitors know they are viewing a secure and malware-free website.
Summary
SiteLock TrueShield Firewall/CDN is an all-inclusive solution that beefs up website security through blacklisting malicious internet traffic and probable cyber attacks. It detects and hinders malicious bots and disables access from IPs that have a reputation for malicious activities. Learning how to set up SiteLock TrueShield Firewall is important in improving website protection against cyber attacks, so that the site is safe and running.
If you need further assistance, Bluehost Chat Support is available 24 hours a day, 7days a week while Bluehost Phone Support is available 7 days a week from 7 am-12 midnight EST.
- Chat Support - While on our website, you should see a CHAT bubble in the bottom right-hand corner of the page. Click anywhere on the bubble to begin a chat session.
- Phone Support -
- US: 888-401-4678
- International: +1 801-765-9400
You may also refer to our Knowledge Base articles to help answer common questions and guide you through various setup, configuration, and troubleshooting steps.