How to Manually Install WHMCS
You can manually install WHMCS if you prefer to set up the application yourself instead of using Softaculous. A manual installation gives you more control over where WHMCS is uploaded, which database it uses, and how the installation files are configured.
This guide walks you through the manual WHMCS installation process, including downloading WHMCS, creating a database, uploading files, running the installation script, and setting up the required cron job. Bluehost’s WHMCS installation guide notes that WHMCS can be installed through Softaculous or manually, and a valid WHMCS license is required before setup.
Before You Begin
Before starting the manual installation, make sure you have the following:
- An active WHMCS license
- Access to your Bluehost Portal
- Access to cPanel
- A domain or subdomain for WHMCS
- A MySQL database and database user
- The latest stable WHMCS installation files
- An FTP client or access to cPanel File Manager
Manual WHMCS Installation
Follow the steps below to manually install WHMCS on your hosting account.
Step 1: Obtain a WHMCS License
To begin, you need a valid WHMCS license.
- Go to the WHMCS website.
- Purchase or access your WHMCS license.
- Save your license key in a secure place.
You will need this license key later when running the WHMCS installation script.
Step 2: Download WHMCS
After obtaining your license, download the latest stable version of WHMCS from your WHMCS Client Area.
- Log in to your WHMCS Client Area.
- Click My Licenses & Services.
- Select your active WHMCS license.
- Review the available downloads.
- Download the latest stable WHMCS version.
After downloading the file, unzip it on your computer so the installation files are ready to upload.
Step 3: Create a MySQL Database and User
WHMCS requires a database to store client records, invoices, settings, products, and other system data.
- Log in to your Bluehost Portal.
- Click Hosting in the left-hand menu.
- In the hosting details page, click the cPanel button.
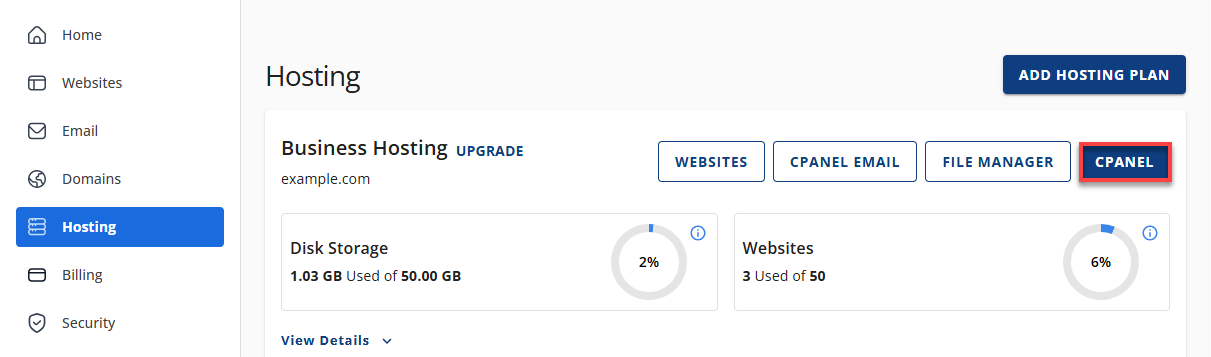
- Your cPanel will open in a new tab.
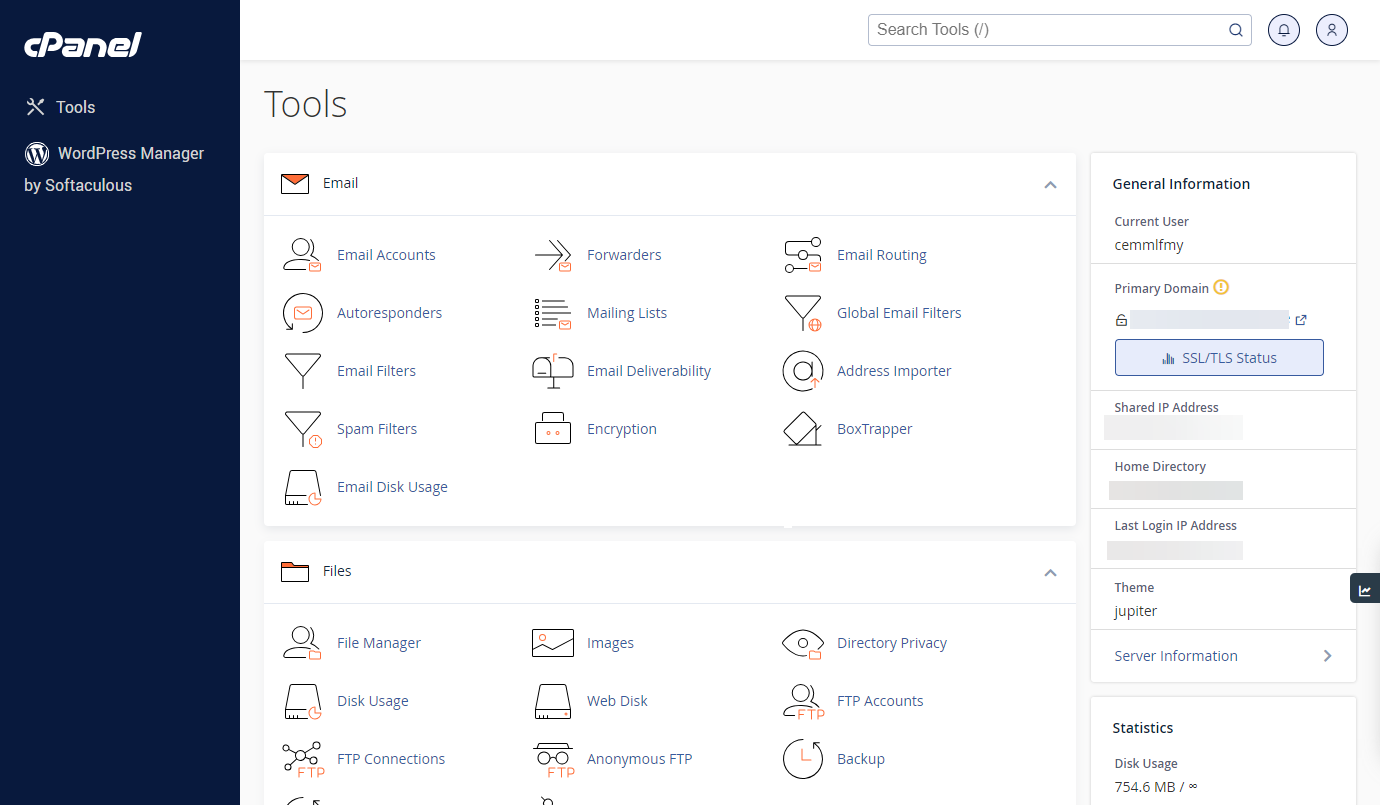
- In cPanel, open MySQL Databases.
- Create a new database.
- Create a database user.
- Assign the user to the database.
- Grant the required privileges.
- Save the following details:
- Database name
- Database username
- Database password
- Database host, usually localhost
You will enter these details during the WHMCS installation process.
Step 4: Upload the WHMCS Files
Next, upload the unzipped WHMCS files to your hosting account.
You can upload the files using either:
- cPanel File Manager
- FTP
If you use FTP, SFTP is recommended when available because it provides a more secure connection than standard FTP.
Choose where you want WHMCS to be installed. For example:
-
public_html/whmcs -
public_html/billing -
public_html/clients
The folder name you choose will become part of the WHMCS URL. For example, if you upload WHMCS to a folder named billing, the installation may be accessed from:
example.com/billing
Step 5: Rename the Configuration File
After uploading the files, locate the following file in your WHMCS installation folder:
configuration.php.new
Rename it to:
configuration.php
This allows WHMCS to create and save the required configuration details during installation.
Step 6: Run the WHMCS Installation Script
Once the files are uploaded and the configuration file is renamed, open the WHMCS installer in your browser.
Use the following format:
example.com/whmcs/install/install.php
Replace:
example.comwith your actual domain namewhmcswith the folder where you uploaded WHMCS
For example, if you uploaded WHMCS to a folder named billing, you would visit:
example.com/billing/install/install.php
Then complete the setup:
- Read the WHMCS End User License Agreement.
- Click I Agree to continue.
- Allow the installer to check system and permission requirements.
- Click Continue if all checks pass.
- Enter your WHMCS license key.
- Enter the database details you created earlier.
- Click Continue.
- Create your WHMCS administrator account.
- Click Complete Setup.
Finish the WHMCS Installation
After the setup is complete, there are a few important cleanup and security steps to complete.
Delete the Install Directory
For security reasons, delete the install directory from your WHMCS installation folder after the setup is finished.
For example, if WHMCS is installed in:
public_html/billing
Delete:
public_html/billing/install
Move Writable Directories, If Needed
For additional security, you may move certain writable WHMCS directories outside of publicly accessible folders.
These may include:
-
attachments -
downloads -
templates_c
This step is optional, but it is recommended for users who want a more secure WHMCS setup.
Set Up the WHMCS Cron Job
WHMCS requires a cron job to run scheduled tasks, such as invoices, reminders, account actions, and automation processes.
- Log in to your Bluehost Portal.
- Click Hosting in the left-hand menu.
- In the hosting details page, click the cPanel button.
- Your cPanel will open in a new tab.
- Find the Advanced section.
- Click Cron Jobs.
- Add the WHMCS cron command.
- Save your changes.
Example cron command:
0 0 * * * php -q /home/username/public_html/whmcs/admin/cron.php
Replace:
usernamewith your actual cPanel usernamewhmcswith your WHMCS folder nameadminwith your custom admin directory name, if you changed it
After Installing WHMCS
Once WHMCS is installed, log in to your WHMCS Admin Dashboard and review the main settings.
You may need to configure:
- General settings
- Company details
- Payment gateways
- Currencies
- Products and services
- Server connections
- Automation settings
- Support departments
- Email templates
- Security settings
Before accepting real customer orders, create a test product, test client account, and test invoice to confirm the setup works as expected.
Troubleshooting Manual WHMCS Installation
If the manual WHMCS installation does not complete successfully, check the following:
- Confirm your WHMCS license key is correct.
- Make sure the database name, username, and password are entered correctly.
- Verify the database user has the correct privileges.
- Check that
configuration.php.newwas renamed toconfiguration.php. - Make sure the WHMCS files were uploaded to the correct folder.
- Confirm your domain or subdomain points to your Bluehost hosting account.
- Check file and folder permissions if the installer shows permission errors.
- Make sure the
installdirectory is deleted after setup. - Confirm the WHMCS cron job path uses the correct cPanel username and folder name.
If the issue is related to your WHMCS license or WHMCS account, contact WHMCS directly.
Summary
You can manually install WHMCS by obtaining a valid WHMCS license, downloading the latest WHMCS files, creating a MySQL database, uploading the files to your hosting account, renaming the configuration file, and running the installation script.
After the installation is complete, delete the install directory, review optional security steps, and set up the WHMCS cron job so scheduled tasks can run properly. Once WHMCS is installed, configure your billing, server, currency, payment, and automation settings before using it with customers.
If you need further assistance, Bluehost Chat Support is available 24 hours a day, 7days a week while Bluehost Phone Support is available 7 days a week from 7 am-12 midnight EST.
- Chat Support - While on our website, you should see a CHAT bubble in the bottom right-hand corner of the page. Click anywhere on the bubble to begin a chat session.
- Phone Support -
- US: 888-401-4678
- International: +1 801-765-9400
You may also refer to our Knowledge Base articles to help answer common questions and guide you through various setup, configuration, and troubleshooting steps.