Bluehost Self-Managed VPS: Reimage Your Server for Cloudron Installation
Cloudron is a turnkey platform that allows you to self-host web applications on your Bluehost Self-Managed VPS. This guide walks you through reimaging your server for Cloudron installation using the Bluehost Portal and shows you how to access your Cloudron dashboard, so you can start deploying apps efficiently and securely.
Reimage Your Server for Cloudron Installation Using Bluehost Portal
To reimage your server and install Cloudron:
- You can install only one application using the one-click installer.
- To change or delete your application, follow the guide: Bluehost Self-Managed VPS: How to Change and Delete an Application. Create a backup of your existing applications or templates.
- If you want to keep your current template, install the new application manually using SSH. The system will automatically apply the recommended OS for Cloudron.
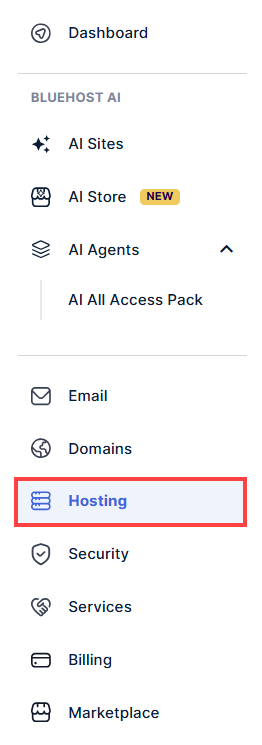
- Log in to your Bluehost Portal.
- In the left-hand menu, click Hosting.
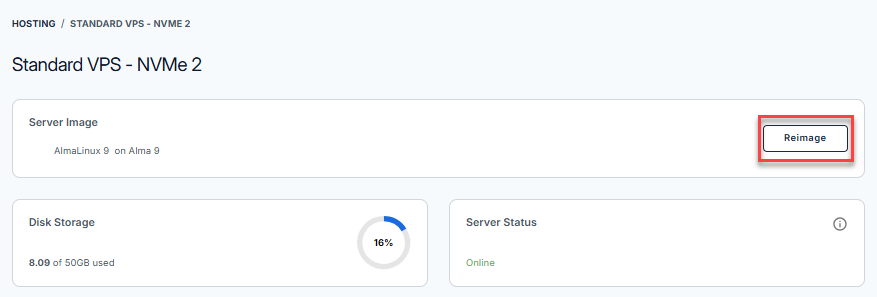
- Click the Manage button on the Self-Managed VPS package.

- Click the Reimage button.
- Select the Applications tab.
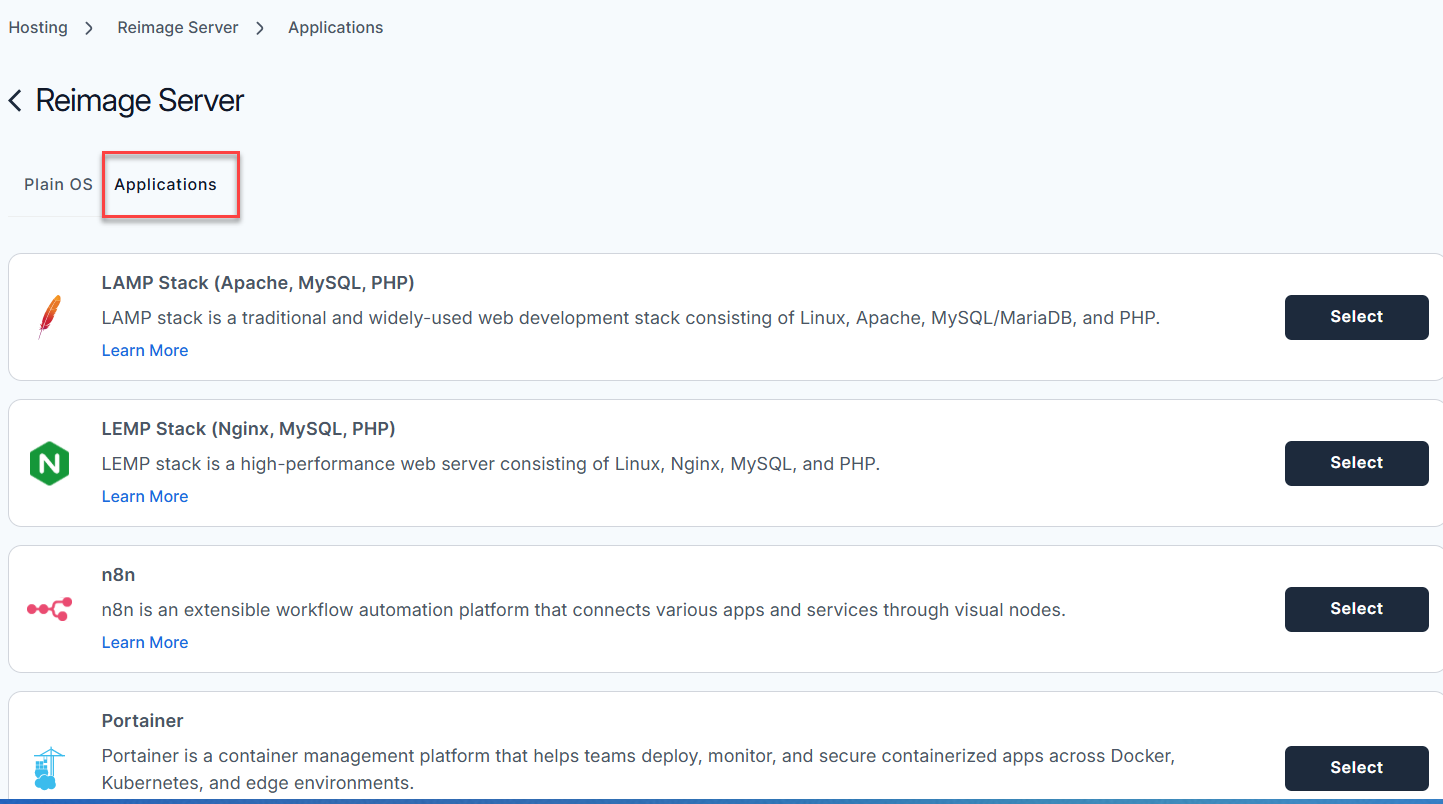
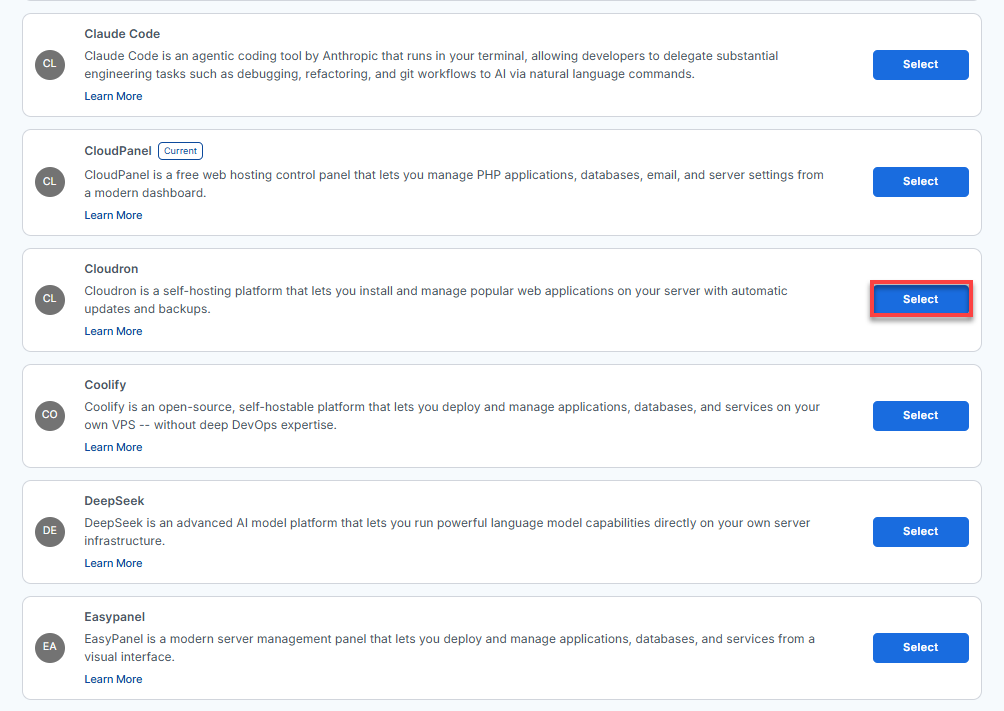
- From the list, find Cloudron and click Select.
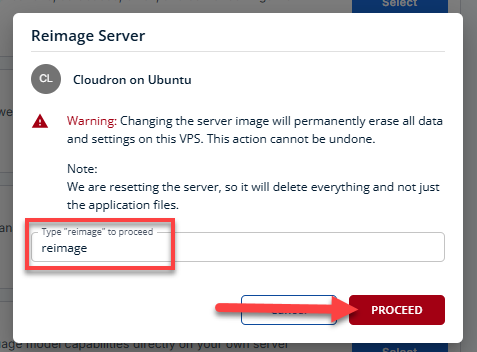
- To confirm, please type "reimage" and then click Proceed to start the process.
- Wait a few moments while the installation completes.

- Once completed, you will see Cloudron listed in the Server Image section.
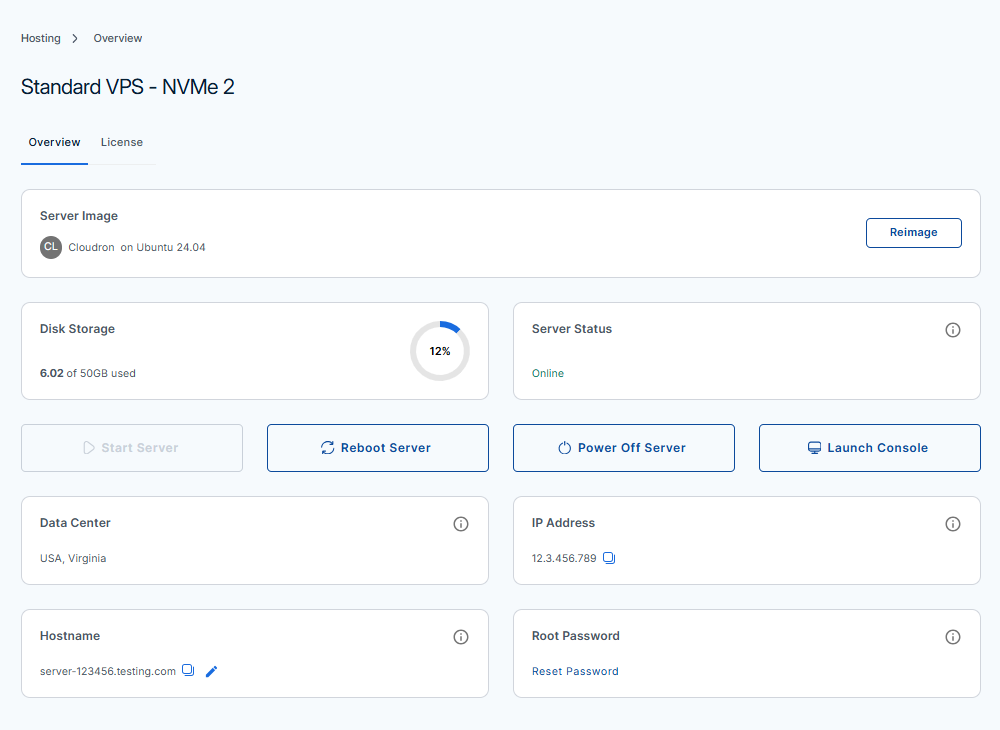
- Once completed, you will see Cloudron listed in the Server Image section.
How to Setup your Cloudron Server
Prerequisites:
- A domain name (e.g., yourdomain.com).
- An account with a supported DNS provider.
- An API Token from your DNS provider.
- A server meeting the minimum specs: 2 vCPUs, 3 GB RAM, and 20 GB disk space.
- Server and Network Configuration
Example Output:cat /var/log/onboot.logLast login: Sat Jun 20 20:54:21 2026 from 123.45.678.910 root@server-123456:~# cat /var/log/onboot.log [2026-06-20 20:41:18] Starting onboot script [2026-06-20 20:41:18] Disabled Cloudron MOTD: 92-cloudron [2026-06-20 20:41:18] Onboot script completed successfully root@server-123456:~# - Open Firewalls (Cloud Provider Specific)
Do NOT enable UFW (
ufw enable). Cloudron manages its own internal firewall using iptables. Enabling UFW will break its container networking.- If you are on AWS EC2: Go to your AWS Console → Security Groups, and ensure Ports 80 (HTTP) and 443 (HTTPS) are open to the world (0.0.0.0/0).
- If you are on Oracle Cloud: The script should handle this. If you can't reach the setup page shortly, force-open the OS firewall by running:
iptables -I INPUT -p tcp --dport 80 -j ACCEPT
iptables -I INPUT -p tcp --dport 443 -j ACCEPT
netfilter-persistent save
root@server-123456:~# iptables -I INPUT -p tcp --dport 80 -j ACCEPT iptables -I INPUT -p tcp --dport 443 -j ACCEPT netfilter-persistent save run-parts: executing /usr/share/netfilter-persistent/plugins.d/15-ip4tables save run-parts: executing /usr/share/netfilter-persistent/plugins.d/25-ip6tables save root@server-123456:~# - Configure Your DNS Records
- Log into your DNS provider's dashboard and add two A Records pointing to your server's public IP:
Type Name Value / Points to TTL A @ your-server-public-ip Auto / 14400 A * your-server-public-ip Auto / 14400
- Log into your DNS provider's dashboard and add two A Records pointing to your server's public IP:
Access your Cloudron Dashboard
After the configuration completes:
- Log In via Your Browser:
https://your-server-ipImportant!- Make sure you use https:// and include the trailing slash after your panel path.
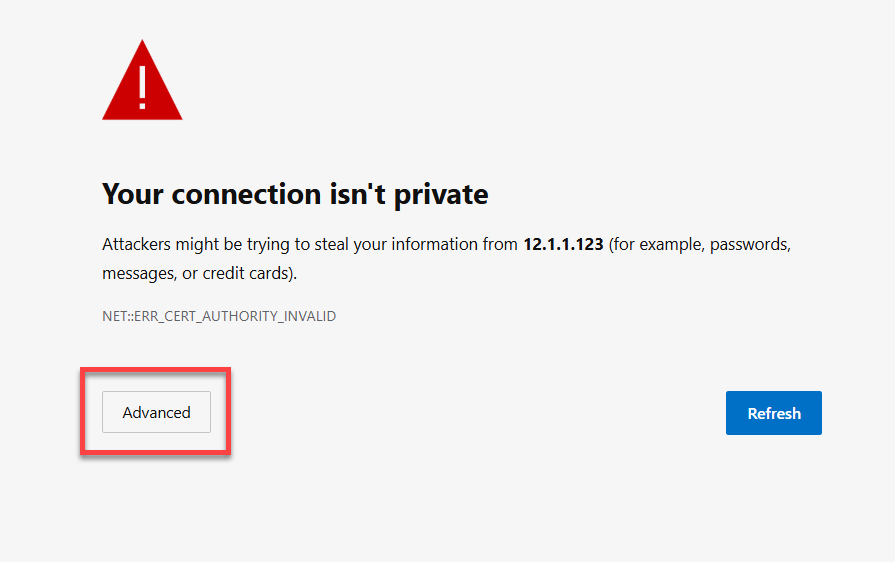
- Bypass the Browser Security Warning.
Cloudron uses a temporary self-signed SSL certificate, your browser will flag it. Click Advanced and then Proceed/Continue to bypass it safely.
- Link Your Domain & DNS API
On the setup screen, fill out the configuration form:
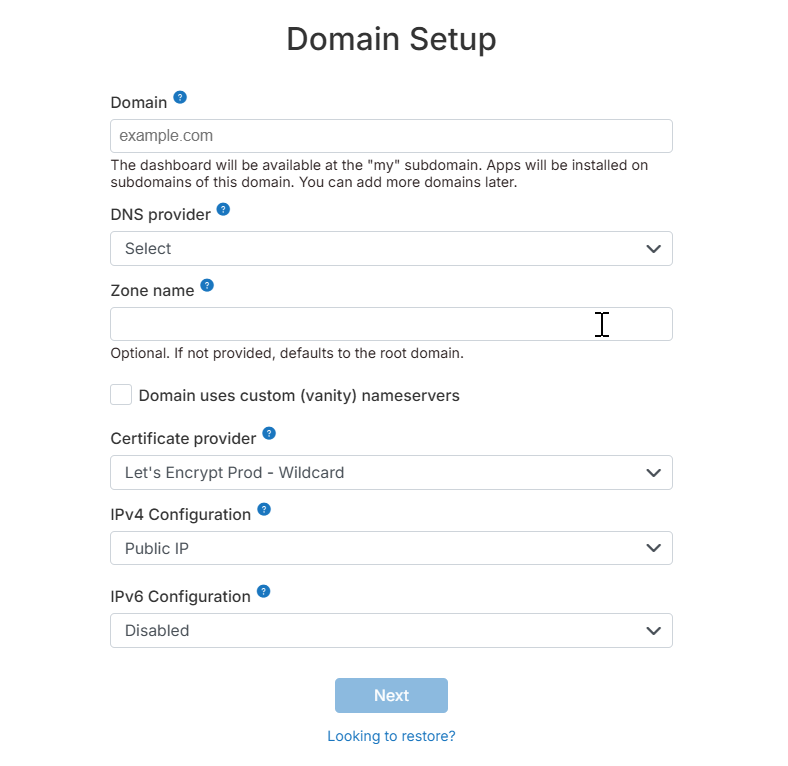
- Domain: Enter your root domain (e.g., yourdomain.com).
- DNS Provider: Select your provider from the dropdown.
- API Token: Paste the API key/token you generated during Phase 1.
- Certificate Provider: Leave it on Let's Encrypt Prod - Wildcard.
- IPv4 Configuration: Select Public IP.
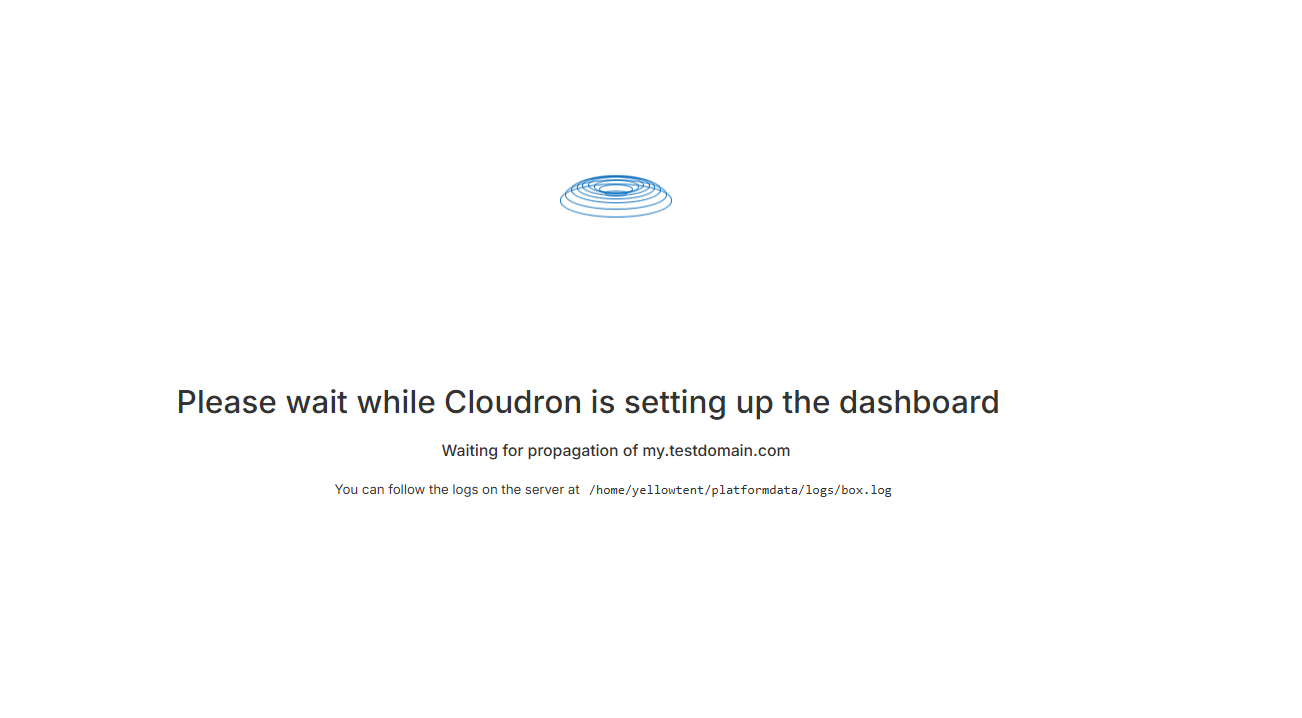
Once done, Cloudron will now automatically communicate with your DNS provider, create the necessary management subdomains, and provision an SSL certificate. This takes about 2–3 minutes.
- Create the Admin Account
Once the DNS validation succeeds, your browser will automatically redirect to a secure URL:
https://my.yourdomain.comFill out the final form to create your master admin account:
- Enter your Name, Username, and a strong Password.
- Enter a valid Email Address (Let’s Encrypt will send SSL expiration warnings here if anything ever fails to auto-renew).
Click Create admin.
- Verification
You are now logged into your Cloudron Dashboard!
- To Install Apps: Go to the built-in App Store, click an app (like WordPress or Nextcloud), and give it a subdomain. Cloudron handles the rest.
- Future Dashboard Access: You will always access your server administration portal at:
https://my.yourdomain.com
- If you ever need to check if the background system services are running happily via SSH, you can run:
Last login: Sat Jun 20 21:15:21 2026 from 123.456.789.101
root@server-123456:~# systemctl status box
● box.service - Box
     Loaded: loaded (/etc/systemd/system/box.service; enabled; preset: enabled)
     Active: active (running) since Sat 2026-06-20 20:41:16 UTC; 2h 13min ago
    Process: 2388 ExecReload=/bin/kill -HUP $MAINPID (code=exited, status=0/SUCCESS)
   Main PID: 1251 (MainThread)
      Tasks: 11 (limit: 2332)
     Memory: 196.1M (max: 400.0M available: 203.8M peak: 200.6M)
        CPU: 5.683s
     CGroup: /system.slice/box.service
             └─1251 node /home/yellowtent/box/box.js

Jun 20 20:41:20 server-123456.testingdomain.com sudo[1533]: pam_unix(sudo:session): session opened for user root(uid=0)>
Jun 20 20:41:20 server-123456.testingdomain.com sudo[1533]: pam_unix(sudo:session): session closed for user root
Jun 20 22:17:04 server-123456.testingdomain.com sudo[2380]: pam_unix(sudo:session): session opened for user root(uid=0)>
Jun 20 22:17:04 server-123456.testingdomain.com sudo[2380]: pam_unix(sudo:session): session closed for user root
Jun 20 22:17:04 server-123456.testingdomain.com sudo[2385]: pam_unix(sudo:session): session opened for user root(uid=0)>
Jun 20 22:17:04 server-123456.testingdomain.com systemd[1]: Reloading box.service - Box...
Jun 20 22:17:04 server-123456.testingdomain.com sudo[2385]: pam_unix(sudo:session): session closed for user root
Jun 20 22:17:09 server-123456.testingdomain.com systemd[1]: Reloaded box.service - Box.
Jun 20 22:31:21 server-123456.testingdomain.com sudo[2471]: pam_unix(sudo:session): session opened for user root(uid=0)>
Jun 20 22:31:21 server-123456.testingdomain.com sudo[2471]: pam_unix(sudo:session): session closed for user root
Additional Information and Example Documentation Output
You can run cat /root/README.md to see more information and useful commands:
root@server-123456:~# cat /root/README.md
# Cloudron

## Description

Cloudron is a self-hosting platform that lets you install and manage popular web applications on your server with automatic updates and backups. It handles app configuration, SSL certificates, user management, and system maintenance automatically, making it easy to run a personal or organizational app ecosystem without deep technical expertise.

## Before You Begin

You will need the following before starting setup:

1. **A registered domain name** (e.g. `mycompany.com`) -- purchase from
   Namecheap, GoDaddy, or Porkbun. Cheap `.xyz` or `.online` domains
   cost $1-2/year.
2. **Wildcard DNS configured** -- create a wildcard `A` record pointing
   `*.yourdomain.com` -> your server's public IP. This is required for
   Cloudron to create subdomains for each app automatically.
3. **A DNS provider API key** so Cloudron can automatically manage DNS
   records. Cloudflare is recommended (free). Point your domain nameservers
   to Cloudflare, then create an API token with Zone -> DNS -> Edit permissions.
4. **An admin email address** -- used for Let's Encrypt SSL certificate
   provisioning. Use a valid email you have access to.

> Cloudron requires a real domain because it automatically provisions
> wildcard SSL certificates and creates subdomains for every app you install
> (e.g. `wordpress.yourdomain.com`, `nextcloud.yourdomain.com`).
> This cannot be bypassed in production use.

---

## Minimum Resources

Cloudron requires more resources than a typical single-app image due to its
container orchestration, Docker engine, and built-in services (nginx, MySQL,
mail server, etc.).

| Resource | Minimum |
|----------|---------|
| CPU      | 2 vCPUs |
| RAM      | 3 GB    |
| Disk     | 20 GB   |

---

## How to Use

#### Step 1 -- Wait for First Boot to Complete

After launching the instance, the first-boot script runs automatically in the
background. It opens ports 80 and 443 via iptables and prepares the system for
Cloudron setup. This takes about 2 minutes. You can verify it completed:

```bash
cat /var/log/onboot.log
```

#### Step 2 -- Point Your Domain to This Server

Before opening the setup UI, add these DNS records at your DNS provider:
```
Type: A  |  Name: *  |  Value: your-server-ip  |  TTL: Auto
Type: A  |  Name: @  |  Value: your-server-ip  |  TTL: Auto
```
The wildcard record is required -- Cloudron automatically creates a subdomain
for every app you install (e.g. `wordpress.yourdomain.com`).

#### Step 3 -- Open the Cloudron Setup UI

Open your browser and go to:
```
http://your-server-ip
```

You will see the Cloudron first-time setup wizard. If the page does not load,
wait another minute and try again.

#### Step 4 -- Enter Your Domain and DNS Credentials

Fill in the setup form:
- **Domain** -- your registered domain (e.g. `mycompany.com`)
- **DNS Provider** -- select your provider (Cloudflare recommended)
- **API Token** -- your DNS provider API token
- **Certificate provider** -- leave as `Let's Encrypt Prod - Wildcard`
- **IPv4 Configuration** -- leave as `Public IP`

Click **Next**. Cloudron will create the required DNS records and provision
a wildcard SSL certificate automatically. This may take 2-3 minutes.

#### Step 5 -- Create Your Admin Account

Once DNS and SSL are configured, Cloudron redirects you to
`https://my.yourdomain.com`. Fill in your name, email, username, and
password, then click **Create admin** to access your dashboard.

> Use a real email address -- Let's Encrypt sends certificate renewal
> notices to this address.

---

### Oracle Cloud Deployment

Oracle Cloud has an additional OS-level firewall that blocks ports 80 and 443
even after opening them in the Security List. This image handles this
automatically on first boot -- no manual iptables commands are needed.

If ports are still blocked after booting, SSH in and run:

```bash
iptables -I INPUT -p tcp --dport 80 -j ACCEPT
iptables -I INPUT -p tcp --dport 443 -j ACCEPT
netfilter-persistent save
```

Then follow Steps 2-5 above.

---

### AWS EC2 Deployment

#### Step 1 -- Open Security Group Ports

Open these ports in your EC2 Security Group before accessing the setup page:

| Port | Protocol | Source    | Purpose                    |
|------|----------|-----------|----------------------------|
| 22   | TCP      | Your IP   | SSH access                 |
| 80   | TCP      | 0.0.0.0/0 | Cloudron setup UI + HTTP   |
| 443  | TCP      | 0.0.0.0/0 | HTTPS for apps + dashboard |

**Steps:**
1. Go to EC2 -> Instances -> select your instance -> Security tab
2. Click the Security Group link -> Edit inbound rules
3. Add HTTP (port 80) and HTTPS (port 443) with source Anywhere (0.0.0.0/0)
4. Save rules

## Accessing the Dashboard

Cloudron has no default username or password. Your admin credentials are
created by you during the first-boot setup wizard (Step 5 above). If you
have not completed setup yet, open `http://your-server-ip` to begin.

After setup, your Cloudron dashboard is always at:
```
https://my.yourdomain.com
```

Each app you install gets its own subdomain automatically:
- WordPress -> `https://wordpress.yourdomain.com`
- Nextcloud -> `https://nextcloud.yourdomain.com`
- Gitea -> `https://git.yourdomain.com`

Cloudron acts as an OAuth/OIDC provider -- once logged into the dashboard,
you are automatically signed into all hosted apps.

---

## DNS Provider API Keys

| Provider     | How to get credentials                               |
|--------------|------------------------------------------------------|
| Cloudflare   | My Profile -> API Tokens -> Create Token (Zone:Edit)  |
| AWS Route 53 | IAM -> Users -> Create Access Key + Secret Key         |
| GoDaddy      | developer.godaddy.com -> API Keys                    |
| Namecheap    | Profile -> Tools -> API Access                        |
| DigitalOcean | API -> Generate New Token                            |

Full list: [DNS Provider docs](https://docs.cloudron.io/domains/#dns-providers)

---

## Services

| Service  | Ports   | Purpose                                      |
|----------|---------|----------------------------------------------|
| Cloudron | 80, 443 | Setup UI, dashboard, and hosted applications |
| OpenSSH  | 22      | Remote SSH access                            |

> Do NOT enable UFW -- Cloudron manages its own firewall via iptables.
> Enabling UFW will conflict with Cloudron's internal port management.

---

## Image Contents

- Cloudron 8+ (currently 9.1.6, installed via official installer)
- Docker CE (latest stable, upgraded post-install)
- Ubuntu 24.04 with all security patches applied at build time

> Cloudron bundles and manages its own versions of nginx and Node.js
> internally. These are updated via Cloudron's own update mechanism.

---

## Known Limitations

- Remaining Trivy vulnerabilities are in Cloudron's bundled Node.js
  dependencies and Docker CE binaries compiled with Go stdlib. These are
  managed by Cloudron and Docker upstream respectively and will be resolved
  in their future releases.
- Cloudron requires a real domain name -- it cannot be accessed via IP
  address alone in production use.

---

## Validation Tests

```bash
perl /root/app_test/main.t
```

Runs 11 checks: `box.service` enabled and unit file present, first-boot script
executable, logrotate config present, log directory exists, README copied to
`/root/README.md`, MOTD executable, Docker binary and service available, port 80
listening, and Cloudron box service active.

## Useful Commands (via SSH)

```bash
# Check Cloudron status
systemctl status box

# Restart Cloudron
systemctl restart box

# View Cloudron logs
journalctl -u box -n 100 --no-pager

# View first-boot log
cat /var/log/onboot.log
```

---

## Links

**Cloudron**

* Home: [cloudron.io](https://www.cloudron.io/)
* Documentation: [docs.cloudron.io](https://docs.cloudron.io/)
* App Store: [Cloudron App Store](https://www.cloudron.io/store/)
* DNS Providers: [Supported DNS Providers](https://docs.cloudron.io/domains/#dns-providers)
* Community Forum: [forum.cloudron.io](https://forum.cloudron.io/)
root@server-123456:~#
Summary
Cloudron is a robust platform that empowers you to deploy and manage web applications directly on your Bluehost Self-Managed VPS. By following this guide, you can easily reimage your server for Cloudron installation using the Bluehost Portal and access your dashboard to start deploying apps with confidence and efficiency.