Bluehost Self-Managed VPS: Reimage Your Server for Ghost Installation
Ghost is a free, open source CMS for publishing content, managing memberships, and sending newsletters. This guide shows you how to reimage your Bluehost Self-Managed VPS for Ghost installation using the BH Portal, so you can start publishing with Ghost quickly and efficiently.
Reimage Your Server for Ghost Installation
Important:
- You can install only one application using the one-click installer.
- To change or delete your application, follow the guide: Bluehost Self-Managed VPS: How to Change and Delete an Application. Create a backup of your existing applications or templates.
- If you want to keep your current template, install the new application manually using SSH. The system will automatically apply the recommended OS for Ghost.
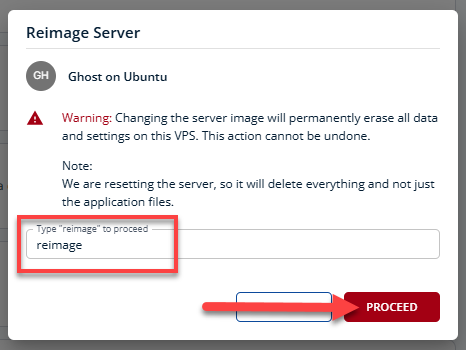
Changing the server image will permanently erase all data and settings on this VPS. This action cannot be undone.
- Log in to your Bluehost Portal.
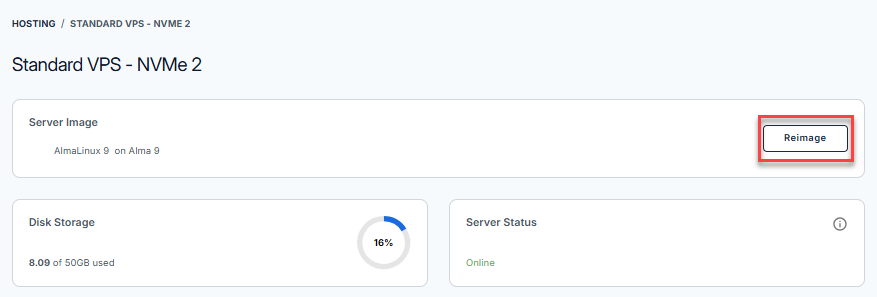
- In the left-hand menu, click Hosting.

- Click the Manage button on the Self-Managed VPS package.

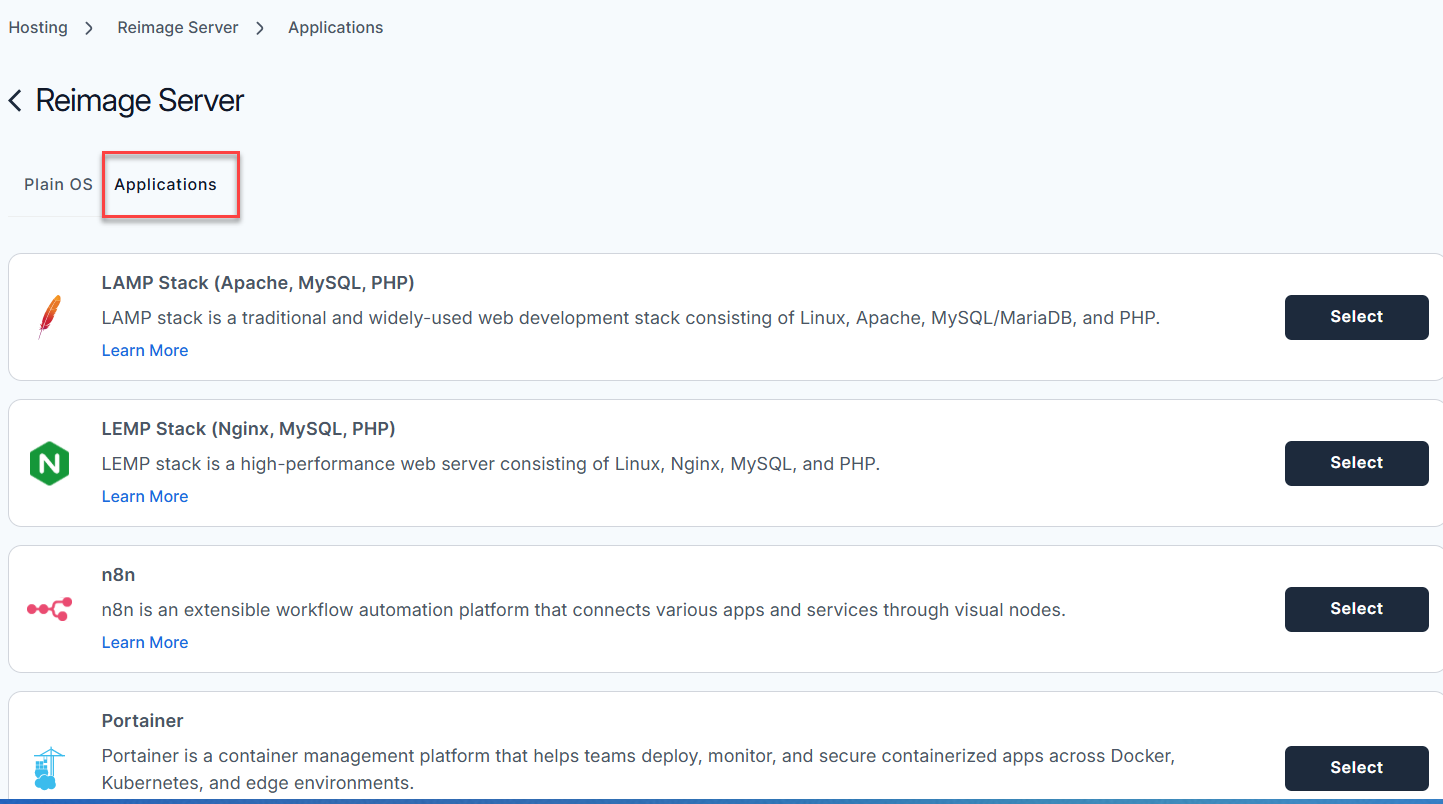
- Click the Reimage button.
- Select the Applications tab.
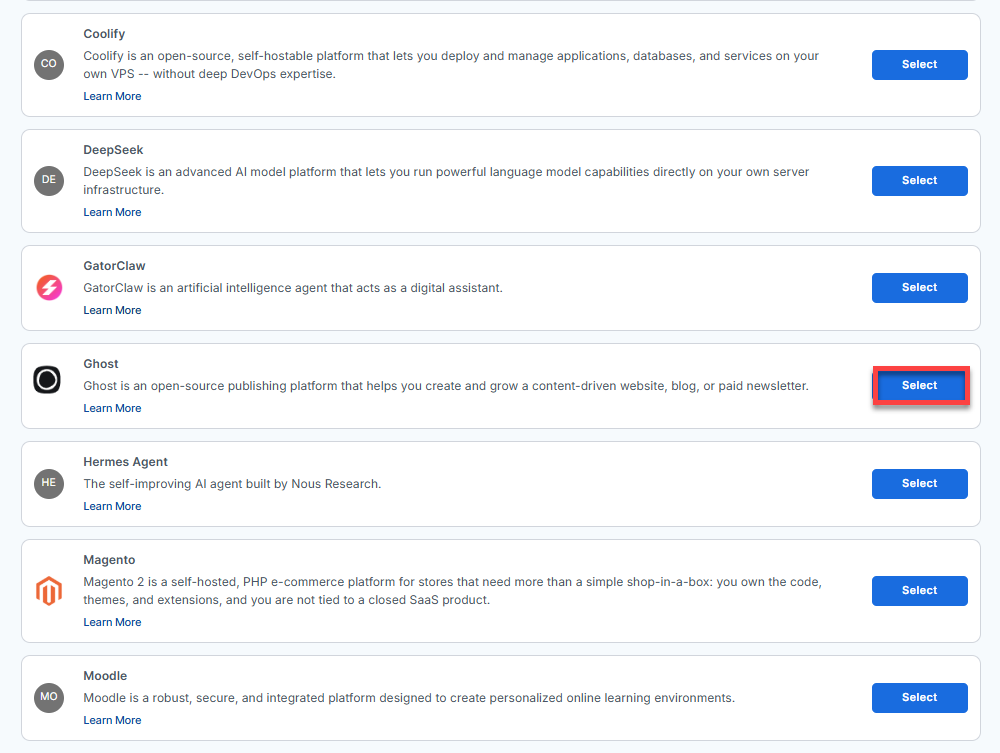
- From the list, locate Ghost and click Select.
- To confirm, type "reimage" and then click Proceed to start the process.
- Wait a few minutes while the installation completes.

- Once completed, you will see Ghost listed in the Server Image section.
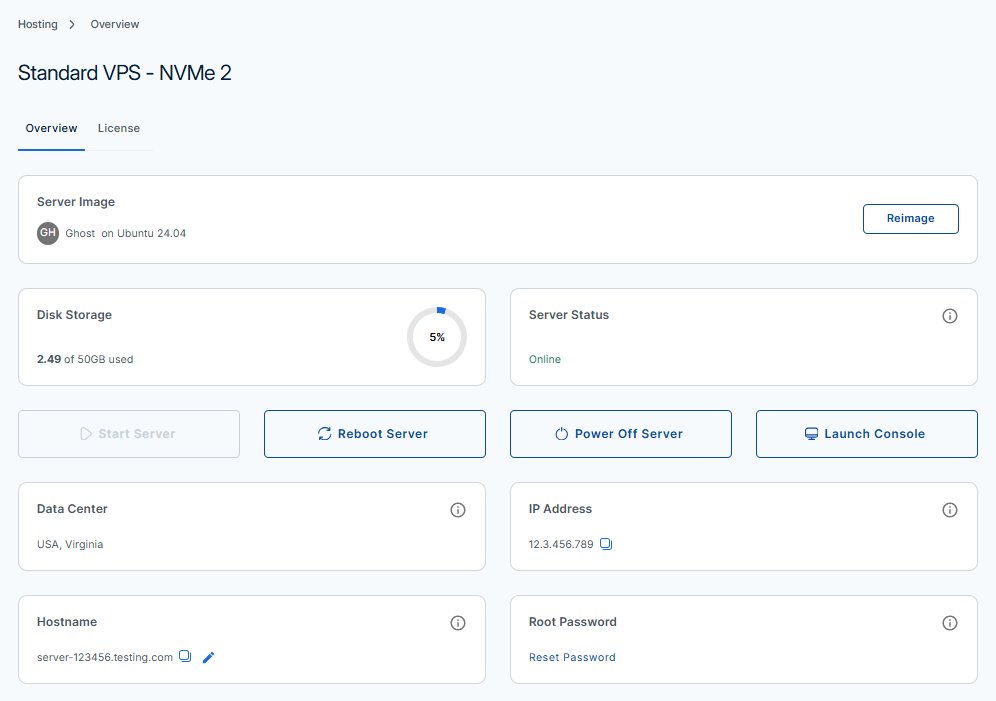
- Once completed, you will see Ghost listed in the Server Image section.
Summary
Ghost is a powerful publishing platform that you can quickly install on your Bluehost Self-Managed VPS by reimaging your server. Follow the steps above to get started with Ghost and manage your content efficiently.
Did you find this article helpful?