Bluehost Self-Managed VPS: Reimage Your Server for gstack Installation
Learn how to wipe and reset your Bluehost Self-Managed VPS server to install gstack. This guide shows you exactly how to use the Bluehost Portal to set up gstack, check your new installation, and protect your files before making the switch. Whether you are installing gstack for the very first time or just need a fresh start on your server, this walkthrough will get you up and running safely and fast.
Reimage Your Server for gstack Installation
- You can install only one application using the one-click installer.
- To change or delete your application, follow the guide: Bluehost Self-Managed VPS: How to Change and Delete an Application. Create a backup of your existing applications or templates.
- If you want to keep your current template, install the new application manually using SSH. The system will automatically apply the recommended OS for gtack.
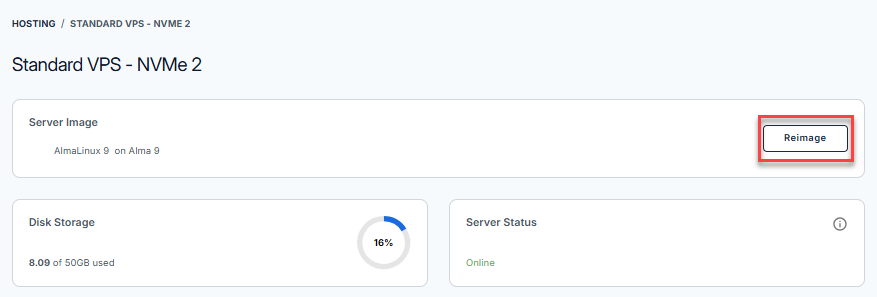
- Log in to your Bluehost Portal.
- In the left-hand menu, click Hosting.

- Click the Manage button on the Self-Managed VPS package.

- Click the Reimage button.
- Select the Applications tab.
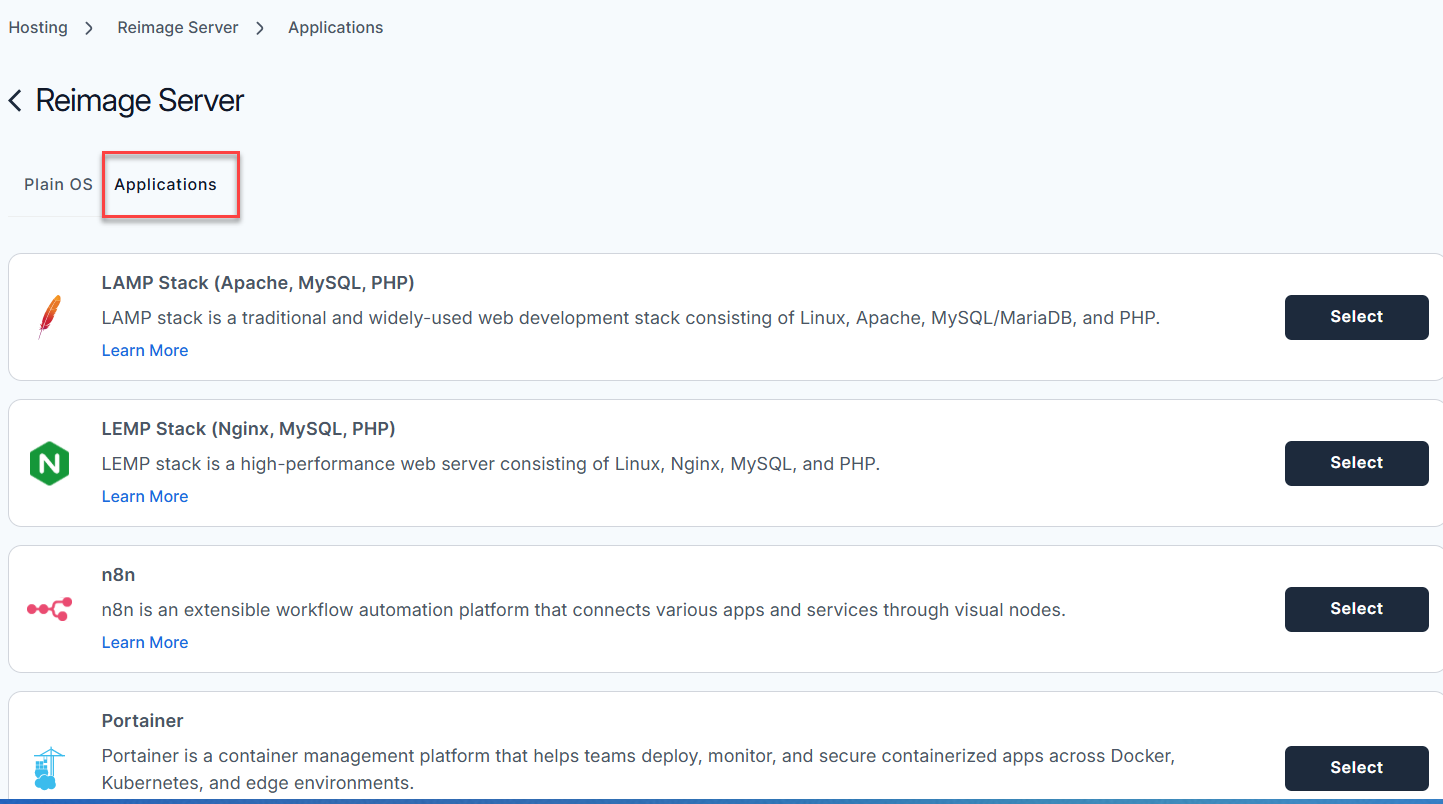
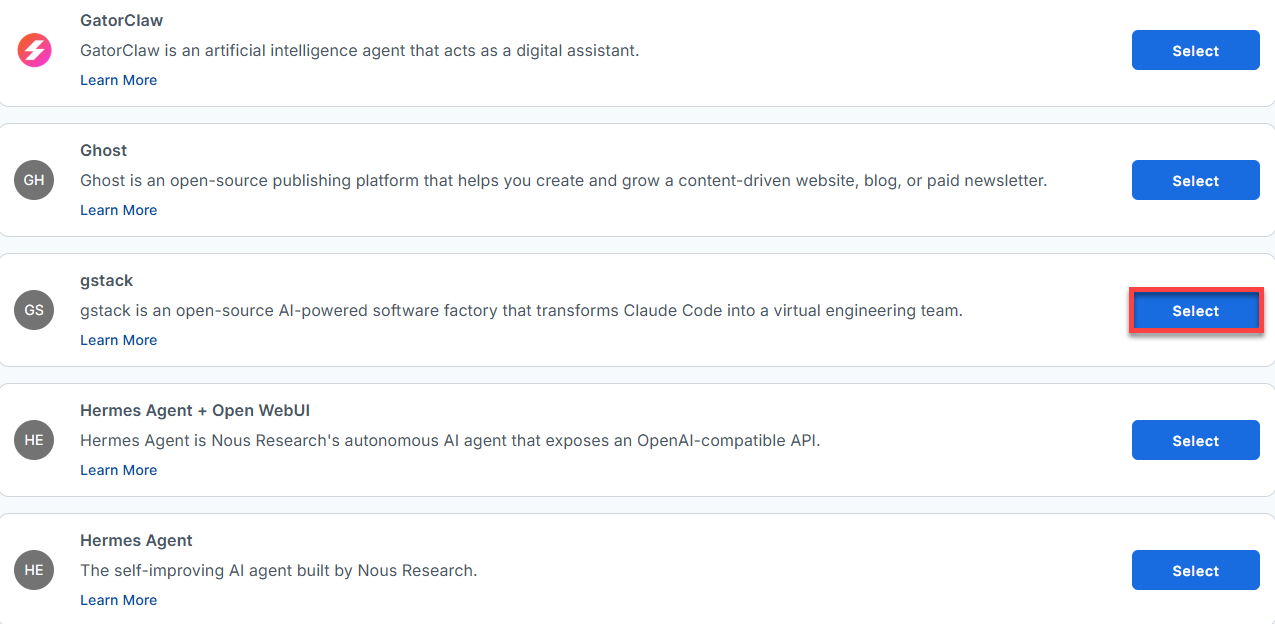
- From the list, locate gstack and click Select.
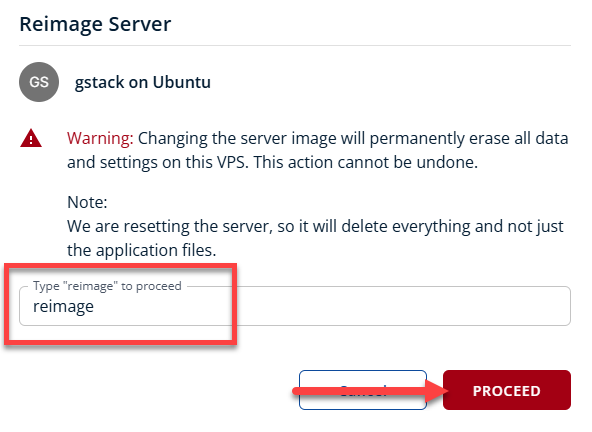
- To confirm, type "reimage" and then click Proceed to start the process.
- Wait a few minutes while the installation completes.

- Once completed, you will see gstack listed in the Server Image section.
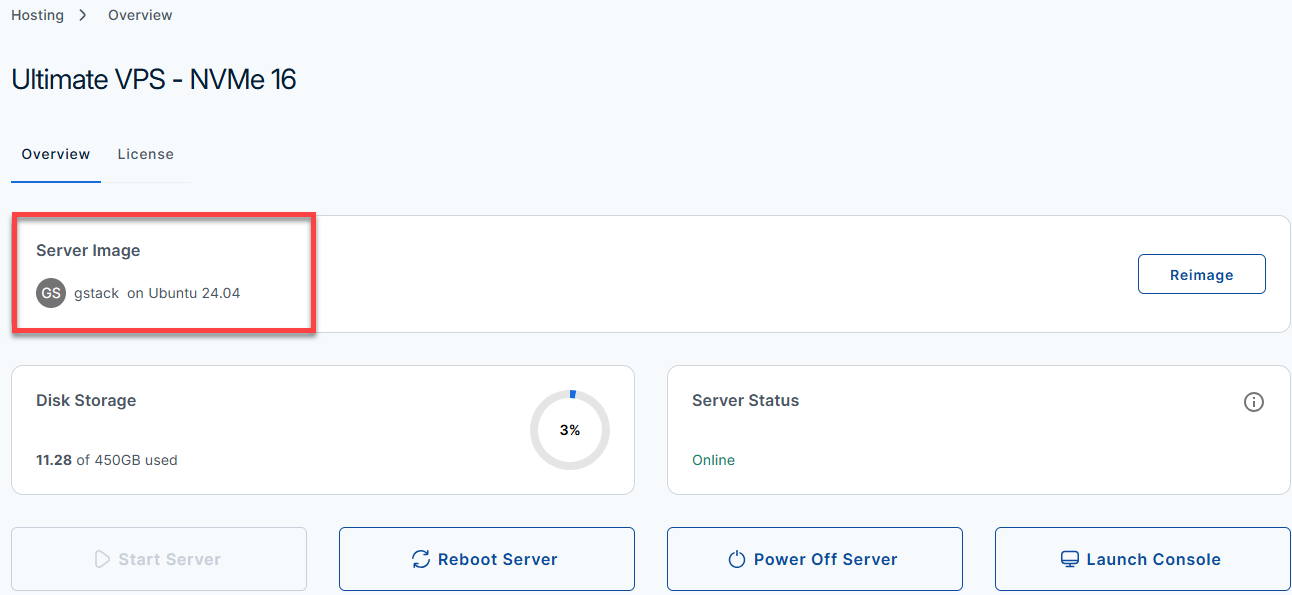
- Once completed, you will see gstack listed in the Server Image section.
Summary
Reimaging your Self-Managed VPS for gstack installation is a straightforward process using the one-click installer. Remember that this action will erase all existing data and settings, so always back up important information before proceeding. If you wish to keep your current template, manual installation via SSH is recommended. Once the process is complete, gstack will be ready for use on your server.