Website Crawl Settings - Microsoft
By default, Microsoft adjusts its crawl frequency and timing based on the server load it detects from your website. If your server encounters bandwidth-related performance problems—such as receiving too many requests within a short period—you may consider lowering how often Microsoft and other search engines crawl your pages. Excessive rapid requests can slow down your website and may even cause server performance issues, especially on heavily trafficked sites or those with inefficient coding.
Modifying Microsoft’s Crawl Settings
Microsoft gives you the ability to define a custom crawl rate for your site and even configure a crawl schedule by hour (a crawl pattern). This lets you instruct Microsoft to crawl more aggressively during off-peak periods and scale back during hours when most of your visitors are active.
To adjust Microsoft’s crawl settings:
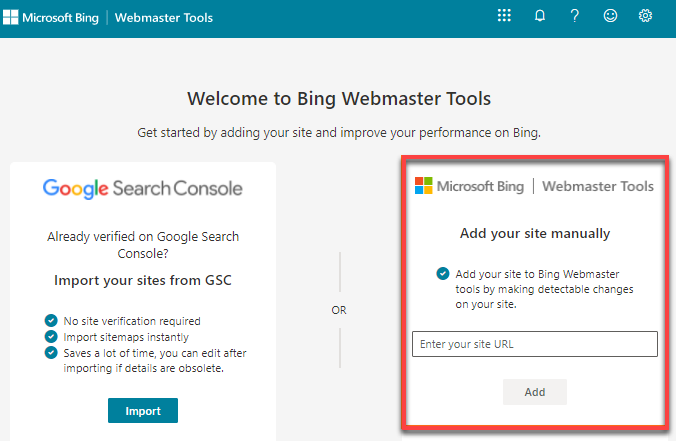
- Sign in to your Microsoft Bing | Webmaster Tools.
- If you have not already added your website, enter your site information in Microsoft Bing | Webmaster Tools and click Add.
- You must verify your website. Choose one of the available verification methods.

If you selected the XML File method, follow the steps below.
- Download the XML file and upload it to your site’s document root.
You may upload the XML file directly through the File Manager. Refer to the article How to Upload Files Using File Manager. - After uploading, click the Verify button.
- Download the XML file and upload it to your site’s document root.
- Once verified, a “Site addition successful” page will appear.

- Click Done.
- You will then be taken to the Microsoft Bing homepage.
- Select the hamburger menu icon on the upper left.
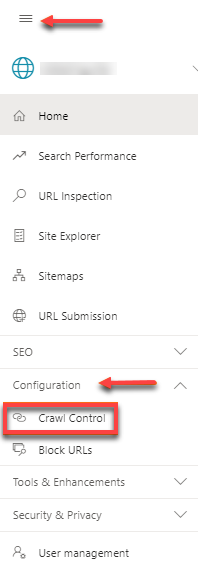
- Choose Configuration and then click Crawl Control.
-
On the Crawl Control page, you can use the provided presets in the Time when your site receives most of the traffic section to indicate when your site is busiest.
To adjust crawl rate hours according to your local time, select your appropriate time zone from the Time zone drop-down menu and configure your preferred crawling pattern.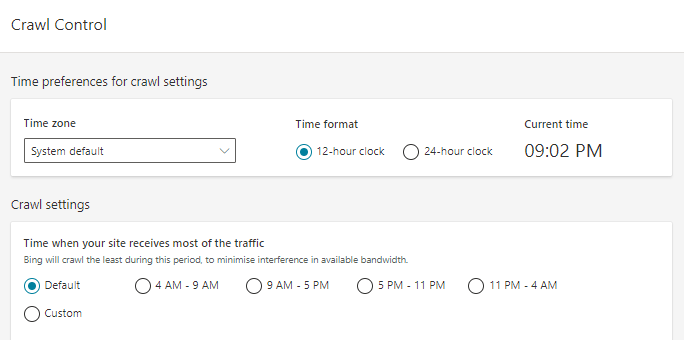
- Alternatively, you may create a custom hourly crawl pattern by adjusting the cubes to reflect your desired intensity on the timeline (x-axis). More cubes increase crawl frequency, while fewer cubes slow it down.
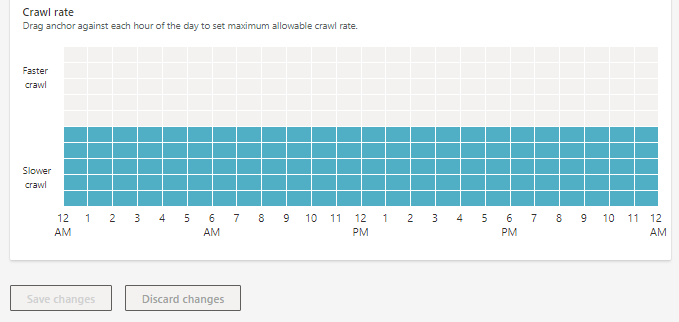
- Click Save Changes to apply your new settings.
For additional details, you may review Microsoft Bing’s documentation.
Summary
Microsoft Bing automatically adjusts crawl frequency based on detected server load, helping minimize potential performance issues. However, if a website experiences bandwidth or performance constraints, administrators can manually configure crawl rates and schedules through Bing Webmaster Tools. By analyzing traffic patterns and setting appropriate crawl controls—such as reducing activity during peak hours—site owners can balance search engine visibility with optimal server performance while maintaining a smooth experience for visitors.
If you need further assistance, Bluehost Chat Support is available 24 hours a day, 7days a week while Bluehost Phone Support is available 7 days a week from 7 am-12 midnight EST.
- Chat Support - While on our website, you should see a CHAT bubble in the bottom right-hand corner of the page. Click anywhere on the bubble to begin a chat session.
- Phone Support -
- US: 888-401-4678
- International: +1 801-765-9400
You may also refer to our Knowledge Base articles to help answer common questions and guide you through various setup, configuration, and troubleshooting steps.