Create and Manage FTP Accounts for your Website
File Transfer Protocol (FTP) accounts are essential for efficiently creating and managing the files on your website. By utilizing an FTP client, you can securely transfer files between your computer and your web hosting server. This allows you to easily create and manage website updates, maintain website content, and ensure seamless website functionality.
Recommended FTP Clients
For a better experience, we recommend using reliable FTP clients, such as:
- Filezilla
- CoreFTP
- Cyberduck
- SmartFTP (A trial version is available.)
- CuteFTP (A trial version is available.)
Visit the FTP Client Recommendations article for a list of other FTP clients.
Configuring your FTP Clients
Configuring these FTP clients will require the following details, which are available within your Bluehost Portal.
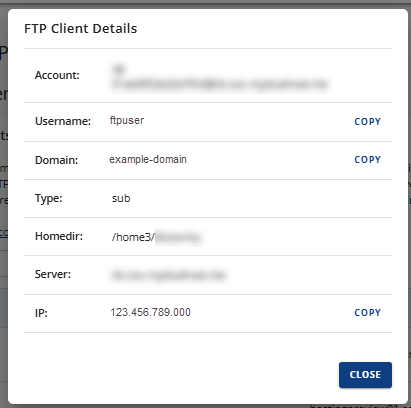
- FTP Host/Address: (IP address or server hostname)
- FTP User: (FTP username)
- FTP Password: (FTP password)
- Port: 21
To know where to find them, see the View the FTP Account Details section below.
Check out the following articles to learn how to manage some of these FTP clients.
Accessing the FTP Management Panel
You can create new accounts without sharing your Bluehost Portal credentials to grant other users access to your files via FTP.
Already logged into your Bluehost Portal? If you are already logged into your Bluehost portal, you can use the following link to create and manage FTP accounts:
Not yet logged into your Bluehost Portal? If you have not logged in to your Bluehost Portal yet, follow these steps.
- Log in to your Bluehost Portal.
- In the left-hand menu, click Websites.
- Click the Manage Site button located next to the website you want to manage.

- Click on the Files & Access tab in the top menu.

- Click the Manage button in the FTP section.
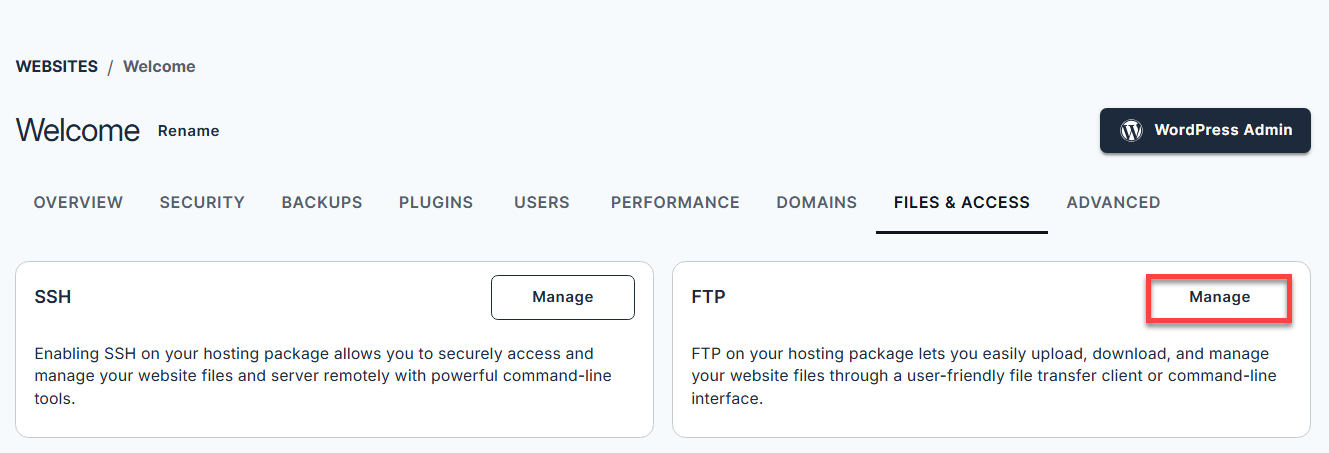
- You will be taken to the FTP Management page, where you can manage your FTP accounts.
Managing an FTP Account
You can perform the following actions on the FTP Management page to manage your FTP accounts.
- Create a new FTP account
- Search for existing FTP user/account
- View the FTP account details
- Change the FTP password
- Delete an FTP account
Create an FTP Account
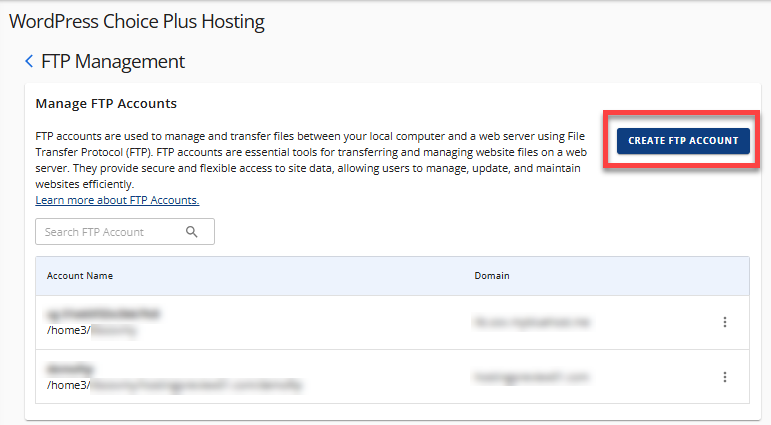
- On the FTP Management page, click the Create FTP Account button.
- Fill out the required fields for the username, password, and directory. Make sure to select the correct domain where you want to create the FTP account.
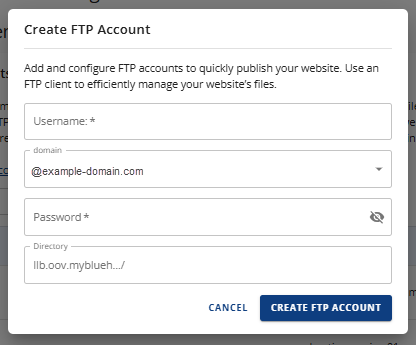
- Once done, click the Create button.
You will see the new FTP among the FTP accounts on the list.
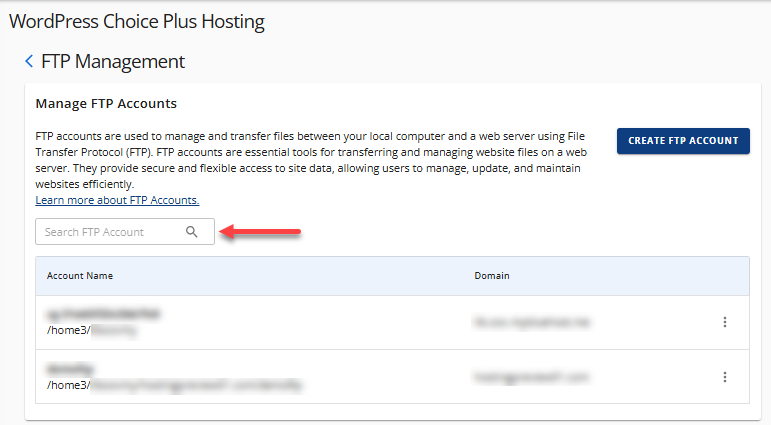
Search for Existing FTP User/Account
If your Bluehost Portal has several FTP accounts, you can use the search box to locate a specific user or account.
View the FTP Account Details
If you want to access important information about a specific FTP account, follow the steps below.
- On the FTP Management page, click the vertical ellipsis icon next to the FTP account whose details you wish to view.
- Select View.
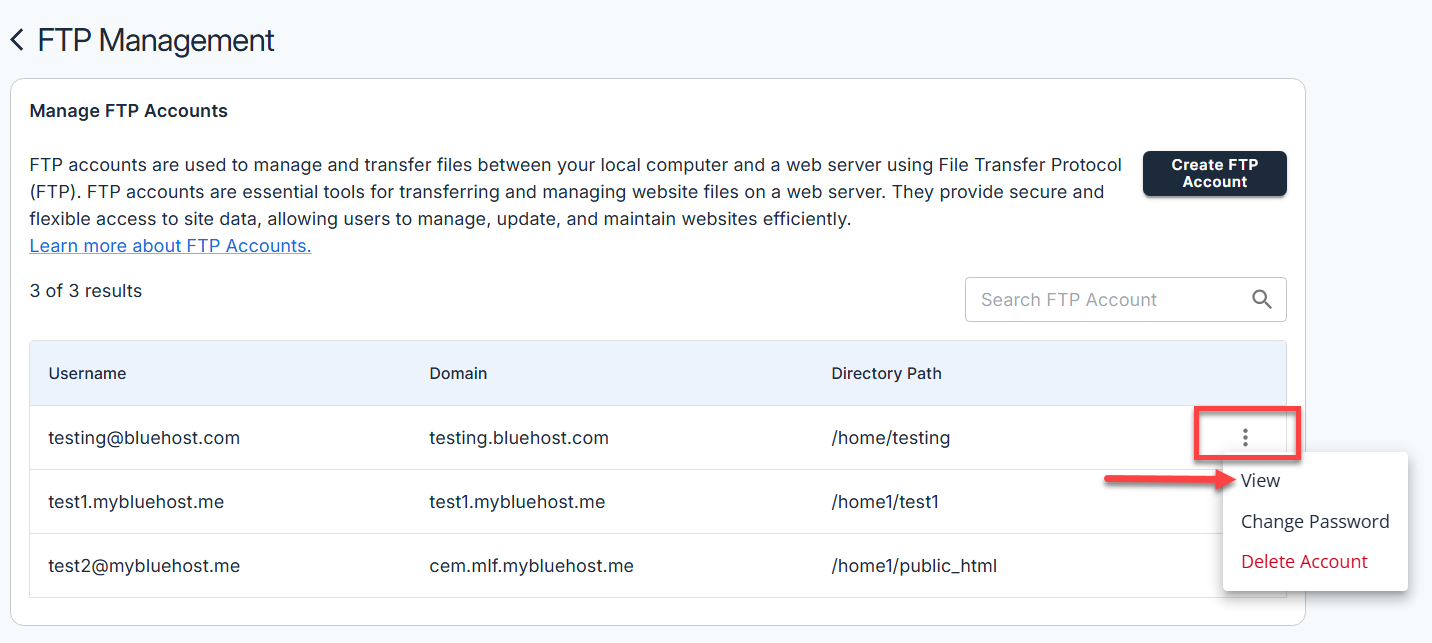
- A pop-up window will appear, displaying all the FTP account details.
Change the FTP Password
If you need to change the password for a specific FTP user, follow these steps.
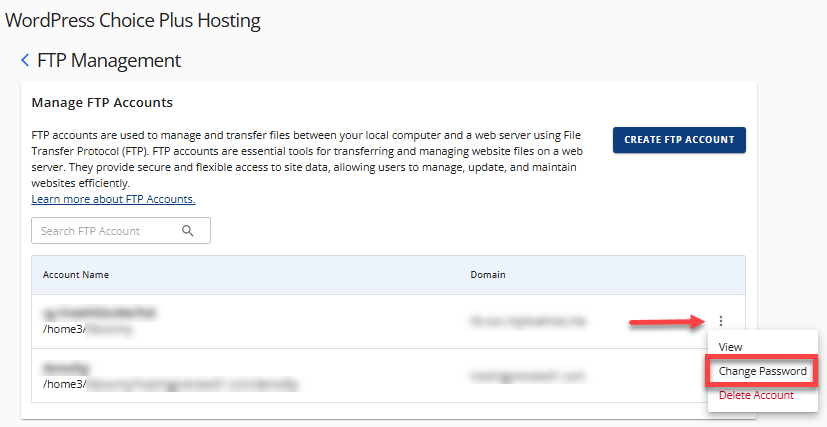
- On the FTP Management page, click the vertical ellipsis icon next to the FTP account whose password you want to change.
- Select Change Password.
- A pop-up window will appear. Enter your new FTP password.
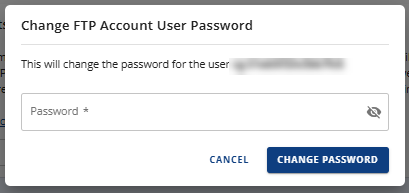
- Click the Change Password button.
- You can now access your FTP account using the new password.
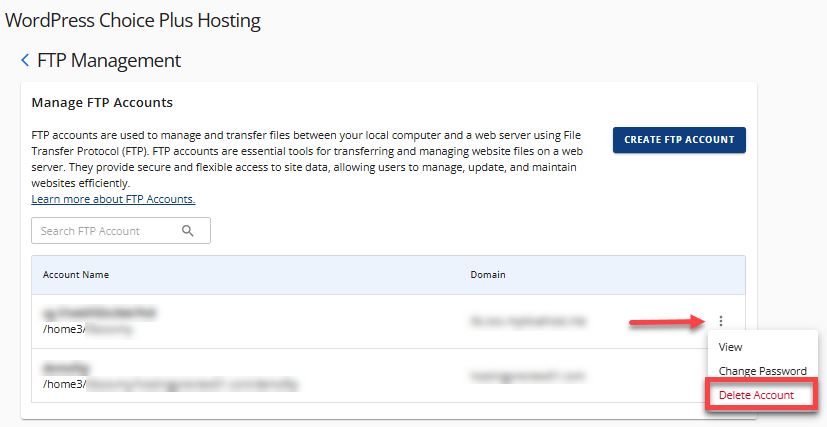
Delete an FTP Account
If you want to remove a specific FTP account, follow the steps below.
- On the FTP Management page, click the vertical ellipsis icon next to the FTP account you want to delete.
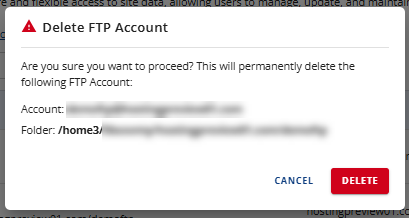
- Select Delete Account.
- In the pop-up window, click Delete to confirm removing the FTP account.
Summary
Learn how to create, manage, and delete FTP accounts on Bluehost. This step-by-step guide covers everything from accessing the FTP management panel to changing passwords and deleting accounts.
If you need further assistance, Bluehost Chat Support is available 24 hours a day, 7days a week while Bluehost Phone Support is available 7 days a week from 7 am-12 midnight EST.
- Chat Support - While on our website, you should see a CHAT bubble in the bottom right-hand corner of the page. Click anywhere on the bubble to begin a chat session.
- Phone Support -
- US: 888-401-4678
- International: +1 801-765-9400
You may also refer to our Knowledge Base articles to help answer common questions and guide you through various setup, configuration, and troubleshooting steps.