Email Application Setup Outlook 2010 for Windows
This guide provides instructions for setting up email in Outlook 2010 for Windows, aiming for efficient communication. The steps are designed to be clear and helpful for anyone, whether for professional or personal use. By following this guide, users can effectively utilize Outlook 2010's features for their email management needs. To learn about Email settings, such as incoming and outgoing servers, please check our article - How To Setup Email Account - Client Setup SSL/TLS Settings - POP & IMAP
Adding a new account
- Open Microsoft Outlook 2010.
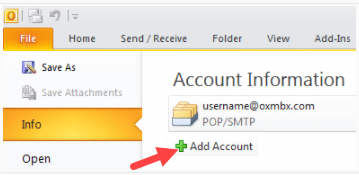
- Go to File > Info > Account information.
- Click the Add Account button.
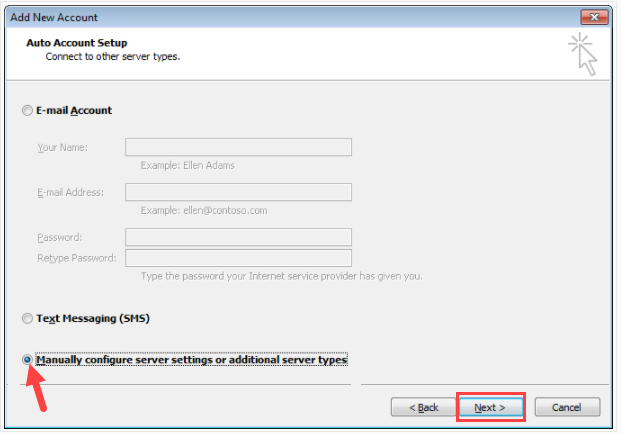
- Choose Manually configure server settings.
- Click the Next button.
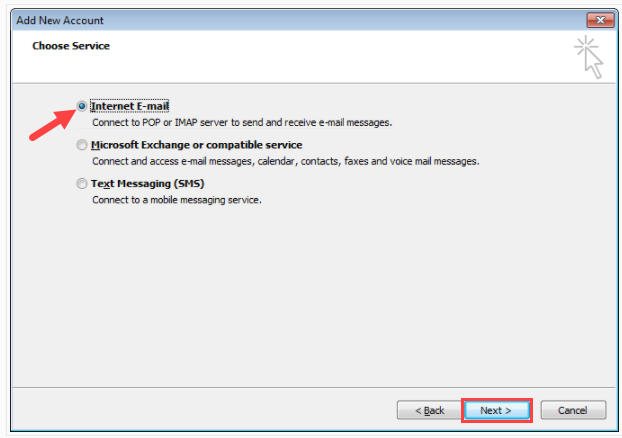
- Choose Internet E-Mail.
- Click the Next button.
Account Settings
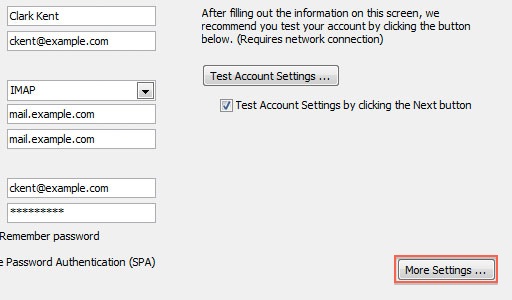
Enter the details in each field on the screen:
- Your Name: Enter your name as you want it to appear on your outbound email messages.
- E-mail Address: Your email address.
- Account Type: IMAP or POP3. We recommend IMAP.
- Incoming Mail Server: mail.example.com, replacing example.com with your domain name.
- Outgoing Mail Server: mail.example.com, replacing example.com with your domain name.
- User Name: Your email address.
- Password: Your email account password.
More Settings
- Click More Settings.
- Go to the Outgoing Server tab.
- Check the My outgoing server (SMTP) requires authentication checkbox.
- Ensure you're using the same settings as your incoming mail server.
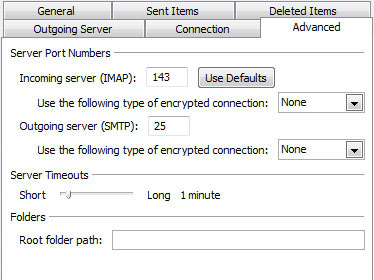
- Go to the Advanced tab.
- For IMAP with SSL*, change the following settings:
- Incoming Port: 993
- Outgoing Port: 465
- SSL: SSL/TLS
- Authentication: Normal password
- Click the OK button.
- Click the Next button.
Testing Settings
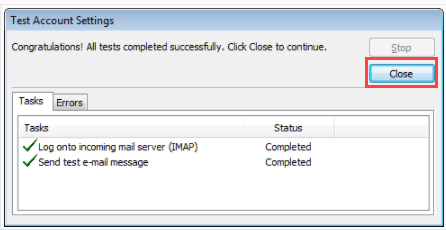
- While on the E-mail Accounts screen, click Test Account Settings. This will check your settings and send a test email to yourself to confirm that everything is working. If you receive any errors, please check your configuration.
- Click the Close button on the Test Account Settings window.
- Click Next on the E-mail Accounts window.
- Click Finish.
You're done! Outlook 2010 is now correctly configured to send and receive emails.
Summary
Managing your e-mails allows you to be on top of everything, whether that's in a professional setting or personal matters. Proper setup is key to avoiding future issues and ensuring seamless communication. To enhance your email experience and further optimize your email management, consider exploring the professional email solutions offered by Bluehost.
If you need further assistance, feel free to contact us via Chat or Phone:
- Chat Support - While on our website, you should see a CHAT bubble in the bottom right-hand corner of the page. Click anywhere on the bubble to begin a chat session.
- Phone Support -
- US: 888-401-4678
- International: +1 801-765-9400
You may also refer to our Knowledge Base articles to help answer common questions and guide you through various setup, configuration, and troubleshooting steps.
