Getting Started with Bluehost AI All-Access: Dashboard Navigation
Getting started with Bluehost AI All-Access Pack is simple—once you know where to look. This guide shows you how to access the platform quickly and confidently navigate the dashboard to manage your tools and AI features with ease.
Watch this short video for a quick guide on navigating the AI All-Access dashboard.
Navigating the AI All-Access Dashboard
Log in to your AI All-Access Dashboard. If you need assistance, please refer to the How to Sign in to the Bluehost AI All-Access Pack article.
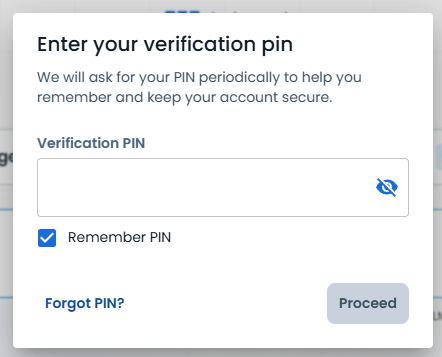
If you are on the AI All-Access Privacy + plan, you will need to enter a PIN first before logging in. Each user gets a unique PIN, helping teams stay secure.
Once logged in, you will see the following tabs:
- New Chat
- Agents
- Search chats
- Admin Console
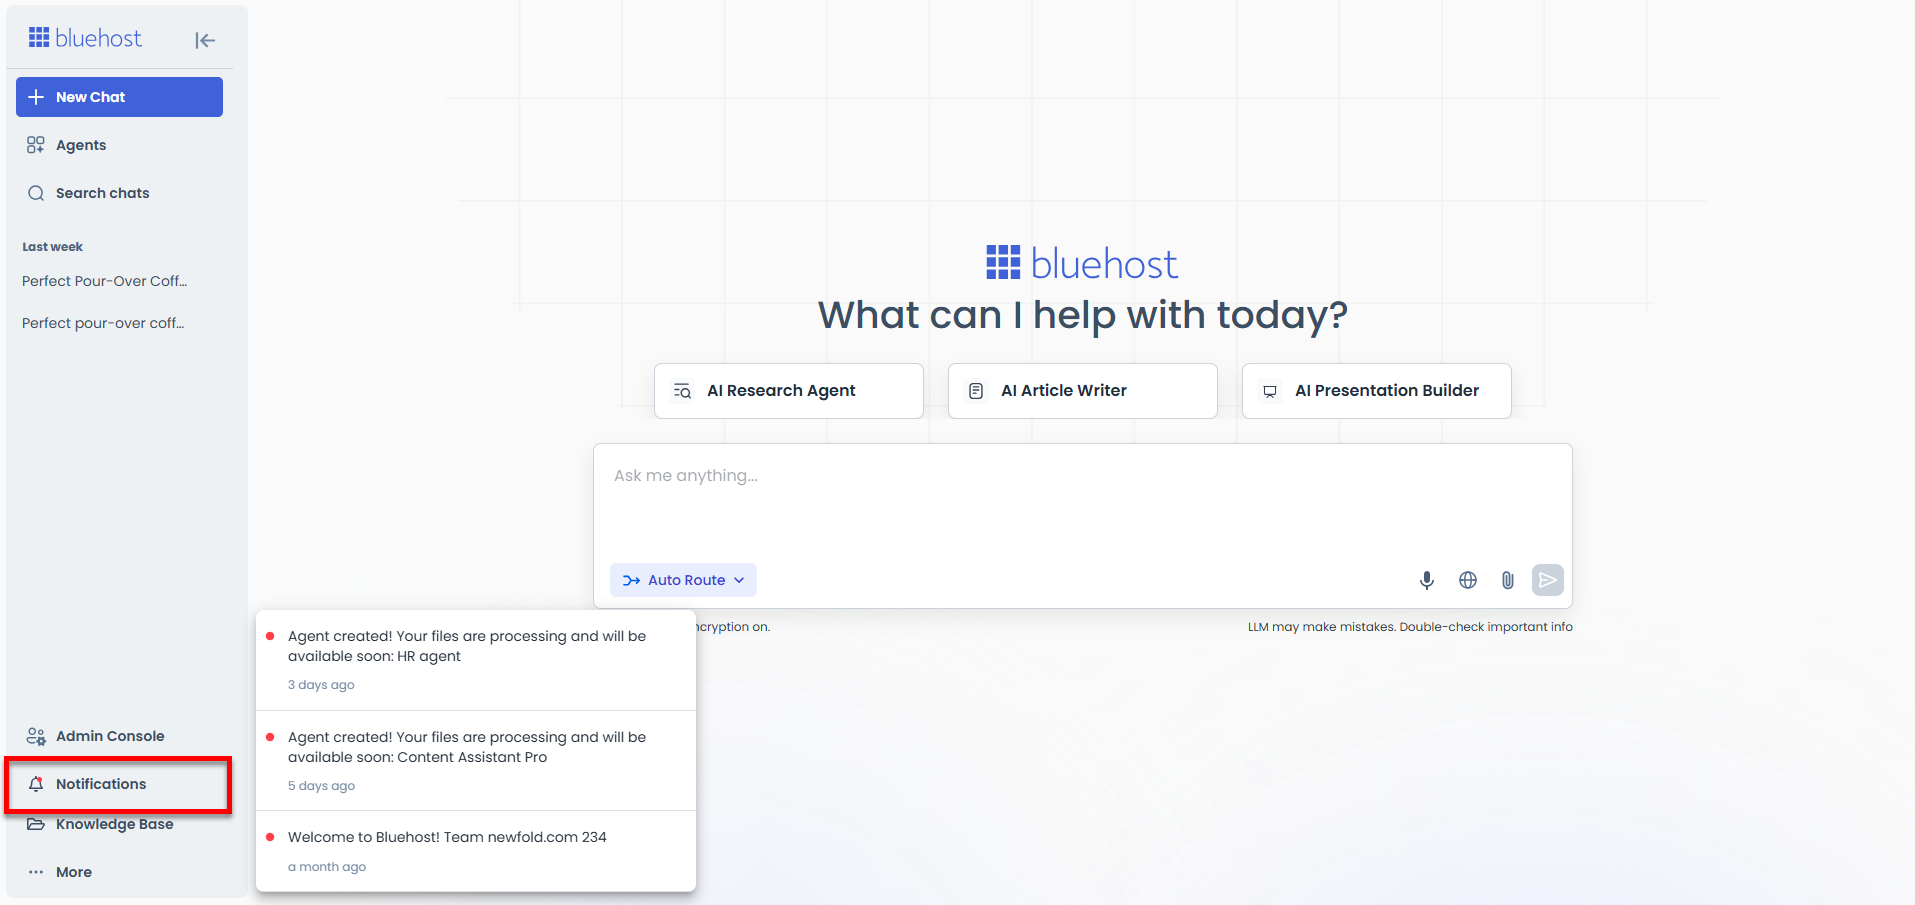
- Notifications
- Knowledge Base
New Chat
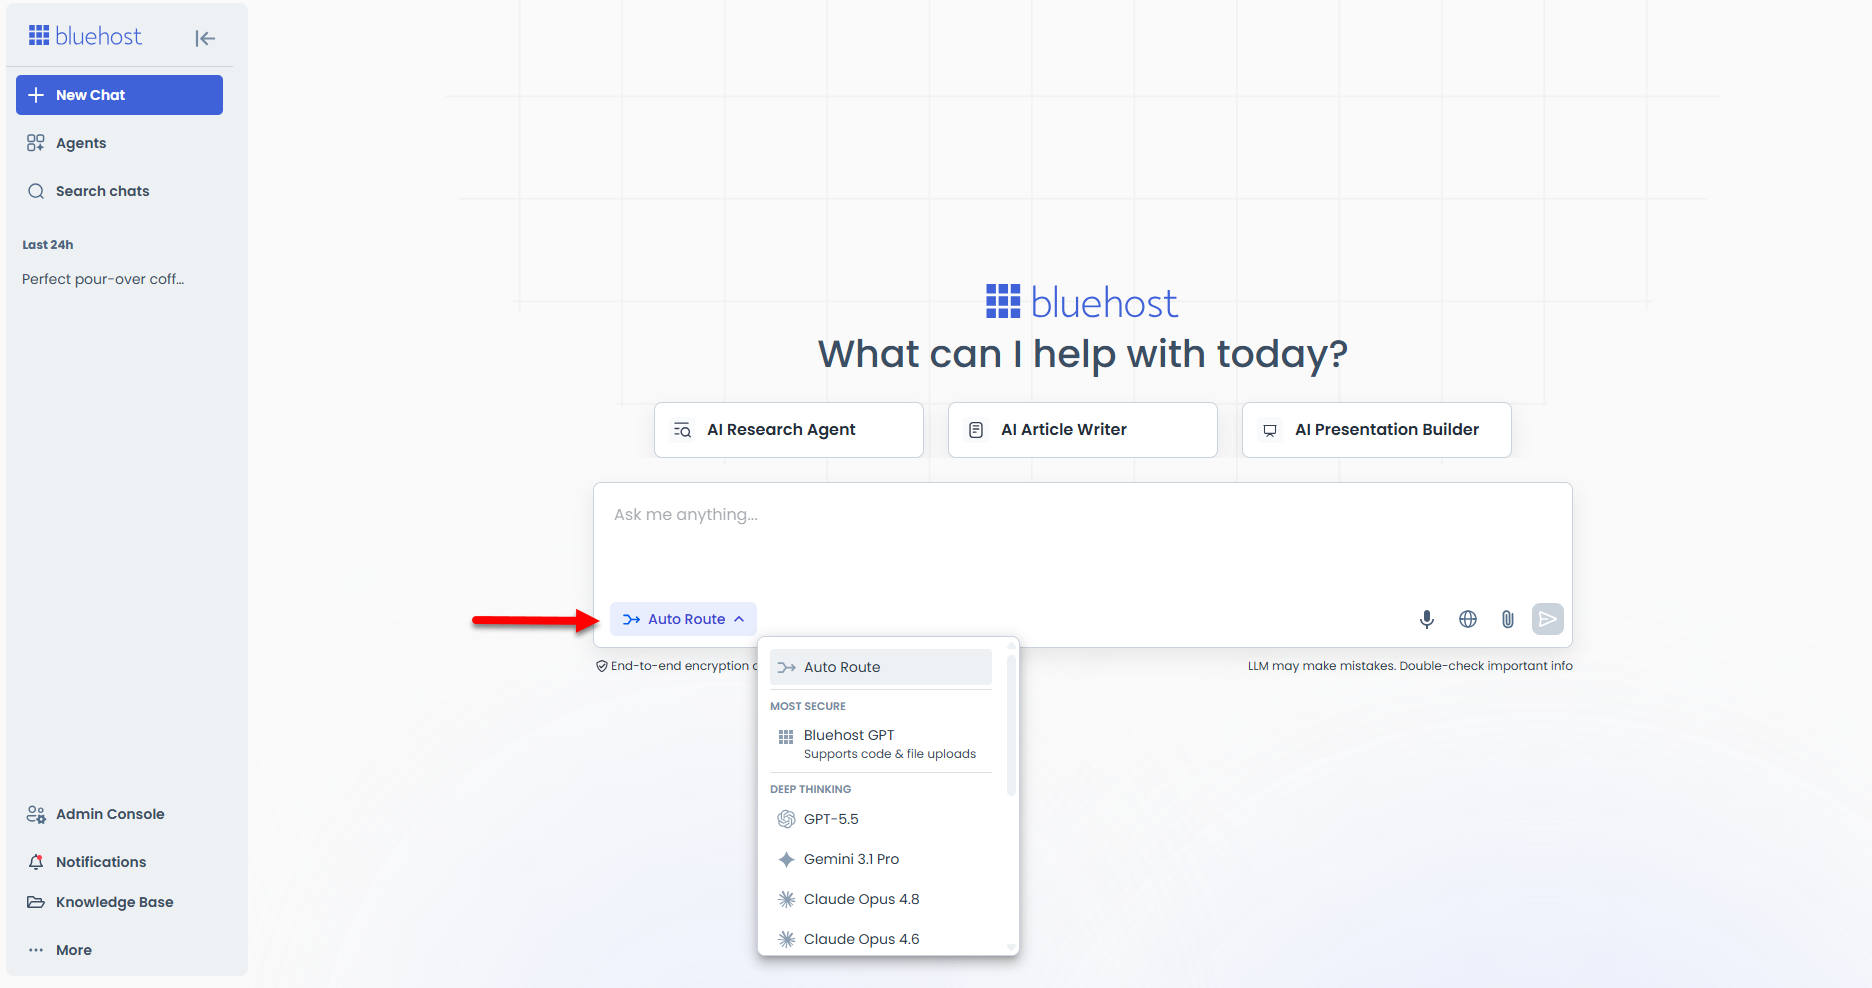
- On the + New Chat page, you can manage conversations efficiently while also allowing you to monitor your AI tools.
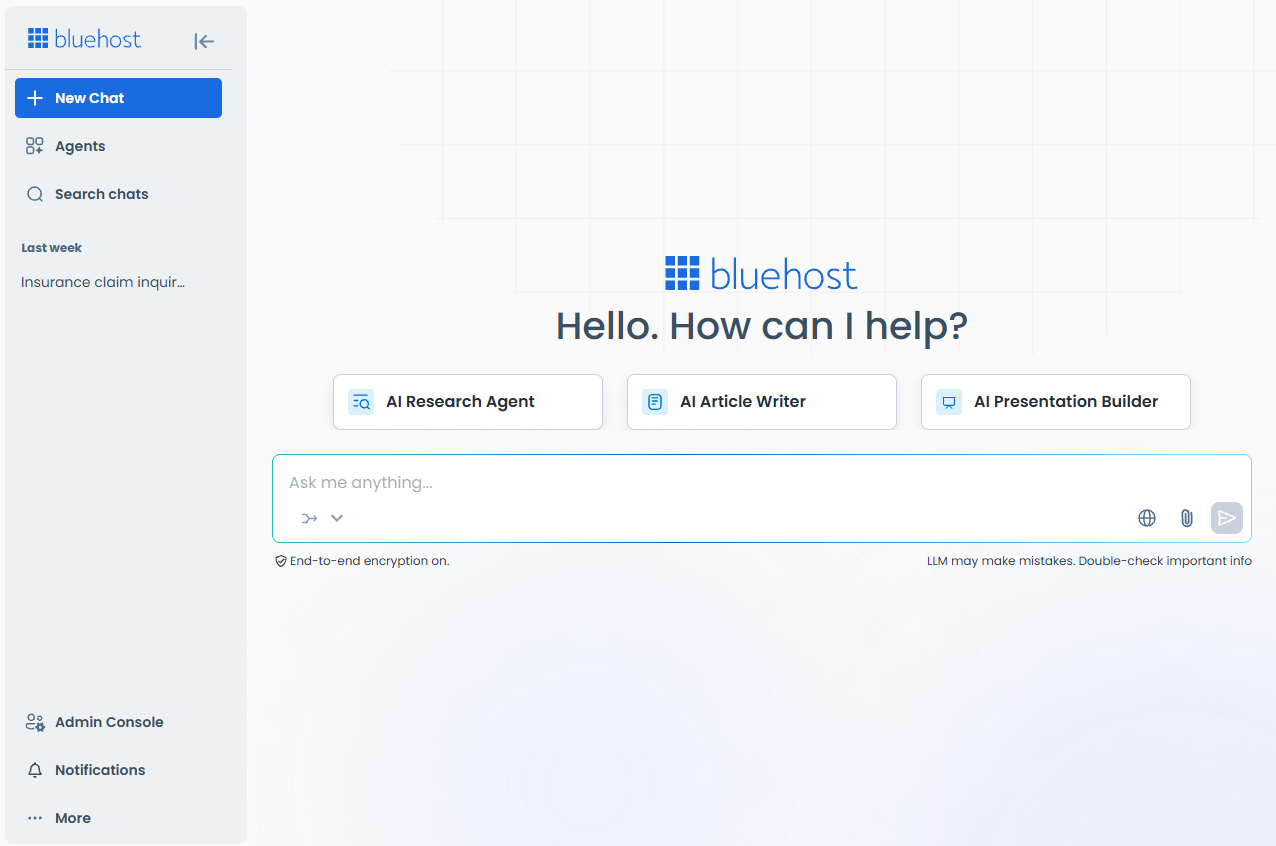
- Select your preferred AI model in the chat box, and then you can start chatting right away.
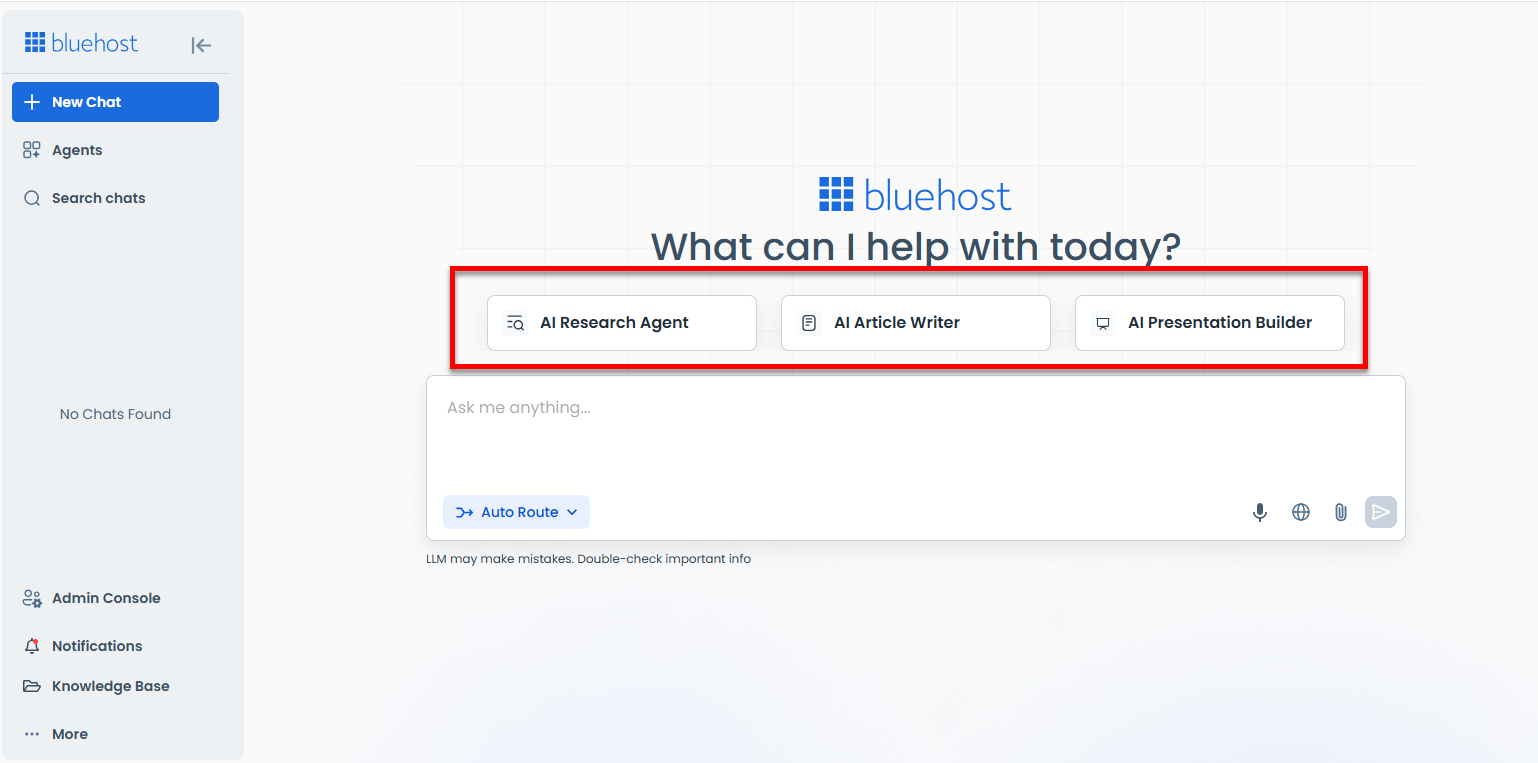
- You can also use the available agents to generate a comprehensive report, create an SEO-optimized article, or generate a presentation using your files or information from the internet.
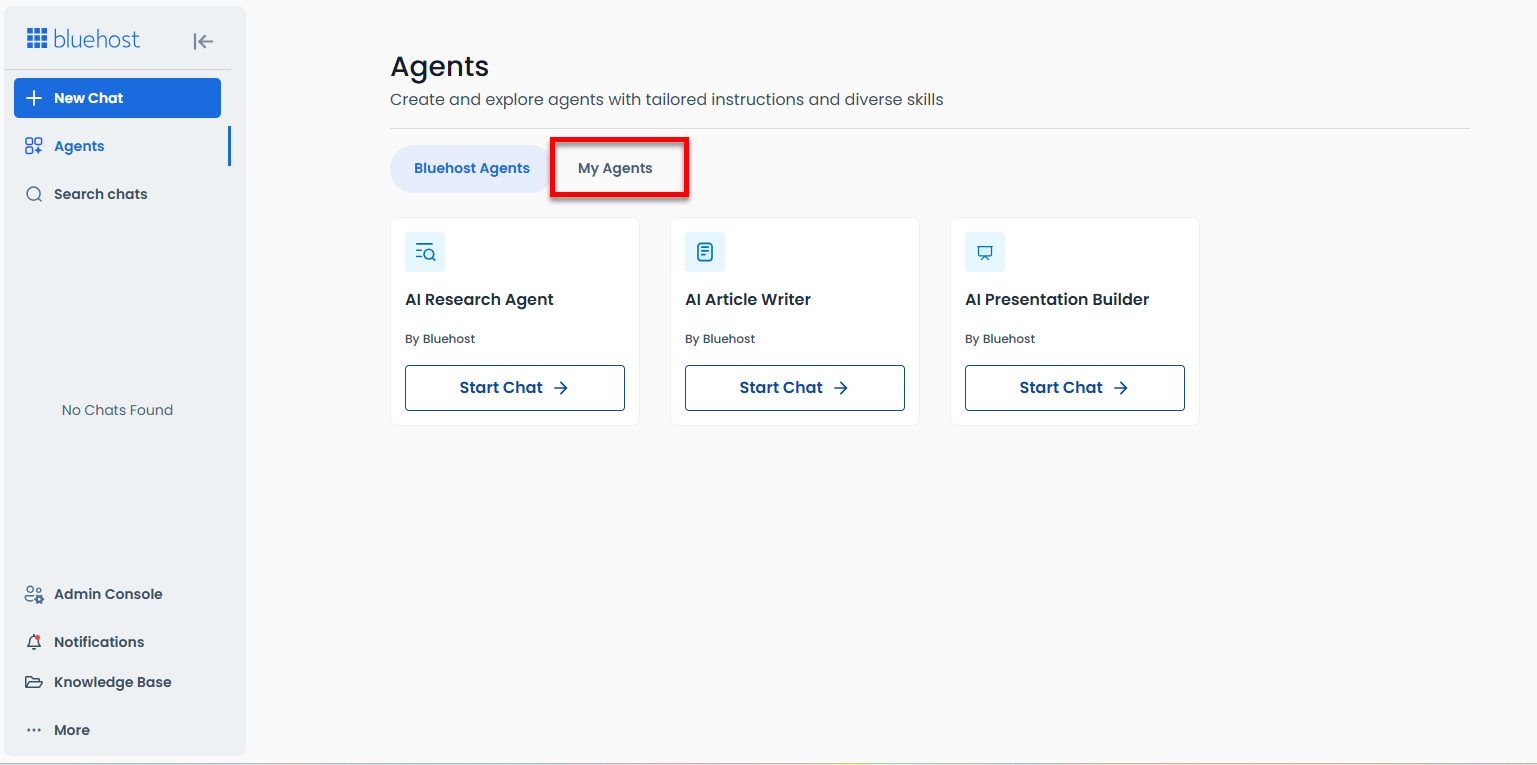
Agents
In the Agents tab, you can create and explore agents with customized instructions and various skills.
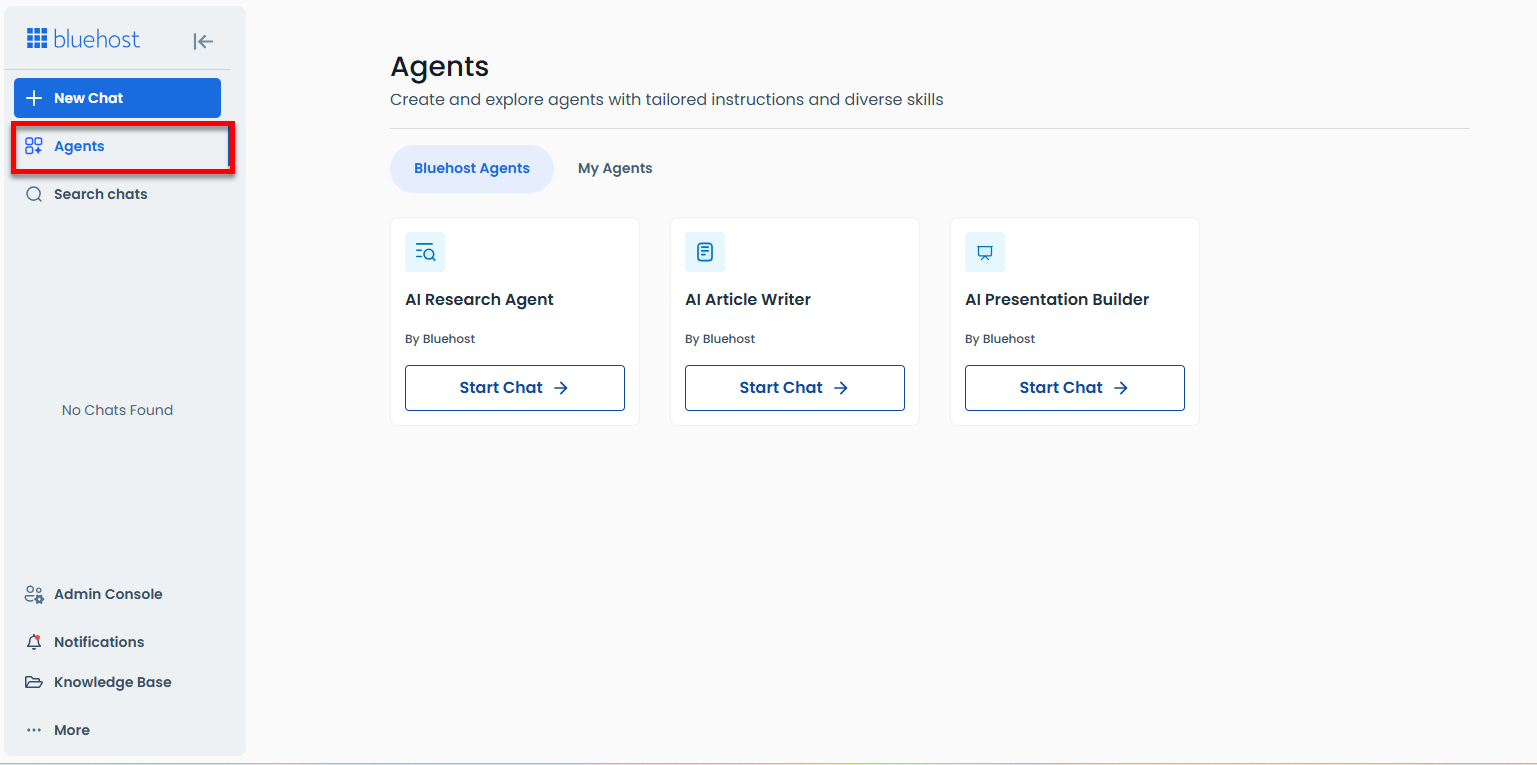
This section allows you to create your own agent under the My Agents tab. For detailed instructions, please refer to the How to Create an AI Agent with AI All-Access article.
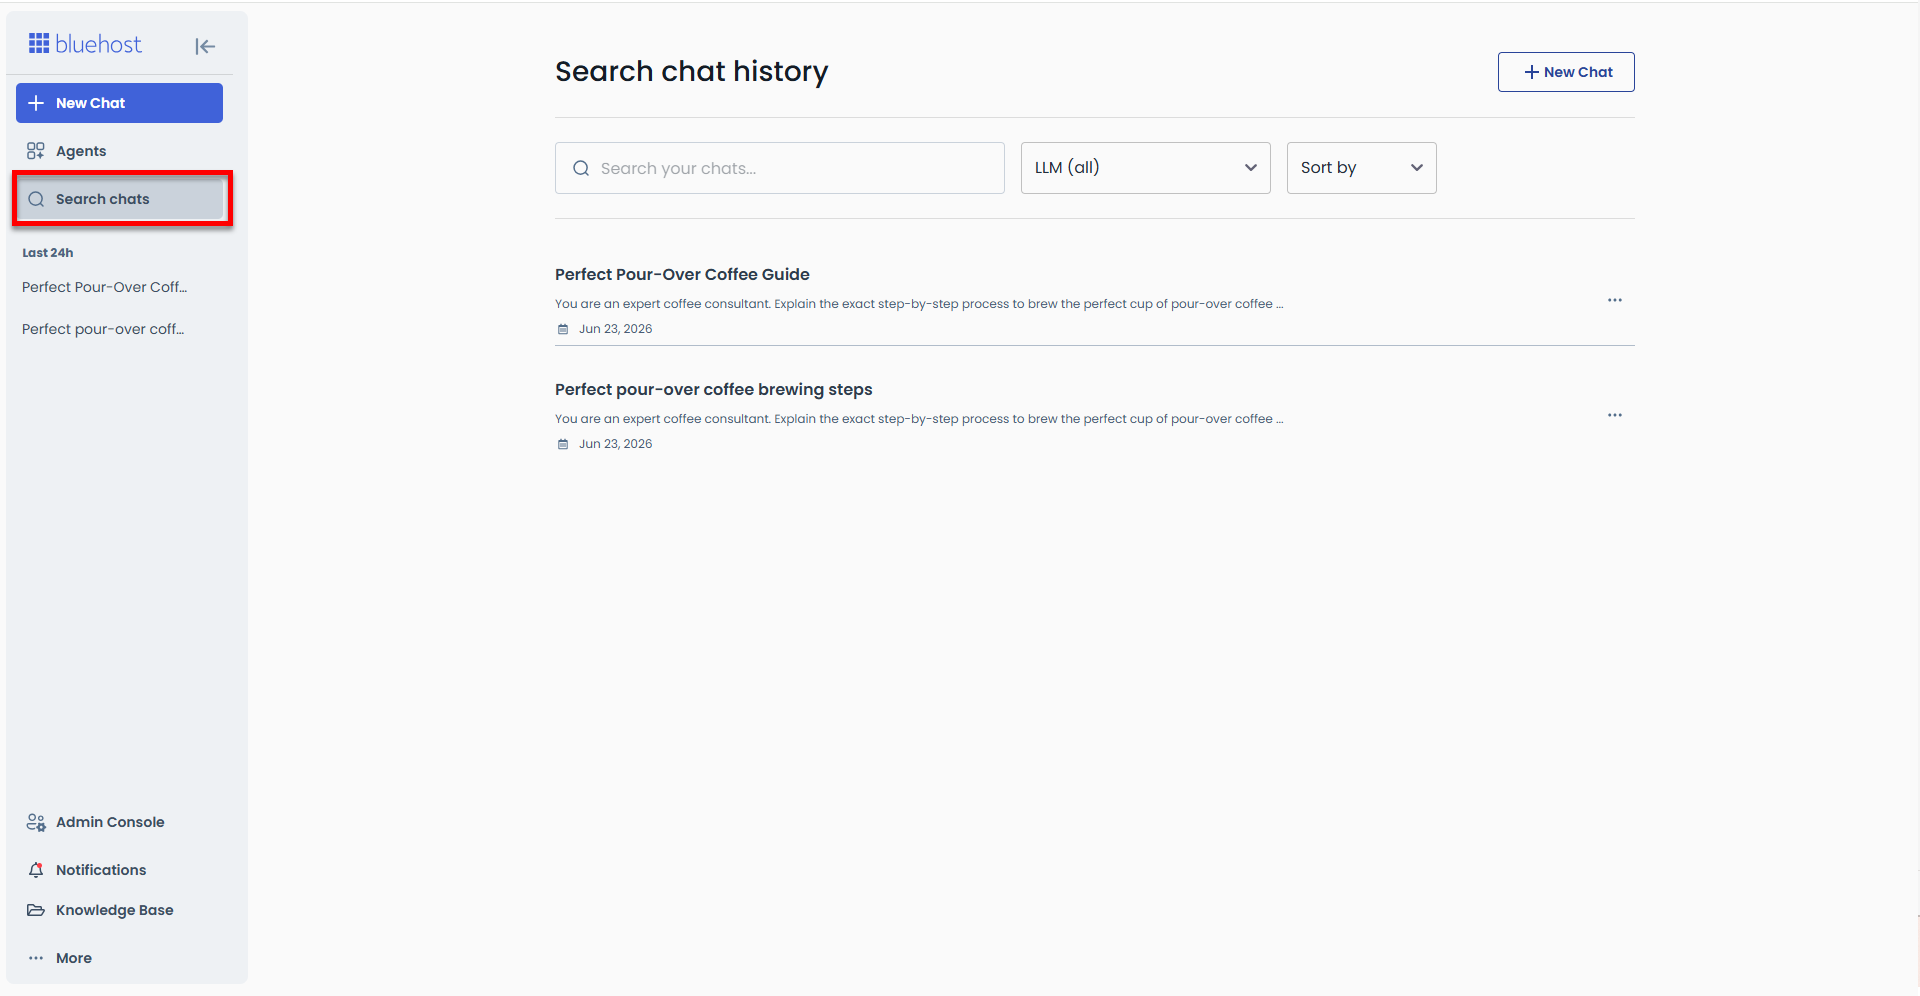
Search Chat
The Search Chat tab allows you to search your chat history.
Admin Console
The Admin Console enables you to manage users, review audit logs, handle billing, and choose AI models. This section is only accessible to account administrators.
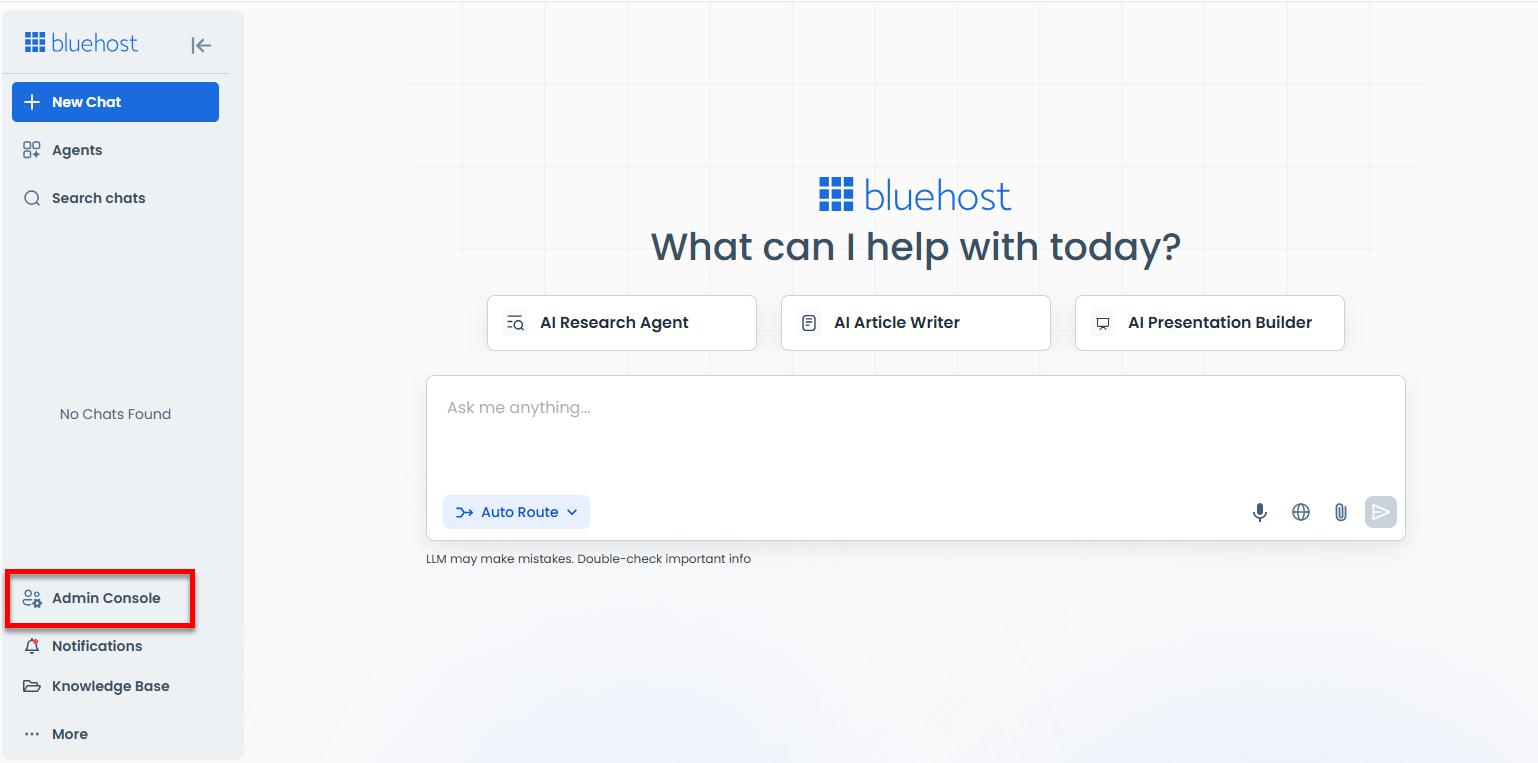
For more information on how to navigate the Admin Console, please see the What's in the Admin Console section below.
Notifications
The Notifications section shows updates and activities related to your account.
Knowledge Base
If you're searching for helpful guides, please visit the Knowledge Base tab.

You'll be redirected to the Knowledge Base search page.

What's in the Admin Console?
In the Admin Console, you'll find the following sections:
- Dashboard
- Substitution
- Audit Trail
- User Management
- Billing
- Admin Settings
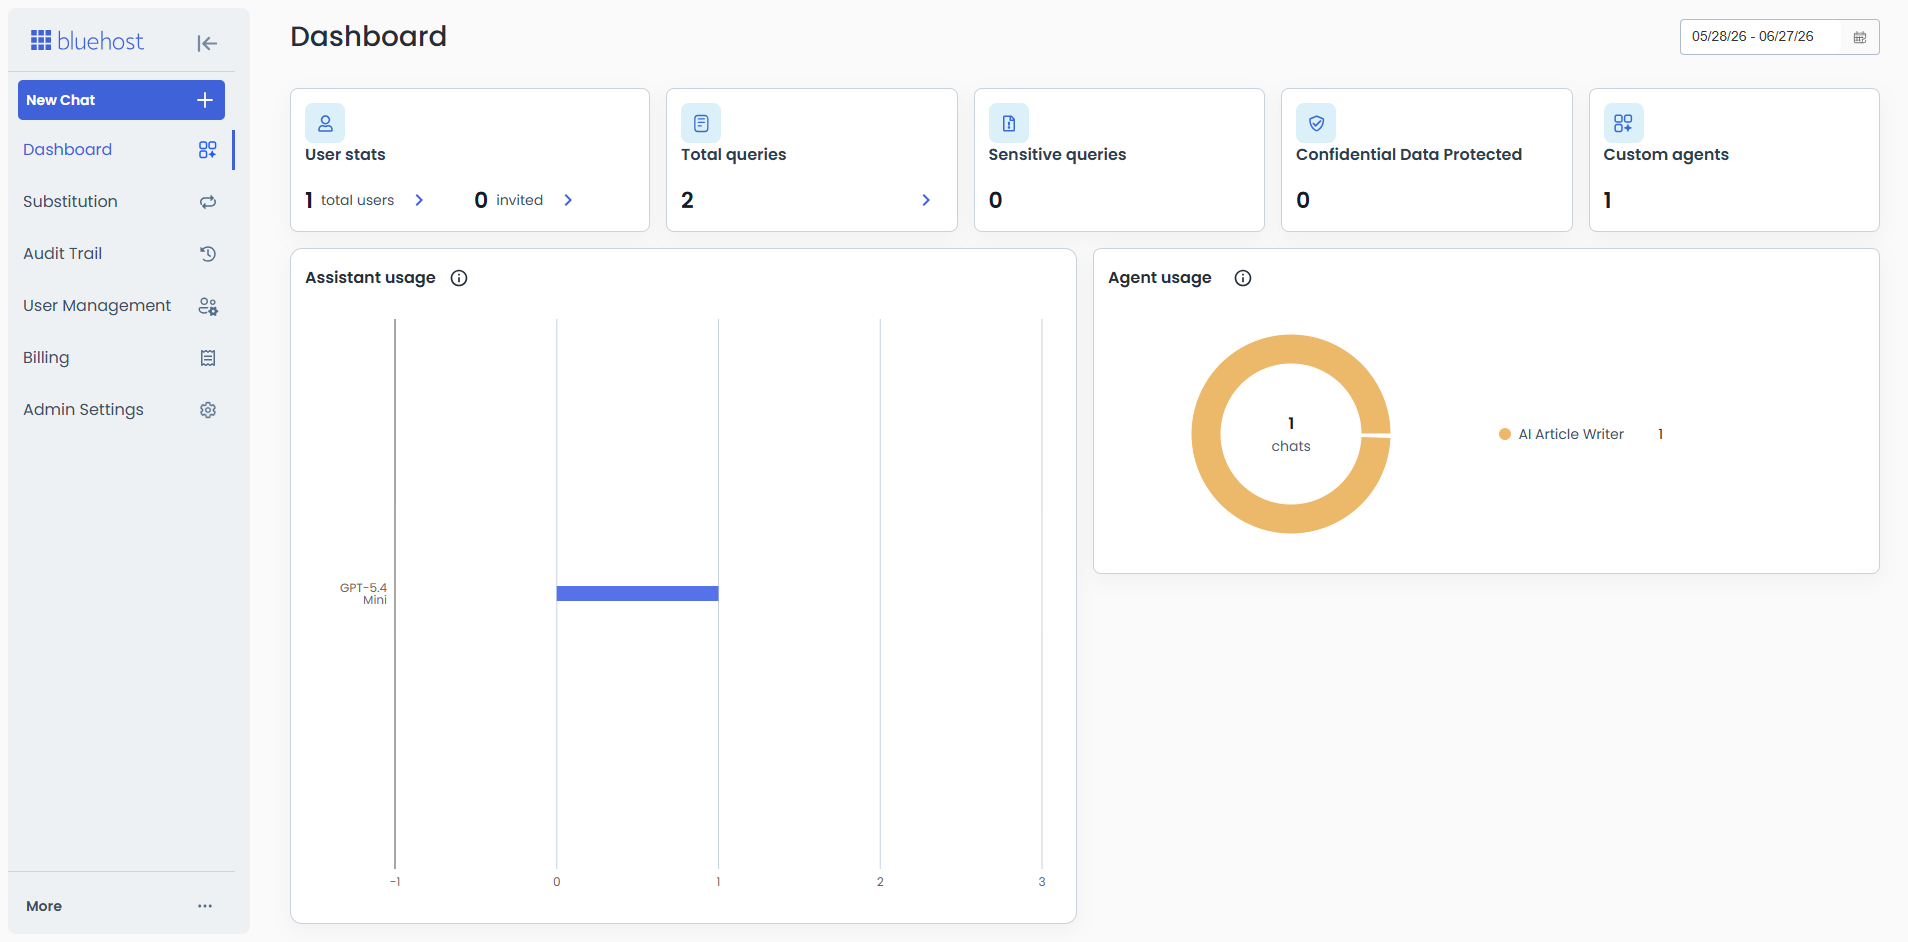
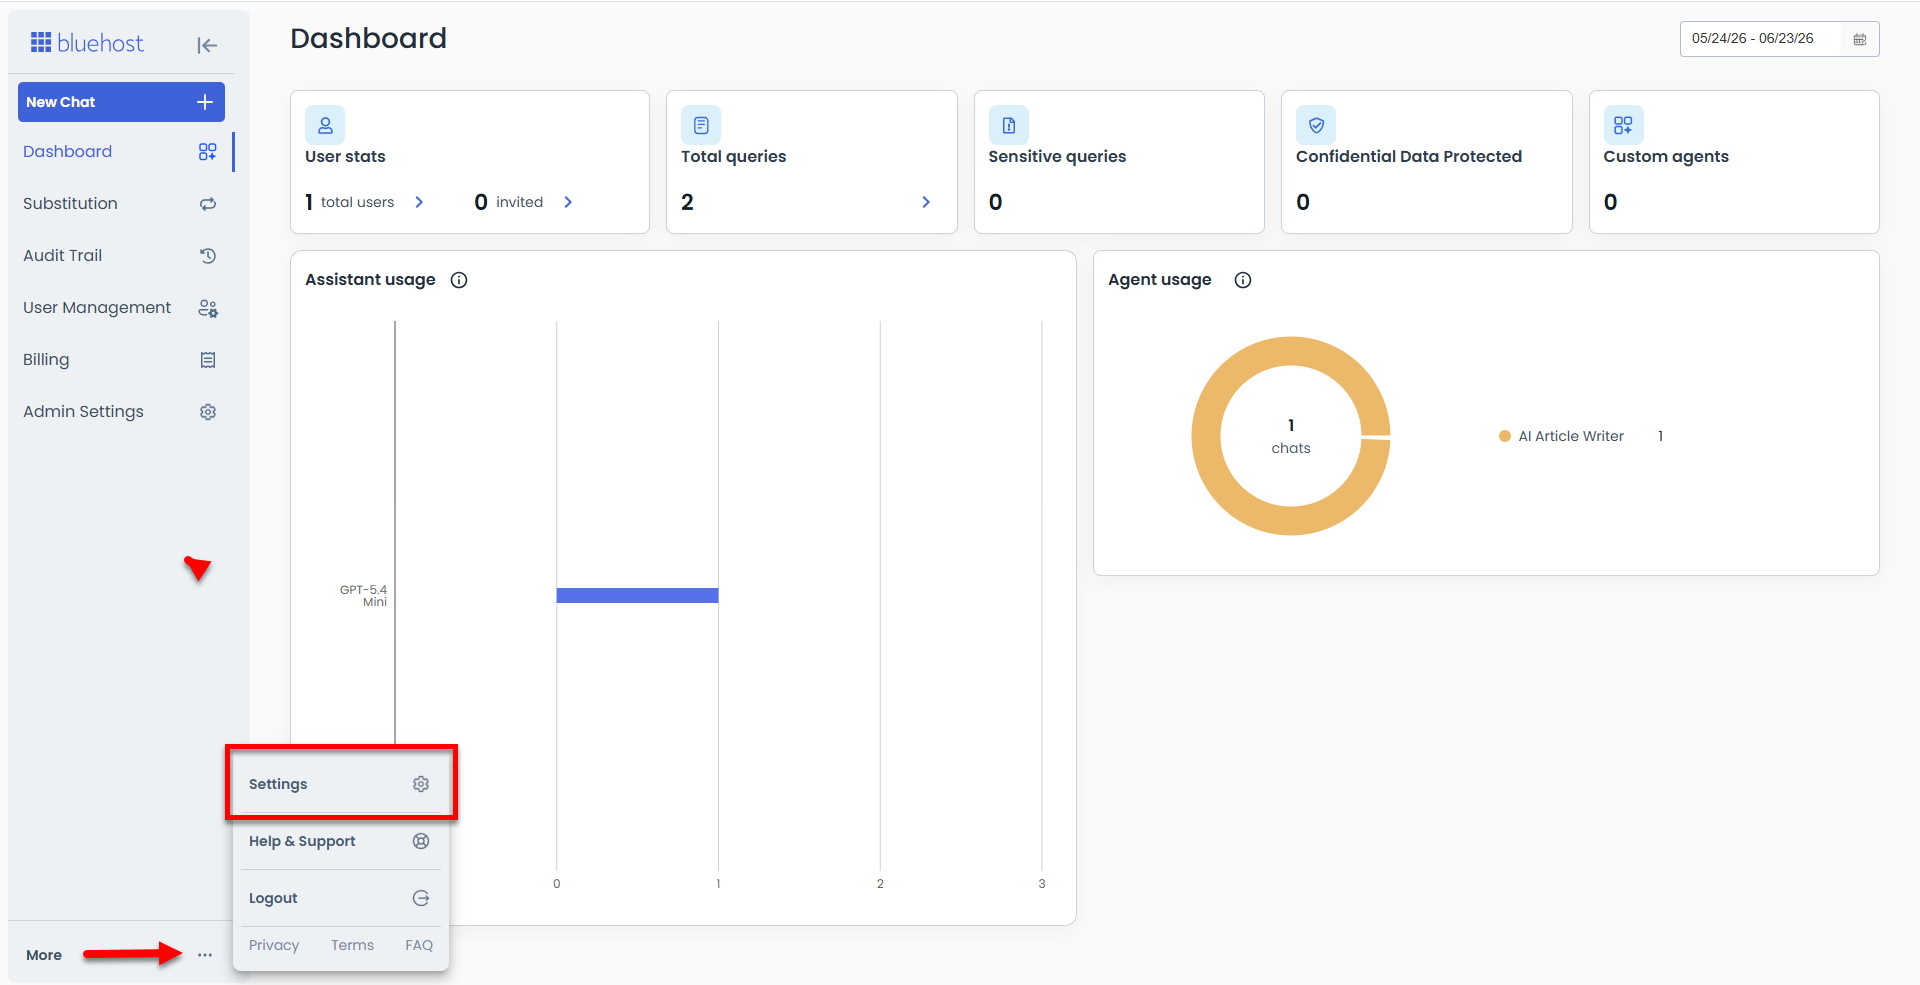
Dashboard
Within the Dashboard, you’ll find a detailed summary of AI All-Access usage metrics.
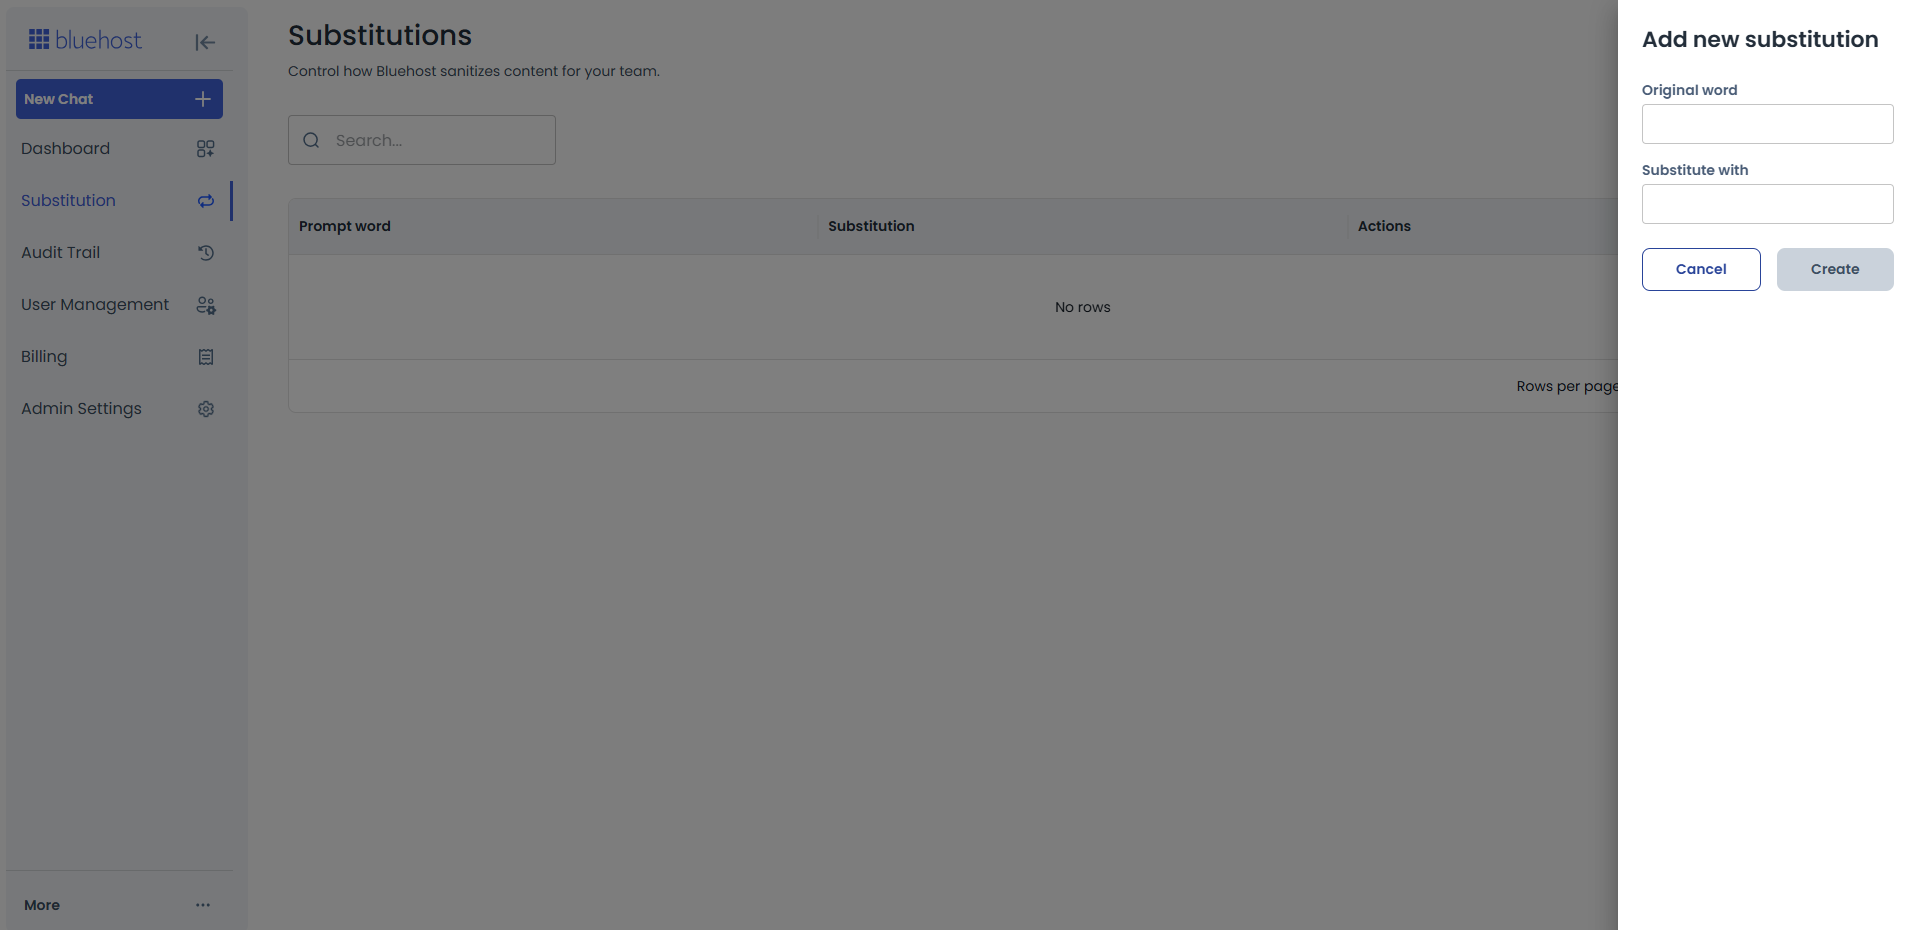
Substitution
In the Substitution tab, you can control how Bluehost sanitizes content for your team.
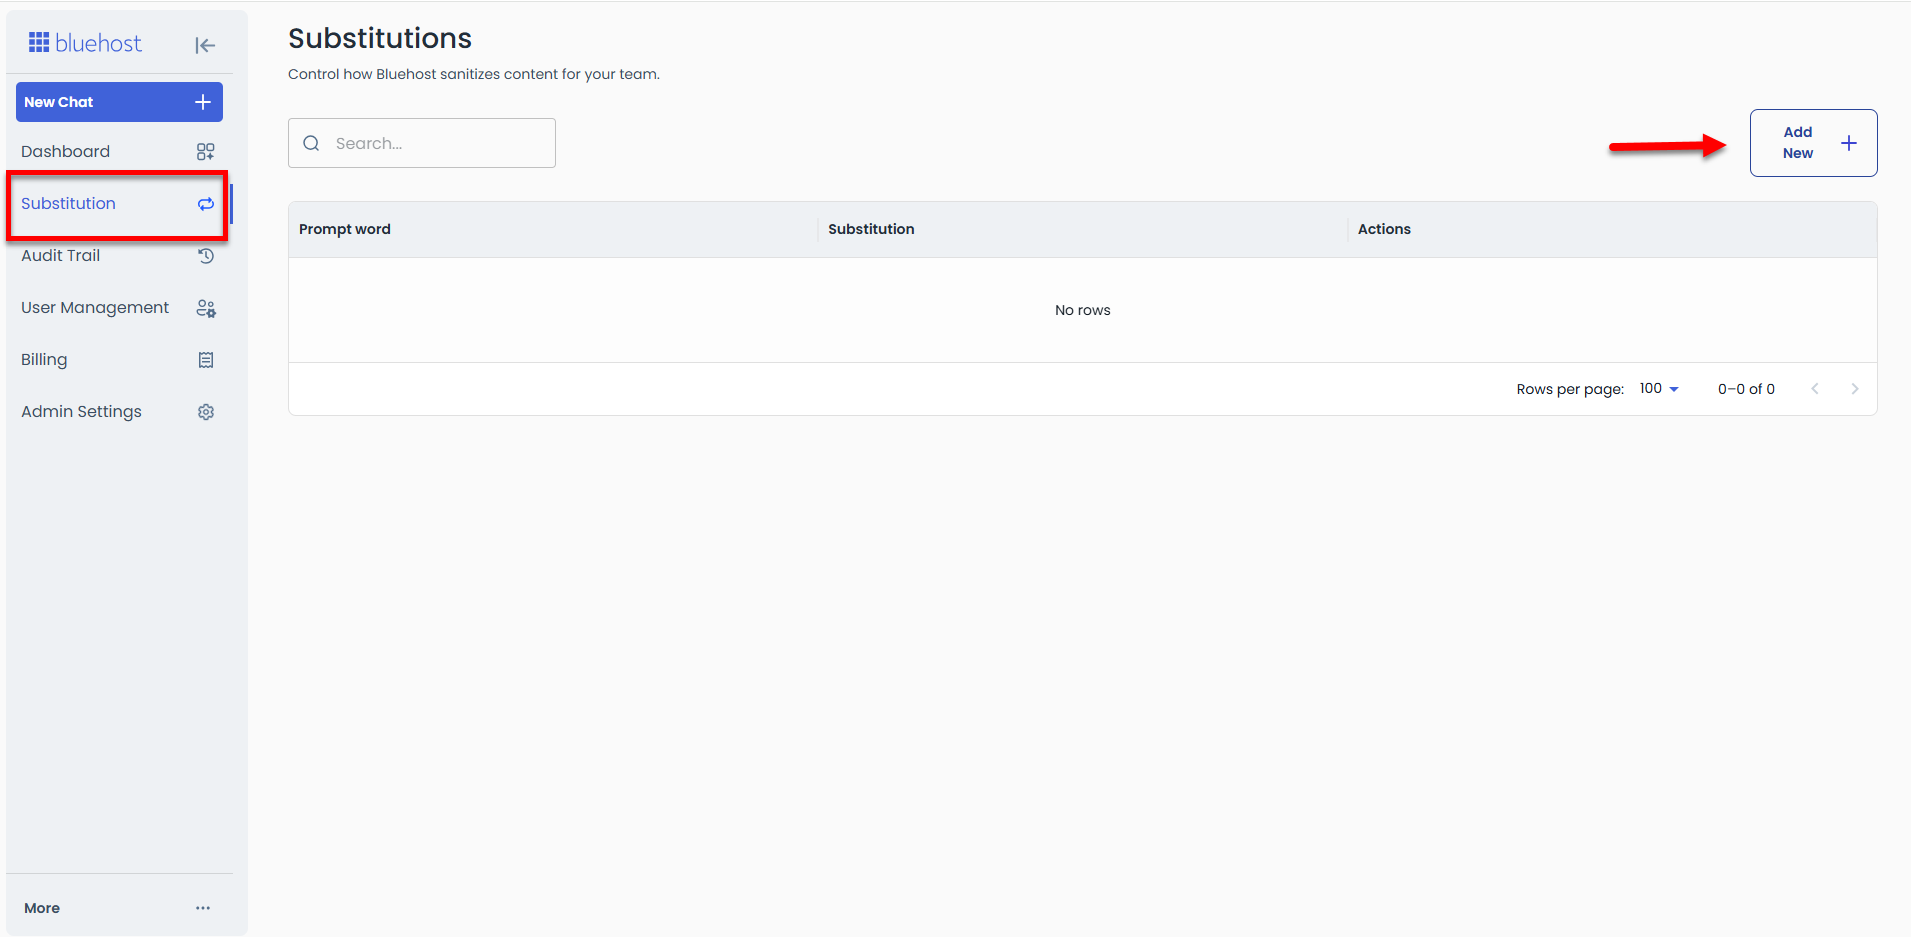
Simply click on Add New, then enter the original word and what you want to substitute it with.
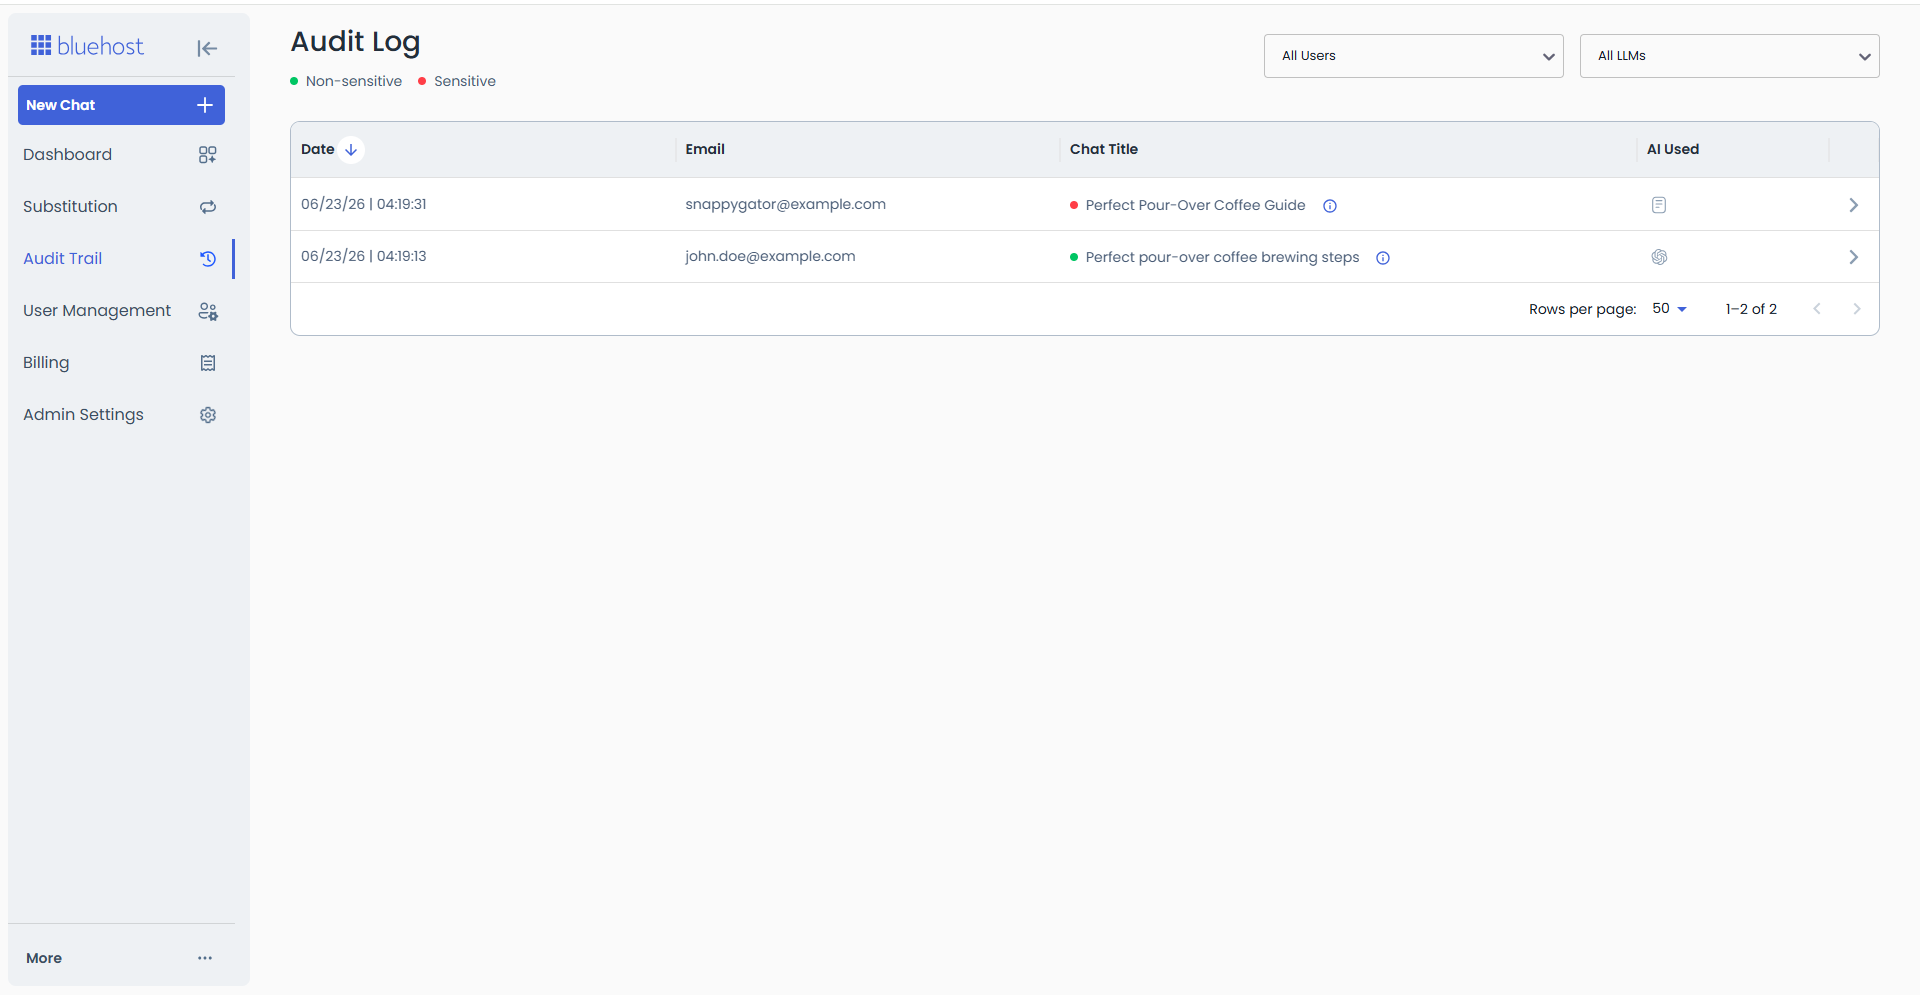
Audit Trail
The Audit Trail page provides a log of user conversations and usage history.
User Management
Within User Management, you can view existing users or invite new ones.
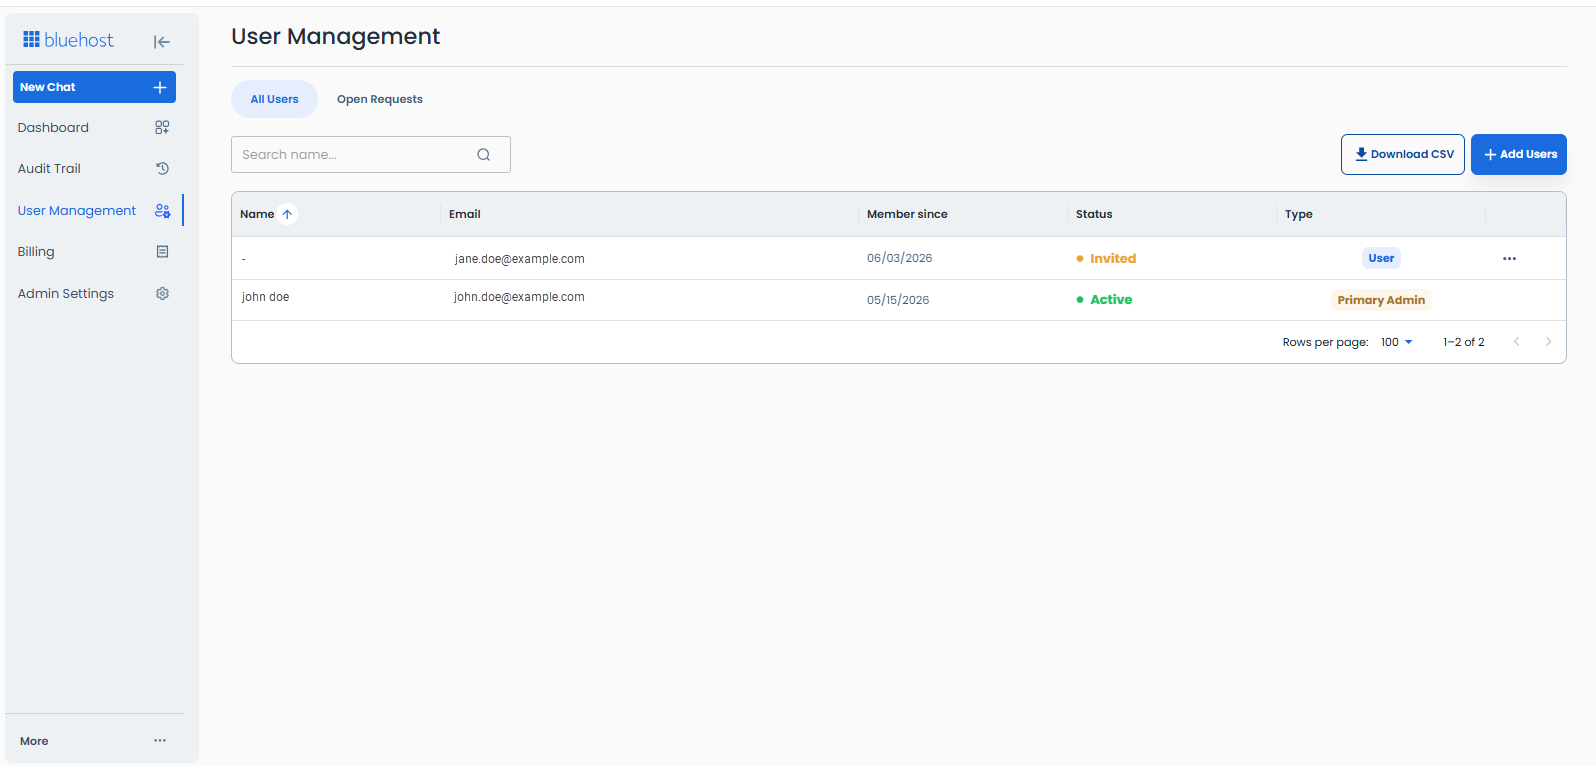
Under the All Users tab, you will find a list of all users in your AI account. This includes their status, profile type, and the date they became members.
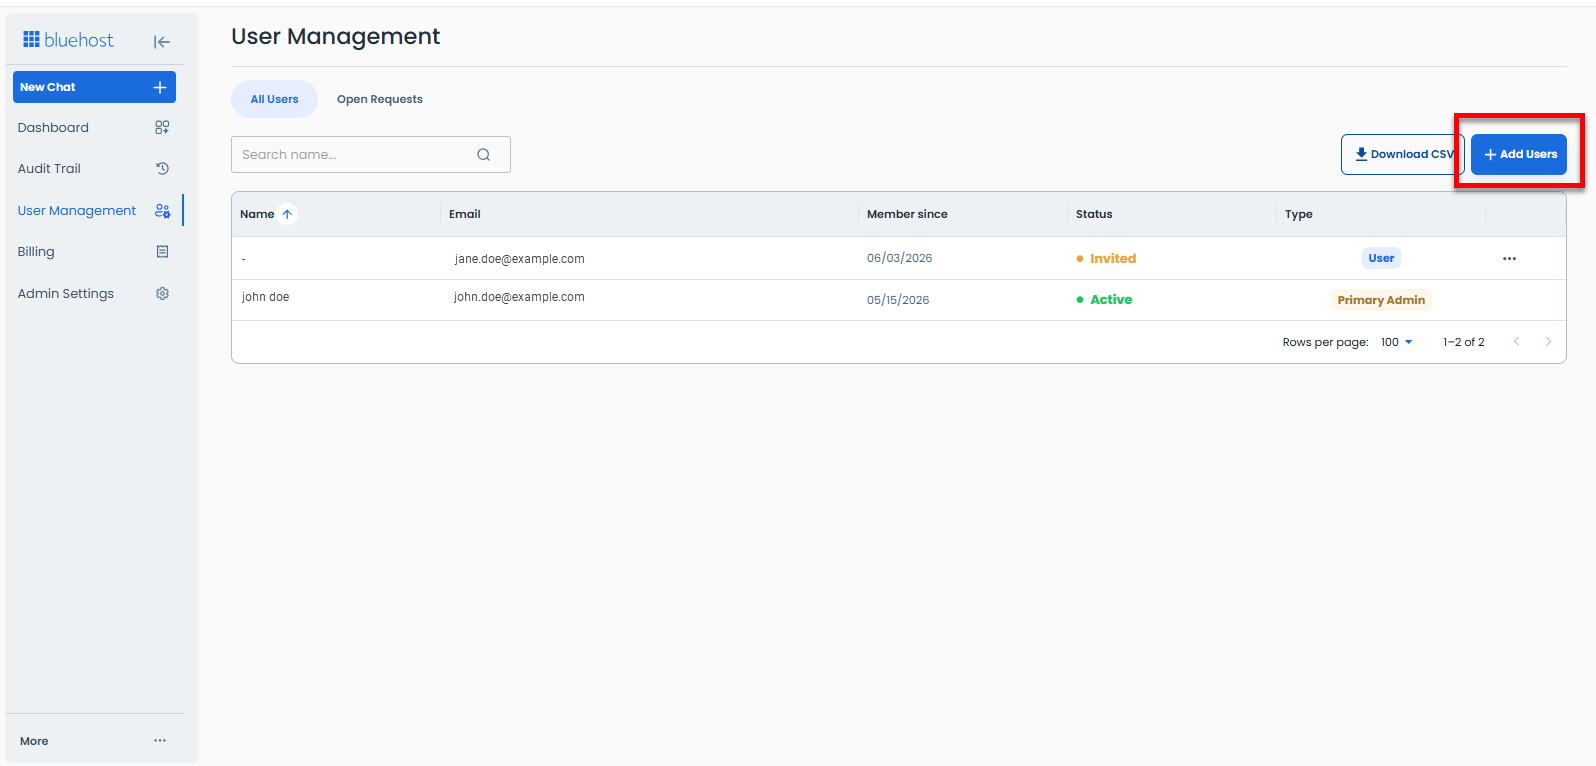
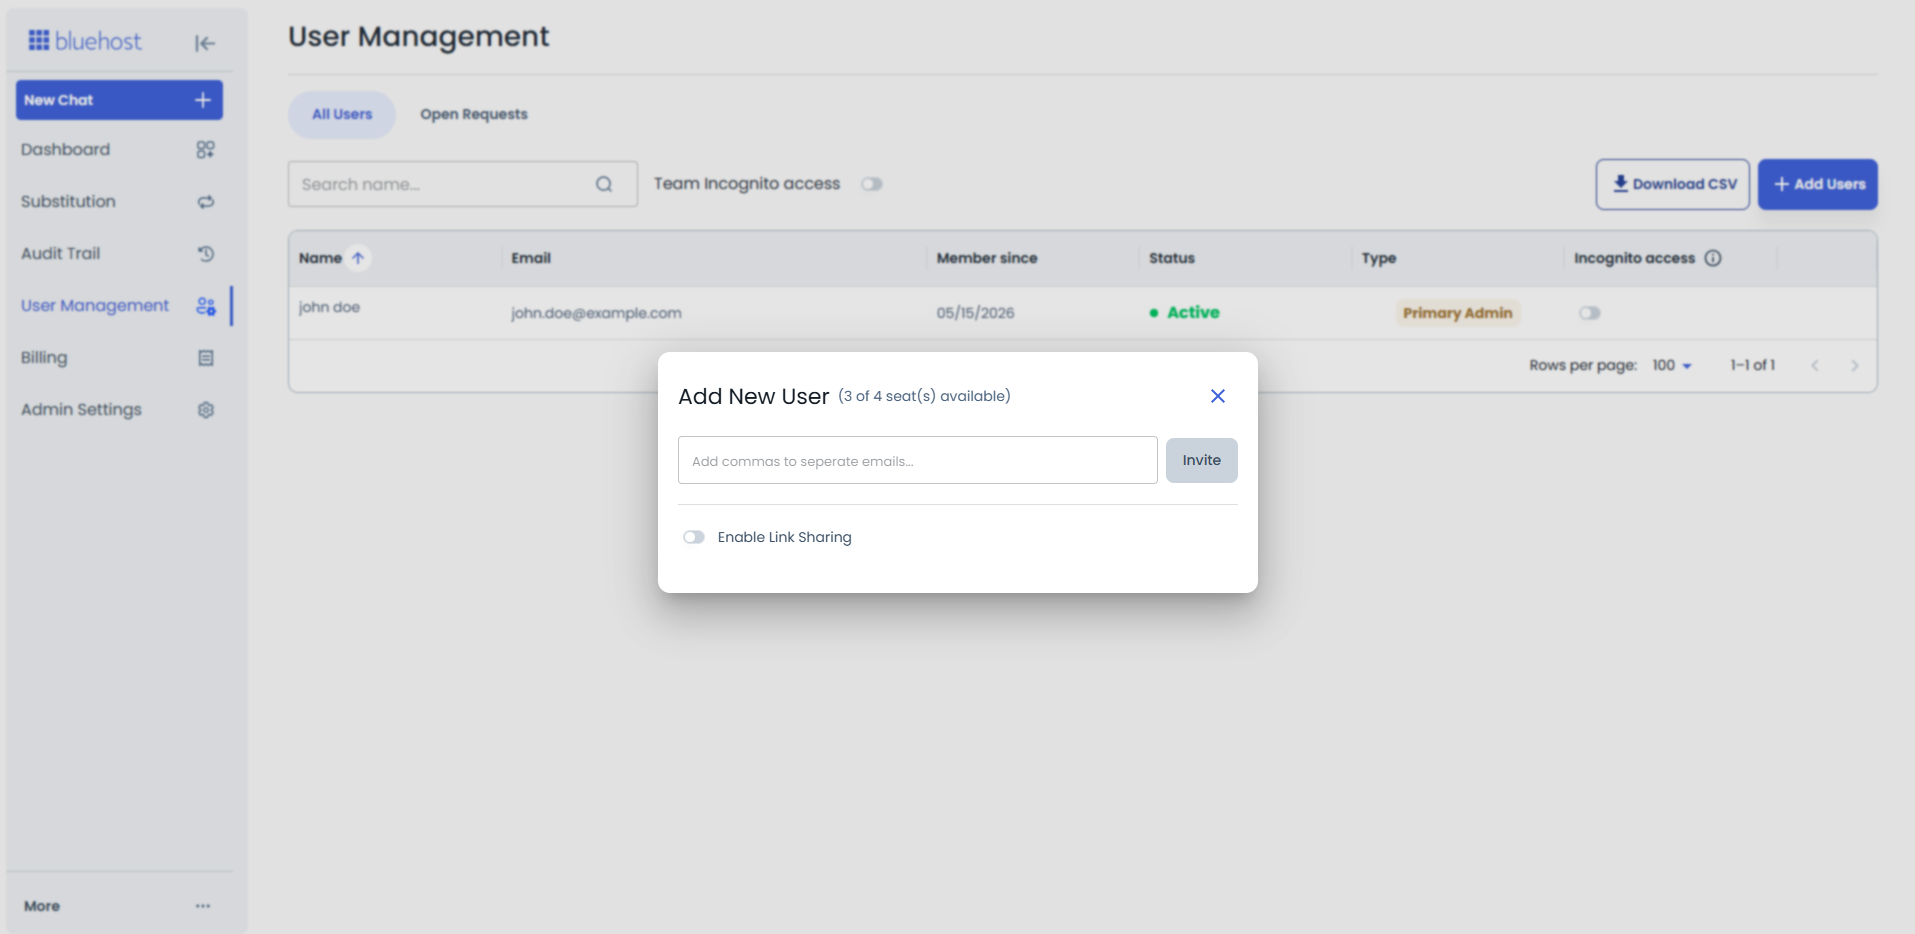
To add new users:
- Click on + Add Users.
- In the pop-up, enter their email address, and then click Invite. The new user will receive an email notification with a link they must click to accept the invitation.
Billing
The Billing section shows your current AI All-Access plan, along with the number of monthly seats and available seats.

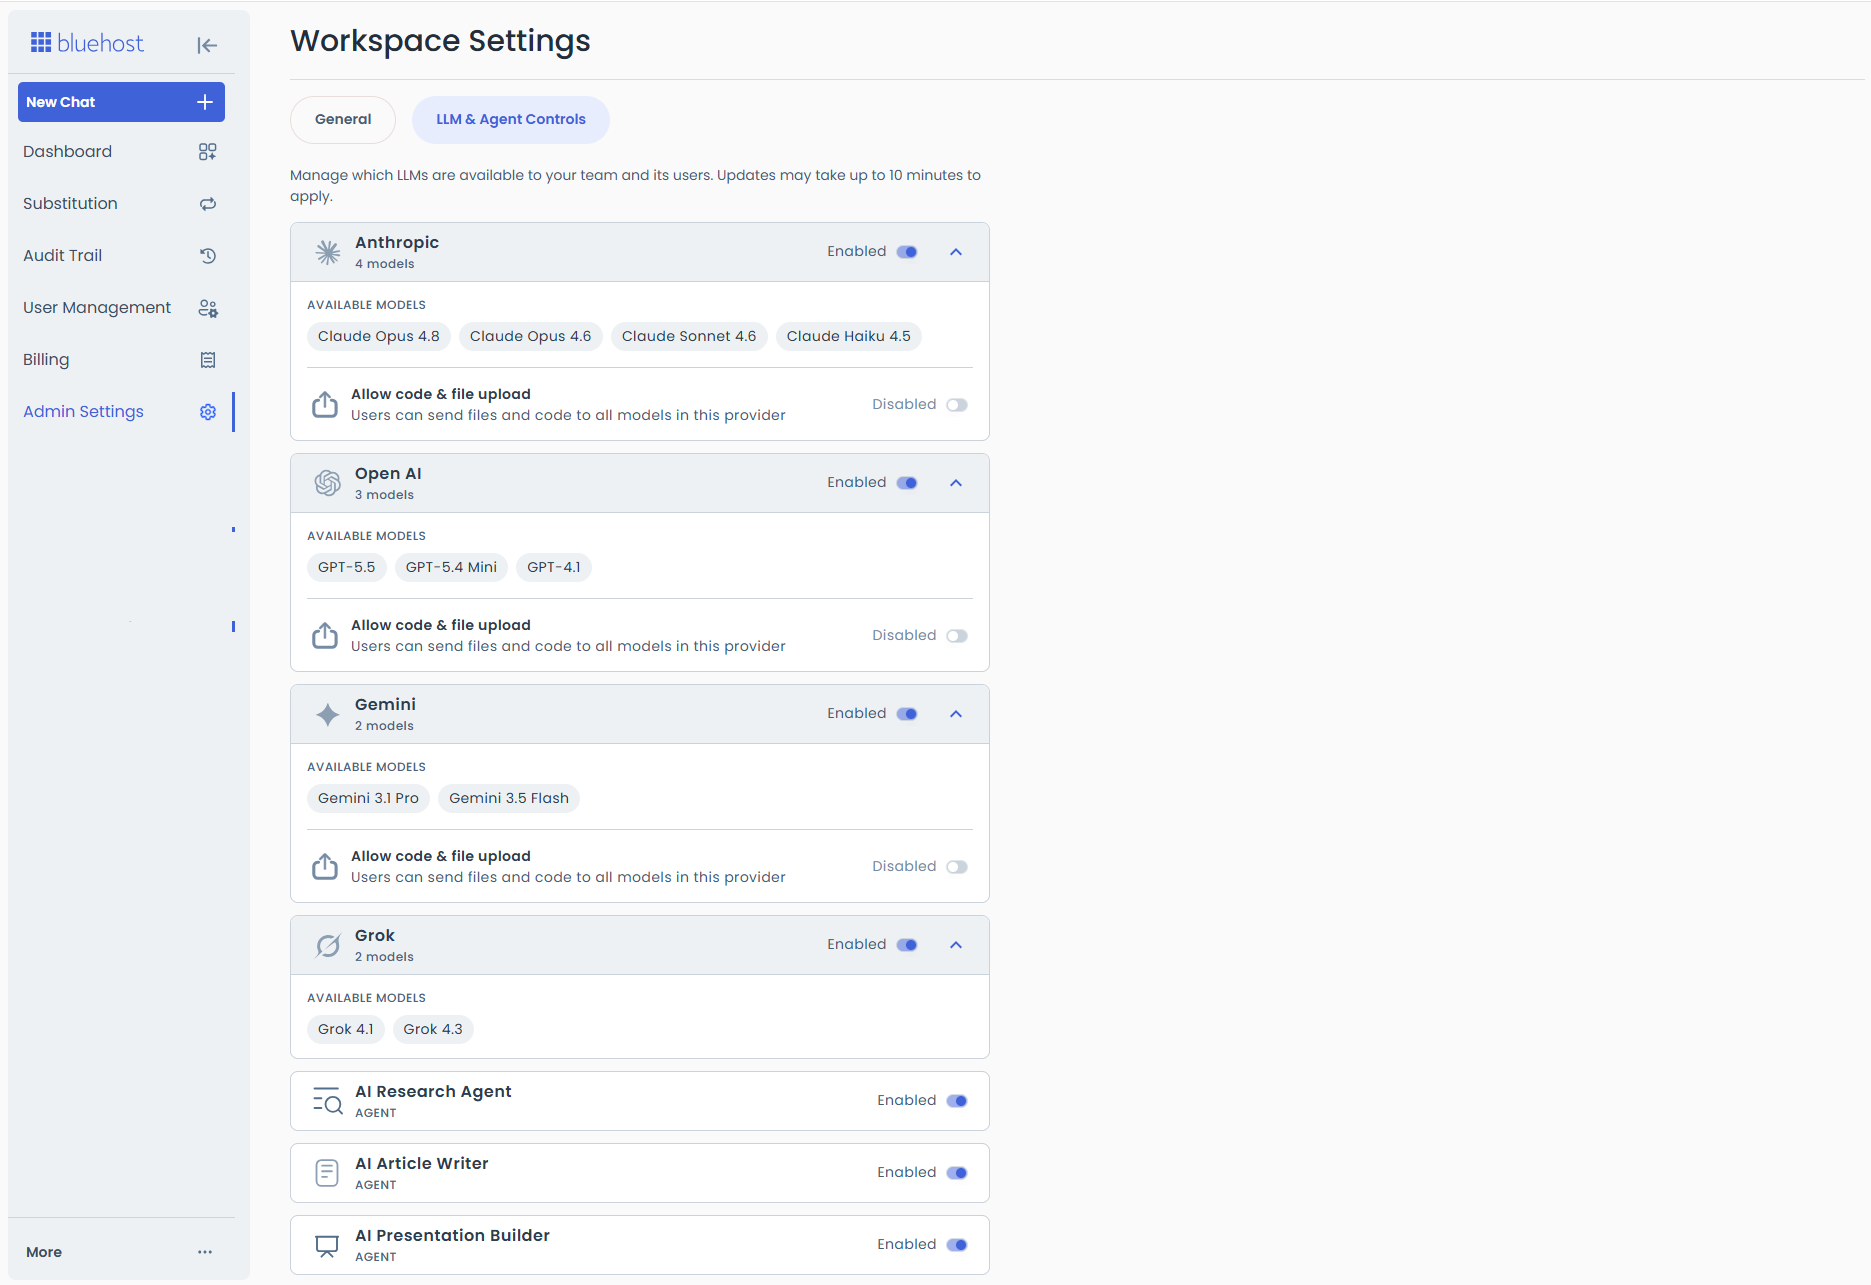
Admin Settings
Within the Admin Settings page, administrators can modify the team's name and manage conversation retention policies.

Click on the LLM & Agent Controls tab to manage which LLMs are available to your team and its users.
More Options
You can personalize your experience by clicking More.
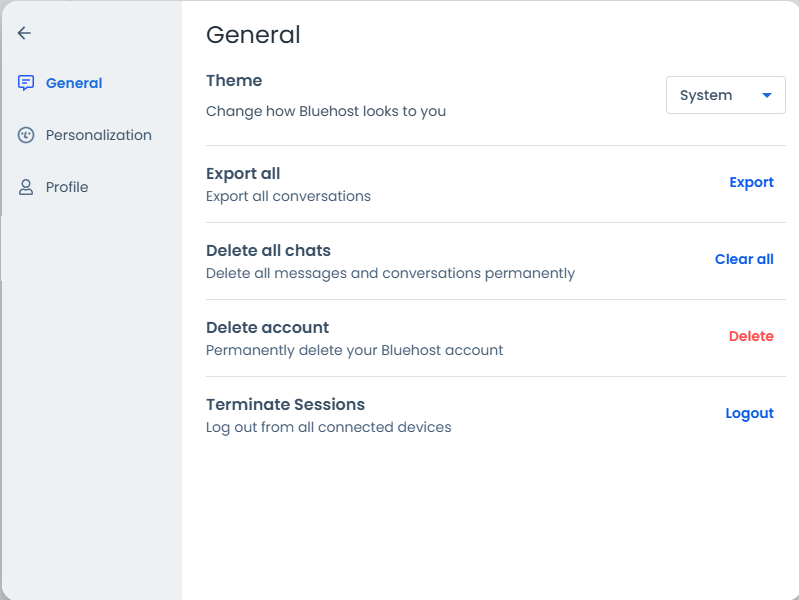
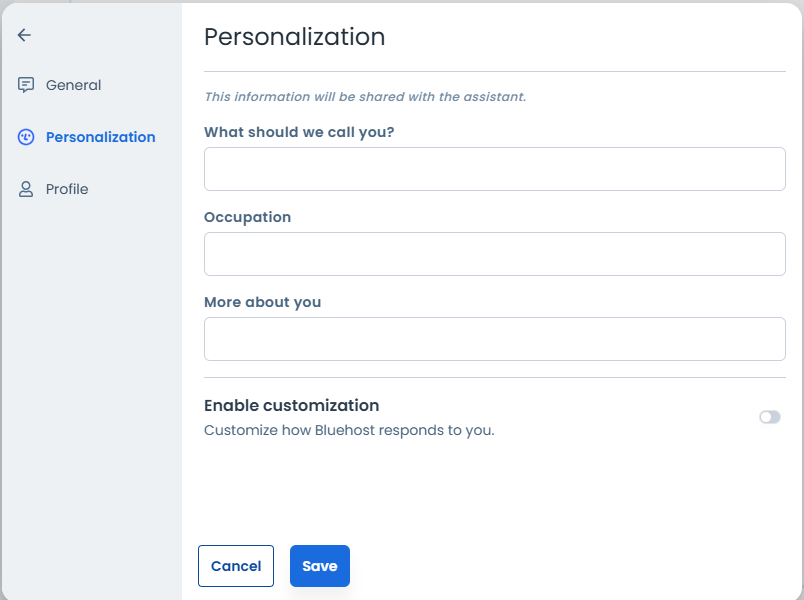
Settings
To access the Settings page, you will need to click More and select Settings.
Under Settings, you can tweak the following:
- General - Allows you to customize the theme, export conversations, remove chats or accounts, and end sessions on all connected devices.
- Personalization - You can add more information about yourself and customize how the AI responds, including adjusting its personality or setting up custom instructions.
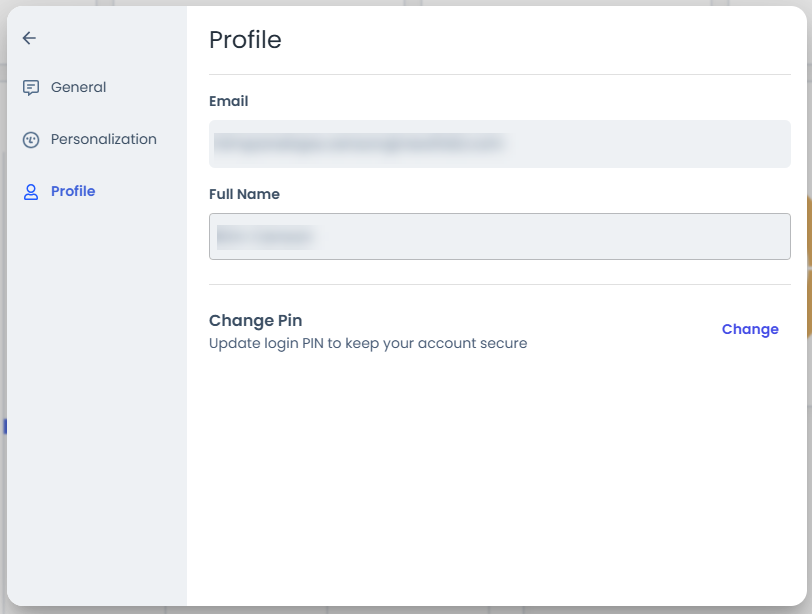
- Profile - Allows you to add your full name and change your account's PIN.
Help & Support
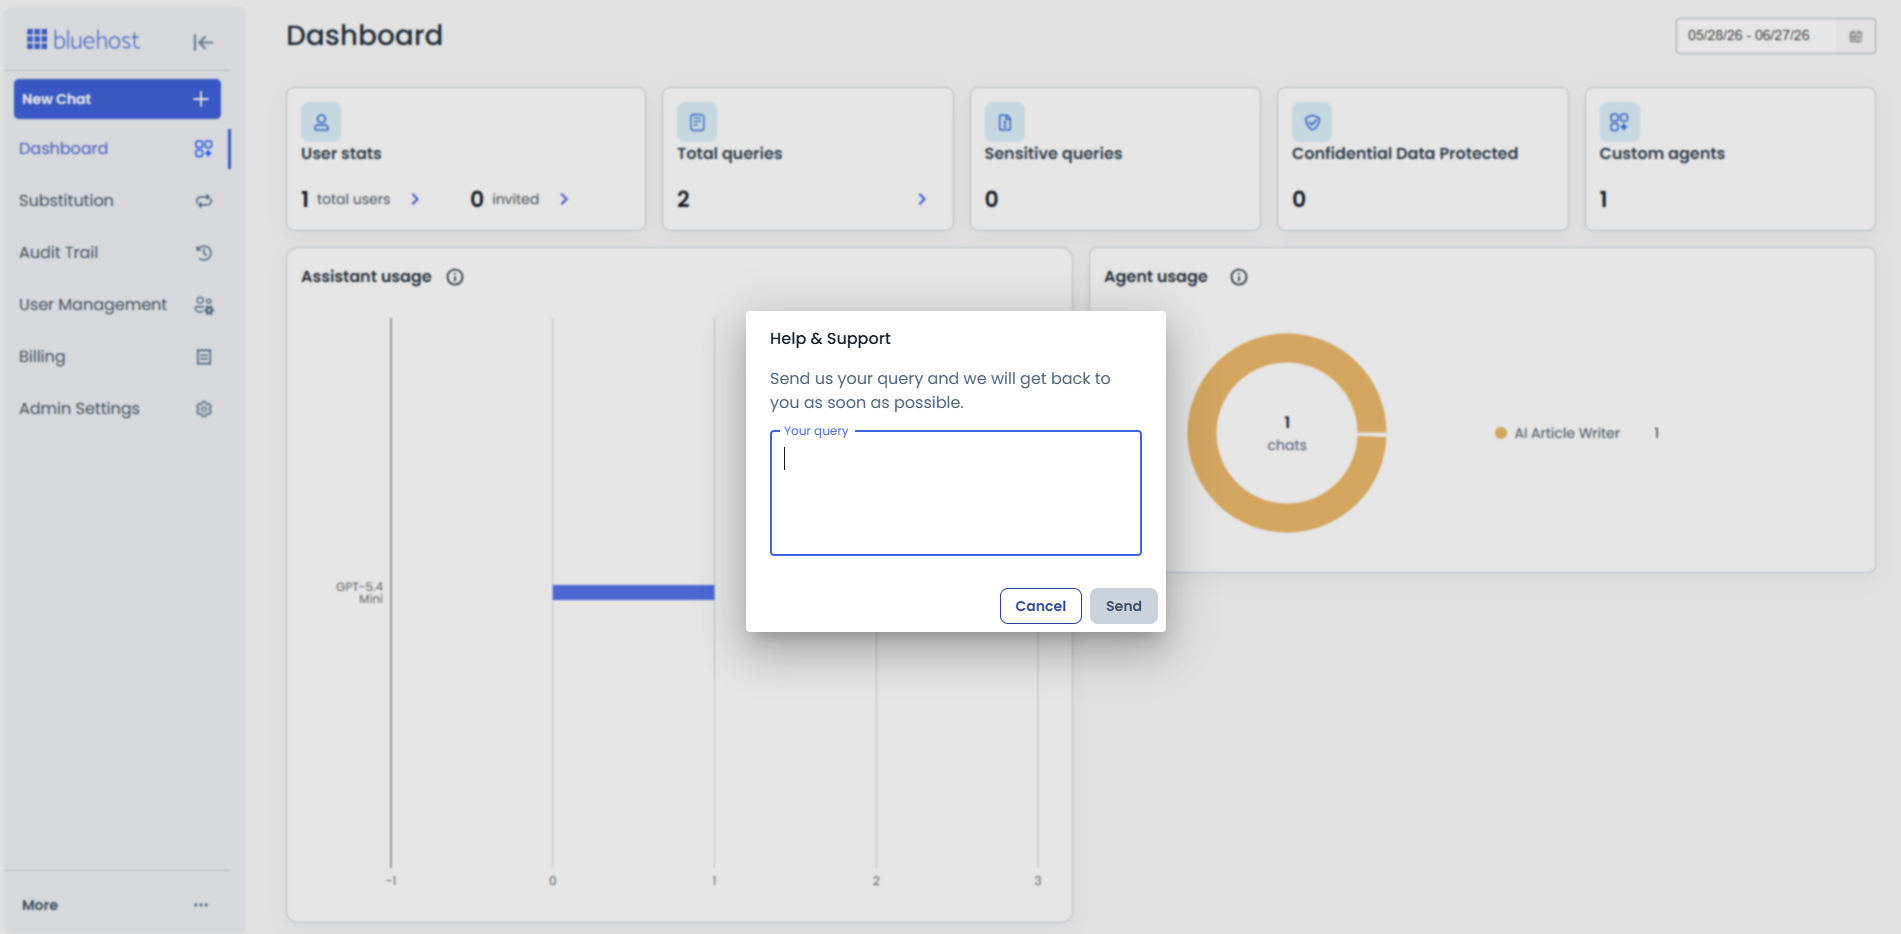
Need assistance? Click on More, then select Help & Support.
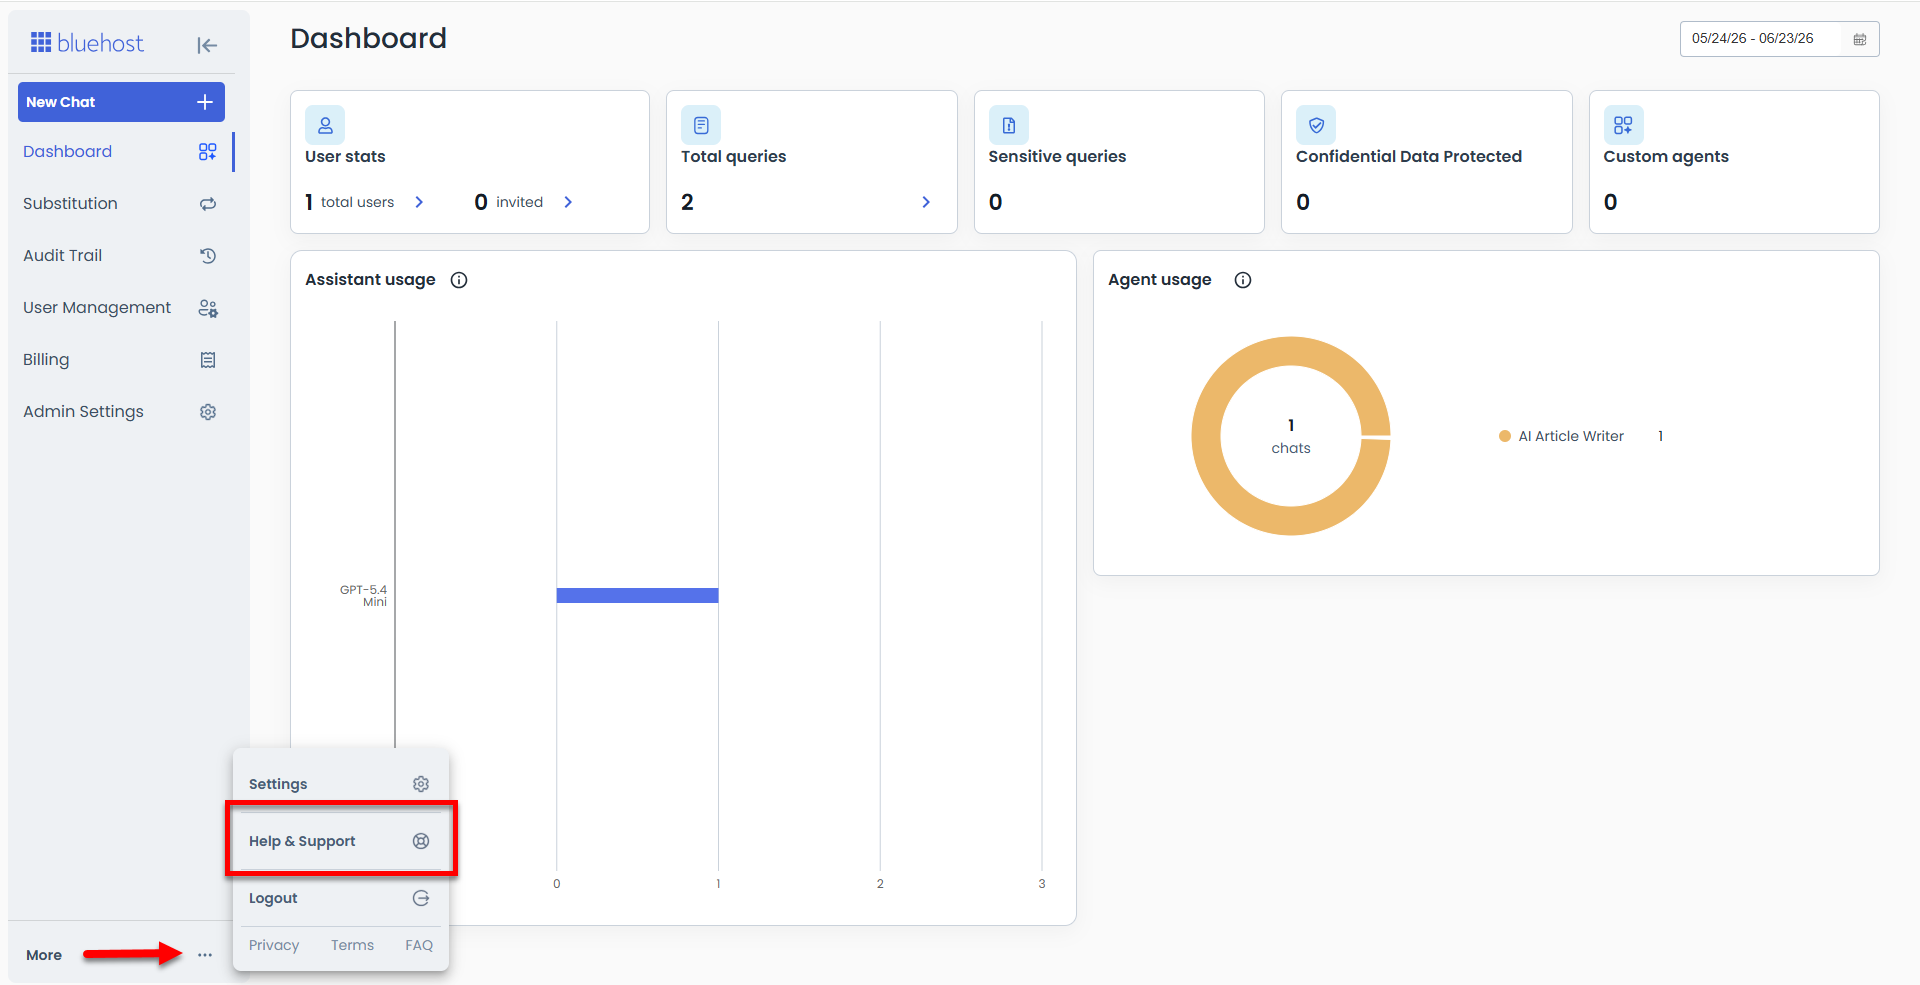
Send us your query and the team will get back to you as soon as possible.
AI All-Access Pack Privacy+ Plan
With a Privacy + plan, you can sanitize searches containing sensitive data. You’ll have access to different features such as Encrypted AI services, Privacy Mode, privately hosted LLM access, end-to-end encryption, and many more. You can visit Bluehost AI All-Access Pack: Plans, Features & Benefits to see the complete details.
What is AI Sanitization?
As AI tools become part of everyday work (writing content, researching topics, or analyzing data), users often worry about one important question:
- Is my data safe when I use AI?
This is where AI sanitization plays a critical role.
AI sanitization is the process of automatically detecting, masking, or removing sensitive information from data before it is processed by an AI system.
In simple terms, it helps ensure that private or sensitive details are not exposed, stored, or reused by AI tools.
Examples of sensitive data that may be sanitized include:
- Personal Identifiable Information (PII)
- Names
- Email addresses
- Phone numbers
- Financial data
- Credit card numbers
- Bank details
- Confidential or regulated information
- Medical records
- Insurance claim numbers
- Internal business data
- Personal Identifiable Information (PII)
In the Privacy + plan, AI sanitization allows users to safely run searches and prompts that contain sensitive data without risking data leakage.
How to Enable Sanitization with the Privacy + Plan
- Once you enter your query with private information, just click the toggle button to sanitize the content.
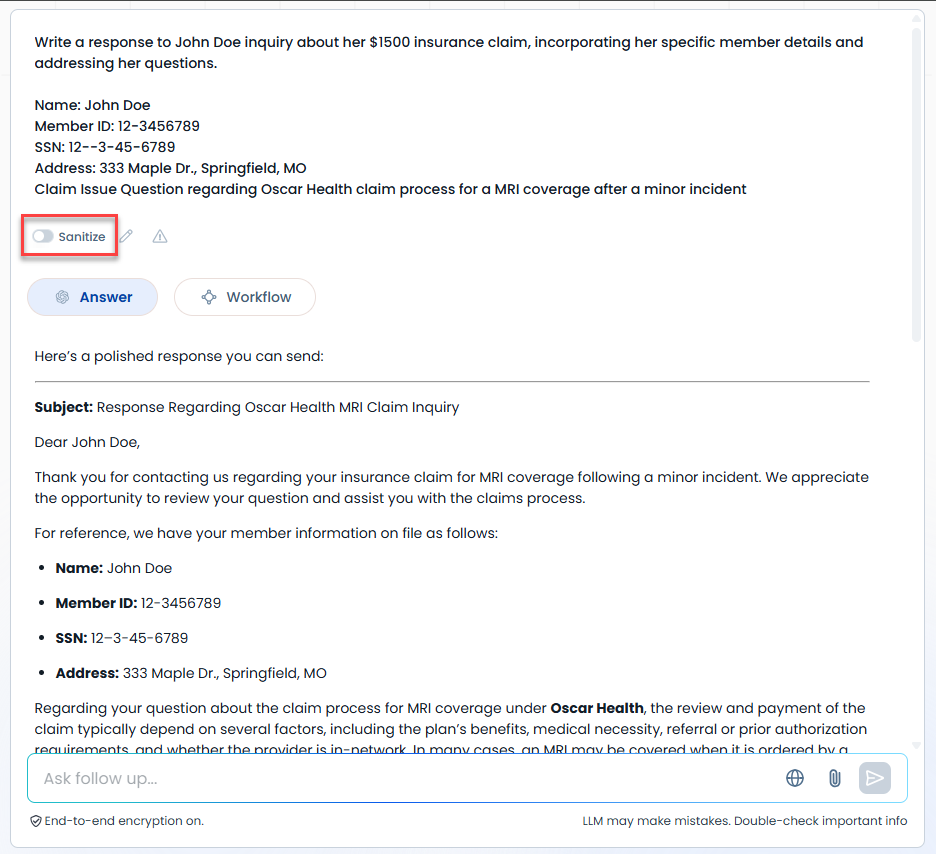
- The AI will then show you the sanitized content.

Summary
This guide walks you through navigating the Bluehost AI All-Access Pack dashboard and exploring its key features. It covers how to start chats using different AI models, create and manage AI agents, and understand the Admin Console dashboard and settings. By following this article, users and administrators can confidently manage AI tools, users, billing, and customization options to get the most out of Bluehost AI All–Access Pack.
If you need further assistance, Bluehost Chat Support is available 24 hours a day, 7days a week while Bluehost Phone Support is available 7 days a week from 7 am-12 midnight EST.
- Chat Support - While on our website, you should see a CHAT bubble in the bottom right-hand corner of the page. Click anywhere on the bubble to begin a chat session.
- Phone Support -
- US: 888-401-4678
- International: +1 801-765-9400
You may also refer to our Knowledge Base articles to help answer common questions and guide you through various setup, configuration, and troubleshooting steps.