 ChatGPT,
  Claude,
  Gemini,
  Grok — all four for
 Purchase a Self-Managed VPS with WooCommerce (WordPress) Installation
WooCommerce (WordPress) is a powerful, open-source eCommerce solution built on WordPress. By deploying WooCommerce on a self-managed VPS, you gain full control over your online store’s performance, security, and scalability. This guide will walk you through the process of purchasing a Self-Managed VPS from Bluehost and installing WooCommerce (WordPress).
Why Use WooCommerce (WordPress) on a Self-Managed VPS?
When WooCommerce (WordPress) is running on your own self-managed VPS, it will give you complete control over the resources of your online store, security, and customization. Unlike shared hosting or managed platforms, a self-managed VPS allows you to optimize server settings for WooCommerce, handle higher traffic, and install any plugins or themes you need. This setup is ideal for businesses that want flexibility, scalability, and the ability to manage their own environment.
Uses of WooCommerce (WordPress)
WooCommerce is widely used for building and managing online stores of all sizes. With WooCommerce, you can:
- Sell Physical and Digital Products: List, manage, and sell any type of product.
- Customize Your Store: Use thousands of themes and plugins to add payments, shipping, and marketing tools.
- Manage Orders and Inventory: Track sales, inventory, and customer data from a single dashboard.
- Integrate with WordPress: Seamlessly combine content and commerce on one platform.
- Scale as You Grow: Add more resources or features as your business expands.
How to Purchase a Self-Managed VPS with WooCommerce (WordPress) Installation
To deploy WooCommerce (WordPress) efficiently, start by purchasing a Self-Managed VPS Hosting from Bluehost. Follow these steps:

New to VPS or not sure where to start? No worries! At the top of the Self-Managed VPS purchase page, you’ll see the Pre-configured Setup section. This handy feature is perfect if you’re feeling a bit unsure—just pick the type of project you want, like WordPress Site, AI Agent/Claude Code, Dev/Staging, or eCommerce Store. We’ll take care of the rest by automatically filling in the best plan, operating system, and template for you.
- Super simple for beginners or anyone who just wants a quick setup
- Instantly get the recommended settings for your project
- Skip the guesswork and save time
- You can still customize things later if you want
- In your browser, go to https://www.bluehost.com/vps-hosting.
- Click the Choose Plan button under your preferred VPS hosting plan.
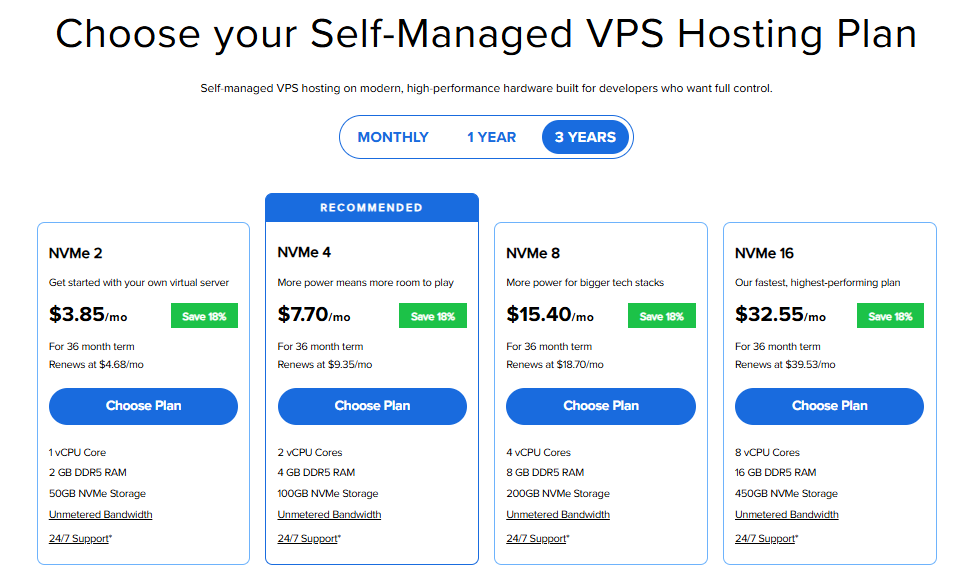
Important: Pricing is subject to change—please visit https://www.bluehost.com/vps-hosting for the current introductory/sign-up offer for Bluehost VPS Hosting. For the most up-to-date renewal pricing, visit your Bluehost Portal Renewal Center.
- Select your preferred Data Center location.

- On the Cart page, you can configure your server to fit your needs in the following section:
- Hardware:
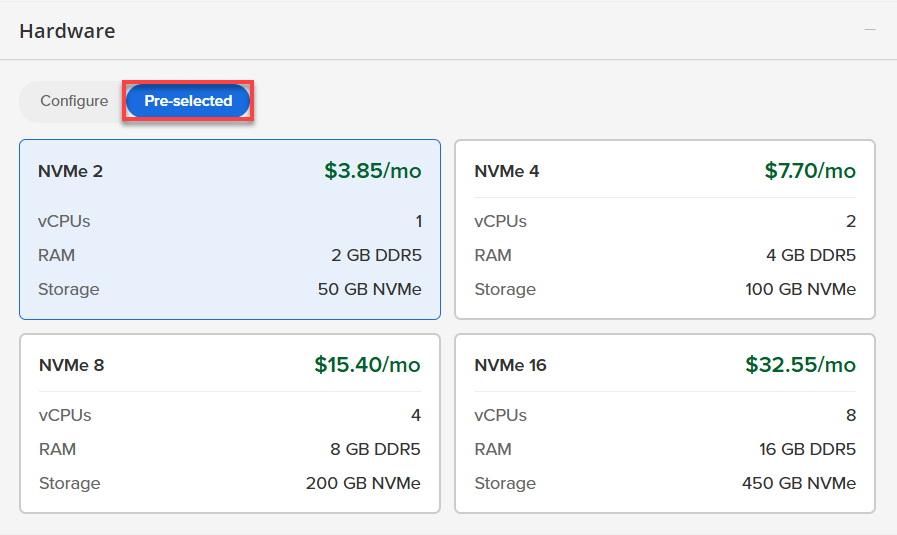
- Pre-selected:
You can select a different Self-Managed VPS plan in this section.
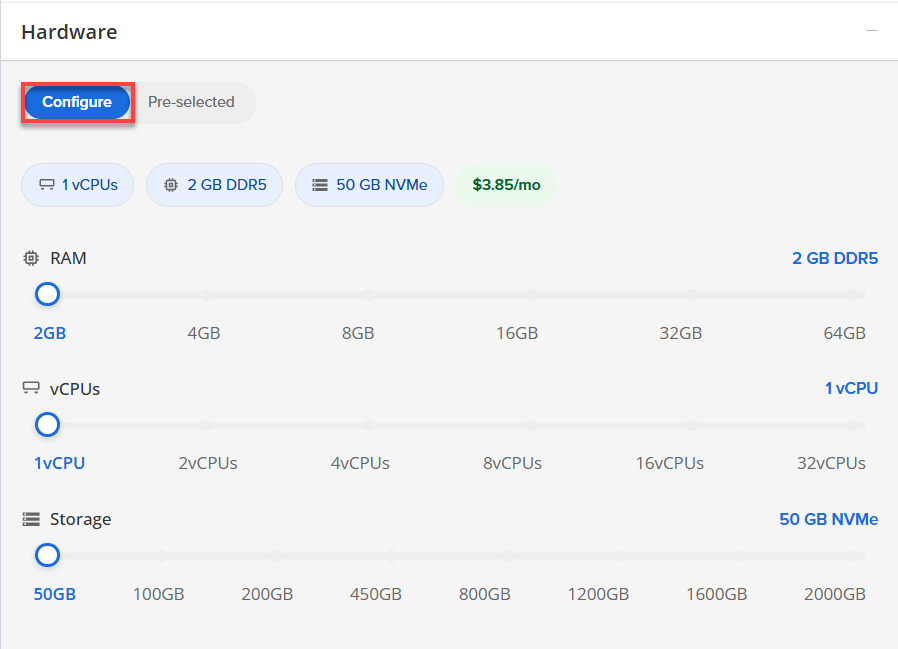
- Configure:
Click Configure to customize your package.
Note that your changes help customize your plan, and the overall cost will adjust accordingly to fit your needs.
- Pre-selected:
- Software:
If the selected plan does not meet the app's minimum requirements, the app will be grayed out.
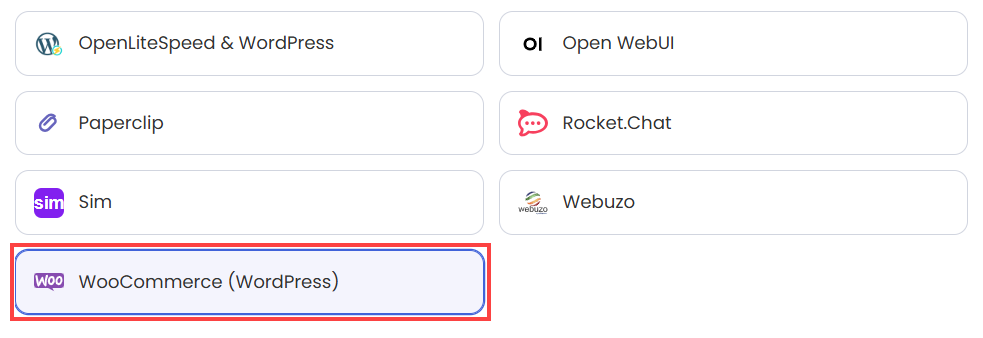
- Click on the Application Tab.
- Choose WooCommerce (WordPress).
- Click Confirm to continue.
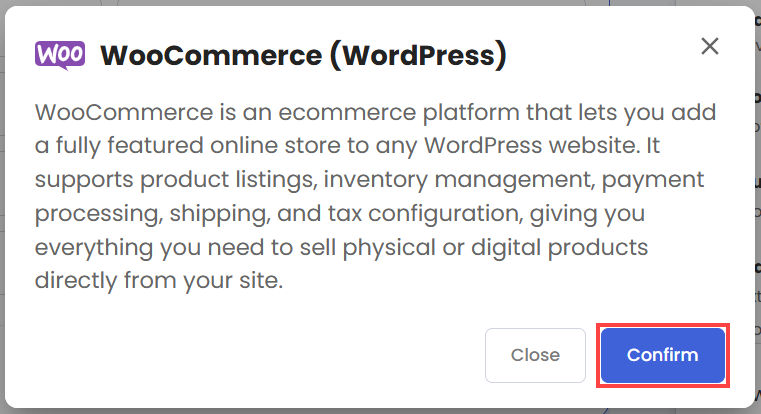
- Hardware:
- Add-Ons:
- Premium Support:
This service provides you with priority access to our expert team for faster responses and personalized assistance whenever you need it.

- Premium Support:
- In the Advanced options:
- Extra IP's: You can add extra IP addresses for an additional fee.
Pricing changes based on how many IPs you add. - Hostname: Assign a custom hostname to easily identify your server. This is optional.
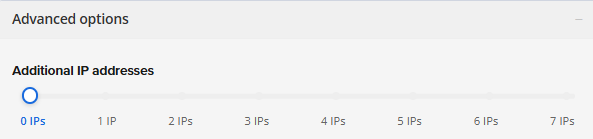
- Extra IP's: You can add extra IP addresses for an additional fee.
- Select your preferred billing term and view your Order Summary. Click the Continue to Checkout button to proceed.
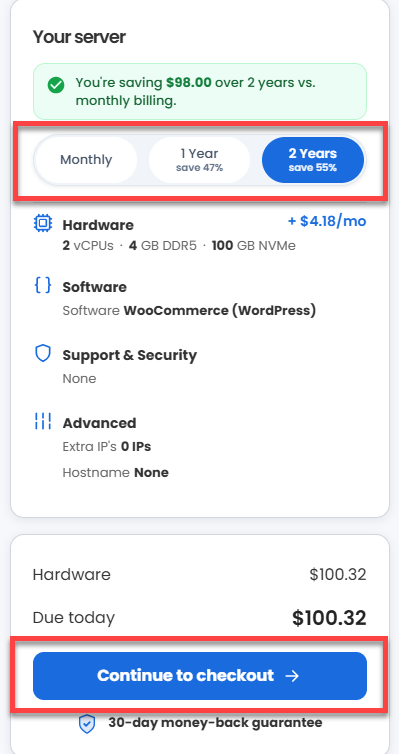
- Do the following on the Checkout page:
If you're new with Bluehost:
- Create your Bluehost account by using your email address or by connecting with your Google, Apple, or GitHub account — whichever you prefer!

- Select your preferred payment method: credit card, Google Pay, or PayPal. Enter your billing information.

If you have an account with us, you will see your Bluehost login details when you are logged into your Bluehost Portal. If you are not logged in, please click the Log In link.

- Create your Bluehost account by using your email address or by connecting with your Google, Apple, or GitHub account — whichever you prefer!
- In the Shopping Cart section, you can still adjust your billing term if needed.
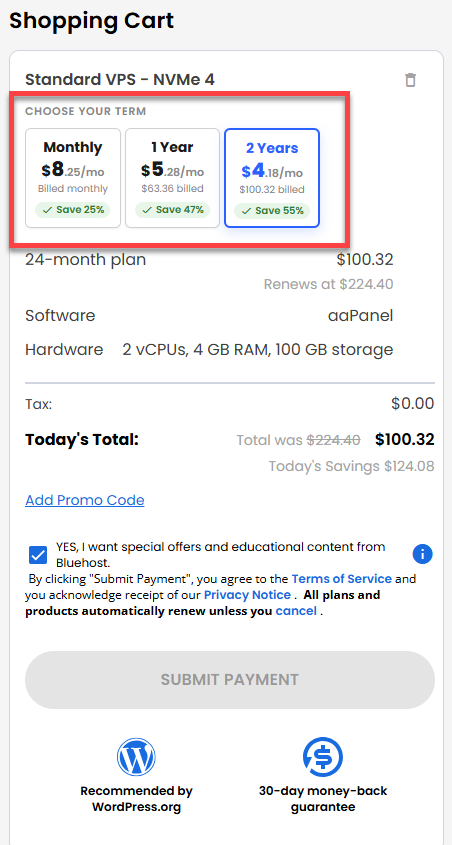
- Review the items in your cart, add a Promo Code if you have one, and then click Submit Payment to complete the purchase.
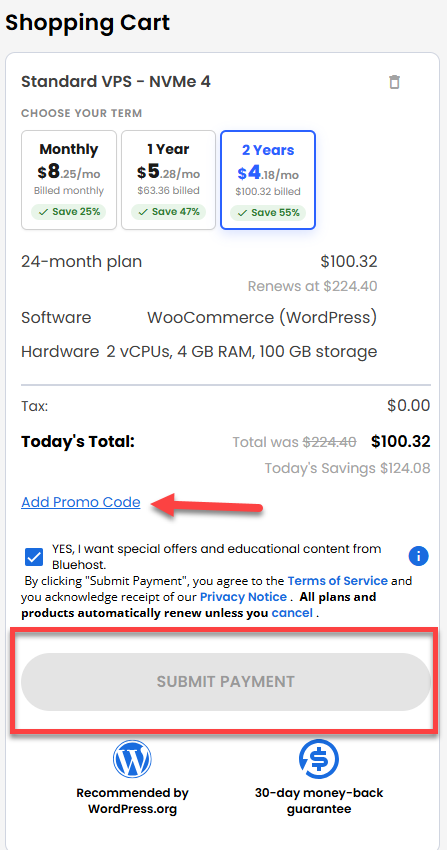
After completing the purchase, your VPS hosting will begin provisioning. You can access and manage your new VPS hosting in the Hosting tab of your Bluehost Portal.
How to Access your WooCommerce (WordPress) Dashboard
Welcome to your new WooCommerce virtual machine! This guide walks you through setting up, accessing, and managing your online store.
We design this image with security in mind, meaning we never bake a fixed password into the system. Instead, your server automatically generates unique, secure credentials on its very first boot.
Follow these simple steps to launch your store.
Step 1: Set Up and Secure Your VPS
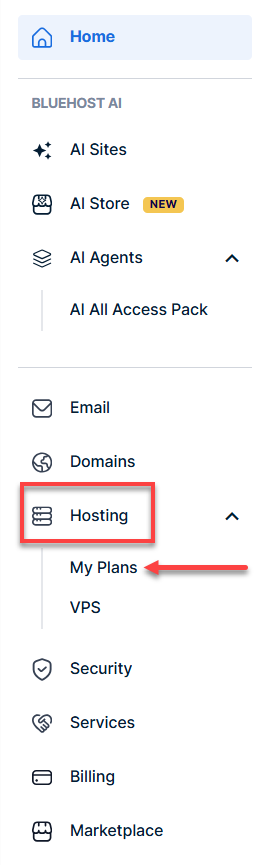
- Log in to your Bluehost Portal.
- In the left-hand menu, click Hosting, then select My Plans.
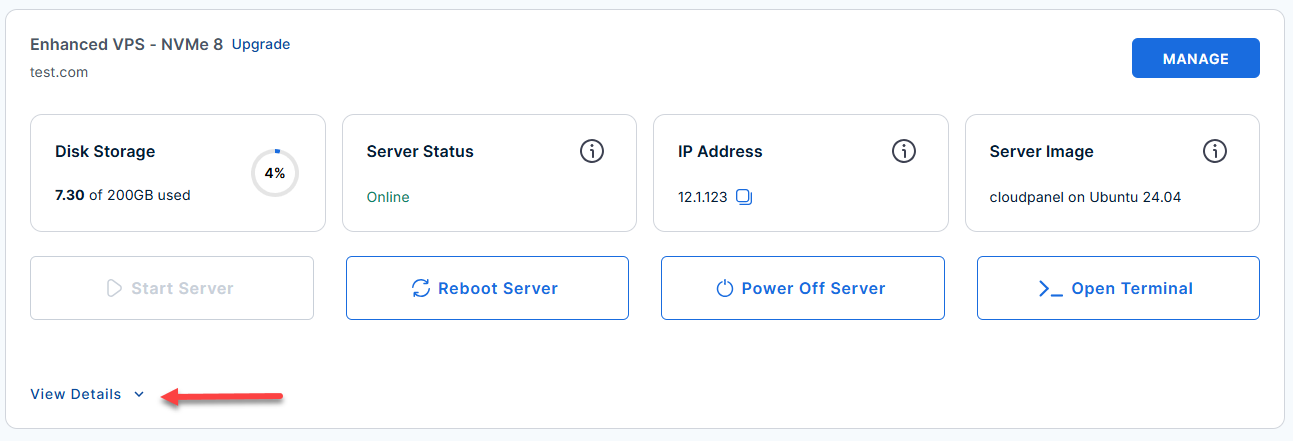
- Locate the server you want to manage, then click View Details in the bottom-left corner to expand the section and access additional server information.
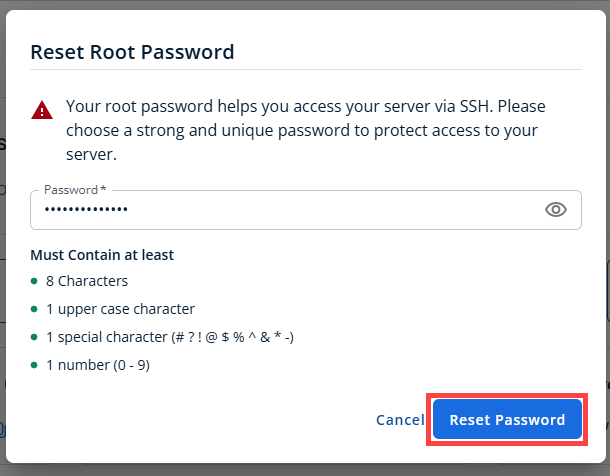
- Click the Reset Password.
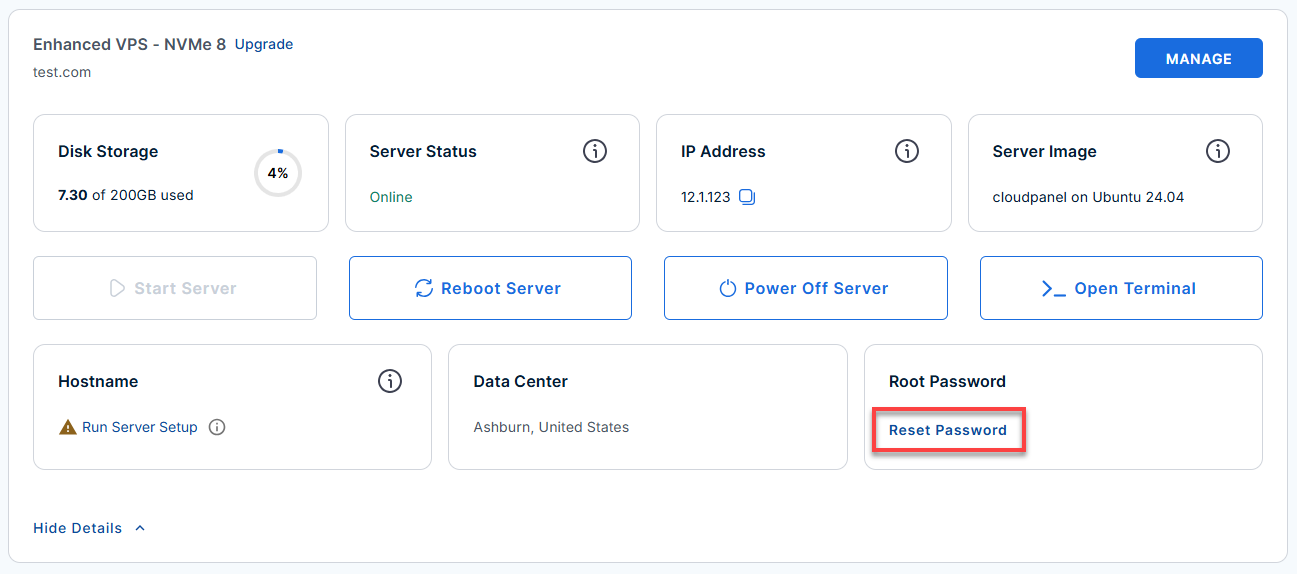
- In the pop-up window, type your new root password, then click Reset Password again to confirm and save the changes.
- Connect to your VPS via SSH.
Open your computer's terminal (or an SSH client like PuTTY) and run the following command to log into your server as the administrator, using your server's public IP address:Replaceyour_server_ipwith your actual server IP address.
Follow the prompts and enter the new root password you created in the step above.ssh root@your_server_ip - If you ever need to quickly review the system's deployment notes directly inside your server terminal, you can print out the original README file by running:
cat /root/README.md
Step 2: Get Your Automatically Generated Password
In this next step, you will retrieve the secure, system-generated password created for your account.
If the password inside
.env still says CHANGEME_ON_BOOT, the script is either still running or failed to execute. Force it to run manually with:
- Look at the MOTD (Message of the Day) text that pops up immediately upon login to your SSH. It will show you exactly where your credentials are.
- Run the following command in your terminal to view your admin credentials:
sudo cat /var/www/html/.env
Example Output:
Last login: Thu Jun 25 14:14:16 2026 from 180.190.7.63
root@server-123456:~# sudo cat /var/www/html/.env
# WooCommerce / WordPress runtime credentials
# Read this file to get your admin password:
#   cat /var/www/html/.env
WP_ADMIN_USER=admin
WP_ADMIN_PASSWORD=rcUFObLZ0qk7R04JuBzhQM
[email protected]
WP_SITEURL=https://12.1.230.123.166
WP_DB_PASSWORD=QUWtfsin7sbgLGe2m0sPJpu
Step 3: Log into your WordPress / WooCommerce Dashboard
Now that you have your credentials, you can open your browser and navigate to your site.
- WordPress Admin Panel:
https://server-ip/wp-adminor (/wp-login.php)Replaceyour_server_ipwith your actual server IP address.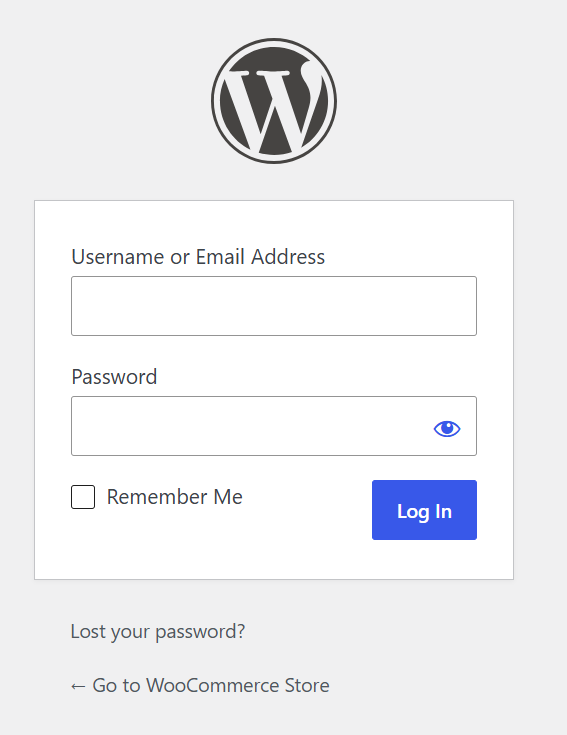
- Your Storefront:
https://server-ip/shopReplaceyour_server_ipwith your actual server IP address.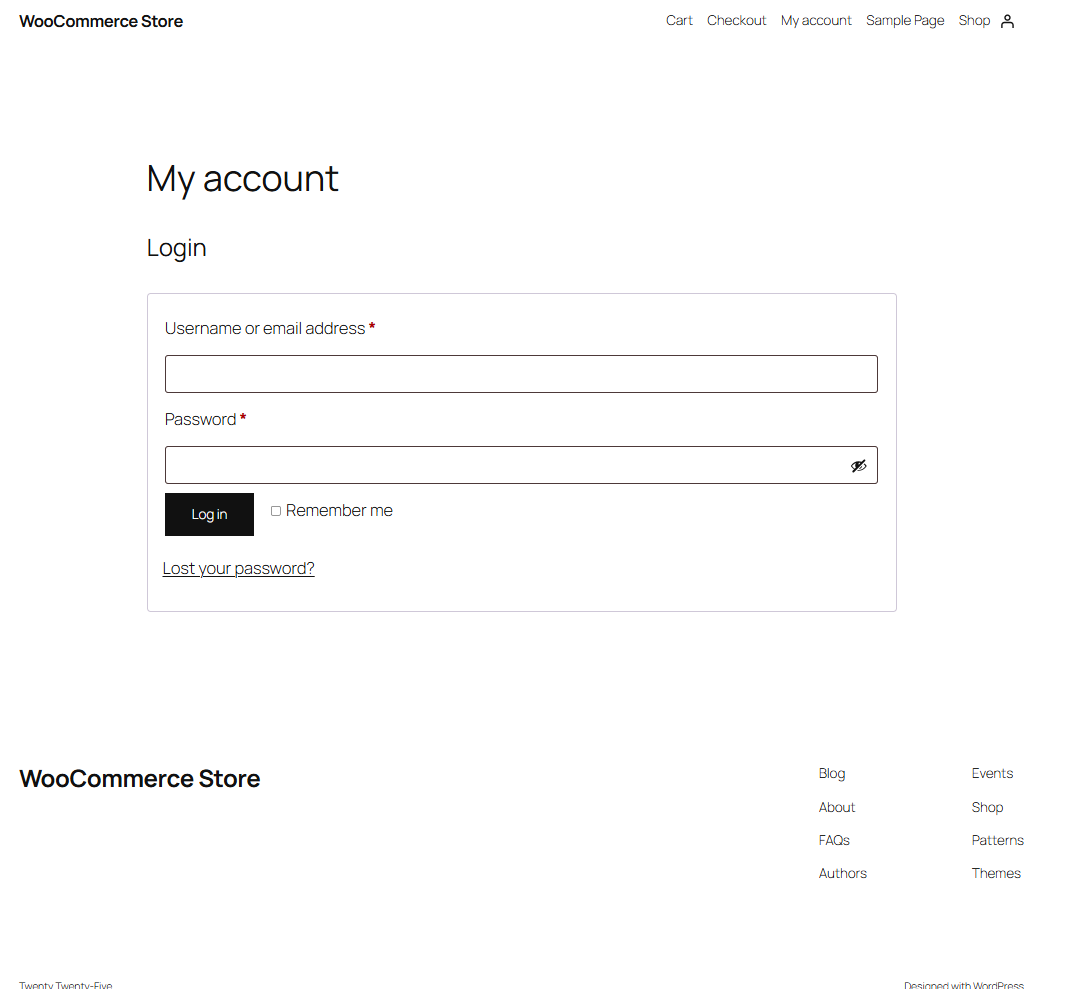
- Main Homepage:
https://server-ip/Replaceyour_server_ipwith your actual server IP address.
Essential Management Commands
You can manage your entire server stack directly from the command line. Here are the most useful shortcuts for maintaining your store:
- Managing System Services
Control your web server, database, and background PHP processors smoothly:
- Check Web Server Status:
systemctl status nginx
- Safely Reload Web Config (No Downtime):
nginx -t && systemctl reload nginx
- Restart PHP Processors:
systemctl restart php8.3-fpm
- Access Database Shell:
mysql -u root
- Check Web Server Status:
- Managing WordPress via Command Line (WP-CLI)
You don't always need the web browser to update your site. Use the built-in global wp command to manage your store rapidly:
- List Installed Plugins:
wp plugin list --path=/var/www/html/wordpress --allow-root
- Update All Plugins at Once:
wp plugin update --all --path=/var/www/html/wordpress --allow-root
- Force Process Scheduled Actions (Cron):
wp cron event run --due-now --path=/var/www/html/wordpress --allow-root
- List Installed Plugins:
- Monitoring Live Logs
Track visitors or diagnose system behaviors in real-time:
- Watch Web Traffic & Errors:
tail -f /var/log/nginx/access.log /var/log/nginx/error.log
- View WooCommerce Logs:
tail -100 /var/log/woocommerce/woocommerce.log
- Watch Web Traffic & Errors:
Additional Information and Example Documentation Output
You can run cat /root/README.md to see more information and useful commands:
root@server-123456:~# cat /root/README.md
# WooCommerce (WordPress)

## Description

WooCommerce is an ecommerce platform that lets you add a fully featured online store to any WordPress website.
It supports product listings, inventory management, payment processing, shipping, and tax configuration,
giving you everything you need to sell physical or digital products directly from your site.

---

## Image contents

This template installs and configures:

- WordPress (latest) from the official WordPress.org download
- WooCommerce plugin (latest stable) pre-downloaded and activated on first boot
- MariaDB 10.11 as the local database backend
- Nginx as the web server - handles TLS termination and serves static files
- PHP 8.3-FPM with all extensions required by WooCommerce (curl, gd, intl, mbstring, mysqli, soap, xml, zip, bcmath, imagick)
- WP-CLI 2.12.0 installed globally at `/usr/local/bin/wp`
- certbot installed at `/opt/certbot/` for automatic TLS certificate provisioning
- UFW firewall rules for SSH (22), HTTP (80), and HTTPS (443)
- `wp-config.php` hardened above webroot at `/var/www/html/wp-config.php` (mode 0600)
- Operator credentials store at `/var/www/html/.env` (mode 0600)
- First-boot initialization script at `/var/lib/cloud/scripts/per-instance/001_onboot`
- Logrotate config at `/etc/logrotate.d/woocommerce`

---

## Services

| Service | Ports | Purpose |
|---------|-------|---------|
| Nginx | 80, 443 | TLS termination, static files, front controller |
| PHP-FPM 8.3 | unix socket | PHP execution for WordPress / WooCommerce |
| MariaDB | local | Database backend for WordPress |
| OpenSSH | 22 | Remote access |

Ports are protected using UFW.

---

## WordPress / WooCommerce configuration

The default WordPress configuration file is `/var/www/html/wp-config.php`.

Key settings include:

- `DB_NAME = wordpress` - WordPress database
- `DB_USER = wpuser` - dedicated database user
- `DB_PASSWORD` - placeholder, replaced at first boot from `.env`
- `DB_HOST = localhost` - local MariaDB instance
- DocumentRoot - `/var/www/html/wordpress`
- WooCommerce plugin - `/var/www/html/wordpress/wp-content/plugins/woocommerce/`

The Nginx site config is at `/etc/nginx/sites-available/woocommerce`.

---

## First boot behavior

On the first boot, the cloud-init per-instance script `/var/lib/cloud/scripts/per-instance/001_onboot`:

- Detects the real public IP (via cloud metadata service, falling back to `hostname -I`)
- Requests a TLS certificate from Let's Encrypt for the **public IP address** using certbot; falls back to a self-signed certificate if certbot fails
- Writes the HTTPS nginx config (HTTP redirects to HTTPS; HTTPS terminates TLS and serves WordPress via PHP-FPM)
- Updates WordPress `siteurl` and `home` options in the database to `https://public-ip`
- Reads and applies `WP_ADMIN_PASSWORD`, `WP_ADMIN_USER`, and `WP_ADMIN_EMAIL` from `.env`
- Ensures WooCommerce is active and flushes rewrite rules with the real URL
- Restarts PHP-FPM and nginx

This guarantees that no fixed admin password is ever baked into the image.

---

## First-time access (How to use)

### How admin credentials work

This image **never bakes a fixed password** into the image. Instead:

1. During the image build, WordPress is installed with a throw-away placeholder password that is never written anywhere accessible.
2. The `.env` file is written with `WP_ADMIN_PASSWORD=CHANGEME_ON_BOOT` as a sentinel value.
3. On **first boot**, `001_onboot` detects the sentinel, generates a secure 24-character random password using `openssl rand`, updates the WordPress admin account in the database, and saves the real password back to `.env`.
4. The generated password is printed to the first-boot log. The MOTD (shown on every SSH login) tells you where to retrieve it.

**You do not need to set a password manually.** It is generated automatically.

-

### 1. Get your credentials after first boot

**On every SSH login the MOTD shows where credentials are stored:**
```
  - Admin Credentials ---------------------------
  Username  : admin
  Password  : sudo cat /var/www/html/.env
```

**Read the credentials file directly:**
```bash
sudo cat /var/www/html/.env
```

**Or check the first-boot log:**
```bash
sudo grep -A 6 "First Boot Credentials" /var/log/cloud-init-output.log
```

-

### 2. If the password in `.env` is still CHANGEME_ON_BOOT

The first-boot script did not run yet (can happen if cloud-init did not execute). Run it manually:

```bash
# Fix Windows line endings if needed (run once)
sudo sed -i 's/\r//' /var/lib/cloud/scripts/per-instance/001_onboot

# Run the first-boot script
sudo bash /var/lib/cloud/scripts/per-instance/001_onboot
```

Then check the password:
```bash
sudo grep 'WP_ADMIN_PASSWORD' /var/www/html/.env
```

-

### 3. Override with a custom password (optional)

If you want a specific password instead of the generated one, edit `.env` **before** first boot:

```bash
sudo nano /var/www/html/.env
```

Set your values:
```env
WP_ADMIN_USER=admin
WP_ADMIN_PASSWORD=YourChosenPassword123
[email protected]
WP_SITEURL=http://your-domain-or-ip
WP_DB_PASSWORD=changeme_on_first_boot
```

Save with `Ctrl+X`, `Y`, `Enter` - then run `001_onboot` and it will use your password instead of generating one.

-

### 4. Access your store

After the VM boots, access WooCommerce at:

| URL | Purpose |
|-----|---------|
| `https://server-ip/wp-admin` | WordPress / WooCommerce admin panel |
| `https://server-ip/wp-login.php` | WordPress login page |
| `https://server-ip/shop` | WooCommerce storefront |
| `https://server-ip/` | WordPress front page |

> **Note:** On first login you may be redirected to `wp-login.php`. Use an incognito/private browser window if you experience redirect issues during local testing.

---

## Manage

### Web Interface

| URL | Purpose |
|-----|---------|
| `https://server-ip/wp-admin` | WordPress / WooCommerce admin panel |
| `https://server-ip/shop` | WooCommerce storefront |
| `https://server-ip/` | WordPress front page |

### Nginx

```bash
# Check status
systemctl status nginx

# Reload config without downtime (safe - no dropped connections)
systemctl reload nginx

# Test config before reloading
nginx -t
```

### PHP-FPM

```bash
# Check status
systemctl status php8.3-fpm

# Restart
systemctl restart php8.3-fpm
```

### MariaDB

```bash
# Check status
systemctl status mariadb

# Open MySQL shell
mysql -u root

# Show all databases
mysql -u root -e "SHOW DATABASES;"

# Show wpuser grants
mysql -u root -e "SHOW GRANTS FOR 'wpuser'@'localhost';"
```

### UFW Firewall

```bash
# Check firewall status
ufw status verbose

# View active rules
ufw status numbered
```

### WordPress via WP-CLI

```bash
# List plugins
wp plugin list --path=/var/www/html/wordpress --allow-root

# Update all plugins
wp plugin update --all --path=/var/www/html/wordpress --allow-root

# Activate WooCommerce
wp plugin activate woocommerce --path=/var/www/html/wordpress --allow-root

# Run cron manually
wp cron event run --due-now --path=/var/www/html/wordpress --allow-root

# Check WordPress version
wp core version --path=/var/www/html/wordpress --allow-root

# List active themes
wp theme list --path=/var/www/html/wordpress --allow-root

# Update site URL (useful for local testing)
wp option update siteurl 'http://localhost:8080' --path=/var/www/html/wordpress --allow-root
wp option update home 'http://localhost:8080' --path=/var/www/html/wordpress --allow-root
```

### Logs

```bash
# Nginx error log
tail -f /var/log/nginx/error.log

# Nginx access log
tail -f /var/log/nginx/access.log

# WooCommerce log
tail -100 /var/log/woocommerce/woocommerce.log

# MariaDB log
journalctl -u mariadb -f

# Cloud-init first boot log
cat /var/log/cloud-init-output.log
```

---

## Security hardening

| Hardening | Detail |
|-----------|--------|
| UFW firewall | Only ports 22, 80, 443 open. Default deny all incoming |
| SSH rate limiting | Port 22 set to LIMIT - brute force protection |
| wp-config.php location | Moved above webroot - not accessible via browser |
| wp-config.php permissions | Mode `0600` - owner read only |
| .env permissions | Mode `0600` - owner read only |
| Credentials | Never baked into image - set at runtime via `.env` |

---

## Validation tests

The template includes a TAP test suite at `/root/app_test/main.t` that checks:

- PHP 8.3 is installed and PHP-FPM is enabled and active
- Nginx is enabled and active
- MariaDB is enabled and active
- WP-CLI is installed
- WordPress core files are present at `/var/www/html/wordpress`
- WooCommerce plugin files are present
- `wp-config.php` exists with mode `0600`
- `.env` file exists with mode `0600`
- Nginx woocommerce site is enabled in `sites-enabled`
- WordPress database exists in MariaDB
- First-boot script is in place
- UFW firewall is active

---


## Configuration files reference

| File | Purpose | Permissions |
|------|---------|-------------|
| `/var/www/html/wp-config.php` | WordPress DB and salt config | `0600` |
| `/var/www/html/.env` | Operator credentials for first-boot | `0600` |
| `/etc/nginx/sites-available/woocommerce` | Nginx site config (rewritten at first boot with HTTPS) | `0644` |
| `/etc/php/8.3/fpm/pool.d/www.conf` | PHP-FPM pool config | `0644` |
| `/var/lib/cloud/scripts/per-instance/001_onboot` | First-boot script | `0755` |
| `/var/log/woocommerce/woocommerce.log` | WooCommerce application log | `0640` |
| `/etc/logrotate.d/woocommerce` | Log rotation config | `0644` |

---

## Notes

- The WooCommerce plugin is pre-downloaded at build time and activated on first boot via WP-CLI.
- `wp-config.php` is intentionally placed above the webroot so it cannot be accessed via a browser.
- The `.env` file holds placeholder credentials - always replace before first boot.
- Nginx serves WordPress directly via PHP-FPM (no Apache). PHP-FPM runs as `www-data` on a unix socket at `/run/php/php8.3-fpm.sock`.
- The TLS certificate is issued for the server's **public IP address** (not hostname) so it works immediately without DNS configuration.
- On first boot, if Let's Encrypt cannot issue a certificate (NAT, rate limit), a self-signed cert is generated automatically. Replace it later with: `certbot certonly --ip-address IP`

---
## Links

- Manage: [Manage](http://localhost:8080/wp-admin)
- WordPress Documentation: [https://wordpress.org/documentation/](https://wordpress.org/documentation/)
- WooCommerce Documentation: [https://woocommerce.com/documentation/](https://woocommerce.com/documentation/)
- WP-CLI Documentation: [https://wp-cli.org/](https://wp-cli.org/)
- MariaDB 10.11 Documentation: [https://mariadb.com/kb/en/mariadb-10-11/](https://mariadb.com/kb/en/mariadb-10-11/)
- PHP 8.3 Documentation: [https://www.php.net/releases/8.3/](https://www.php.net/releases/8.3/)
- Ubuntu 24.04 LTS Release Notes: [https://wiki.ubuntu.com/NobleNumbat/ReleaseNotes](https://wiki.ubuntu.com/NobleNumbat
Summary
Deploying WooCommerce (WordPress) on a self-managed VPS gives you the flexibility, control, and scalability needed for a successful online store. With Bluehost’s VPS hosting and the power of WooCommerce, you can build a secure, high-performance eCommerce site tailored to your business needs.