 ChatGPT,
  Claude,
  Gemini,
  Grok — all four for
 Purchase a Self-Managed VPS with WordPress Installation
WordPress is the world’s most popular open-source content management system (CMS) that allows users to create and manage websites and blogs easily. It offers a user-friendly interface, extensive themes, and thousands of plugins to customize functionality, making it accessible to beginners while powerful enough for developers and enterprises. WordPress supports a wide range of websites, from simple blogs to complex e-commerce platforms.
To get the most out of WordPress, consider a Self-Managed VPS hosting plan for better control and performance.
This article covers why WordPress is important, its common uses, and how to purchase and set up VPS hosting for it.
We've also created a short video to guide you in purchasing a Self Managed VPS with WordPress:
Why Use WordPress?
The importance of a strong online presence cannot be overstated in this age of technology. WordPress is important because it offers scalability, versatility, and simplicity, allowing you to quickly create websites without requiring extensive knowledge in the area. Moreover, it offers a big community that ensures it will keep developing, secure, and have support available. Hosting your WordPress on a VPS server is better than using a shared hosting solution.
Uses of WordPress
WordPress is highly versatile and used for many purposes, such as:
- Blogs and Personal Websites: Easily publish and manage content with themes tailored for various niches.
- Business Websites: Showcase services, portfolios, and company information.
- E-commerce Stores: Use WooCommerce and other plugins to build fully functional online shops.
- Community Forums: Create membership sites and discussion boards.
- Educational Platforms: Build online courses and learning management systems with LMS plugins.
- News and Media Sites: Manage high-volume content with advanced editorial workflows.
This versatility makes WordPress suitable for almost any type of website.
How to Purchase a Self-Managed VPS with WordPress Installation
To get started with WordPress on Bluehost, you first need to purchase a Self-Managed VPS plan. Follow the steps below:

New to VPS or not sure where to start? No worries! At the top of the Self-Managed VPS purchase page, you’ll see the Pre-configured Setup section. This handy feature is perfect if you’re feeling a bit unsure—just pick the type of project you want, like WordPress Site, AI Agent/Claude Code, Dev/Staging, or eCommerce Store. We’ll take care of the rest by automatically filling in the best plan, operating system, and template for you.
- Super simple for beginners or anyone who just wants a quick setup
- Instantly get the recommended settings for your project
- Skip the guesswork and save time
- You can still customize things later if you want
- In your browser, go to https://www.bluehost.com/vps-hosting.
- Click the Choose Plan button under your preferred VPS hosting plan.
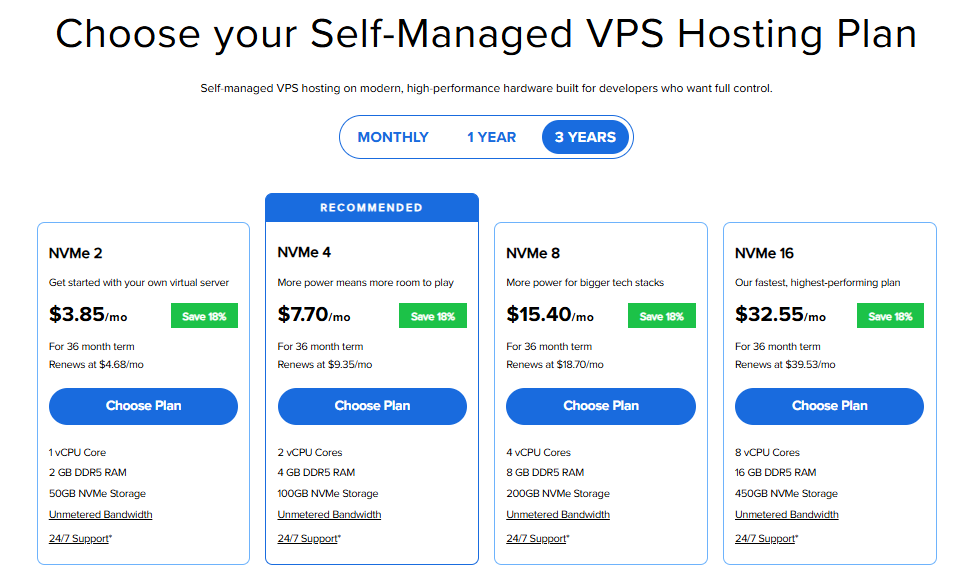
Important: Pricing is subject to change—please visit https://www.bluehost.com/vps-hosting for the current introductory/sign-up offer for Bluehost VPS Hosting. For the most up-to-date renewal pricing, visit your Bluehost Portal Renewal Center.
- Select your preferred Data Center location.

- On the Cart page, you can configure your server to fit your needs in the following section:
- Hardware:
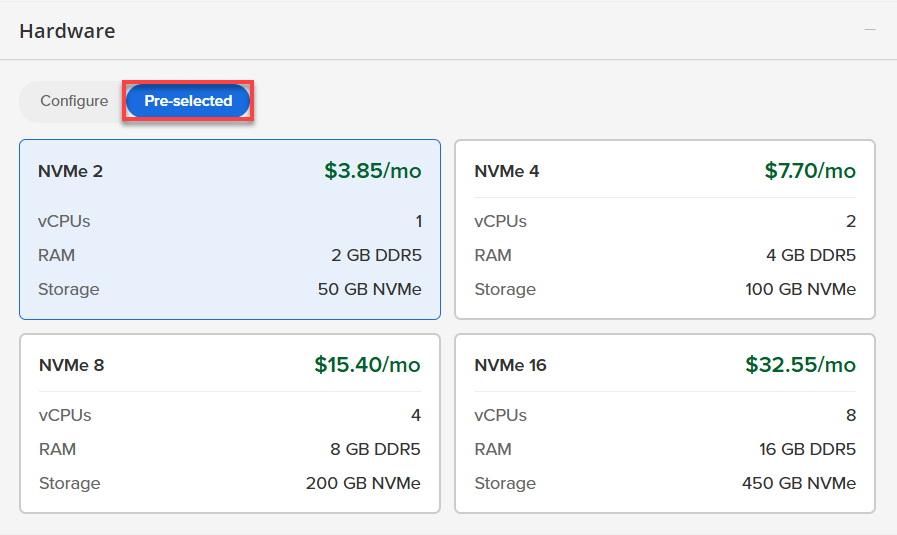
- Pre-selected:
You can select a different Self-Managed VPS plan in this section.
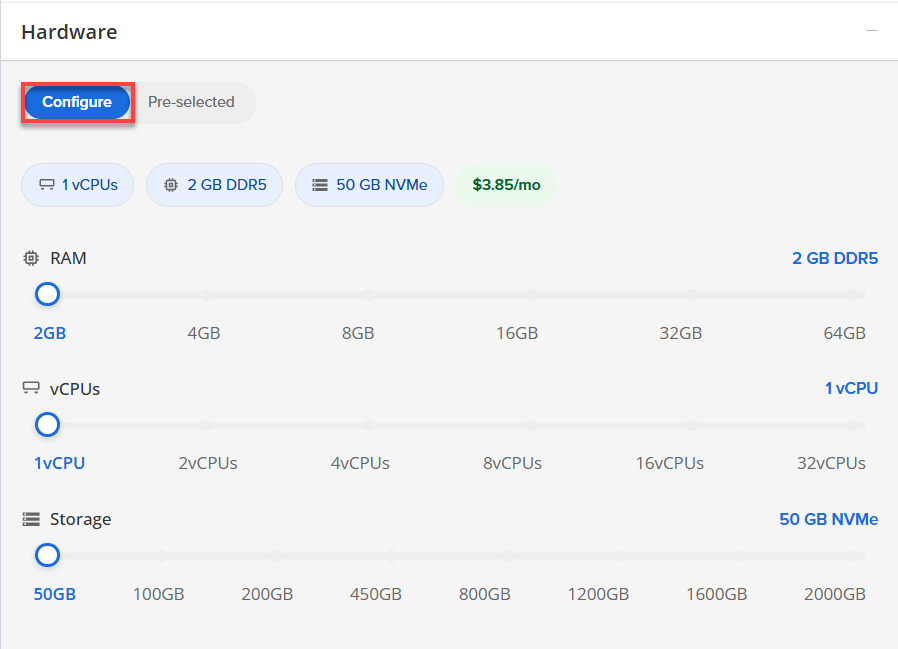
- Configure:
Click Configure to customize your package.
Note that your changes help customize your plan, and the overall cost will adjust accordingly to fit your needs.
- Pre-selected:
- Software:
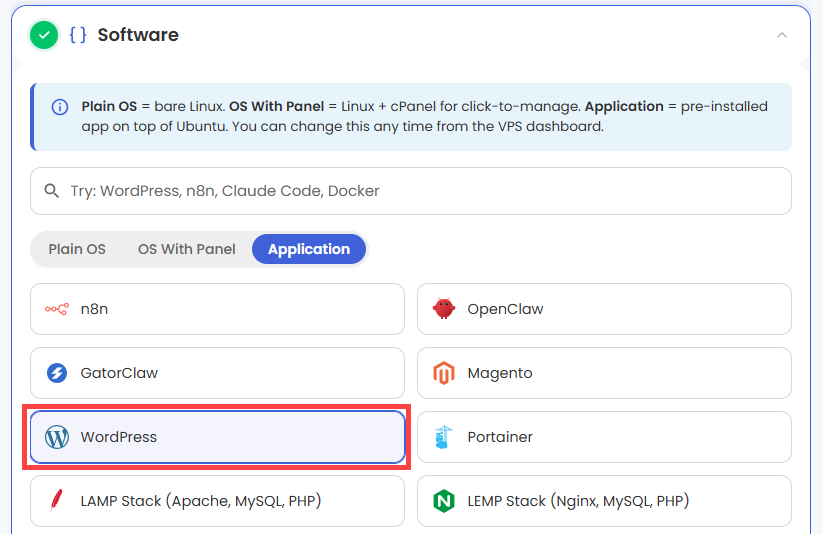
If the selected plan does not meet the app's minimum requirements, the app will be grayed out.
- Click the Application tab.
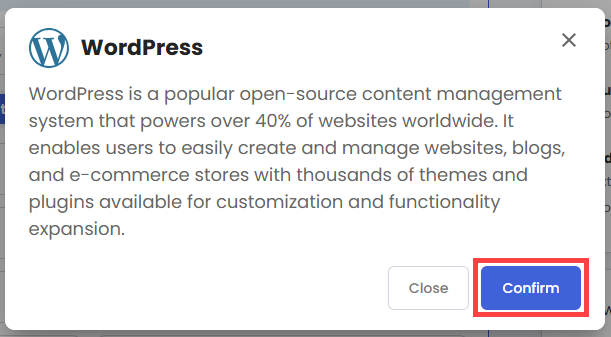
- Select WordPress.
- In the pop-up, click Confirm.
- Hardware:
- Add-Ons:
- Support & Security:
- Premium Support - Recurring:
This service provides you with priority access to our expert team for faster responses and personalized assistance whenever you need it.

- Premium Support - Recurring:
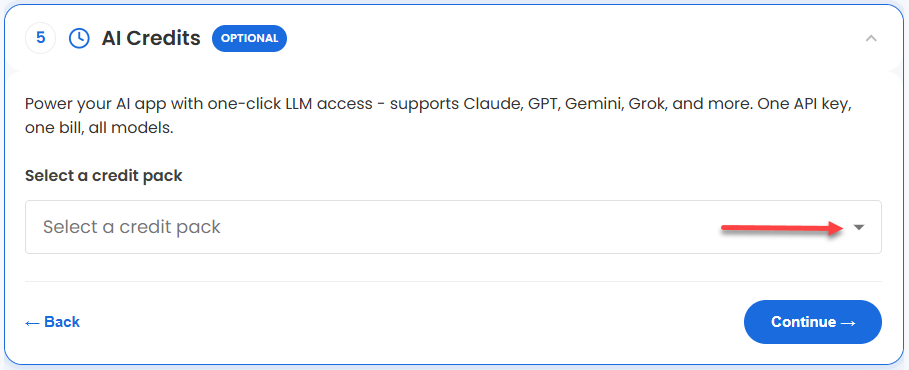
- AI Credits:
Purchase an AI credit package to effortlessly connect your application to leading LLMs through a single API key and bill. This step is optional.
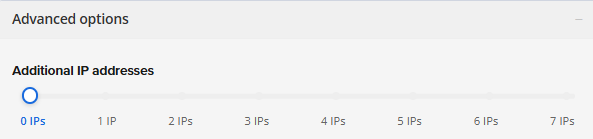
- In the Advanced options:
- Extra IP's: You can add extra IP addresses for an additional fee.
Pricing changes based on how many IPs you add. - Hostname: Assign a custom hostname to easily identify your server. This is optional.
- SSH Key: Add an SSH public key for secure, password-less access after provisioning.
- Extra IP's: You can add extra IP addresses for an additional fee.
- Support & Security:
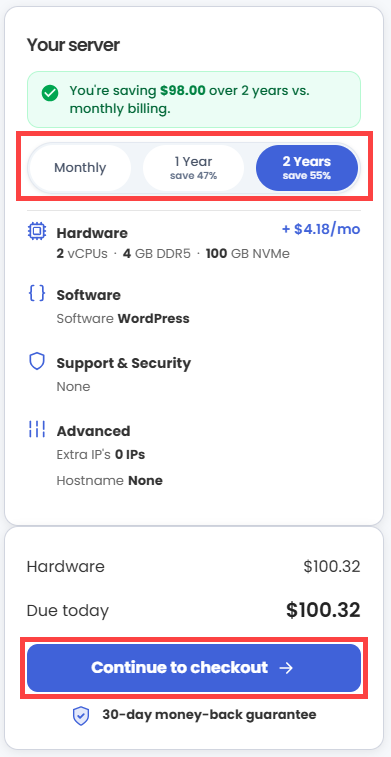
- Next, select your preferred billing term and review your Order Summary, then click Continue to Checkout.
- Do the following on the Checkout page:
If you're new with Bluehost:
- Create your Bluehost account by using your email address or by connecting with your Google, Apple, or GitHub account — whichever you prefer!

- Select your preferred payment method: credit card, Google Pay, or PayPal. Enter your billing information.

If you have an account with us, you will see your Bluehost login details when you are logged into your Bluehost Portal. If you are not logged in, please click the Log In link.

- Create your Bluehost account by using your email address or by connecting with your Google, Apple, or GitHub account — whichever you prefer!
- In the Shopping Cart section, you can still adjust your billing term if needed.
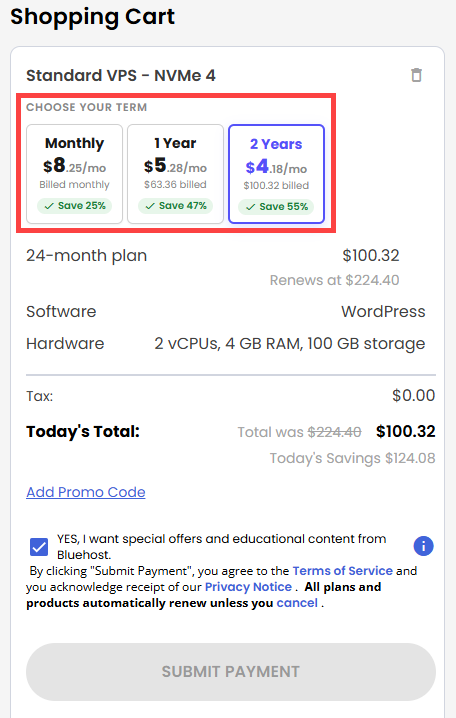
- Review the items in your cart, add a Promo Code if you have one, and then click Submit Payment to complete the purchase.
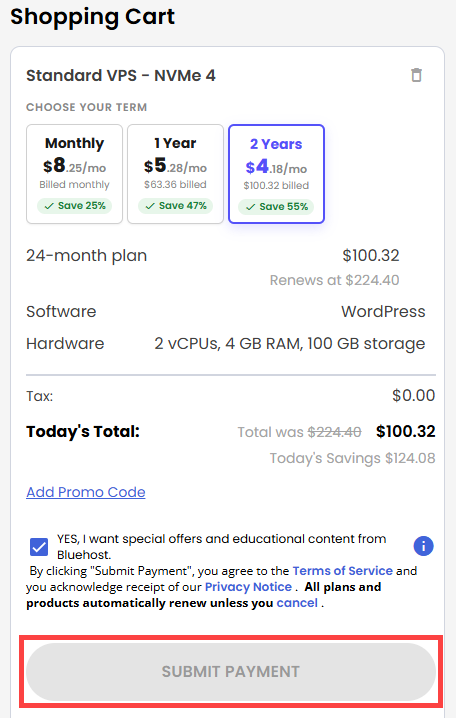
After completing the purchase, your VPS hosting will begin provisioning. You can access and manage your new VPS hosting in the Hosting tab of your Bluehost Portal.
Summary
WordPress is a popular and user-friendly platform that helps you create websites like blogs, business sites, and online stores with ease. Its flexible design lets you customize and grow your site as needed. Using a Self-Managed VPS hosting plan gives you the control and performance required for a fast and secure website. This guide explains why WordPress is important, its common uses, and how to choose the right VPS hosting to support your site.