How to Set Up Bluehost Professional Email
Creating an Email with your domain is essential for managing your business communications effectively. This guide will walk you through the steps to set up Professional Email within your Bluehost Portal, including creating a professional email account and adding mailboxes for additional users. Whether you're just starting or looking to expand your email setup, this article will help you configure your email system seamlessly and ensure your domain is ready for professional use.
Set Up Bluehost Professional Email
After purchasing Professional Email, it will appear under the Email tab in your Bluehost Portal. You must complete the setup before you can start using the email account.
- Log in to your Bluehost Portal.
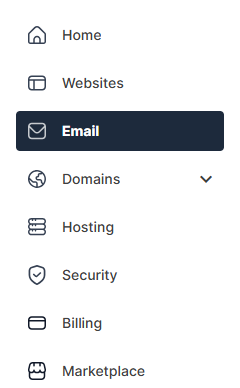
- From the left-hand navigation menu, click the Email tab.
- Select the domain you want to associate with the email account.
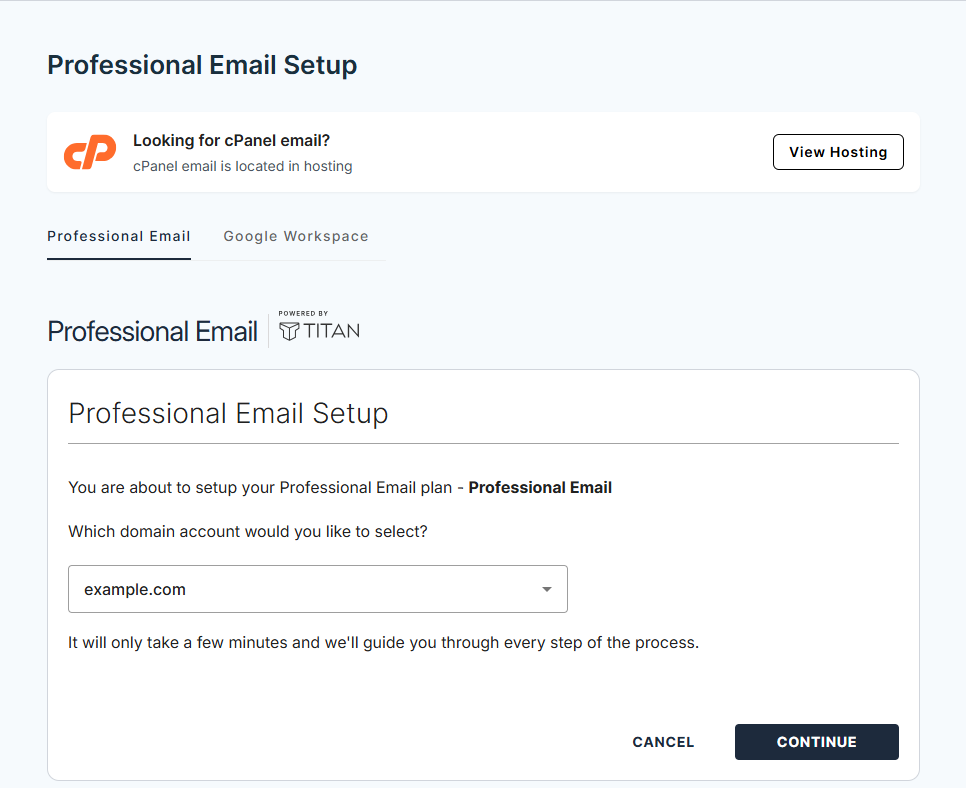
- Click Continue.
- On the Professional Email Setup page, enter the required details:
- Username (email address)
- First name
- Last name
- Password
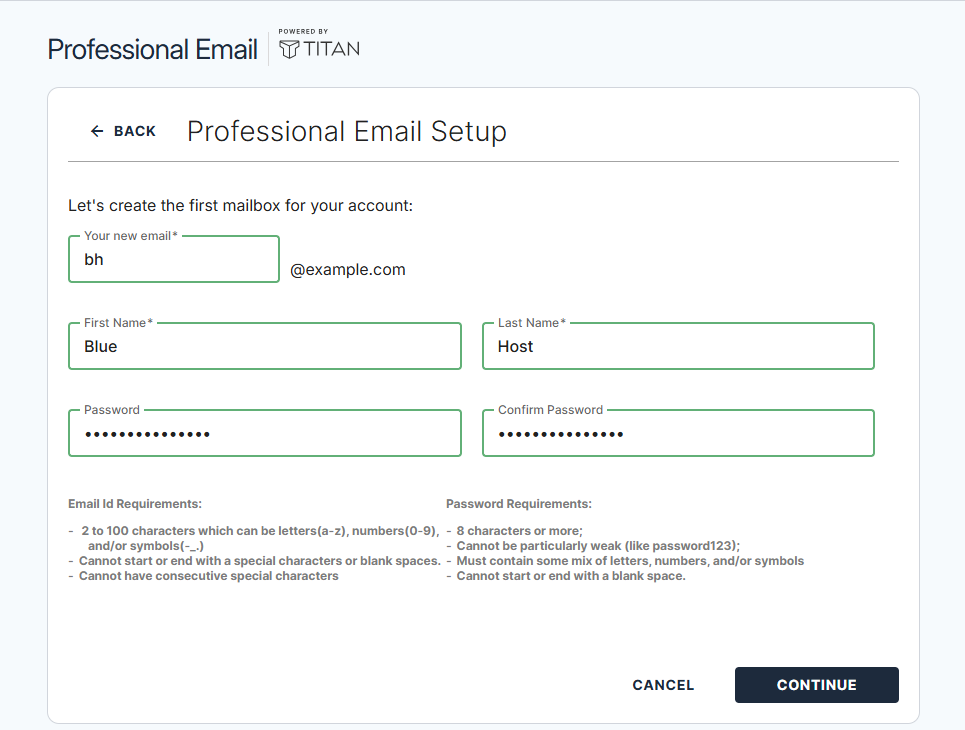
- Review the information you entered, then click Continue.
- Once the account is successfully created, you will receive a confirmation notification.
- To access your inbox, click Log in to Webmail to open the email dashboard.
Create a Professional Email Account (Add Mailboxes)
- Log in to your Bluehost Portal.
- From the left-hand navigation menu, click the Email tab.
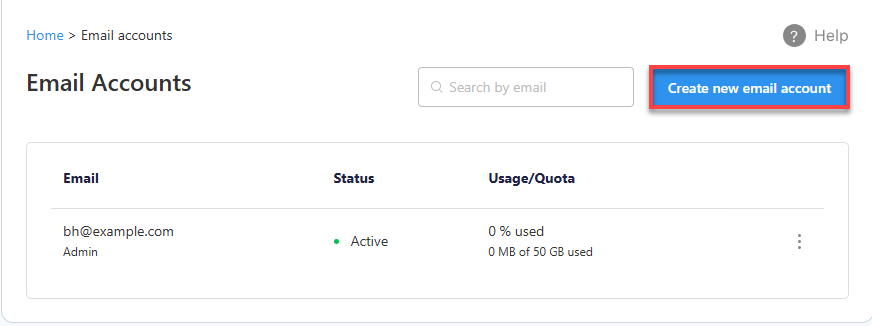
- Scroll down and click Email Accounts.
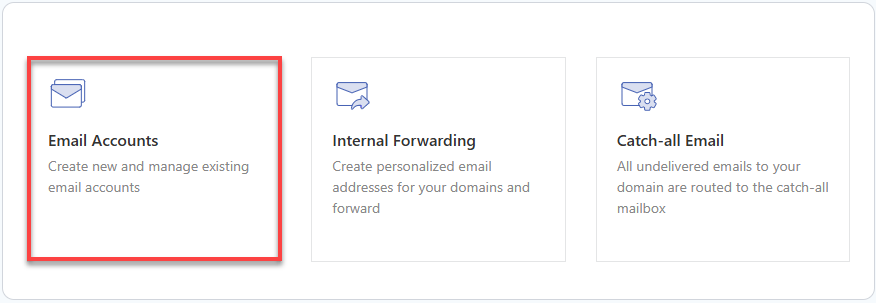
- Click the Create new email account button.
- On the Professional Email Setup page, enter the required details:
- Username (email address)
- Password
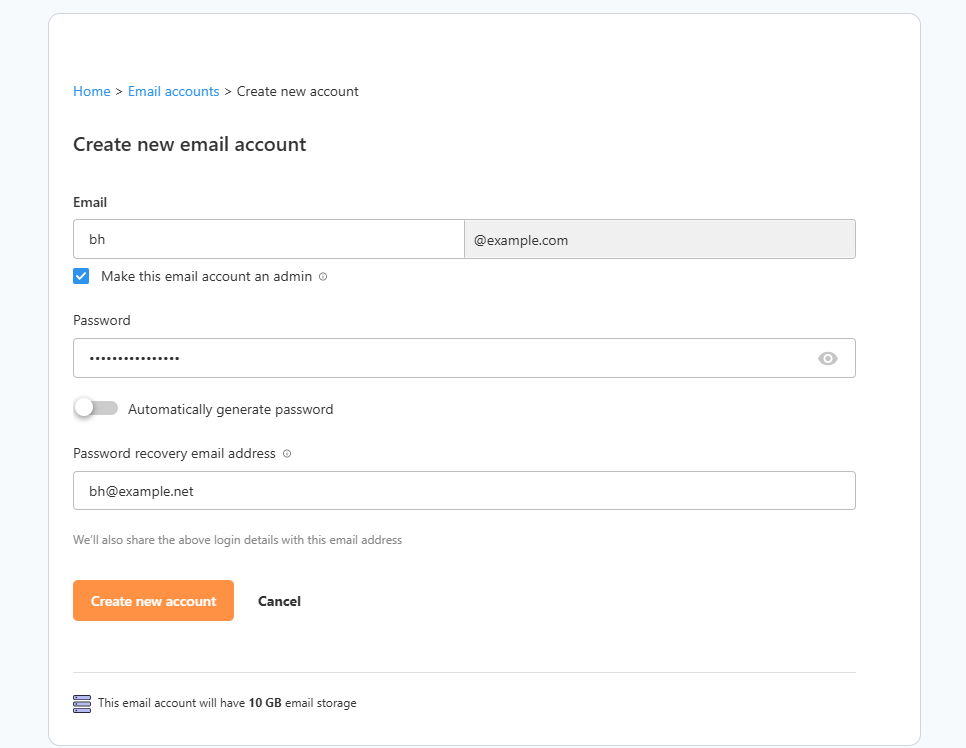
- Review the information, then click Create new account.
- Once the account is created, you will receive a confirmation notification.
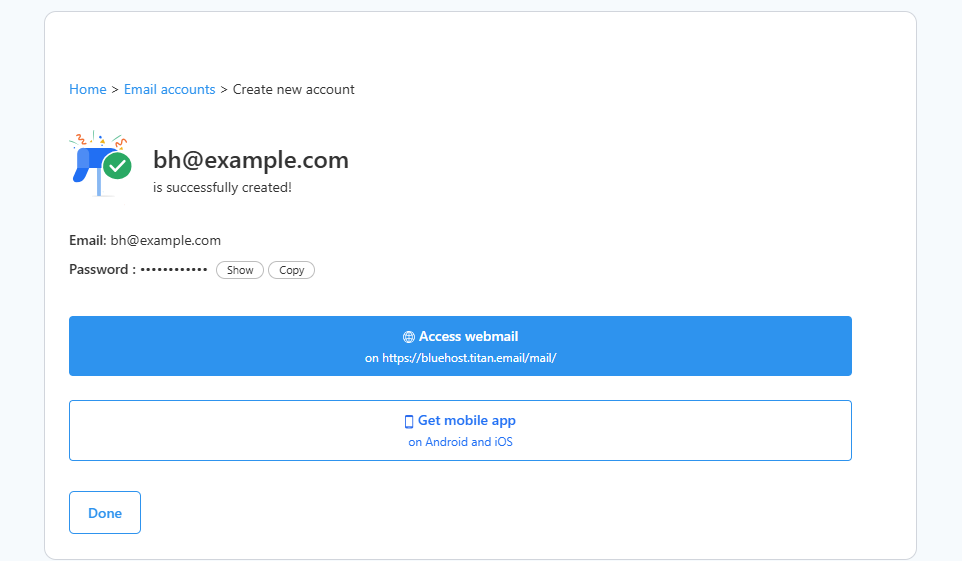
- Click Access webmail to open the email dashboard. For mobile access, select Get mobile app and download the Android or iOS app to check your emails anywhere.
Related Articles
Summary
Now that you know how to set up Bluehost Professional Email, create a professional email account, and add mailboxes, you can effectively manage your email services within your Bluehost Portal. Whether setting up your first email account or adding additional mailboxes for your team, these steps will ensure you're fully prepared for seamless communication.
If you need further assistance, Bluehost Chat Support is available 24 hours a day, 7days a week while Bluehost Phone Support is available 7 days a week from 7 am-12 midnight EST.
- Chat Support - While on our website, you should see a CHAT bubble in the bottom right-hand corner of the page. Click anywhere on the bubble to begin a chat session.
- Phone Support -
- US: 888-401-4678
- International: +1 801-765-9400
You may also refer to our Knowledge Base articles to help answer common questions and guide you through various setup, configuration, and troubleshooting steps.