Adding a Blog Post in WordPress
Keeping your blog or website fresh with new content is key to maintaining audience interest and attracting new visitors. Regular updates not only keep your loyal followers engaged but also improve your site's visibility in search engines, helping you reach a wider audience.
In this guide, you'll learn how to add, delete, and restore blog posts with ease. Make sure to log in first to your WordPress Admin Dashboard.
What is a Post
A Post in WordPress is a type of website or section of a website where content is regularly updated in the form of posts. These posts are typically displayed in reverse chronological order—meaning the newest content appears first.
Postscan be personal, professional, educational, or promotional. Whether you're sharing travel stories, tech tutorials, or business updates, WordPress makes it easy to publish and manage your content.
How to Add a Post
Here is a short video on how to a post in WordPress.
- Log in to your Bluehost Portal.
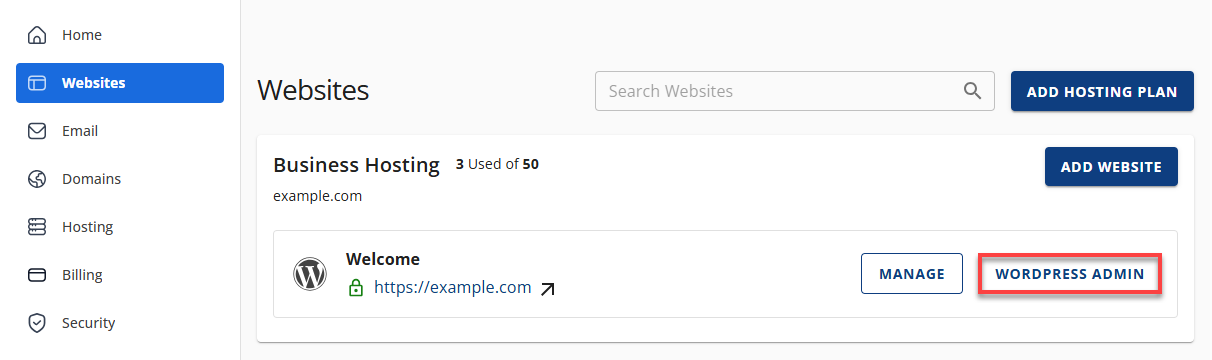
- In the left-hand menu, click Websites.
- Click the WordPress Admin button located next to the website you want to manage.
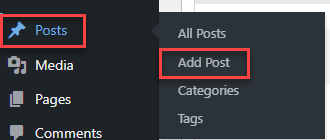
- Click on Posts in the left-hand menu, then select Add Post.
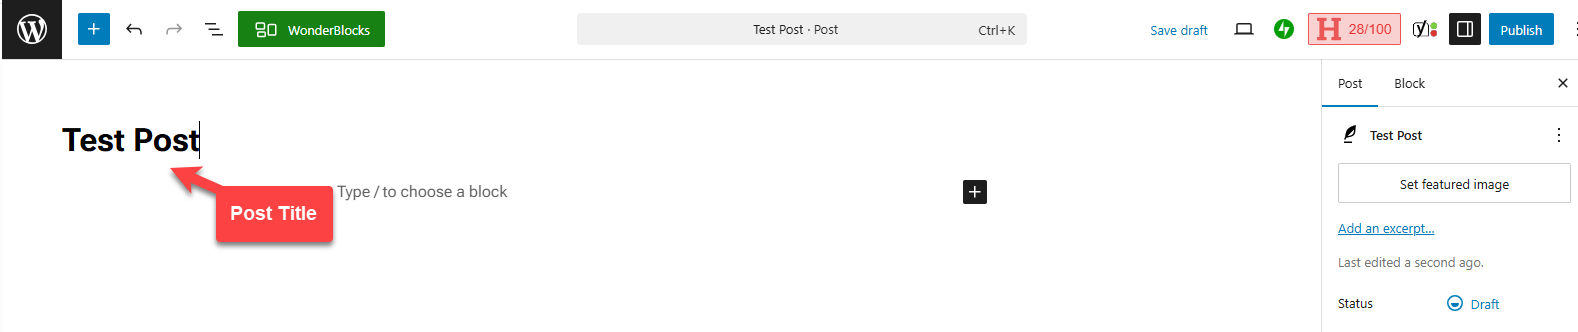
- In the Add Post section you'll see a blank editor screen, this where you will build your post.

- First, you will need to create a Title for your post.
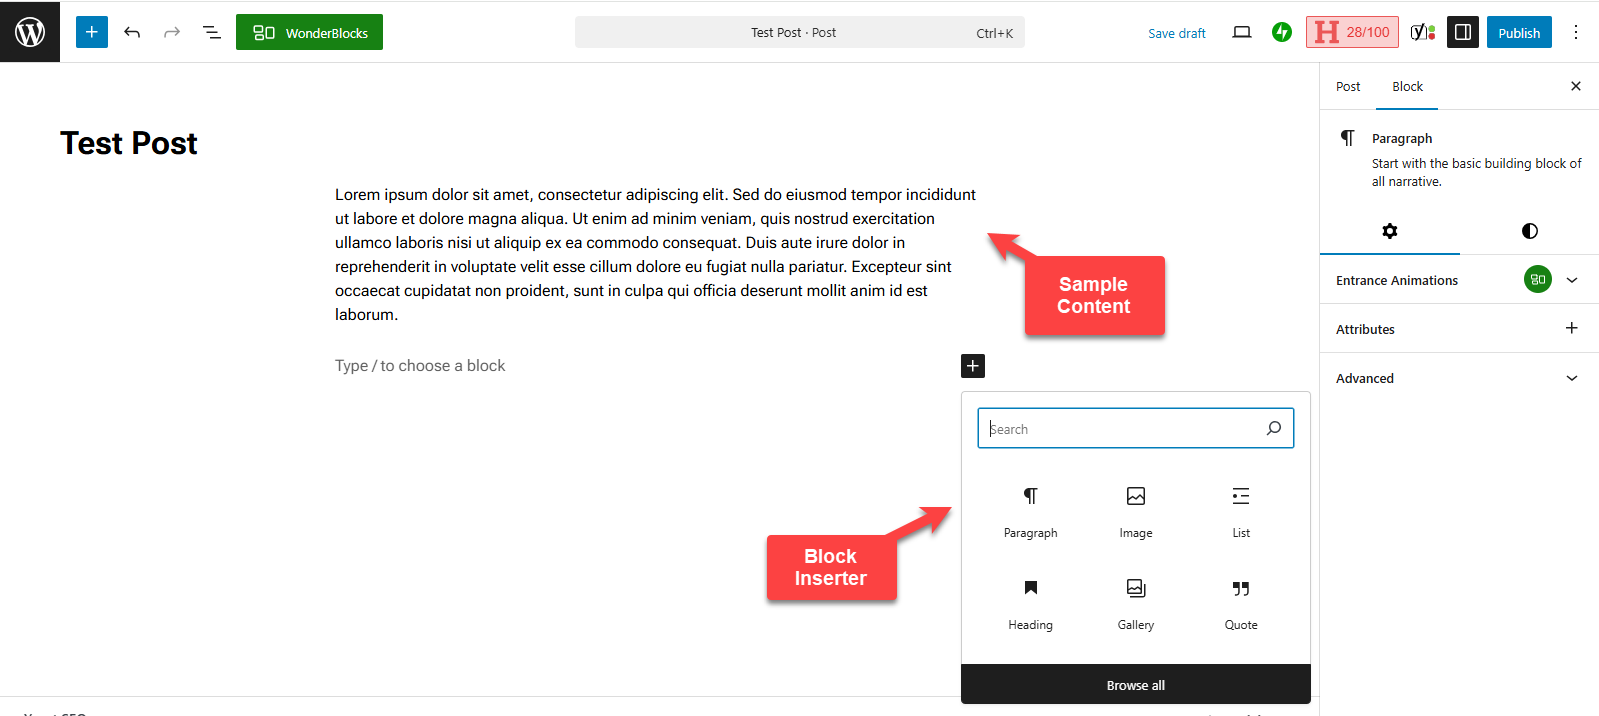
- Next, you can add the content to your page. Add more content to your page by clicking the "+" (block inserter) icon in any part of your content area and choosing from the available block elements.
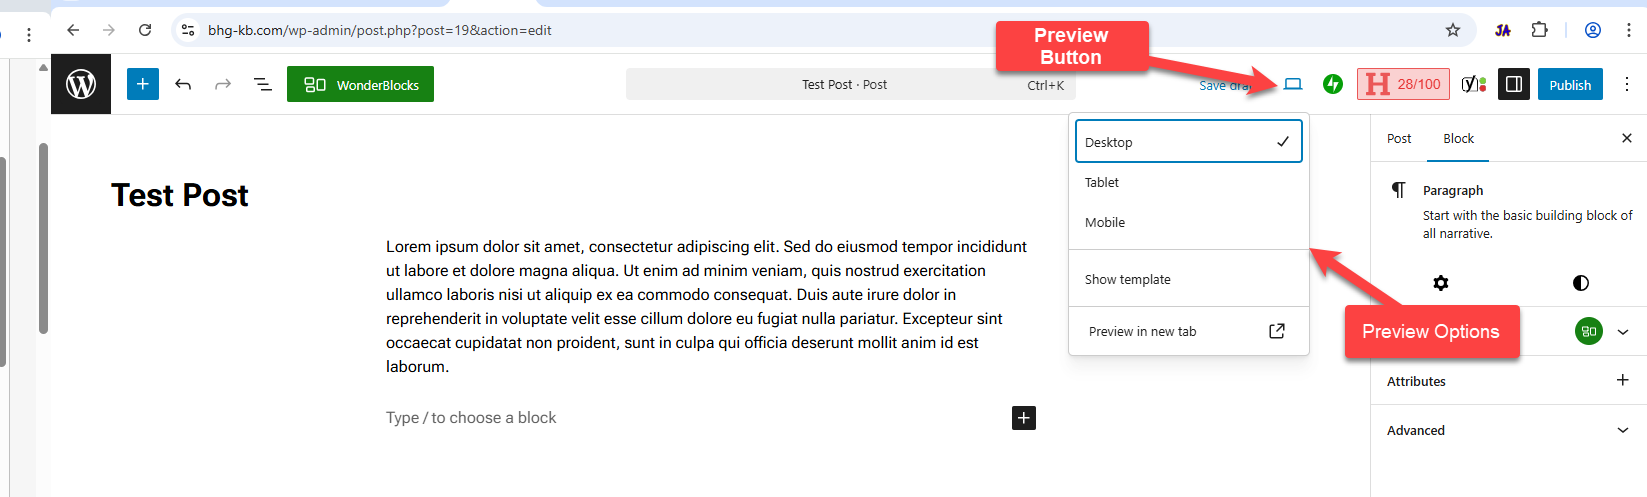
- You can preview your post by clicking the Preview button in the top menu and selecting from the available preview modes.
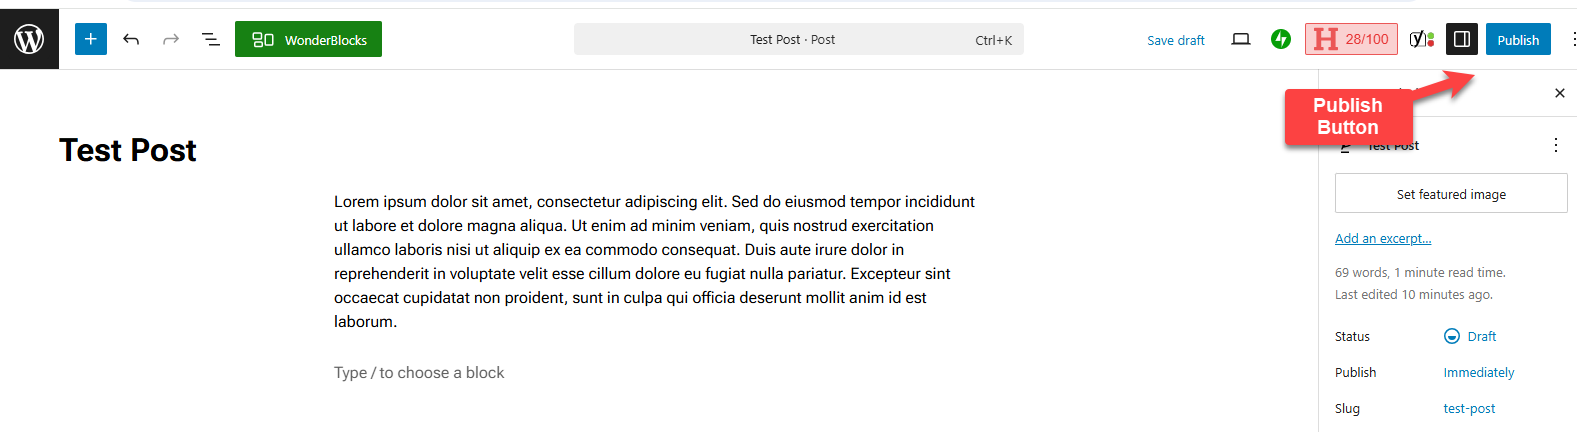
- Once you have finished editing your page, click Publish. This will immediately publish your post online. You can view it live on your site.
How to Delete a Post
- Log in to your Bluehost Portal.
- In the left-hand menu, click Websites.
- Click the WordPress Admin button located next to the website you want to manage.
- Click on Posts in the left-hand menu, then select All Posts.
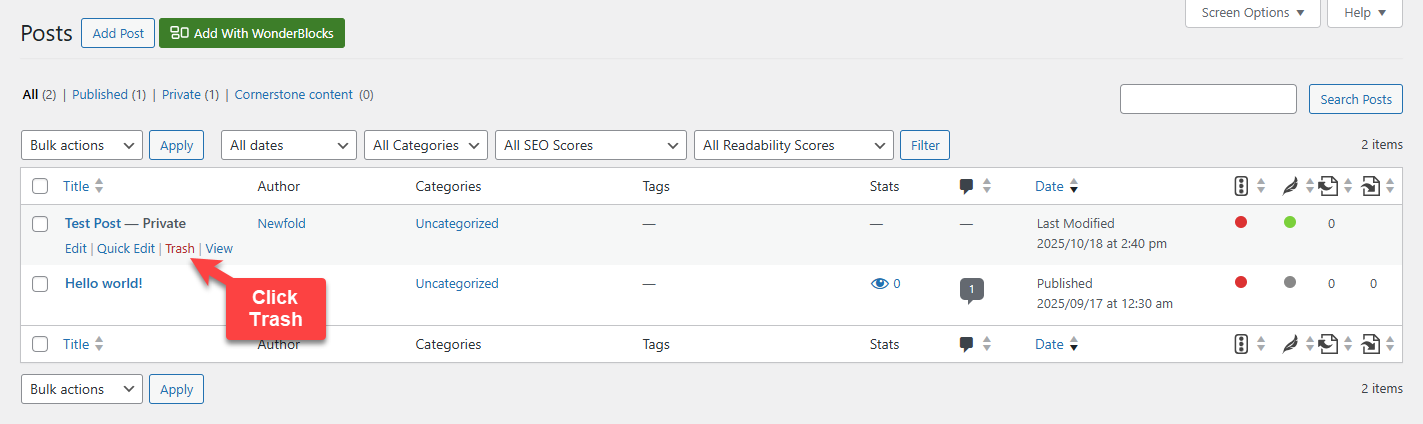
- Locate the page to which you'd like to delete. Click Trash from the options that appear below the page title.
- A notification will show at the top that a posthas been moved to the Trash.
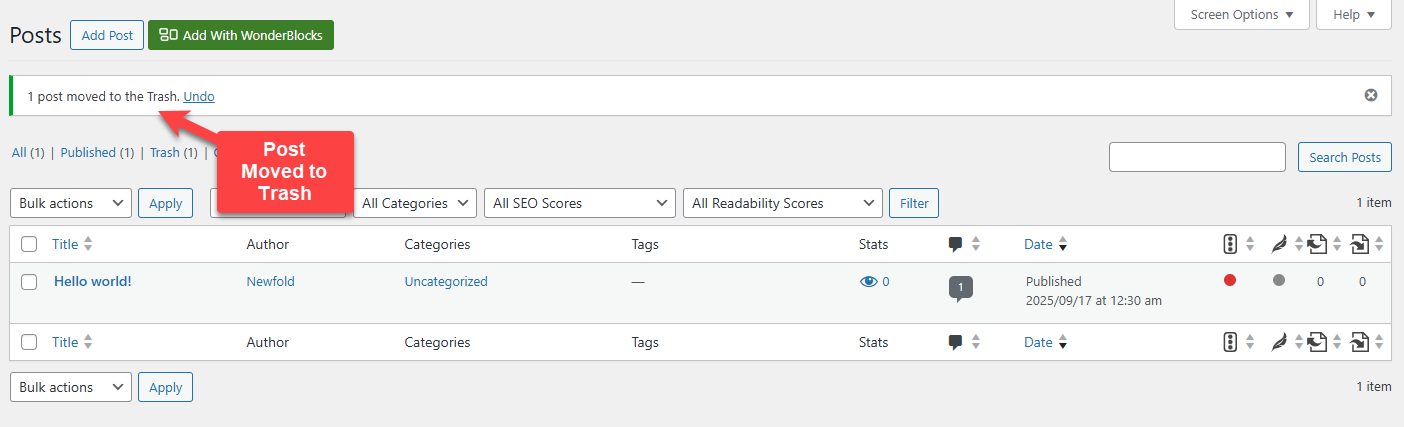
- The deleted post can be restored or permanently deleted from the Trash.

How to Restore a Deleted Post
- Log in to your Bluehost Portal.
- In the left-hand menu, click Websites.
- Click the WordPress Admin button located next to the website you want to manage.
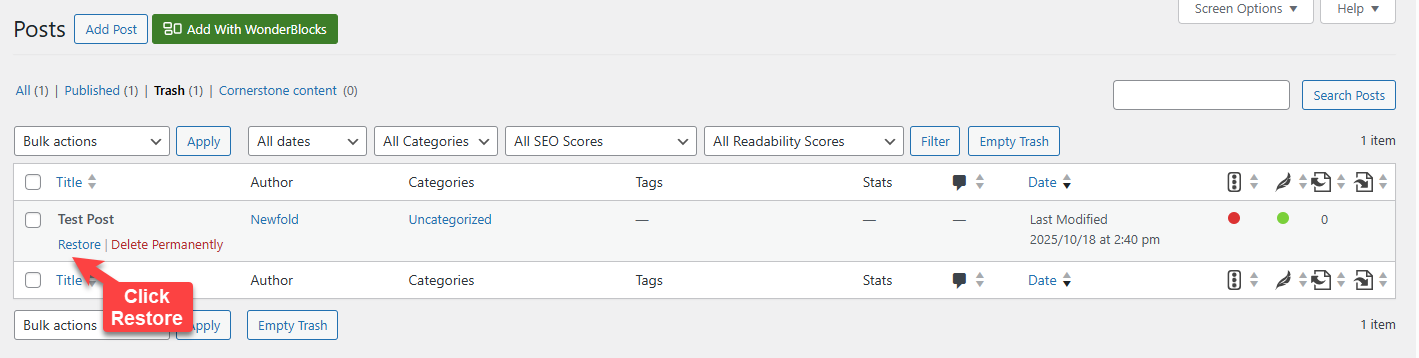
- Click on Posts in the left-hand menu, then select All Post.
- Locate Trash at the top of existing posts.

- Click Restore under the title of the page you want to restore.
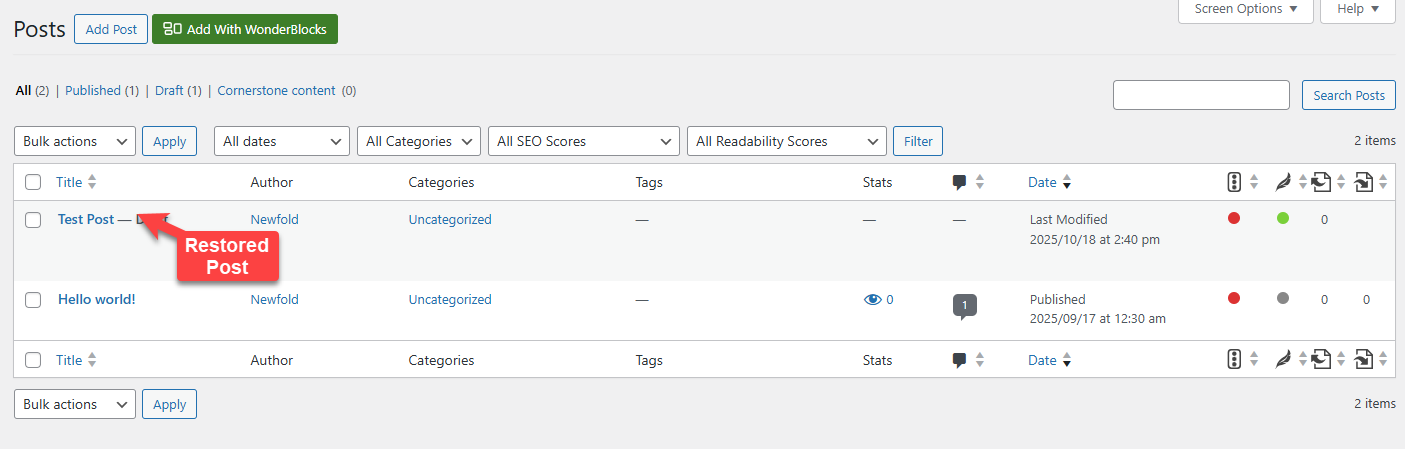
- The restored page can now be found in the All Posts section.
Summary
Maintaining a vibrant and up-to-date blog is one of the most effective ways to grow your online presence. By regularly adding fresh content, cleaning up outdated posts, and restoring valuable entries, you ensure your site remains engaging, relevant, and optimized for search engines.
With WordPress, managing your blog is straightforward—whether you're publishing your first post or reviving an old favorite. Now that you know how to add, delete, and restore posts, you're well-equipped to keep your content strategy running smoothly.
If you need further assistance, Bluehost Chat Support is available 24 hours a day, 7days a week while Bluehost Phone Support is available 7 days a week from 7 am-12 midnight EST.
- Chat Support - While on our website, you should see a CHAT bubble in the bottom right-hand corner of the page. Click anywhere on the bubble to begin a chat session.
- Phone Support -
- US: 888-401-4678
- International: +1 801-765-9400
You may also refer to our Knowledge Base articles to help answer common questions and guide you through various setup, configuration, and troubleshooting steps.