How to Remove Malware From Wordpress Site
If you've ever encountered spammy content while conducting a Google search or your WordPress site has been infected with malware, you might be worried about the consequences. However, you don't need to worry. There are ways to fix your site and eliminate the malware, spam, backdoors, and other malicious software that may have infected it.
In this article, we'll provide you with a step-by-step guide on how to remove malware from WordPress websites and make them secure again. You'll learn how to diagnose the issue and take the necessary steps to protect your website from future attacks.
So, if your WordPress site has been hacked and infected with malware or spam, don't panic. Follow the steps this guide outlines, and you'll be back up and running quickly.
- WordPress Site Hacked Signs
- How to Remove Malware from a WordPress Site
- Step 1: Back up Website Files and Database
- Step 2: Examine the Backup Files
- Step 3: Delete Every File in the Public HTML Subdirectory
- Step 4: Uninstall and Reinstall WordPress
- Step 5: Password and Permalink Recovery
- Step 6: Reinstall Themes and Plugins
- Step 7: Select and Upload Backup Photos
- Step 8: Set up and Activate Security Plugins
- How to Secure WordPress Websites
- Summary
WordPress Site Hacked Signs
Your viewers are complaining about being directed to a malicious or spammy website. Please pay attention to them because many hacks will only show you something spammy if you indicate that you are the site administrator. It will only be visible to visitors to your website or search engine crawlers.
Assume you discover spam in your site's header or footer, such as ads for pornography, drugs, or illegal services. These are frequently inserted into your page without notice, so they can appear as dark text on a dark background and be difficult to read for us (but the search engines can see them).
When you search for a website on Google, you may come across unfamiliar pages or material that appears harmful.
Your hosting provider notifies you that your website is engaging in malicious or spammy behavior. For example, if your host informs you that they are receiving reports of spam emails containing a link to your website, there is a problem.
How to Remove Malware from a WordPress Site
If your website has been hacked and you are experiencing odd behavior or have been blacklisted by Google, it's important to act quickly to minimize any potential losses. The first step is to perform a website malware removal as soon as possible. This can be done by taking the following steps:
Step 1: Back up Website Files and Database
Remember that this procedure is for individuals with expertise working on website backends. If you are still determining these steps, pause and ask your host for assistance.
To do a manual backup, you must first log in to your dashboard. After logging in, locate your file manager to download and back up your stuff.
You can also use an FTP manager to access the required website files. FileZilla is a popular choice. You will require the FTP details for your website, which can be found on the hosting platform. Once you can grant FileZilla FTP access to your site, download the contents of the main file to your web server. Make sure that nothing is deleted.
Step 2: Examine the Backup Files
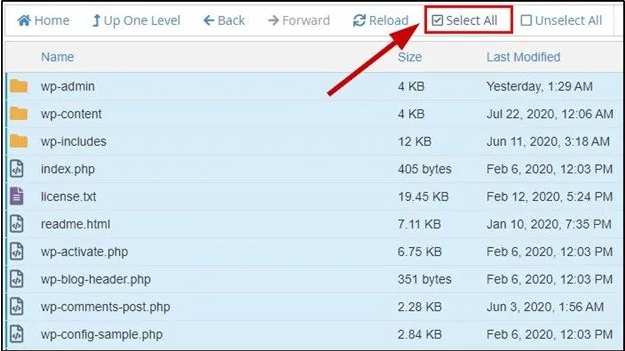
Save the backup to your PC once the site has been backed up. Select the zip file and look for the following:
The WordPress core files can be found here. First, download WordPress from WordPress.org to ensure the files in the download are identical to your WordPress core files.
The wp-config.php file is critical because it contains your WordPress database's name, username, and password, which we'll need throughout the restoration.
The wp-content directory: Examine the following wp-content folders: themes, uploads, and plugins. It demonstrates that you have a reliable site backup to view your theme, plugins, and uploaded images.
The .htaccess file will be rendered inaccessible. Only an FTP program (such as FileZilla) or a code editing program (such as Brackets) that allows you to examine invisible files within the application's interface can tell you if you backed up this file.
The repository: An SQL file exporting your database must be available. The database will not be deleted during this procedure, but keeping a backup is a good idea.
Step 3: Delete Every File in the Public HTML Subdirectory
Using the File Manager or FTP of your web host. After ensuring you have a reasonable and complete site backup, delete all files in your public HTML folder (except the CGI-bin folder and any server-related directories that are visibly free of hacked data). 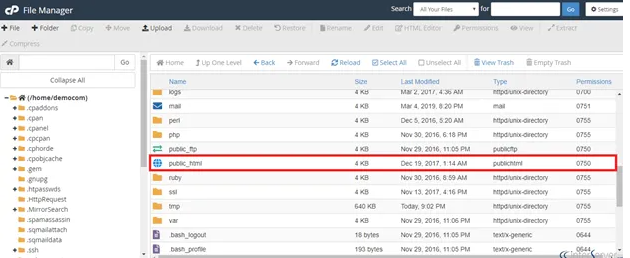
If multiple websites are hosted on the same account, you can assume they have all been compromised. As a result, it's best to clean all the sites, back them up, download the backups, and then follow the procedures listed below for each one.
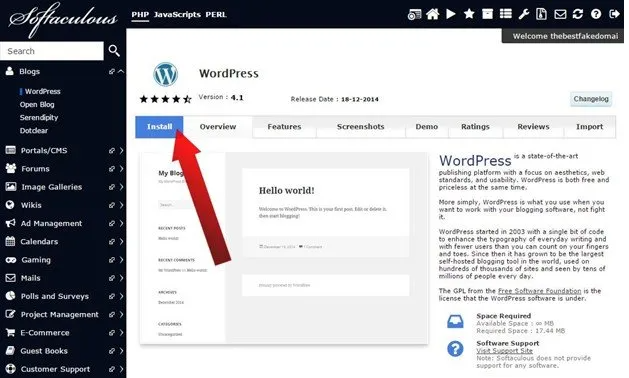
Step 4: Uninstall and Reinstall WordPress
Reinstall WordPress using the one-click option provided by your web hosting provider. Refer to your site's backup and update the wp-config.php file on your new WordPress installation to use your old site's database credentials.
The old database will be linked to the new WordPress installation. It is not recommended to re-upload your old wp-config.php file is not recommended because the new one will contain fresh login encryption salts and be free of any compromised code.
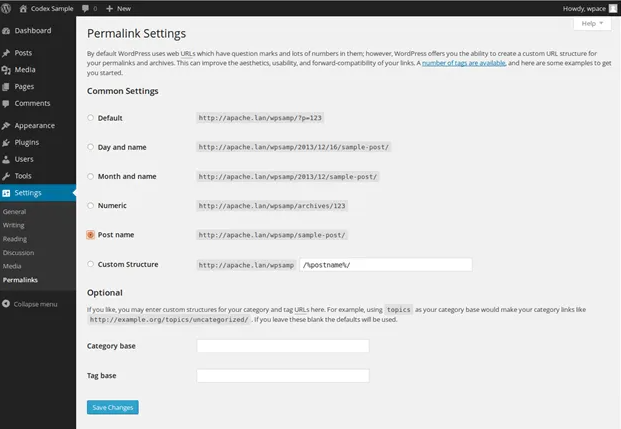
Step 5: Password and Permalink Recovery
Log in to your site to recover all usernames and passwords. If you discover any unknown users, your database has been hacked, and you should call a specialist to ensure that no malicious code has been left behind.
Go to Settings > Permalinks to save your changes.
Your .htaccess file will be restored, and your site URLs will work properly again. When you remove files, make sure you don't leave any hacked .htaccess files behind.
Step 6: Reinstall Themes and Plugins
All of your plugins should be reinstalled from the WordPress source code or downloaded from a developer of premium plugins. Installing obsolete plugins that are no longer supported is not a smart idea.
Install the theme again from a trusted source, such as the WordPress theme repository. Refer to your backup files if you have modified the theme files, and then reproduce the changes on a new copy of the theme.
You should not upload an outdated theme because it is impossible to determine whether files have been compromised.
Step 7: Select and Upload Backup Photos
You must copy your old picture files to the server's new wp-content > uploads folder. However, care should be taken to avoid copying any compromised data during the process.
To accomplish this, double-check that each folder in your backup contains only picture files and no PHP scripts, JavaScript files, or other things you did not add to your Media Library.
Step 8: Set up and Activate Security Plugins
Aside from Sitelock, we recommend using a security plugin to scan your WordPress website once you have found malware on your site, as security plugins such as MalCare perform a comprehensive job and can identify malware within minutes.
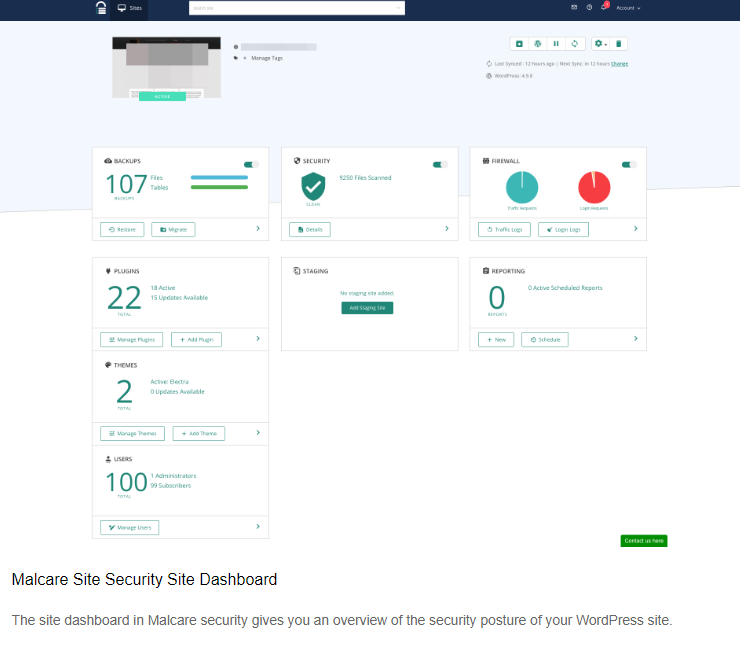
MalCare makes scanning your website very simple. Visit MalCare, install the plugin on your website, and allow it to perform its magic.
When you log in to your security dashboard, your website's most recent security status will be displayed.
Click the Scan Site button to initiate a scan of your website. The plugin will then definitively indicate whether your website is infected with malware.
With this knowledge, you can proceed with securing your website.
MalCare is recommended for a variety of reasons. Most other security plugins identify malware through file matching. This means they have a list of potential problems to watch out for. What happens when a new strain of malware infects your website? It has yet to be detected since it is not on the list./p>
MalCare does not scan your website; it uses a sophisticated algorithm that delves through your code to discover if it is contaminated.
How to Secure WordPress Websites
Malware attacks on websites are becoming increasingly common these days. They can cause data breaches, theft of sensitive information, and damage a website's reputation. Therefore, it is important to take proactive measures to prevent malware attacks. Here are some ways to increase website security and prevent such attacks:
Keep Website Software up to Date
Make sure all the software, including WordPress and PHP versions, plugins, and themes, are updated regularly. This ensures that any vulnerabilities in the software are fixed, preventing attackers from exploiting them.
Use Strong Passwords
Use complex and unique passwords for all user accounts, including admin accounts. This makes it harder for attackers to gain access to your website.
Check out the article How to Create a Strong Password for tips on creating a strong password to protect your account and website.
Install SSL Certificate
An SSL certificate encrypts data transmitted between the website and the user's browser, making it more difficult for attackers to intercept and steal sensitive information.
Bluehost provides free SSL certificates for all domain names assigned or parked in your account. The SSL will be installed and assigned automatically to all your old and new domains. However, some users may need to enable the certificate manually. To learn how to activate it, visit our guide on How To Activate Free SSL Certificate - Free WordPress SSL Setup.
Use a Web Application Firewall (WAF)
A WAF filters out malicious traffic and prevents attacks such as SQL injections and cross-site scripting (XSS).
Bluehost offers SiteLock, which includes a Web Application Firewall (WAF). Visit our article SiteLock: Web Application Firewall WAF to learn how SiteLock can protect your website and the benefits it provides.
Backup Website Regularly
Regular backups ensure you can quickly restore your website in case of a malware attack or other unexpected event.
If you're worried about protecting your website from cyber threats, CodeGuard can assist you. With its backup and monitoring services, you can be confident that your website is secure. Check out the CodeGuard: How to Protect Your Website article to learn more about SiteLock, choosing the right plan, and placing an order to protect your website.
Summary
If your WordPress site has been hacked and infected with malware or spam, don't worry. You'll be back up and running by following our guide.
Removing malware from your WordPress site can be a stressful and time-consuming process. Still, it's important to act quickly to minimize any potential losses. Following the step-by-step guide outlined in this article on how to remove malware from a WordPress sites, you can effectively remove malware and make them secure again. It's also crucial to take preventative measures such as keeping your website software up to date, using strong passwords, installing an SSL certificate, using a web application firewall, and backing up your website regularly to prevent future malware attacks. Always be vigilant and take website security seriously to protect your site and visitors from harm.
If you need further assistance, feel free to contact us via Chat or Phone:
- Chat Support - While on our website, you should see a CHAT bubble in the bottom right-hand corner of the page. Click anywhere on the bubble to begin a chat session.
- Phone Support -
- US: 888-401-4678
- International: +1 801-765-9400
You may also refer to our Knowledge Base articles to help answer common questions and guide you through various setup, configuration, and troubleshooting steps.