How to Install and Configure W3 Total Cache
W3 Total Cache (W3TC) is a powerful WordPress plugin that enhances website performance by reducing load times and optimizing caching. Properly configuring W3 Total Cache can improve SEO (Search Engine Optimization), user experience, and server efficiency.
Before You Start
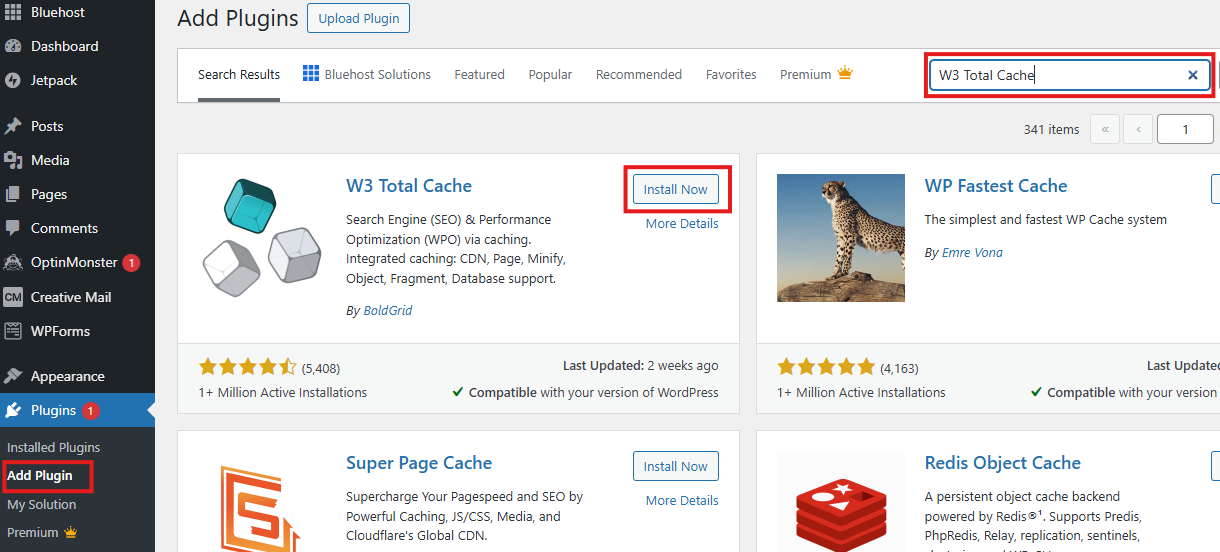
- Log in to your WordPress Dashboard.
- Click Plugins and click Add Plugin on the left menu.
- Type and search for W3 Total Cache in the search bar.
- Click Install Now, then Activate the plugin.
W3 Total Cache Configuration
General Settings
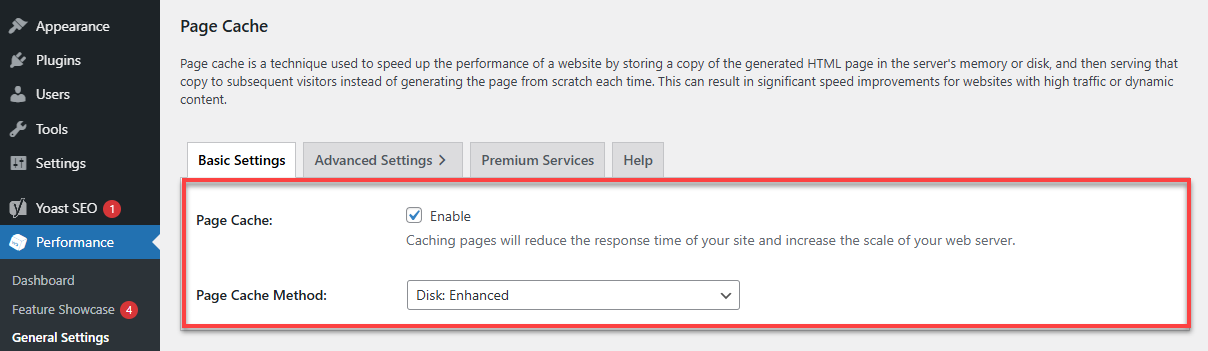
- Navigate to Performance > General Settings.
- Under Page Cache, toggle Enable.
- Set Page Cache Method to Disk (Enhanced).
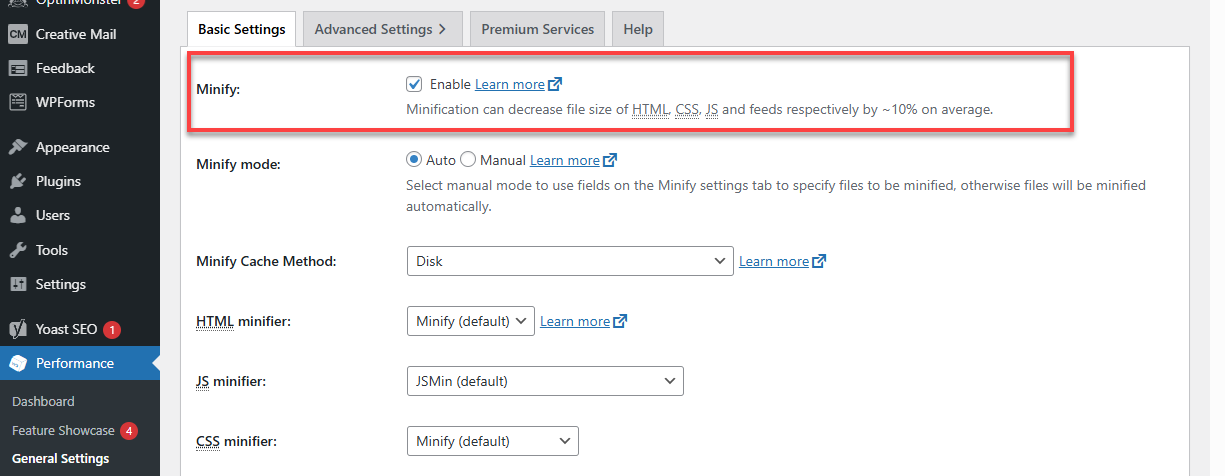
- Under Minify, toggle Enable, but use caution as it may break site layouts.
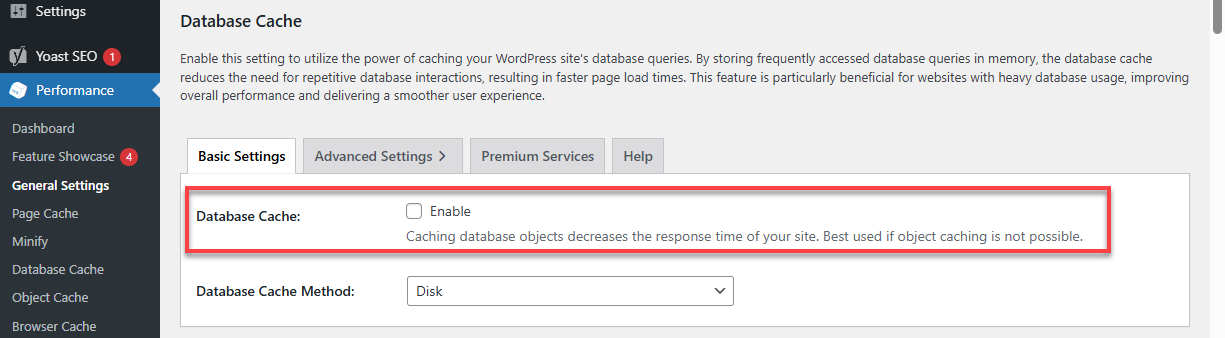
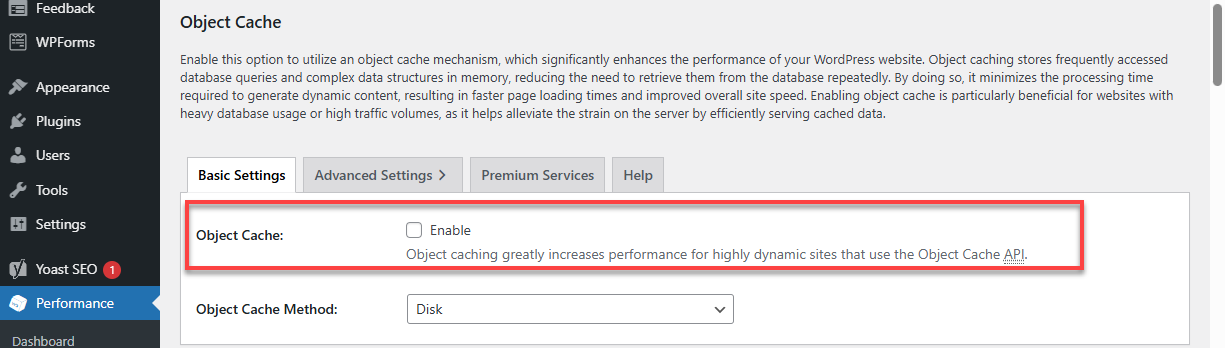
- Under Database Cache, select Disable (recommended for shared hosting).
- Under Object Cache, select Disable unless you have a powerful server.
Page Cache Settings
- Go to Performance > Page Cache.
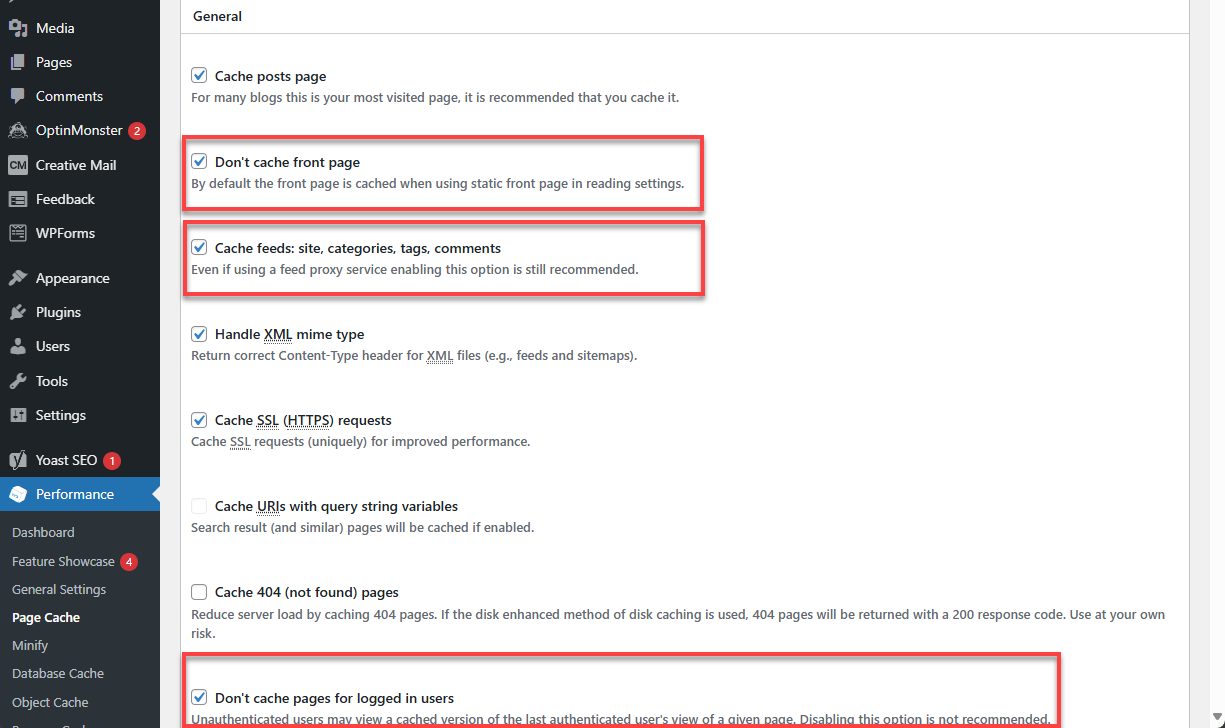
- Enable Cache Front Page and Cache Feeds.
- Ensure that the Don't cache pages for logged in users are checked (for membership sites).
Browser Cache Settings
- Navigate to Performance > Browser Cache.
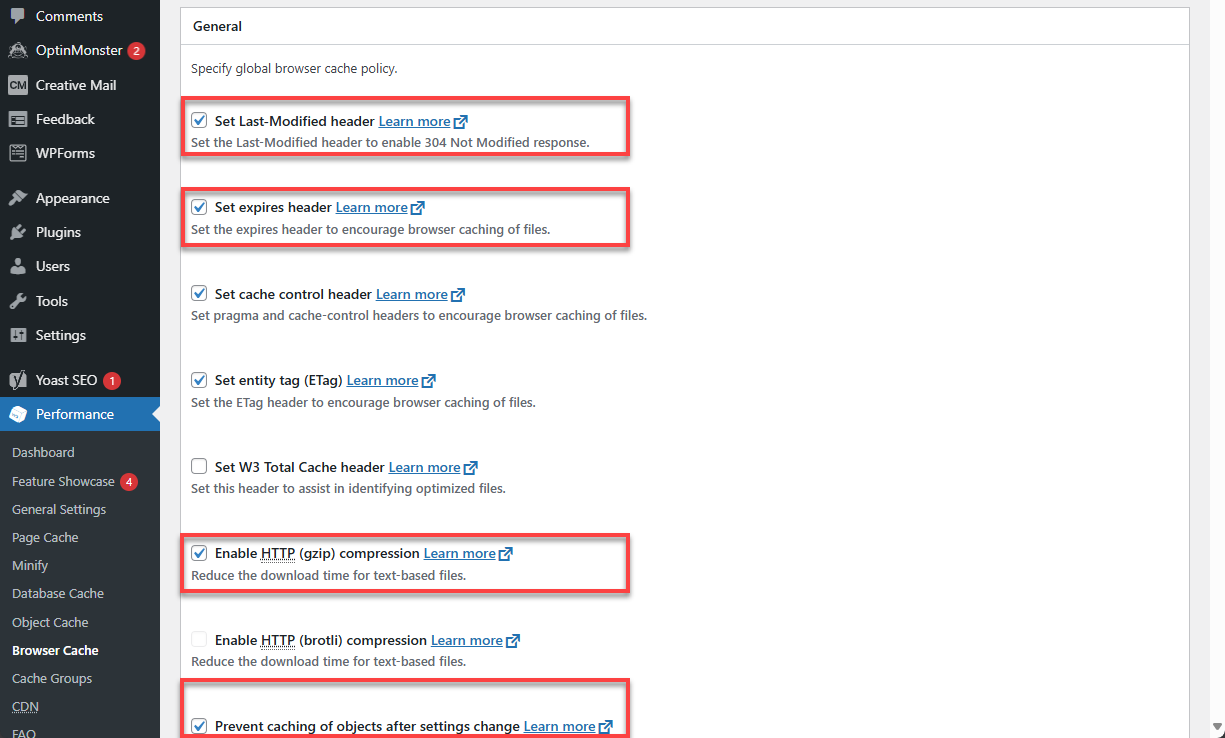
- Enable settings for Set expires header, Set cache control header, Enable HTTP (gzip) compression, and Prevent caching of objects after settings change.
Troubleshooting Common W3 Total Cache Issues
Site Layout is Broken After Activation
- Cause: Minification may be interfering with theme styles.
- Fix: Go to Performance > Minify and disable minification or exclude specific CSS/JS files.
Website Speed Not Improving
- Cause: Caching is not configured correctly or conflicts with other plugins.
- Fix: Ensure Page Cache and Browser Cache are enabled. Use GTmetrix or Google PageSpeed Insights to test.
White Screen After Activation
- Cause: Conflict with another caching plugin.
- Fix: Deactivate all other caching plugins before enabling W3 Total Cache.
Additional Optimization Tips
- Use a Content Delivery Network (CDN) like Cloudflare for better performance.
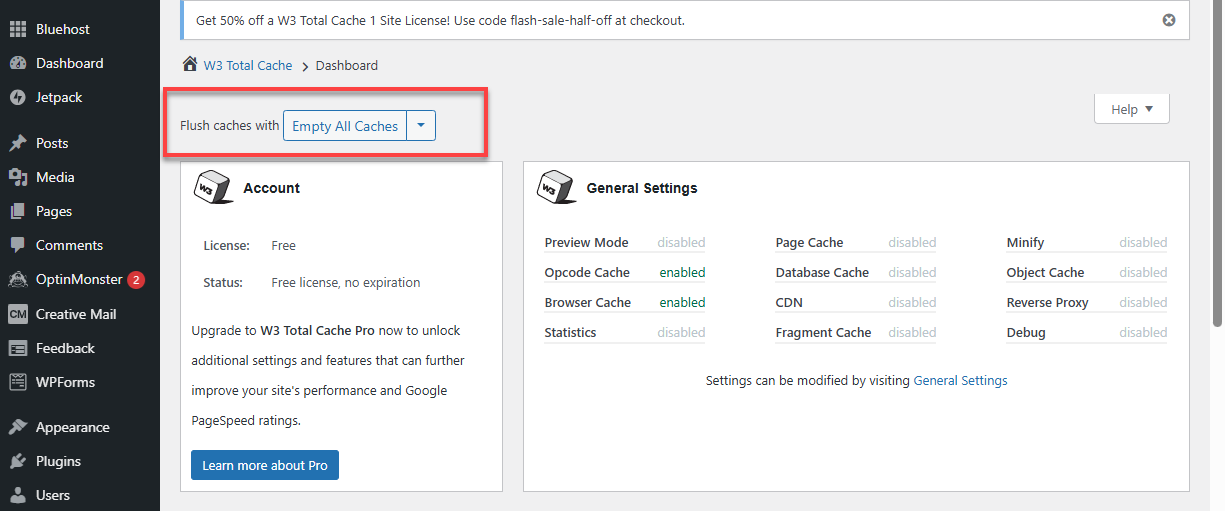
- Regularly clear the cache by navigating to Performance > Dashboard > Empty All Caches.
Check out our article on The 12 Best WordPress Plugins to Take Your Site to the Next Level to enhance your website's efficiency.
If you're having trouble choosing plugins, explore our blog post Beginner's Guide to WordPress Plugins: How To Pick and Use the Right Plugins.
View the blog How to Make My WordPress Site Faster: 5 Easy Tips + 8 Bonus Ideas about '5 fundamental ways to improve site speed.
For more tips while building your WordPress site, follow the steps in this blog: How To Clear Your WordPress Cache and Why You Should.
Summary
W3 Total Cache is an essential tool for optimizing WordPress performance. This guide explains configuring the W3 Total Cache for optimal speed and efficiency. If you're looking for alternative caching plugins, check out our guide on WP Super Cache.
Now that your website is optimized, test your speed using PageSpeed Insights and make further adjustments as needed!
If you need further assistance, Bluehost Chat Support is available 24 hours a day, 7days a week while Bluehost Phone Support is available 7 days a week from 7 am-12 midnight EST.
- Chat Support - While on our website, you should see a CHAT bubble in the bottom right-hand corner of the page. Click anywhere on the bubble to begin a chat session.
- Phone Support -
- US: 888-401-4678
- International: +1 801-765-9400
You may also refer to our Knowledge Base articles to help answer common questions and guide you through various setup, configuration, and troubleshooting steps.