How to Change WordPress Theme in the Database via phpMyAdmin
If, for some reason, you're unable to access your WordPress dashboard due to an issue with your active theme or maybe a plugin update, you can change your WordPress theme directly through your site's database. In such cases, one effective way of restoring functionality to your website or dashboard is to change your theme to a default WordPress theme, such as the Twenty Twenty-Five theme. You don't need to be a developer to do this; this article will guide you through changing your WordPress theme using phpMyAdmin.
Here is a video we created to guide you through the steps.
When to Use This Method
- You updated a theme or plugin, and now you're getting a blank, white screen or an error page.
- You're locked out of your WordPress dashboard due to theme incompatibility.
- You're debugging issues and need to revert to a known working theme.
/wp-content/themes/ folder via File Manager. You can also find your current theme in the /wp-config.php file.How to Change the WordPress Theme in the Database
To change the theme using the database method, follow these steps
Step 1: Upload Your WordPress Theme File
First, you need to upload your theme file to your document root. You can do this by using an FTP client to connect to your file manager or directly through your Bluehost Portal.
- Log in to your Bluehost Portal.
- In the left-hand menu, click Websites.
- Click the Manage Site button located next to the website you want to manage.

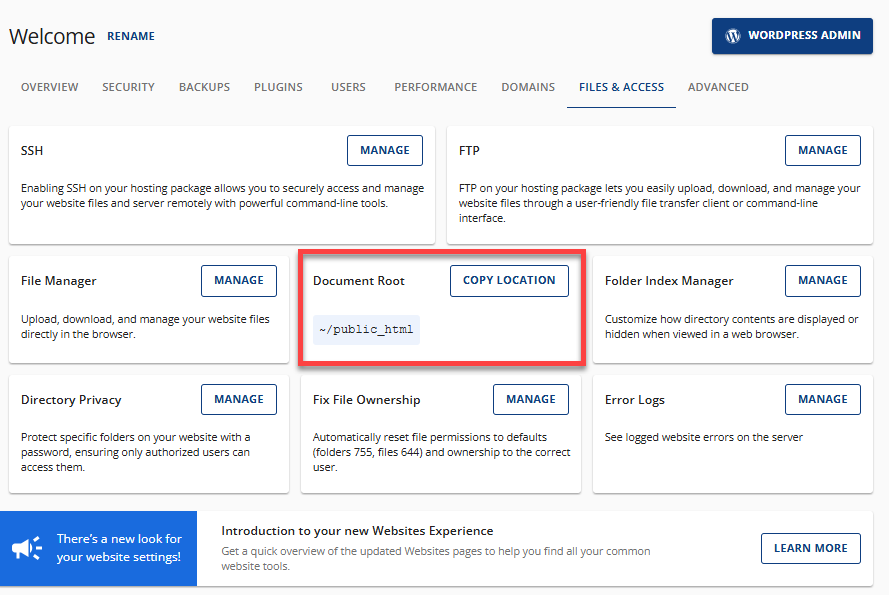
- Identify your site's document root by clicking the Files & Access tab.
- Take note of your document root. Click Copy Location if needed.
- Click Manage under the File Manager card.
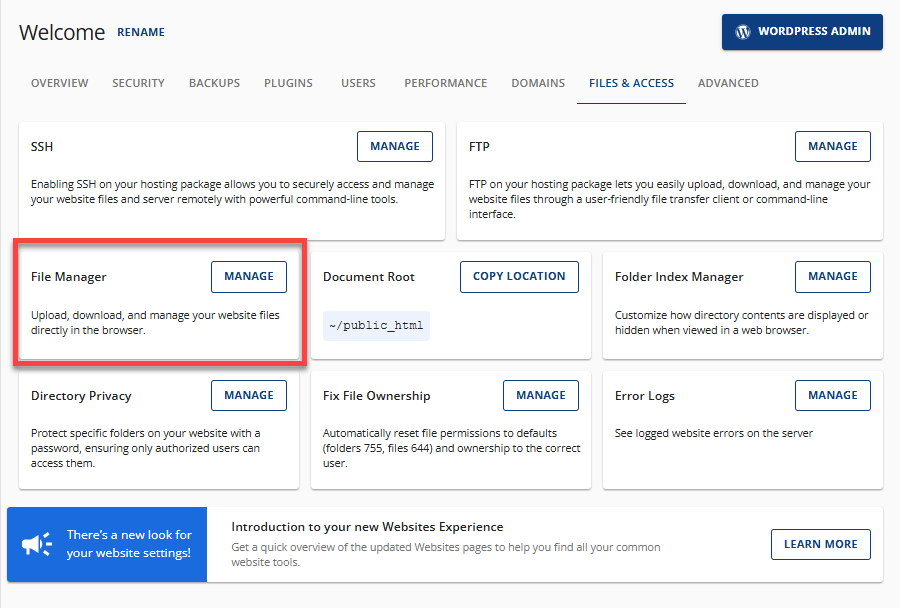
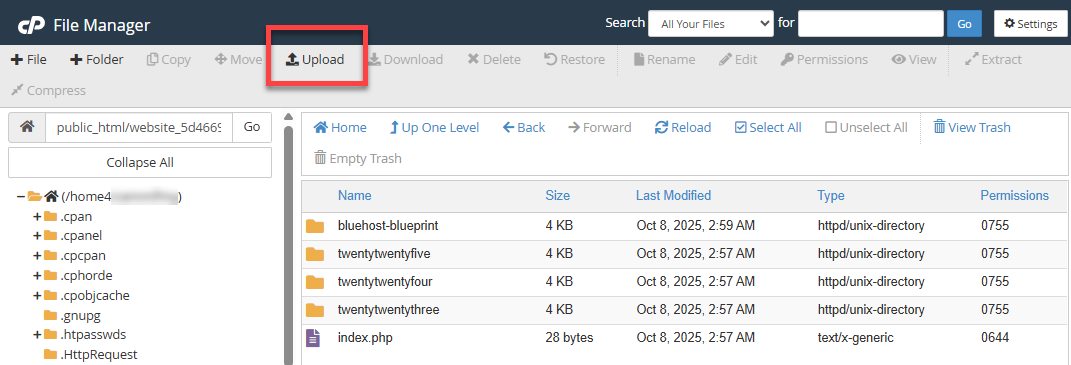
- You'll be redirected to your File Manager in a new tab. Navigate to your document root, which you noted earlier, and then click its wp-content folder.
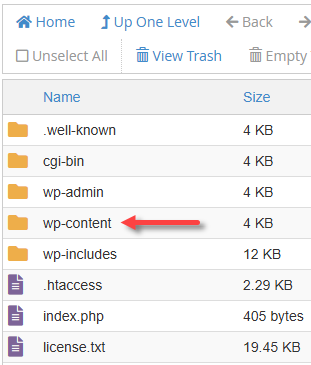
- Click the themes folder.
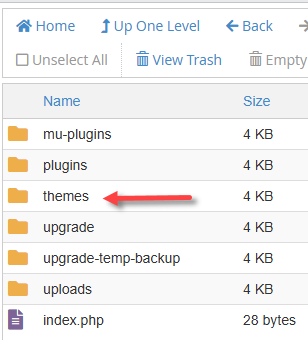
- Click Upload in the top menu and select your theme's .zip file.
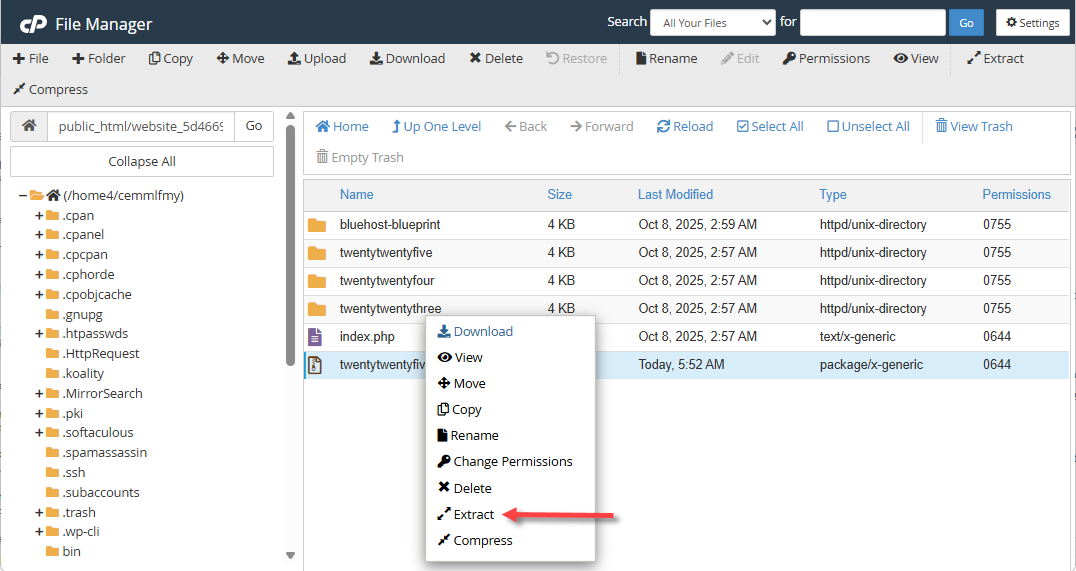
- After uploading, right-click on the .zip file and select Extract.
- Click Reload to see the extracted file.
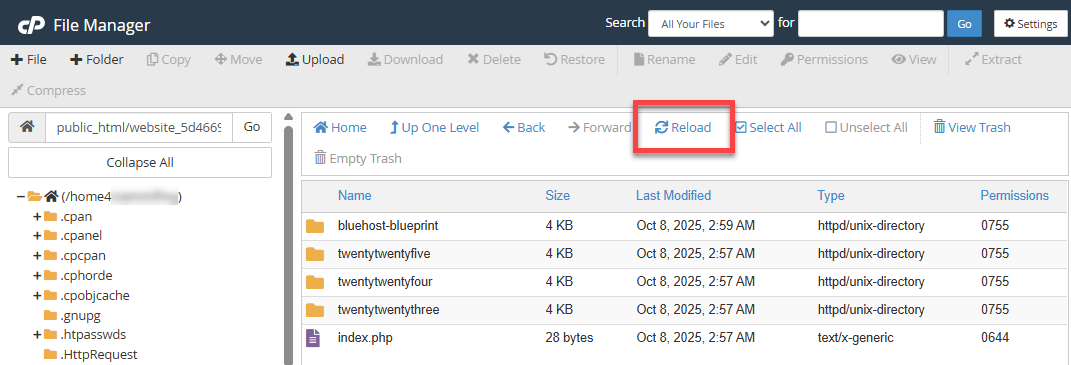
- Take note of your new theme's folder name. You will need this information later when we update your theme in the database.
Step 2: Change Your Template in phpMyAdmin
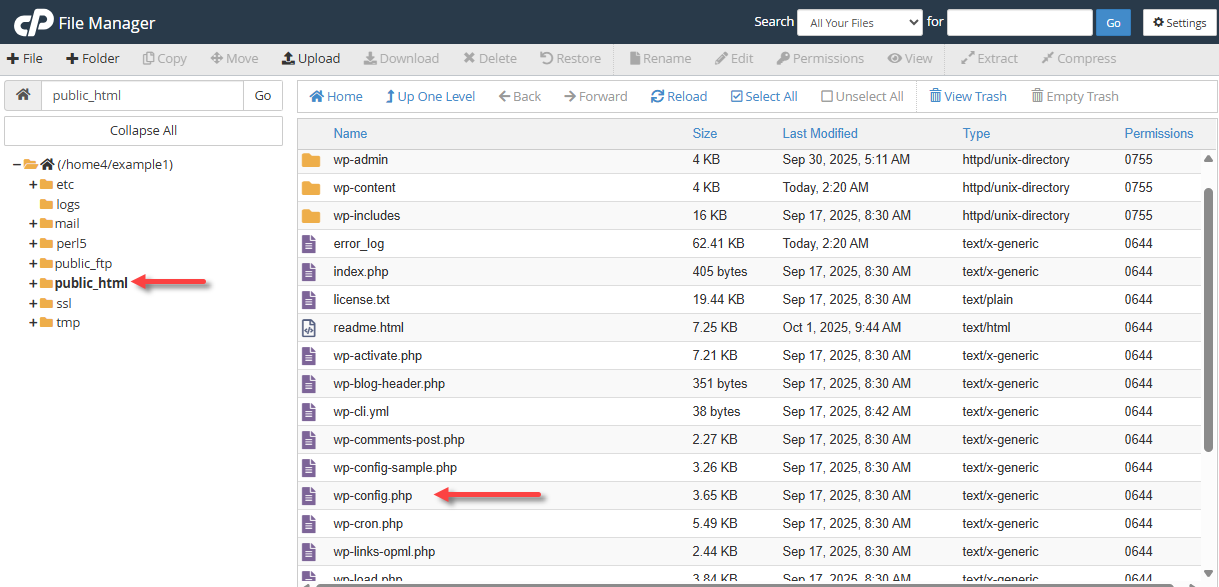
- Go back to your site's document root and find your database name in the wp-config.php file.
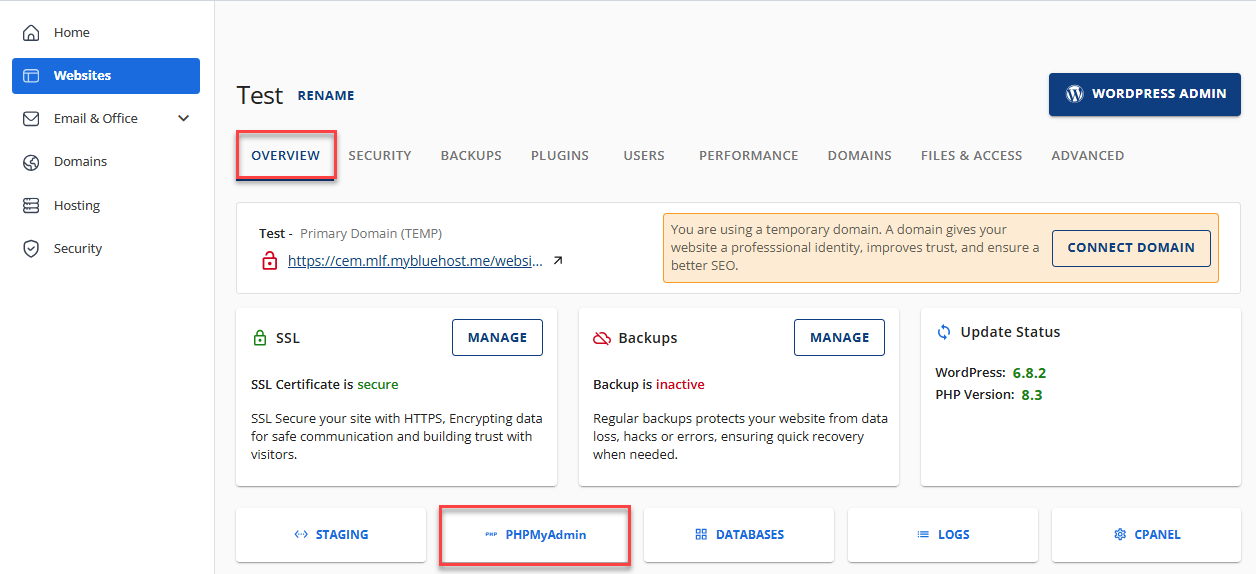
- Once you have your database name, go back to your Bluehost Portal and navigate to the Overview tab.
- Under the Overview tab, click the PHPMyAdmin button.
- Your phpMyAdmin will open in a new tab. Within phpMyAdmin, click your database name in the left pane.
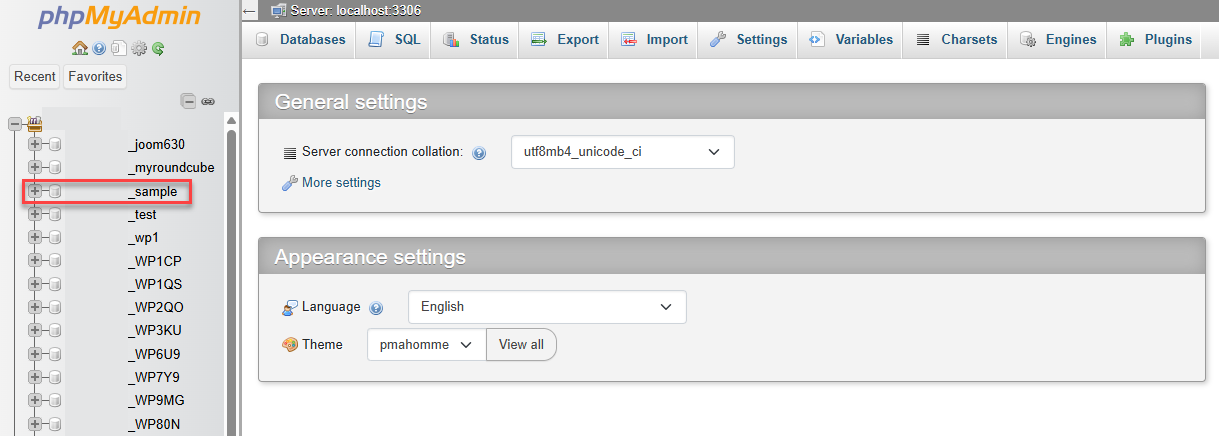
- Under your database, look for the table "_options." The "wp" is the default prefix. Your phpMyAdmin could show a different prefix, but that's okay as long as you navigate to the "_options" table.

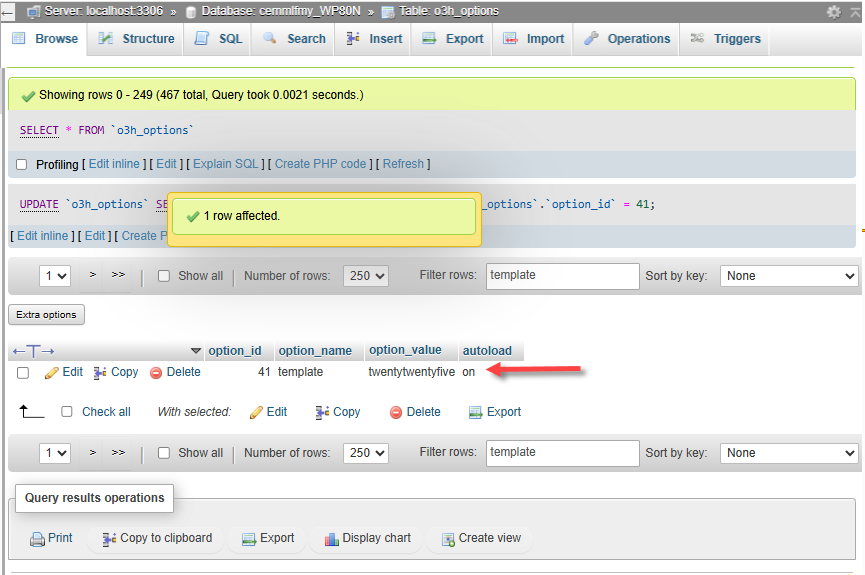
- Using the search function, search for the "template" row.
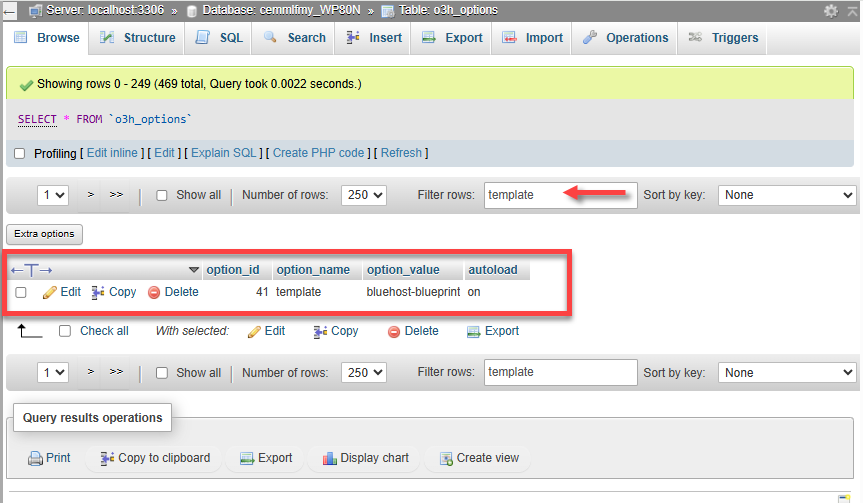
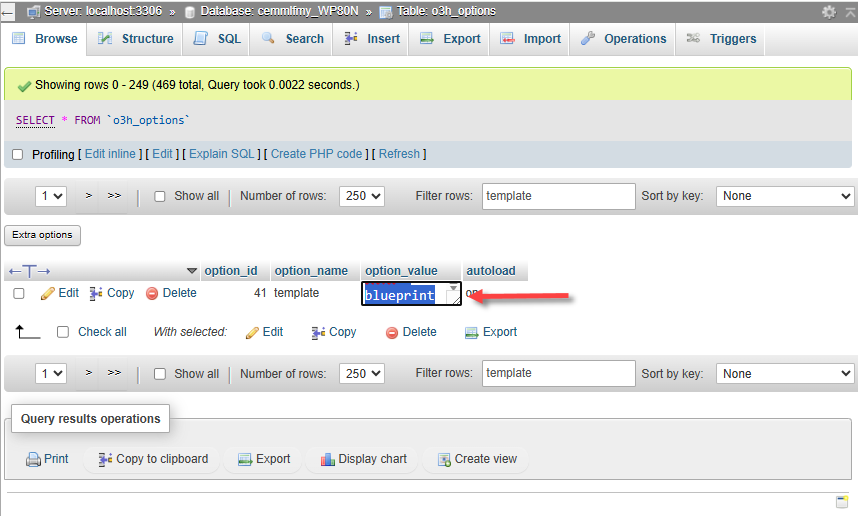
- Double-click and replace the value under the option_value column with your theme's folder name, which you noted earlier.
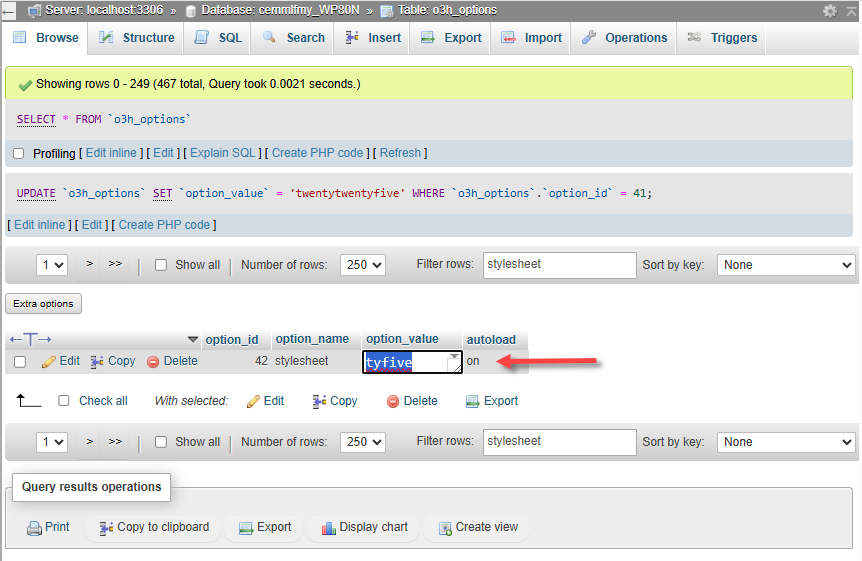
- Next, search for the "stylesheet" row.
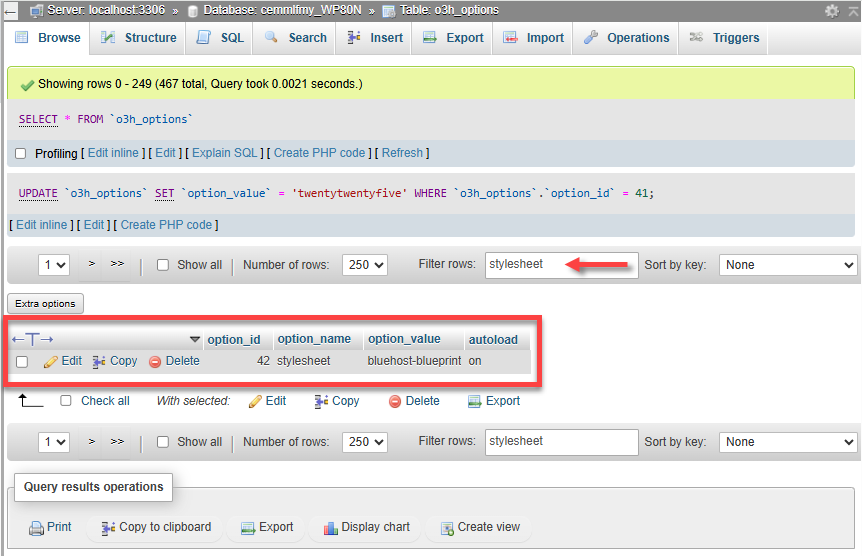
- Double-click the value under the option_value column. Replace it with your theme's folder name once again.

- After updating the template and stylesheet rows, visit your website and your WordPress dashboard. You should now have access to the dashboard.
Related Articles
Summary
Learning how to change your WordPress theme through the database is a reliable solution when you're locked out of your WordPress dashboard due to theme- or plugin-related issues. By using phpMyAdmin to update the "template" and "stylesheet" values in the "_options" table, you can safely regain access to your website. Just remember to back up your database before making any changes!
If you need further assistance, Bluehost Chat Support is available 24 hours a day, 7days a week while Bluehost Phone Support is available 7 days a week from 7 am-12 midnight EST.
- Chat Support - While on our website, you should see a CHAT bubble in the bottom right-hand corner of the page. Click anywhere on the bubble to begin a chat session.
- Phone Support -
- US: 888-401-4678
- International: +1 801-765-9400
You may also refer to our Knowledge Base articles to help answer common questions and guide you through various setup, configuration, and troubleshooting steps.