Configuring WHM (Part 1)
This guide walks you through the first-time setup of a new cPanel account. Use the links below to jump to specific sections for additional details.
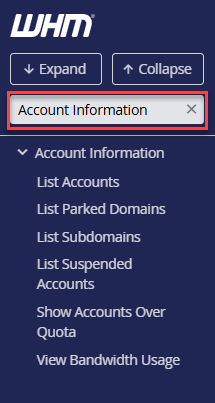
How To Log In and Access WHM
This section explains how to access your WHM interface:
Configure Server Settings
There are many server options available that are not covered in this walkthrough. Below are the key settings that should be configured before creating any hosting accounts. Most other options can be adjusted later, even after accounts already exist on the server.
Basic cPanel/WHM Setup
The following items represent core configuration areas for your server:
- Main Shared Virtual Host IP
- The server’s primary IP address is typically assigned as the Main Shared Virtual Host IP. This is standard for most environments, though it can be changed if needed.
- The root user always retains full access to all accounts associated with this IP address, even when the IP is shared with a reseller.
- WHM supports only one shared IP per WHM user. If multiple shared IPs are required, you will need to create separate reseller users and assign one shared IP to each of them.
- Server contact email address
- This setting lets you define the email address that receives system alerts and server notifications.
- Email addresses tied to the primary domain must be created within cPanel after the hosting account has been added.
- Setting the default name servers
- Here you specify the hostnames used as name servers for the server. These values are normally predefined for the primary and secondary name servers.
- Your registrar must register each name server and link it to a valid IP address on the server. WHM allows up to four name servers, although most setups only require two.
Reset the Root Password
Refer to the following resource for steps on updating your WHM root password:
Initial Quota Setup
Disk quotas are typically enabled by default on newly provisioned servers.
Server Time
Servers are usually configured to use Central Standard Time (CST). This option allows you to adjust the server’s system timezone if required.
Tweak Settings
This area allows you to fine-tune a wide range of server-wide behaviors and defaults.
- Configuring the catch-all/default address behavior to "fail" ensures that messages sent to invalid email addresses are rejected automatically.
- This helps lower server load and reduces spam-related abuse.
- Shell Access/Jailshell
- When shell access is enabled for specific accounts, this option enforces the use of a jailed shell by default rather than a standard shell environment.
- Jailed shell users are confined to a restricted environment, preventing visibility into other users’ files and processes. This significantly improves system security compared to standard shell access, which can expose broader system information.
- When shell access is enabled for specific accounts, this option enforces the use of a jailed shell by default rather than a standard shell environment.
For a detailed breakdown of all available options within Tweak Settings, see the article below.
Configure WHM/cPanel Updates
These preferences determine how cPanel, WHM, and related software are updated. By default, servers follow the Stable build and receive updates automatically.
You can review the official cPanel documentation here:
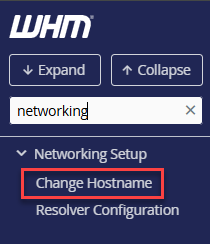
Set Hostname In the Networking Setup
The hostname is a Fully Qualified Domain Name (FQDN) that uniquely identifies your server online. WHM assigns a default hostname initially, but you can customize it as needed. Additional guidance is available in the following external documentation:
To configure a hostname in WHM:
- Log in to WHM.
- Navigate to the Change Hostname section. The fastest method is to enter the keyword in the search bar on the left side.
- Alternatively, expand Networking Setup in the left panel and select Change Hostname.
- The right-hand panel displays notes, example hostnames, randomly generated suggestions, and the server’s current hostname.
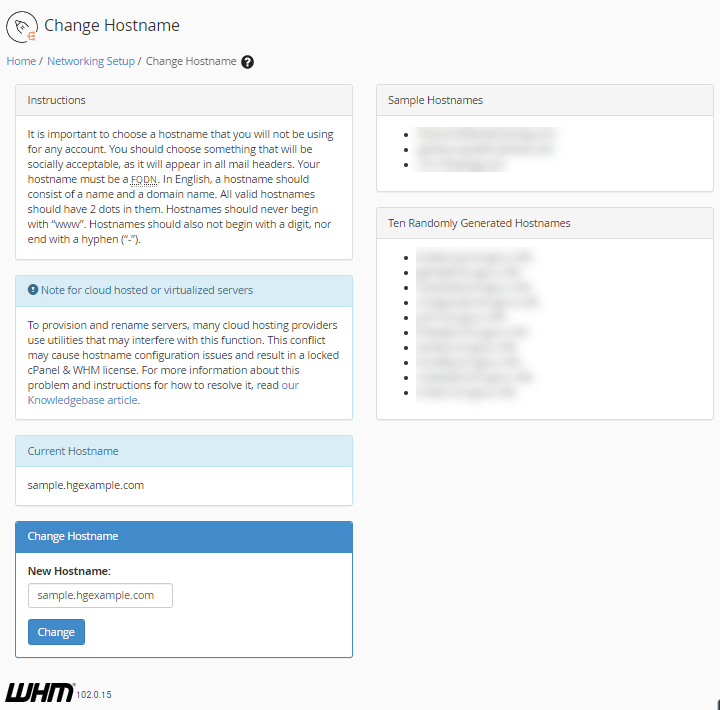
- Enter the desired value into the New Hostname field.
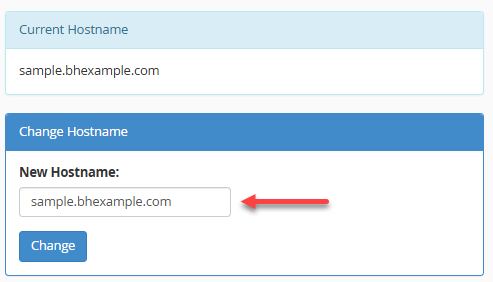
- Click the Change button.
Name Server IPs
Name server IP addresses are normally assigned automatically. If you updated the name servers earlier and did not select the option to associate IPs at that time, you may need to assign them manually.
Resolver Configuration
Resolvers are typically pre-set to use data center-provided resolver addresses. Additional details can be found in the WHM documentation.
Security Password Options
The next step focuses on configuring password security controls.
These settings help enforce stronger passwords across the server. Before creating user accounts that allow self-service password resets, it’s recommended to define minimum strength requirements to reduce the risk of compromised credentials.
To configure password security in WHM:
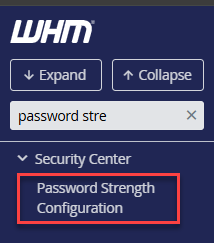
- Log in to WHM.
- Locate the Password Strength Configuration section using the search field on the left panel.
- Alternatively, expand Security Center and select Password Strength Configuration.
- Use the slider on the right panel to adjust the Default Required Password Strength.
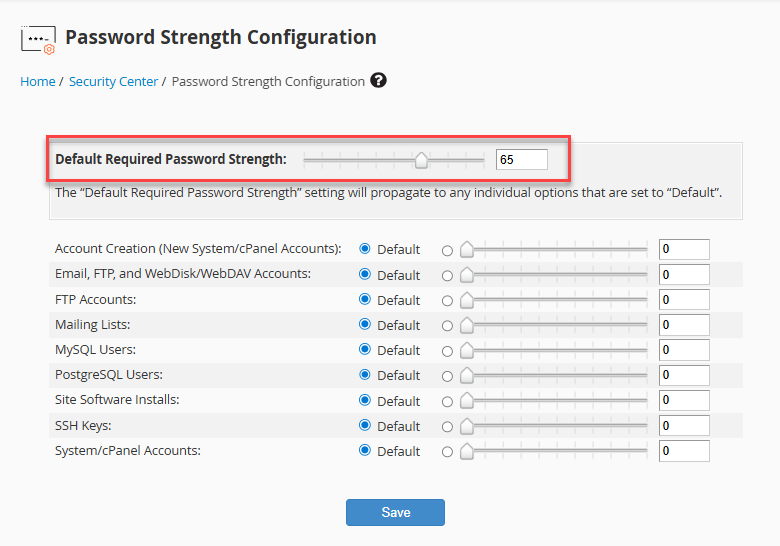
You may also enter a numeric value between 0 and 100.
- Click Save.
Create Packages
Packages define resource limits and feature access applied to new accounts. For the main domain, we will create a package with no restrictions that is reserved specifically for that domain.
Step-by-step instructions for creating a package can be found in the article below:
Adjust the following options in the package’s Resources and Settings sections to allow unlimited domains and standard feature access:
- Max Parked Domains - Set to unlimited.
- Max Addon Domains - Set to unlimited.
- Feature List.- Select default. This includes all features unless modified within the Feature Manager section of WHM.
You may want to repeat this process to create additional packages with predefined limits before provisioning future client accounts.
DNS Zone Template
This section reviews the DNS zone template used when creating the primary domain.
Most standard DNS records are already present. However, editing the template allows WHM to automatically apply your preferred records each time a new account is created.
Because hostname and name server records apply only to the primary domain’s zone, we will not include them in the template. These records can be added manually after the zone is generated.
To access the DNS Zone Template in WHM:
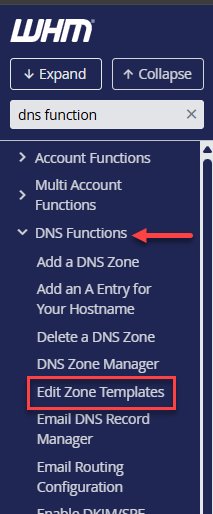
- Log in to WHM.
- Navigate to Edit Zone Templates using the search box.
- Or expand DNS Functions and select Edit Zone Templates.
- Click the standard template link.
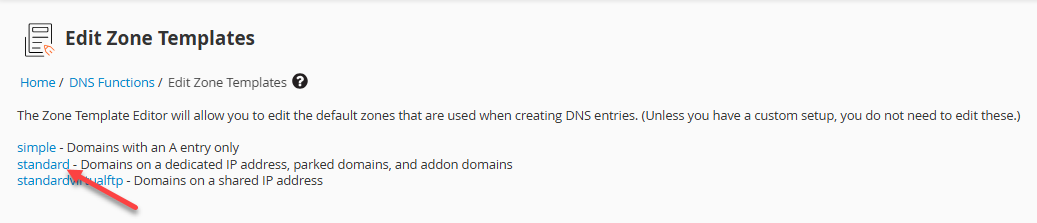
- Click Save to preserve any changes. (No edits are required unless your setup is non-standard.)
Sender Policy Framework (SPF)
You may want to include details necessary to generate an SPF record.
Sender Policy Framework (SPF) allows domain owners to specify which mail servers are permitted to send email on their behalf. Receiving servers that validate SPF may reject messages sent from unauthorized sources.
Guidance on managing DNS records in WHM is available here:
This completes Part 1 of the tutorial. Part 2 will continue with additional steps for initial cPanel server configuration.
Summary
This guide outlines the key steps for completing the initial setup of a cPanel server using WHM. It covers logging in, configuring essential server settings, securing access, managing updates, setting the hostname and name servers, and preparing packages and DNS templates. Following these steps helps ensure the server is properly configured, secure, and ready for account creation before moving on to more advanced setup tasks.
If you need further assistance, Bluehost Chat Support is available 24 hours a day, 7days a week while Bluehost Phone Support is available 7 days a week from 7 am-12 midnight EST.
- Chat Support - While on our website, you should see a CHAT bubble in the bottom right-hand corner of the page. Click anywhere on the bubble to begin a chat session.
- Phone Support -
- US: 888-401-4678
- International: +1 801-765-9400
You may also refer to our Knowledge Base articles to help answer common questions and guide you through various setup, configuration, and troubleshooting steps.