How to Set Private Nameservers in WHM for New Accounts
Private nameservers in WHM allow you to use branded nameservers, such as ns1.example.com and ns2.example.com, when creating new cPanel accounts on a VPS or Dedicated server. This is helpful if you manage multiple websites, host client accounts, or want a more professional DNS setup for your hosting environment.
This guide explains how to set private nameservers as the default nameservers for new accounts created in WHM. These changes apply to new accounts only. Existing accounts will continue using their current nameservers unless you update them manually.
Before You Begin
Before setting private nameservers in WHM, make sure your private or custom nameservers are already created and pointed to your server IP address.
For example:
- ns1.example.com
- ns2.example.com
You may also need to register your private nameservers with your domain registrar. Updating the settings in WHM only sets the nameserver entries used in DNS zones. Your domain or customer domains must still use those nameservers at the registrar level for DNS to resolve properly.
Set Private Nameservers in WHM for New Accounts
Use these steps to make private nameservers the default for new cPanel accounts created through WHM.
- Log in to your Bluehost Portal.
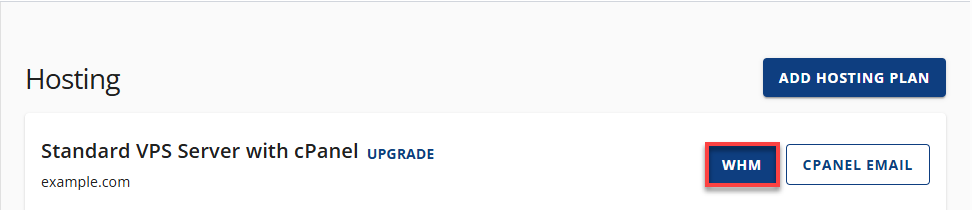
- Click Hosting in the left-hand menu.
- In the hosting details page, click the WHM button.
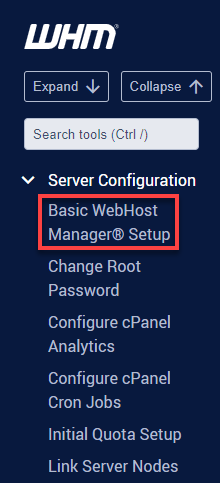
- In WHM, locate the Server Configuration section.
- You can also use the WHM search box and search for Basic WebHost Manager Setup.
- Click Basic WebHost Manager® Setup.
- Scroll down to the nameserver section near the bottom of the page.
- Enter your private nameserver details:
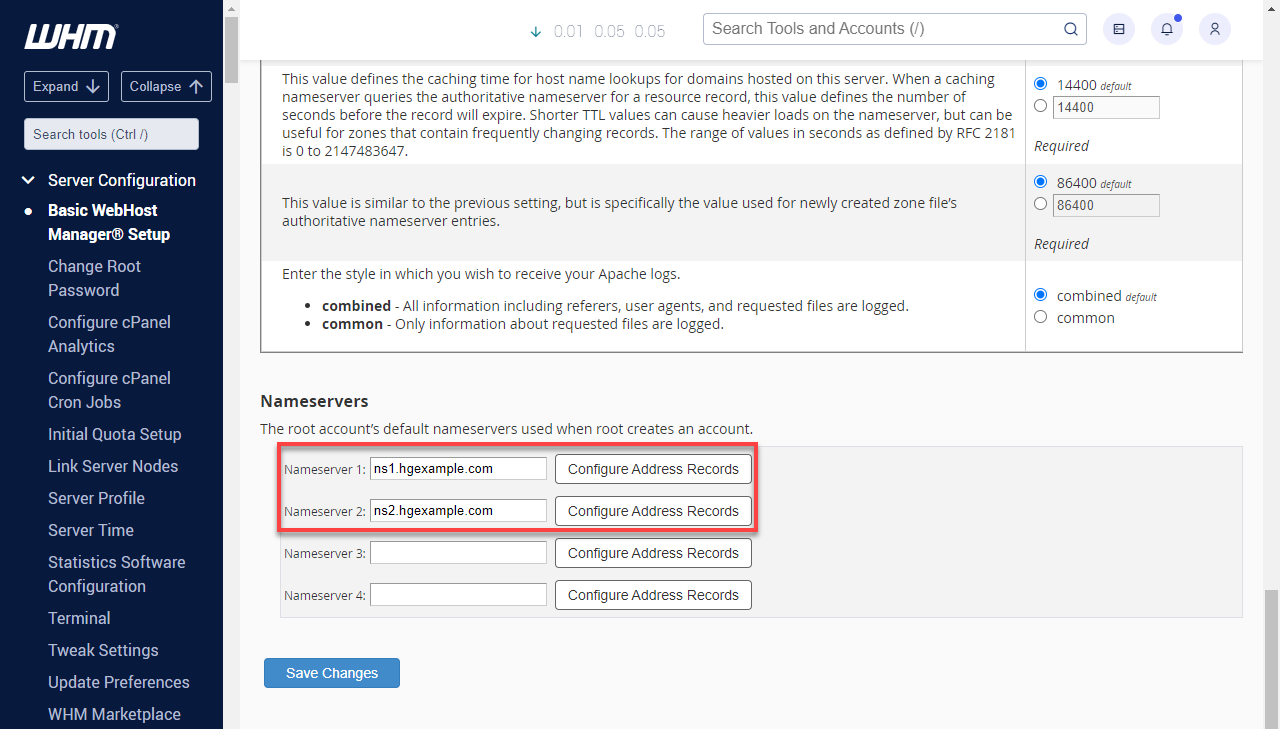
- Nameserver 1: Enter your primary private nameserver, such as ns1.example.com.
- Nameserver 2: Enter your secondary private nameserver, such as ns2.example.com.
- Click Save Changes.
After saving, WHM will use these private nameservers by default when creating new cPanel accounts on the server.
Set Private Nameservers for a Reseller Account in WHM
If you create reseller accounts on your VPS or Dedicated server, you can assign different default nameservers to individual reseller accounts. This is useful when each reseller needs their own branded nameservers instead of using the server-wide default nameservers.
These settings also apply only to new accounts created under that reseller. Existing accounts will not automatically change.
To configure reseller private nameservers:
- Log in to your Bluehost Portal.
- Click Hosting in the left-hand menu.
- In the hosting details page, click the WHM button.
- In the left-side menu, find the Resellers section.
- Click Edit Reseller Nameservers and Privileges.
- Select the reseller user or domain from the list.
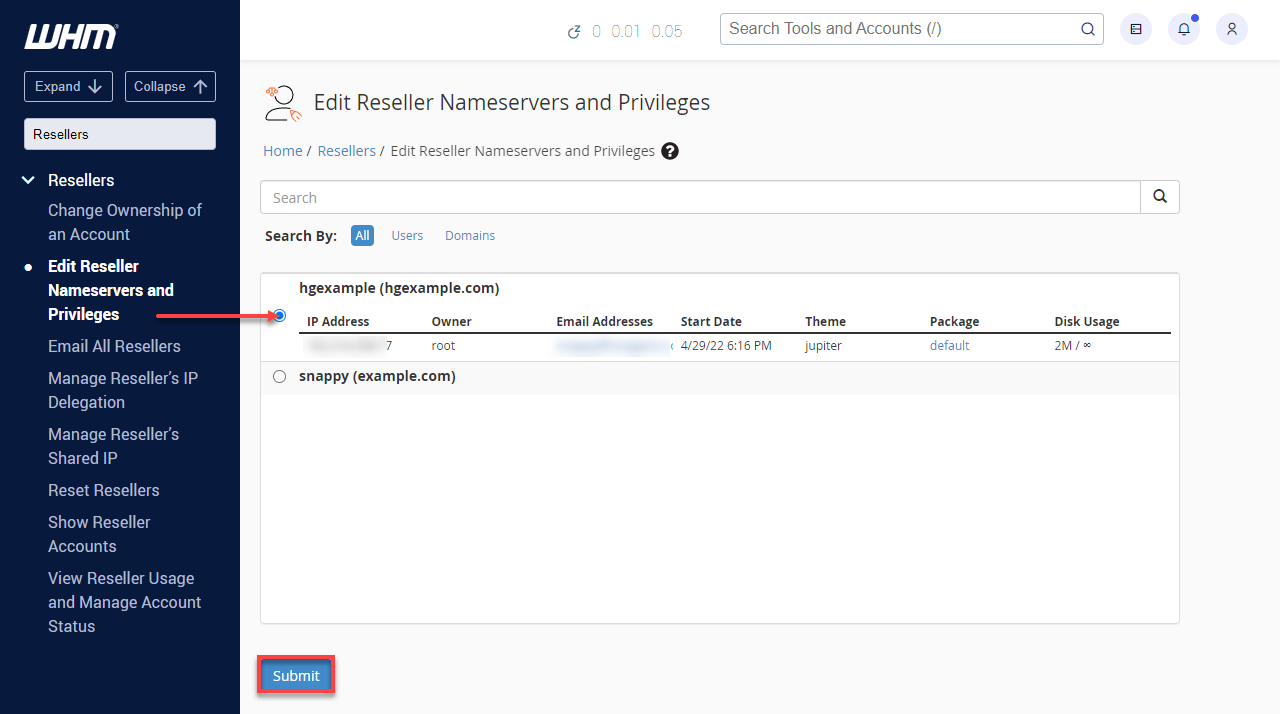
- Click Submit.
- Scroll down to the Nameservers section.
- Select Explicitly Set the Nameservers.
- Replace the existing nameserver values with the reseller’s private nameservers:
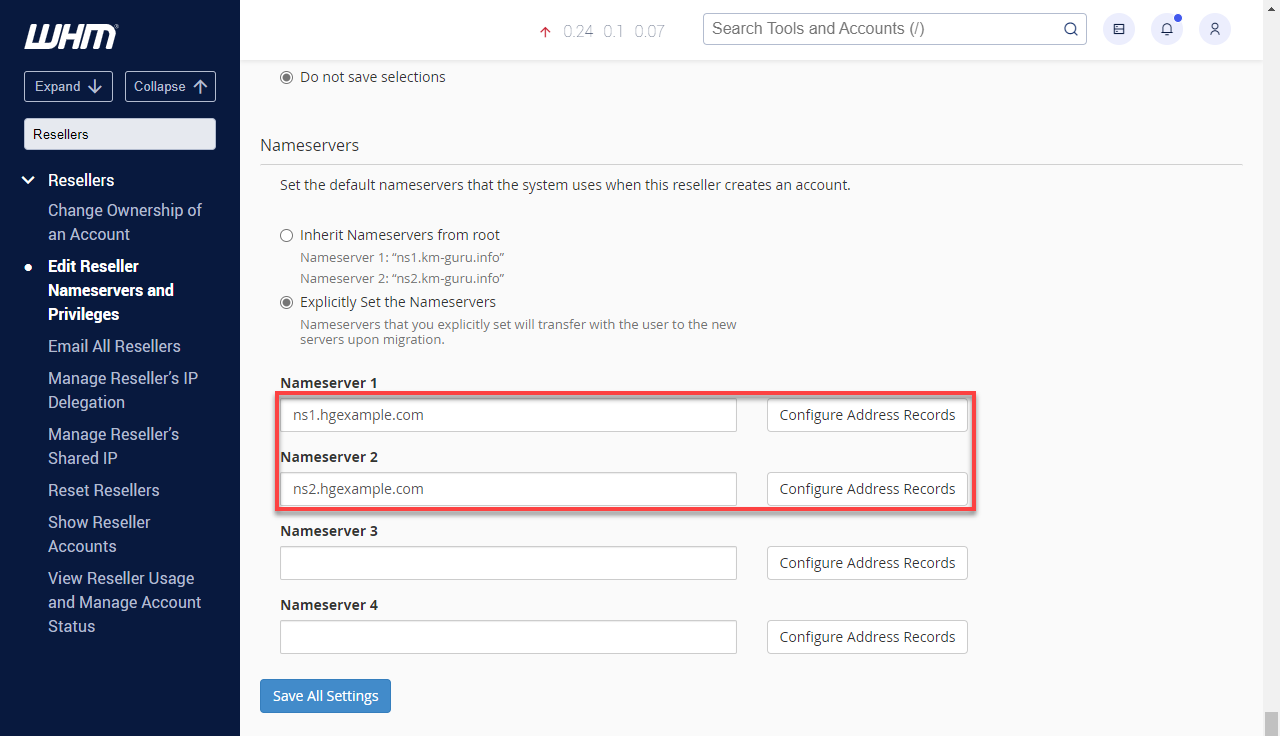
- Nameserver 1: Enter the primary nameserver, such as ns1.resellerdomain.com.
- Nameserver 2: Enter the secondary nameserver, such as ns2.resellerdomain.com.
- Click Save All Settings.
Once saved, new cPanel accounts created by that reseller will use the assigned private nameservers.
When to Use Private Nameservers
Private nameservers are useful when you want more control and branding for your hosting environment.
You may want to use them if you:
- Manage multiple cPanel accounts.
- Host websites for clients.
- Use reseller accounts in WHM.
- Want nameservers that match your domain or brand.
- Prefer to manage DNS through your VPS or Dedicated server.
For example, instead of using a generic provider nameserver, you can use:
- ns1.yourdomain.com
- ns2.yourdomain.com
This helps create a cleaner, more professional setup for client or business websites.
Troubleshooting Nameserver Issues
If your new accounts are not resolving correctly after setting private nameservers, check the following:
- Confirm the private nameservers were entered correctly in WHM.
- Make sure the nameserver domain has the correct A records.
- Verify that the private nameservers are registered with the domain registrar.
- Check that the domain is using the correct nameservers.
- Allow enough time for DNS propagation.
- Review the DNS zone for the affected cPanel account.
If the issue continues, review the domain’s DNS records in WHM or contact Bluehost support for help checking the server-side configuration.
Related Articles
Summary
Setting private nameservers in WHM allows new cPanel accounts to use branded nameservers by default. You can apply private nameservers server-wide through Basic WebHost Manager Setup or assign separate nameservers to individual reseller accounts through Edit Reseller Nameservers and Privileges.
Remember that these settings only apply to new accounts. Existing accounts must be updated separately, and customers still need to point their domains to the correct private nameservers through their registrar.
If you need further assistance, Bluehost Chat Support is available 24 hours a day, 7days a week while Bluehost Phone Support is available 7 days a week from 7 am-12 midnight EST.
- Chat Support - While on our website, you should see a CHAT bubble in the bottom right-hand corner of the page. Click anywhere on the bubble to begin a chat session.
- Phone Support -
- US: 888-401-4678
- International: +1 801-765-9400
You may also refer to our Knowledge Base articles to help answer common questions and guide you through various setup, configuration, and troubleshooting steps.