Key highlights
- Learn how to redirect all HTTP traffic to HTTPS using simple .htaccess code that secures your entire website.
- Understand the critical security and SEO benefits of implementing site-wide HTTPS encryption for user trust and search rankings.
- Discover ready-to-use code snippets you can copy and implement immediately without complex server configurations.
- Know how to troubleshoot common redirect loops, mixed content warnings and server errors after implementation.
- Explore advanced .htaccess rules for specific hosting environments, subdirectories and WordPress installations.
Forcing SSL (Secure Sockets Layer) with HTTPS (Hypertext Transfer Protocol Secure) redirect means that all traffic to a website is encrypted and the user’s browser is automatically redirected from HTTP to HTTPS. This means that all data transmitted between the user’s browser and the website’s server is encrypted and secure.
Any sensitive information, such as login credentials or payment details, is encrypted and protected from prying eyes. Additionally, forcing SSL can help improve your website’s search engine rankings because Google and other search engines prefer websites that use HTTPS over HTTP (Hypertext Transfer Protocol). Finally, implementing SSL can help build trust with your visitors because it shows that you take their privacy and security seriously.
In this tutorial, we will learn how to force HTTPS in .htaccess file and apply it in various scenarios. It’s important to take a backup of your .htaccess file first before making any changes and to thoroughly test the website after implementing them.
Why force HTTPS?
When you force HTTPS using htaccess, you’re protecting both your website and your visitors by ensuring all data transmitted between browsers and your server is encrypted. This encryption is crucial for safeguarding sensitive information like login credentials, contact form submissions and payment details from potential hackers. Your visitors will immediately notice the difference—they’ll see a secure padlock icon in their browser’s address bar instead of a “not secure” warning, which builds instant trust and confidence in your site.
Beyond security, forcing HTTPS through your htaccess file also provides significant SEO benefits. Search engines like Google favor HTTPS websites in their rankings, meaning your secure site is more likely to appear higher in search results. Additionally, HTTPS eliminates the security warnings that can frighten visitors away from your site, reducing bounce rates and improving user experience signals that search engines value.
Without HTTPS, your website appears “not secure” to visitors, potentially damaging your credibility and causing people to leave before engaging with your content. When you force HTTPS htaccess redirects, every page automatically loads with encryption enabled, creating a seamless and secure browsing experience that protects your reputation while meeting modern web standards that both users and search engines expect.
Before you force HTTPS with .htaccess
There are essential prerequisites to ensure a smooth transition. First, verify that your SSL certificate is properly installed and valid by visiting your site at https://[domain].com – you should see the padlock icon in your browser without any security warnings. Next, back up your current .htaccess file by downloading a copy to your computer, as this serves as your safety net if anything goes wrong during the process.
These HTTPS redirect rules work specifically on Apache servers with mod_rewrite enabled, which is standard for most hosting environments. Test your site thoroughly after implementing the changes by visiting both http://[domain].com and https://[domain].com to confirm the redirects work properly. Check key pages like your homepage, contact forms and any login areas to ensure everything loads correctly over HTTPS.
If you encounter a 500 Internal Server Error after adding the redirect code, don’t panic – simply restore your backup .htaccess file to get your site running again. This error typically indicates a syntax issue or server configuration conflict. You can then review the code for typos or contact your hosting provider for assistance with server-specific requirements before attempting the HTTPS redirect again.
How to force HTTPS in .htaccess file on all pages?
You can force all of your pages to use HTTPS redirects. To do this, you will need to modify your .htaccess rewrite rules.
Add these lines to the beginning of the .htaccess file using the Code Editor in the File Manager.
RewriteEngine On
RewriteCond %{HTTPS} off
RewriteRule ^(.*)$ https://%{HTTP_HOST}%{REQUEST_URI} [L,R=301]
.htaccess redirect HTTP to HTTPS with or without www
When you force HTTPS via htaccess, you must also decide whether to standardize on the www or non-www version of your domain to avoid duplicate content issues and redirect chains. Search engines view these as separate entities, so consistency is crucial for SEO and user experience. Choose one preferred format and redirect all variants to it—this prevents visitors from encountering multiple versions of your site and ensures search engines can crawl your content seamlessly.
To redirect all traffic to HTTPS with www (https://www.[domain].com), place this code at the top of your .htaccess file before any other rewrite rules:
RewriteEngine On
RewriteCond %{HTTPS} off [OR]
RewriteCond %{HTTP_HOST} !^www\. [NC]
RewriteRule ^(.*)$ https://www.[domain].com/$1 [R=301,L]
For HTTPS without www (https://[domain].com), use:
RewriteEngine On
RewriteCond %{HTTPS} off [OR]
RewriteCond %{HTTP_HOST} ^www\. [NC]
RewriteRule ^(.*)$ https://[domain].com/$1 [R=301,L]
Always test all four URL variants (http, https, www, non-www) after implementation to ensure they redirect correctly and avoid creating redirect loops. Place these rules at the very beginning of your .htaccess file to prevent conflicts with other directives and ensure proper functionality across your entire site.
How to force HTTPS in .htaccess file on specific pages?
To set up SSL protection on specific pages, you must edit the .htaccess file for that domain. For more information on accessing the .htaccess, please see this article .htaccess Tutorial.
How to edit .htaccess file
Access the .htaccess file inside the file manager:
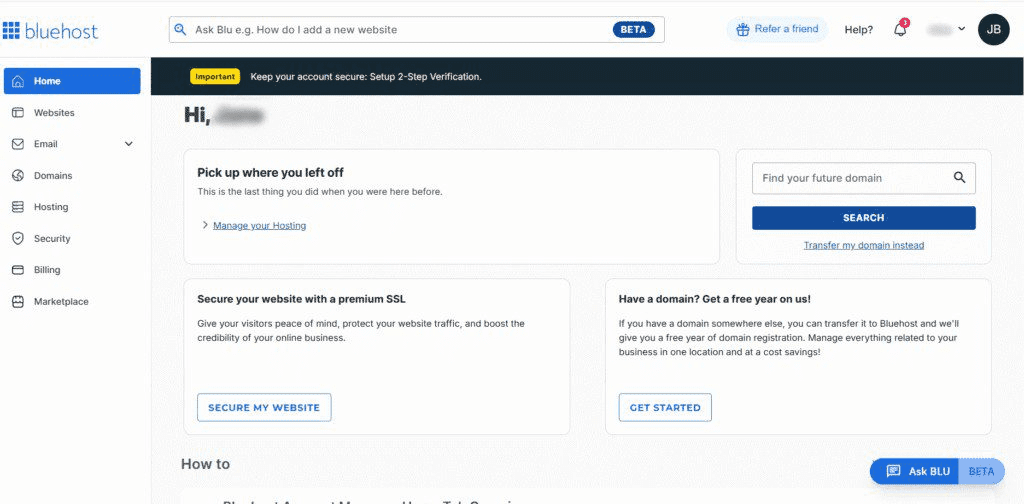
1. Log in to your Bluehost Account Manager.
2. Click Hosting in the left-hand menu.
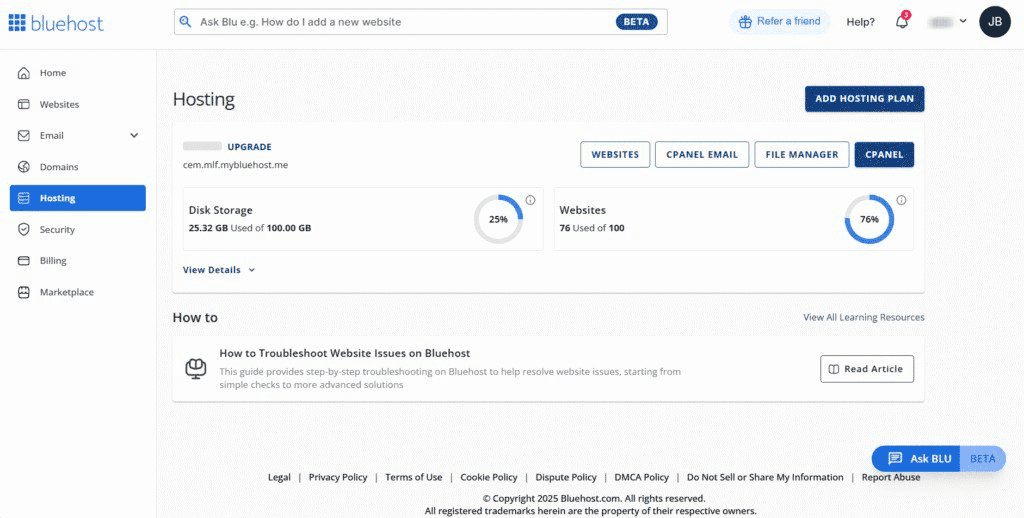
3. The details of your hosting plan will be displayed.
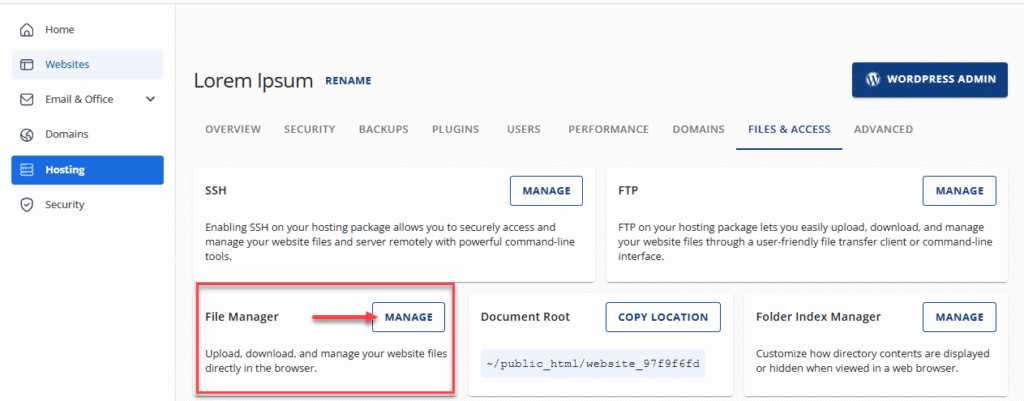
Go to the FILES & ACCESS tab and click MANAGE on the File Manager tile.
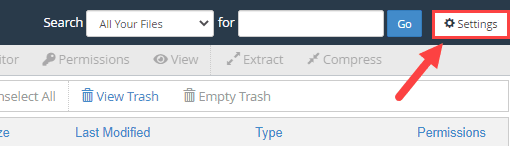
5. Look for the Settings button towards the upper right corner of your screen.
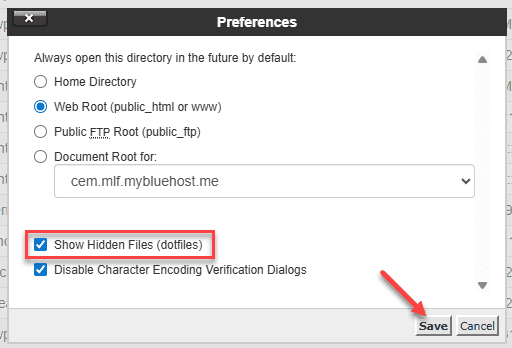
6. On the Preferences pop-up, click the Show Hidden Files (dotfiles) checkbox, then click the Save button.
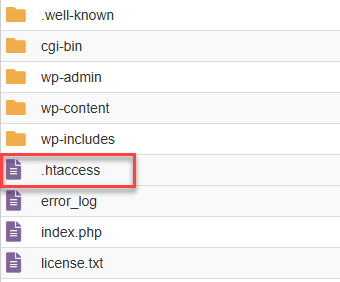
7. Scroll to locate the .htaccess file from the list.
8. Right-click on the .htaccess file and select the Edit option.
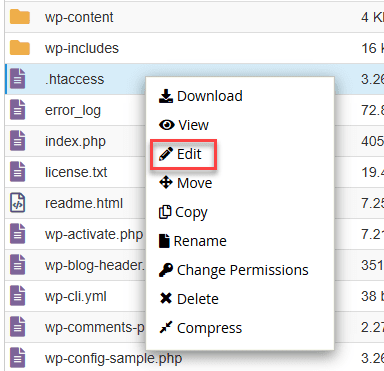
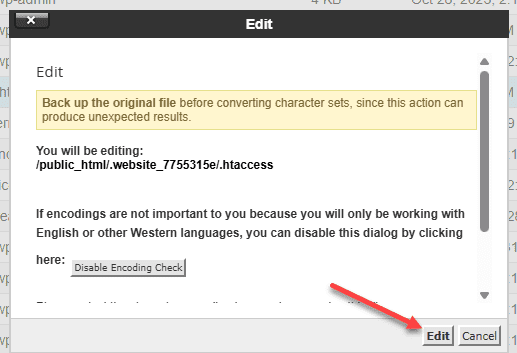
9. A pop-up message will appear, then click the Edit button.
10. At the top of the file, insert the following code:
RewriteEngine On
RewriteCond %{HTTPS} off
RewriteCond %{REQUEST_URI} /[SSL Requested page]/
RewriteRule (.*) https://%{HTTP_HOST}%{REQUEST_URI} [R,L]
11. Click the Save Changes button towards the top right corner of your screen.

12. Check your website to ensure it’s functioning as expected.
If that doesn’t work, you can use this default cPanel code:
RewriteEngine On
RewriteCond %{SERVER_PORT} 80
RewriteRule ^(.*)$ https://example.com/$1 [R,L]
Make sure to replace [example].com with your domain name. Again, remember to Save Changes when finished.
How to force HTTPS on a specific domain
If you have two domains that access the same website and you only want the first one to be redirected to the HTTPS version, use this code:
RewriteEngine On RewriteCond %{HTTP_HOST} ^yourdomain1.com [NC]
RewriteCond %{HTTPS} off
RewriteRule ^(.*)$ https://%{HTTP_HOST}%{REQUEST_URI} [R=301,L]
How to force HTTPS on a specific folder
The .htaccess file can also be used to force HTTPS on particular or specific folders. To do this, the file should be placed in the folder that will have the HTTPS connection. Use this code:
RewriteEngine On RewriteCond %{HTTPS} off
RewriteRule ^(folder1|folder2|folder3) https://%{HTTP_HOST}%{REQUEST_URI} [R=301,L]
Force HTTPS using a plugin
For WordPress users who prefer to avoid editing .htaccess files directly, security plugins offer a user-friendly alternative to force HTTPS redirects. This approach is particularly useful when you have limited access to server files or need a quick setup without technical configuration. Many WordPress security plugins include HTTPS enforcement features that automatically redirect all HTTP traffic to HTTPS with a simple toggle or checkbox setting.
After enabling HTTPS redirection through a plugin, verify that your site loads correctly over HTTPS, check for mixed content warnings in your browser’s developer tools, and ensure your admin and login URLs are properly secured. Test both your homepage and key internal pages to confirm the redirects work consistently. If you later decide to implement server-level HTTPS redirects through .htaccess or your hosting control panel, remember to disable or remove the plugin’s HTTPS feature to prevent redirect conflicts that could cause errors or redirect loops.
How to force HTTPS in WordPress?
When you force HTTPS in WordPress, the process involves more than just adding .htaccess rules. You need to update your WordPress Address and Site Address URLs in the WordPress dashboard under Settings > General to use “https://” instead of “http://”. This ensures your WordPress admin area, login pages, and internal links all function properly with SSL. Without updating these core WordPress settings, you may experience login issues or mixed content warnings even after implementing .htaccess redirects.
Before you force HTTPS using the .htaccess file, verify that your SSL certificate is properly installed and that your WordPress site loads correctly over HTTPS. After implementing your htaccess force HTTPS rules, check critical pages like your homepage, admin dashboard, and any contact forms to ensure they redirect properly and display the padlock icon. You should also scan for mixed content issues—where some elements still load over HTTP—which can break the secure connection and trigger browser warnings.
To confirm your WordPress HTTPS implementation works correctly, test both your frontend and backend. Log out and log back into your WordPress admin to verify the login process redirects to HTTPS. Check that your WordPress site’s internal links automatically use HTTPS and that any plugins or themes aren’t forcing HTTP connections. This comprehensive approach ensures your entire WordPress installation is securely configured, not just the initial redirect.
Force HTTPS with NGINX
If your website runs on NGINX instead of Apache, the .htaccess file won’t work for forcing HTTPS redirects. NGINX uses a different server configuration system where redirects are handled through server block configurations in files typically located in `/etc/nginx/sites-available/` or the main `nginx.conf` file. Instead of .htaccess rules, NGINX requires server-level configuration directives that redirect HTTP traffic to HTTPS.
The basic concept involves adding a server block that listens on port 80 (HTTP) and redirects all requests to port 443 (HTTPS). This redirect rule tells NGINX to automatically send visitors from `http://[domain].com` to `https://[domain].com` with a 301 permanent redirect status. Unlike Apache’s .htaccess approach, NGINX configurations require server reloads to take effect and must be managed at the server level.
If you don’t have direct access to your NGINX server configuration, contact your hosting provider’s support team to implement HTTPS redirects for you. Many hosting providers offer this as a standard feature through their control panels or can configure it upon request. After any redirect implementation, always test your site thoroughly by visiting both HTTP and HTTPS versions of your URLs to ensure the redirects work correctly and don’t create redirect loops that could break your website’s accessibility.
How to troubleshoot SSL errors in .htaccess?
SSL errors in the .htaccess file can lead to website security and functionality issues. Here are a few tips to troubleshoot SSL errors in .htaccess:
- Check the SSL certificate: Make sure that the SSL certificate is valid and issued by a trusted certificate authority.
- Verify the SSL URLs: Make sure the URLs in the .htaccess file are correct and use the HTTPS protocol.
- Check the .htaccess file syntax: Ensure the .htaccess file syntax is correct and error-free. Even a minor syntax error can cause SSL errors.
- Make sure to replace: If you recently switched to HTTPS, update the .htaccess file to reflect the change. You can use a redirect to ensure that all traffic is redirected to the HTTPS version of your site.
- Disable plugins: If you have recently installed a new plugin, try disabling it to see if it resolves the SSL error. Sometimes, plugins can conflict with SSL certificates and cause errors.
If you’ve tried all the tips mentioned above and are still experiencing SSL errors, it’s best to consider using alternative methods to force HTTPS. You can try configuring your server settings directly instead of using the .htaccess file or SSL plugins. Additionally, check out online .htaccess generators for SSL redirection and SSL checker tools to ensure proper implementation.
Final thoughts
Forcing HTTPS on your website through the .htaccess file is a crucial security step that protects your visitors’ data and boosts your SEO rankings. By implementing these redirect rules, you ensure all traffic flows through a secure, encrypted connection. If you’re looking for reliable hosting that makes SSL implementation seamless, Bluehost offers free SSL certificates with all hosting plans and 24/7 expert support to help you secure your site.
Get started with Bluehost today and protect your website with enterprise-grade security features and hassle-free HTTPS configuration.
FAQs
Why am I getting a redirect loop?
Redirect loops typically occur when your .htaccess rules conflict with existing redirects or when your SSL certificate isn’t properly configured. Check that your SSL certificate is valid and remove any duplicate redirect rules. Also verify that your hosting provider hasn’t already implemented HTTPS redirects at the server level.
Should I use 301 or 302 redirects for HTTPS?
Always use 301 (permanent) redirects for HTTPS enforcement. This tells search engines that the HTTPS version is the permanent location, preserving your SEO rankings. The code examples in this guide use R=301 to ensure proper permanent redirects.
Why does my site show mixed content warnings after forcing HTTPS?
Mixed content warnings appear when your HTTPS site loads HTTP resources (images, scripts, stylesheets). Update internal links to use HTTPS or relative URLs. Check your content management system settings and ensure all external resources use HTTPS.
Do I need to update internal links after forcing HTTPS?
While redirects will handle HTTP links automatically, updating internal links to use HTTPS directly improves site performance by avoiding unnecessary redirects. Update your CMS settings and hardcoded HTTP links in your content.
How do I confirm the redirect is working correctly?
Test by visiting http://[domain].com in your browser – it should automatically redirect to https://[domain].com. Use online tools like redirect checkers to verify the redirect returns a 301 status code and confirm there are no redirect chains.

Write A Comment