Key highlights
- Understand what is a staging site and how you can use it to test updates, plugins or code without risking errors or downtime.
- Discover how a WordPress staging environment helps you experiment with themes, plugins and design changes before they go live.
- Uncover how using a staging site improves website stability, enhances workflow and empowers you to make confident, bug-free updates.
- Get practical insights into setting up a Bluehost staging site to safely test and deploy website updates with ease.
- Understand how to manage configurations, perform security checks and follow a structured workflow to ensure flawless website performance.
Website construction is similar to a game of Jenga, where each element is interconnected. One wrong move or an ill-fitting addition can lead to potential disasters, unlike in the game where you simply lose. In the digital realm, a broken website can cost businesses customers and trust.
That’s where a staging site comes in. It’s a closely mimic version of your main site where you can experiment and make changes without affecting your live WordPress site.
In this guide, we’ll explore website environments, define staging sites and delve into their benefits and creation methods (cloning process), including a Bluehost staging site, to enhance your website development skills.
What is a staging site?
A staging site is a duplicate of your live site. It acts as a copy of your website which you can use for initial testing of new site features, upgrades or changes you want to make without introducing errors. The goal is to catch errors and fix them before the changes are published.
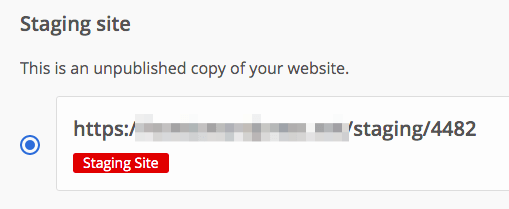
Your staging website is not available to the public. And unless you deploy them, any changes made on your staging site won’t affect your actual website. You control the setup process, and your staging website will only overwrite your live website when you’re ready.
You can create a staging site through your web host. If you make a Bluehost staging site, it gets stored on a staging server that is the same as your live website’s server. You can also build a staging site manually, but that often requires more work and a different staging server. Or you can use staging site WordPress plugins like WP Stagecoach or WP Staging.
When can you use a staging site?
A staging website is a versatile development environment that can be used based on your needs. But what is a staging site’s use? Staging site lets users experiment and be creative without damage.
You can use this risk free zone when you want to:
- Switch themes
- Add or remove plugins
- Change code
- Test major software updates
- Reorganize your website
- Upgrade core functionality
Advantages and disadvantages of a staging site
Now that you know the answer to, “what is a staging site?”, it’s useful to explore the advantages and disadvantages of using this safe space.
Advantages of a staging site
- You can test features and software updates out without breaking your website.
- You can experiment before you commit to choices, allowing for more creativity.
- You can troubleshoot/debug issues and fix bugs without taking your website down.
- It provides better workflow development.
- It increases the stability and functionality of your code.
- It’s a private testing environment.
- It empowers you to make better websites.
While some of the drawbacks are valid, setting up a Bluehost staging site gives you peace of mind. If you take the necessary time to test new updates, you can save time in the long run. And while it won’t necessarily be an exact copy, a WordPress staging environment will catch bugs.
Disadvantages of a staging site
- It can be costly if you use a staging plugin.
- It can take time to properly test a staging site.
- It’s not guaranteed to replicate your website exactly (for example, staging sites don’t usually enable caching)
- It can get confusing if you deploy a change to your live website but don’t update the staging site.
Who needs a staging site?
Anyone who has a website would benefit from a staging website. It is an essential tool for eCommerce websites. When a customer comes to your website, any downtime can cost confidence in your small business and sales.
The same goes for blogs or informational websites. You want viewers to trust that your website will be up when they need it. Website downtime affects how users view the overall quality of your business.
There’s also a link between downtime harming your relevant search engine ranking. While software developer Matt Cutts says a short downtime won’t hurt, it’s a chance you don’t want to take.
A staging website is also a good option for anyone who wants to grow as a web developer. If you like to tweak your website, a WordPress staging site allows you to try new plugins or features.
A Bluehost staging site can also be a great place to learn more about web development if you’re a novice website builder.
How to create a Bluehost staging site?
Creating a Bluehost staging site provides a safe and controlled space to test site changes and updates, ensuring that everything works as expected before implementing them on your live website. It’s a best practice for website development and maintenance.
Here are step by step method to create a staging site on Bluehost:
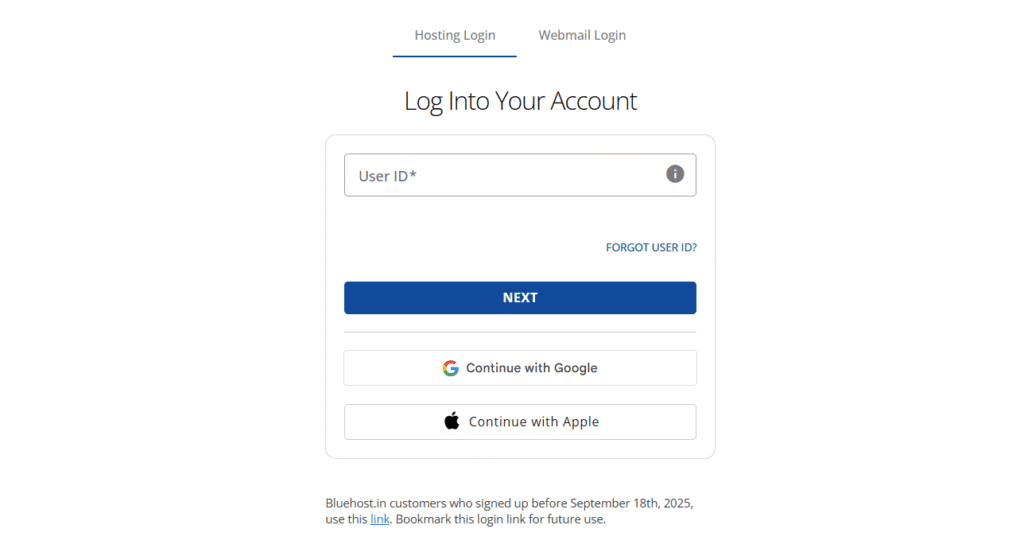
- Log in to your Bluehost Account Manager.
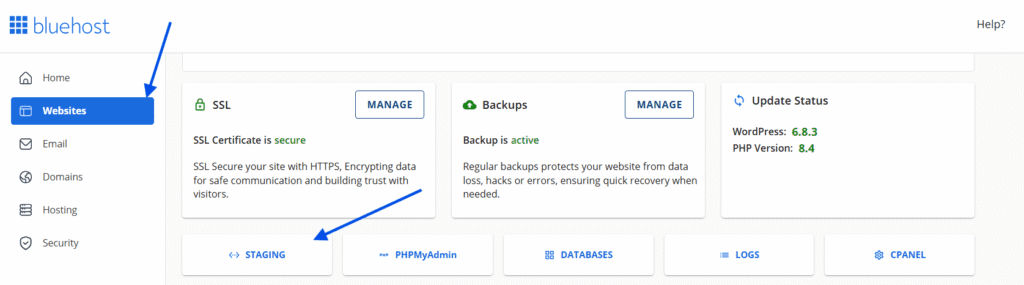
- Go to the ‘Websites’ tab on left navigation and select ‘Staging’.
- You’ll be redirected to your WordPress dashboard. Click ‘Create staging site’.
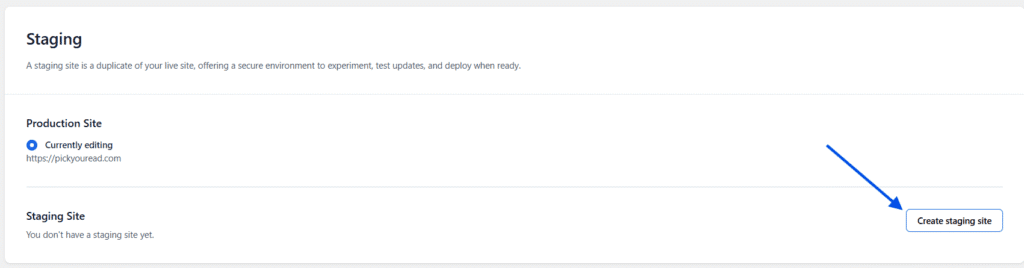
- After a few minutes, your staging site will be ready. Production site is your actual website.
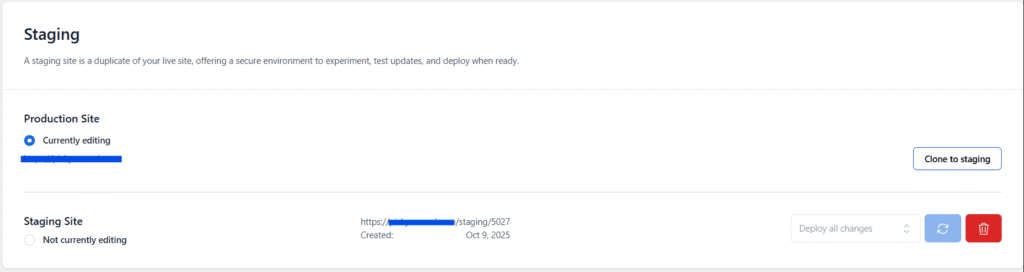
- Click on ‘Staging Site’ and then, ‘Proceed’ to access the space.
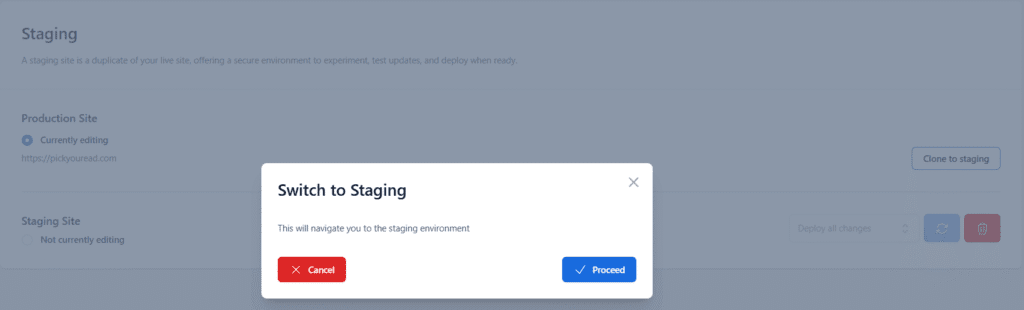
- You will arrive to a page which is the admin area of your staging WordPress site. You will see a red button on top of the admin bar to indicate you are working in the staging environment.
Note: if you have created more than one staging site, you will be able to access any of it just by selecting the staging site in question
- You can now work on your website without worrying about it affecting your live website.
Best practices for staging sites
Now you know the answer to “What is a staging site?” Next, you need to ensure you get the most out of yours.
A staging site is supposed to prevent future headaches, so adhere to the following suggestions to make sure it doesn’t cause any problems:
- Be careful when deploying updates: Make sure everything is how you want it to be. A staging site gives you the confidence to publish your changes because they’ve already been tested. But it’s still necessary to be diligent and verify the details.
- Take notes: Keep track of what you test, what works and what doesn’t. You don’t want to make the same mistakes again. Stay organized and keep notes to make development phase easier.
- It’s OK to break it: Don’t be afraid to break your staging website; that’s why it’s there. It won’t affect your live website. So, get creative and push your WordPress website. You might learn more about its capabilities.
- Stay under the radar: Be aware your website could get picked up by Google. You want your WordPress staging site to stay private. Take preventative measures to ensure your new staging site doesn’t get listed.
What is a staging site? Use the information you’ve learned here to boost your web development game. Instead of crashing your website, you can use your staging site when you experiment with new features or add updates.
While there are some downsides, like using an expensive WordPress plugin or potential confusion, a Bluehost staging site will calm your concerns. You can easily create a staging site on your homepage and upgrade your website without disrupting your real customers.
Different environments for your website
When you design your website or add new features, it’s worthwhile to create a development workflow and set up different local environments for your website.
You can help your website grow if you learn the basics, like what is a staging site or how to use a development website.
Environments can include:
- Development process
- Quality assurance (QA)
- Staging
- Production
Let’s look at all four environments in detail:
1. Development environment
A development website is the first step. Here you can test code and explore new features. This stage is where you can work out any kinks or bugs that arise in the foundation.
2. Quality assurance (QA) environment
Once the coding appears secure and stable, you can move on to quality assurance. A QA environment is for comprehensive testing to reveal any additional issues. The QA stage is an essential step for many bigger companies where a website crash could be disastrous.
3. Staging environment
The next step is the staging website, which functions as a bridge between your website’s testing and live versions. This live environment can also serve as QA and be a playground for functions and testing. But it will need to be fully functional before you can move forward.
4. Production environment
The final stage is production site. This is your live website that users will interact with. All the tested and approved updates from the staging site are deployed here. Because this environment is customer-facing, it’s crucial that every change has been thoroughly vetted in earlier phases.
Why use multiple environments?
When you use multiple environments, you can introduce updates to your website without interrupting your user experience. This structured workflow reduces risks like downtime or broken features, ensuring your website remains stable, secure and optimized for visitors at all times.
What to do when once your staging environment is ready?
Now you can validate your setup, test performance and ensure all updates are ready for a smooth transition to your live website. The goal is to minimize risks like downtime, bugs or data inconsistencies when deploying changes.
Follow these essential steps once your new staging site is ready for action:
- Verify environment configuration: Before proceeding with any testing, double-check that your staging environment mirrors your production environment as closely as possible. Ensure that server configurations, database data, software versions and any other relevant components match those in the production environment.
- Deploy code and content: Push your code changes and content updates to the WordPress staging environment. This includes code branches, database table updates, media files and any other assets required for the application or website.
- Test new functionality: Begin comprehensive testing of the application or website. This includes functional testing to ensure that all features work as expected, usability testing to gauge user experience and compatibility testing across different browsers and devices.
- Website performance testing: Assess the system’s performance by conducting load testing, stress testing and scalability testing. This helps ensure that the application can handle expected traffic volumes without site crashing or slowing down.
- Security testing: Perform security scans and vulnerability quality assessments to identify and address any potential security risks. This is crucial for protecting user data and maintaining the integrity of your system.
- Regression testing: Test the entire site to ensure that new changes haven’t introduced unexpected bugs or broken existing site’s functionality.
- Documentation updates: Update any relevant documentation, including user manuals, support guides and release notes, to reflect the changes made in the staging environment.
- Bug tracking: If you encounter any issues during testing, document them in a bug tracking system and prioritize their resolution.
- Backup and rollback plan: Before making any changes in the production environment, ensure you have a reliable backup and a well-defined rollback plan in case something goes wrong during deployment.
- Deployment to production: Once you have approval and confidence in the staging environment, schedule the deployment to the production environment following your established procedures.
Final thoughts
A staging site is an indispensable tool for site owners and developers seeking to enhance their online presence. It offers a secure, isolated WordPress staging environment where you can experiment, fine-tune and perfect website changes before unleashing them on your live site.
Whether you’re a business owner looking to optimize user experience or a developer aiming for flawless updates, a staging site is your key to success.
If you’re ready to harness the benefits of a staging environment, consider exploring Bluehost’s user-friendly solutions today and take your website to the next level.
FAQs
The purpose of a staging site is to provide a secure environment where you can find errors, test new features and troubleshoot issues before making changes to your live website.
During the staging phase, developers can safely test updates, adjust user roles and check compatibility with other plugins in various scenarios. This setup helps prevent data loss, ensures smooth performance and allows teams to collect feedback before final deployment.
A staging site is a private testing environment where you can manually replicate your live website to experiment safely, while the live site is what your visitors see in real time. The staging site uses a unique staging site URL and sometimes a custom domain, making it accessible only to authorized users.
It’s ideal for testing updates, verifying payment processes and checking login credentials before pushing changes live. In contrast, the live site is fully public and impacts actual visitors and transactions.
A Bluehost staging site is a built-in feature that lets WordPress users clone their live site into a separate staging environment for safe testing. It helps developers find errors, test new plugins and review design changes without affecting real visitors.
You can use it to verify user roles, simulate payment processes and make sure your login credentials work correctly before launch. Once the site passes testing and gains client approval, it can be deployed directly to the live domain from Bluehost’s dashboard.
An example of a staging area is a WordPress staging environment created on Bluehost where you can safely test updates before they go live. For instance, you might use a temporary staging site URL or a custom domain to preview a new website layout, run other plugin compatibility checks and ensure payment process integrity. This private staging phase allows developers and clients to collect feedback and verify functionality before publishing changes to the production site.
A staging site should be used whenever you plan to make changes, updates or test new features on your website. Before implementing any changes on the live site, it’s wise to test them in a controlled environment to ensure they work as intended without causing unexpected issues or disruptions to the user experience.
A staging site provides a safe environment to test updates, plugins, themes and custom code. By using a staging site, you minimize the risk of introducing errors or conflicts to the live website, ensuring that visitors have a consistent and error-free experience. It allows developers and content creators to validate major changes before making them public.
A staging site is a replica of the production website, used for testing purposes. While the staging site allows for experimentation without affecting the end user, the production site is the live website that visitors access. Changes on the production site are immediately visible to users, whereas changes on the staging site are isolated until approved for deployment.


Write A Comment