 ChatGPT,
  Claude,
  Gemini,
  Grok — all four for
 Professional Email: Bookings and Appointment Scheduling
Professional Email Bookings lets your clients book time with you online. You create a booking page that lists the services you offer, such as an intro call or a consultation, and your clients pick a time that works for them. Bookings are added to your calendar, and your clients receive email confirmations and reminders. This article explains how to set up your booking page, add a service, and share your links.
Before You Begin
- Professional Email Bookings is available with Professional Email Ultra. If you don't have Ultra yet, log in to your Bluehost Portal to see current plans and pricing.
- Professional Email Bookings is currently available in English, German, Portuguese (Brazil), and Spanish.
- The first person on your domain to set up Bookings creates the booking page for your business.
Open Professional Email Bookings
- Go to Professional Email Bookings, and sign in with your Professional Email address and password if you're prompted.
- On the welcome screen, click Set up now.
Create Your Booking Page
Your booking page is where clients see all of your services and book a time.
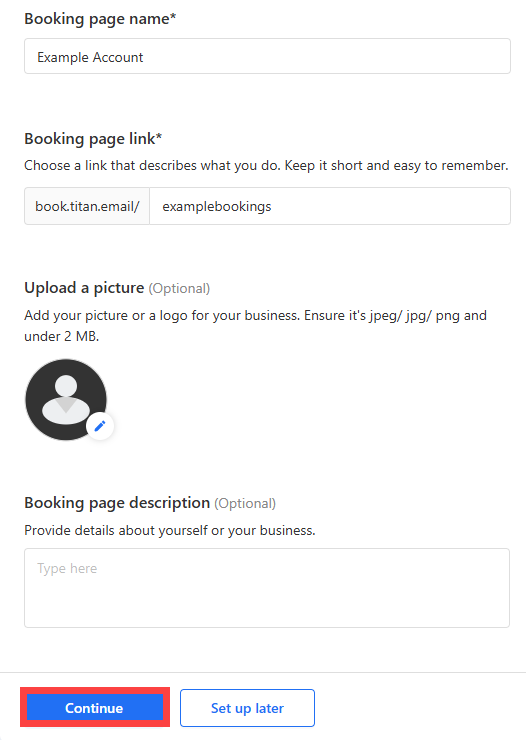
- In the Booking page name field, enter the name of your business. If you work on your own, you can use your name.
- In the Booking page link field, enter a short link name that describes what you do and is easy to remember.
- Optional: Under Upload a picture, add your logo or a picture. The file must be a JPEG, JPG, or PNG that is under 2 MB.
- Optional: In the Booking page description field, tell clients about yourself or your business.
- Click Continue. If you'd like to finish later, click Set up later instead.
Note: If you change your booking page link after you've shared it with clients, the old link stops working. You'll need to share the new link.
Choose Calendars to Block Your Busy Time
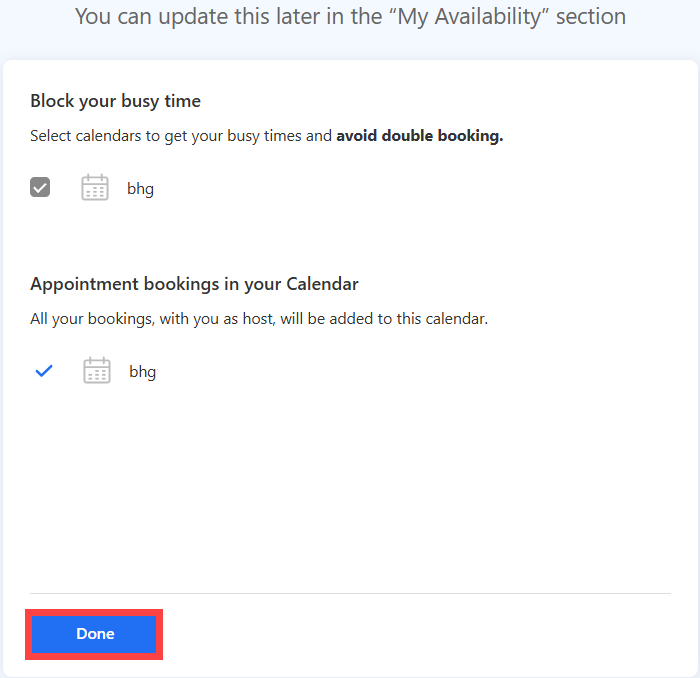
Next, choose which calendars Professional Email Bookings checks so that clients can't book a time when you're already busy.
- Under Block your busy time, select the calendars that Bookings should check for your busy times.
- Under Appointment bookings in your Calendar, confirm the calendar where your bookings will be added. Bookings you host are added to this calendar.
- Click Done.
You can change these choices at any time on the My Availability tab:
- Click the My Availability tab.
- Under Block your busy time, select the calendars that Bookings should check.
- To include a calendar from another provider, such as Google or Outlook, click Add external calendar.
- Click Save changes.
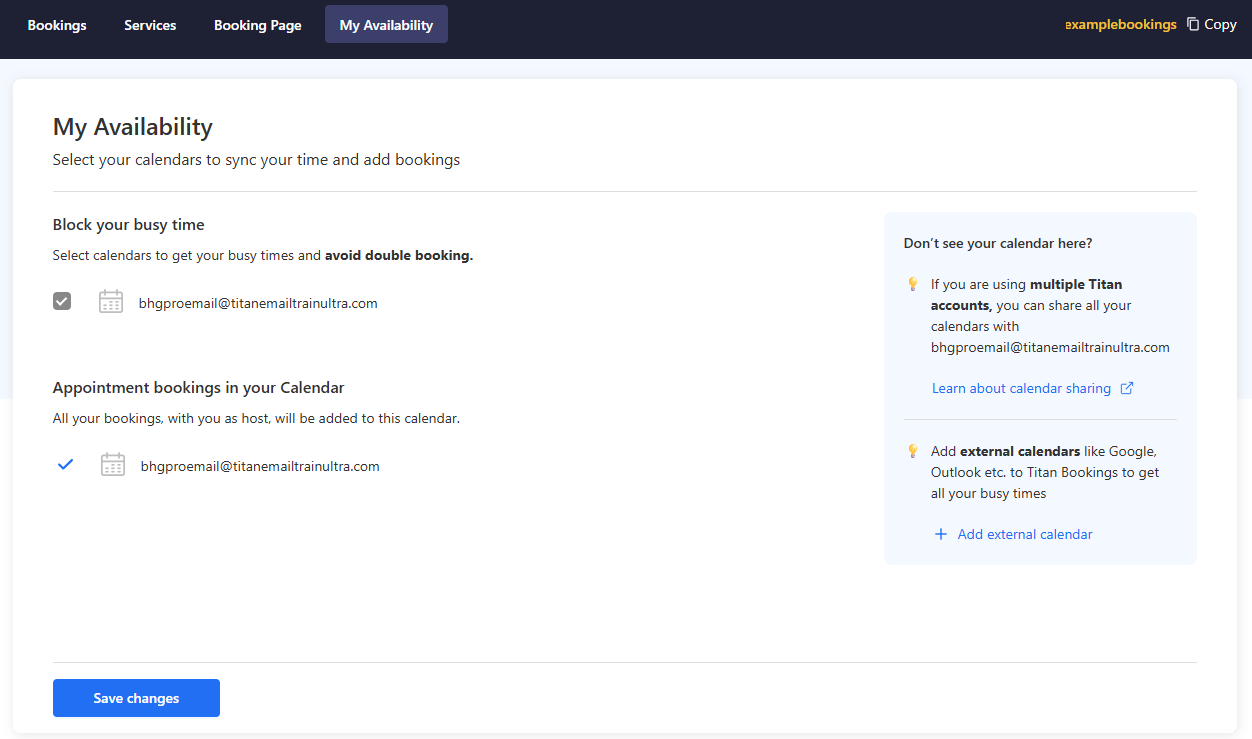
If you use more than one Professional Email account, you can share the calendars from your other accounts with the account you use for Bookings, so that their busy times are included too.
Add a Service
A service is something clients can book with you, such as an intro call or a 30-minute consultation.
- Click the Services tab.
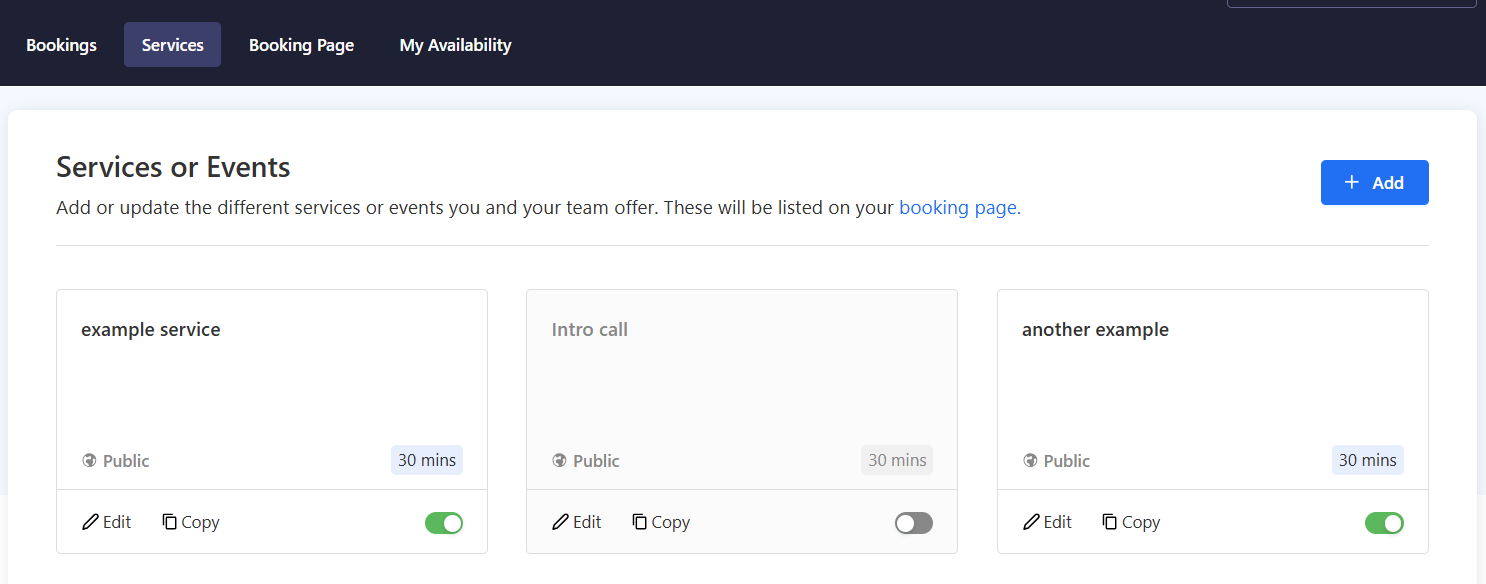
- Click Add. The Add service or event page opens with four sections: Main details, Service availability, Other, and Share.
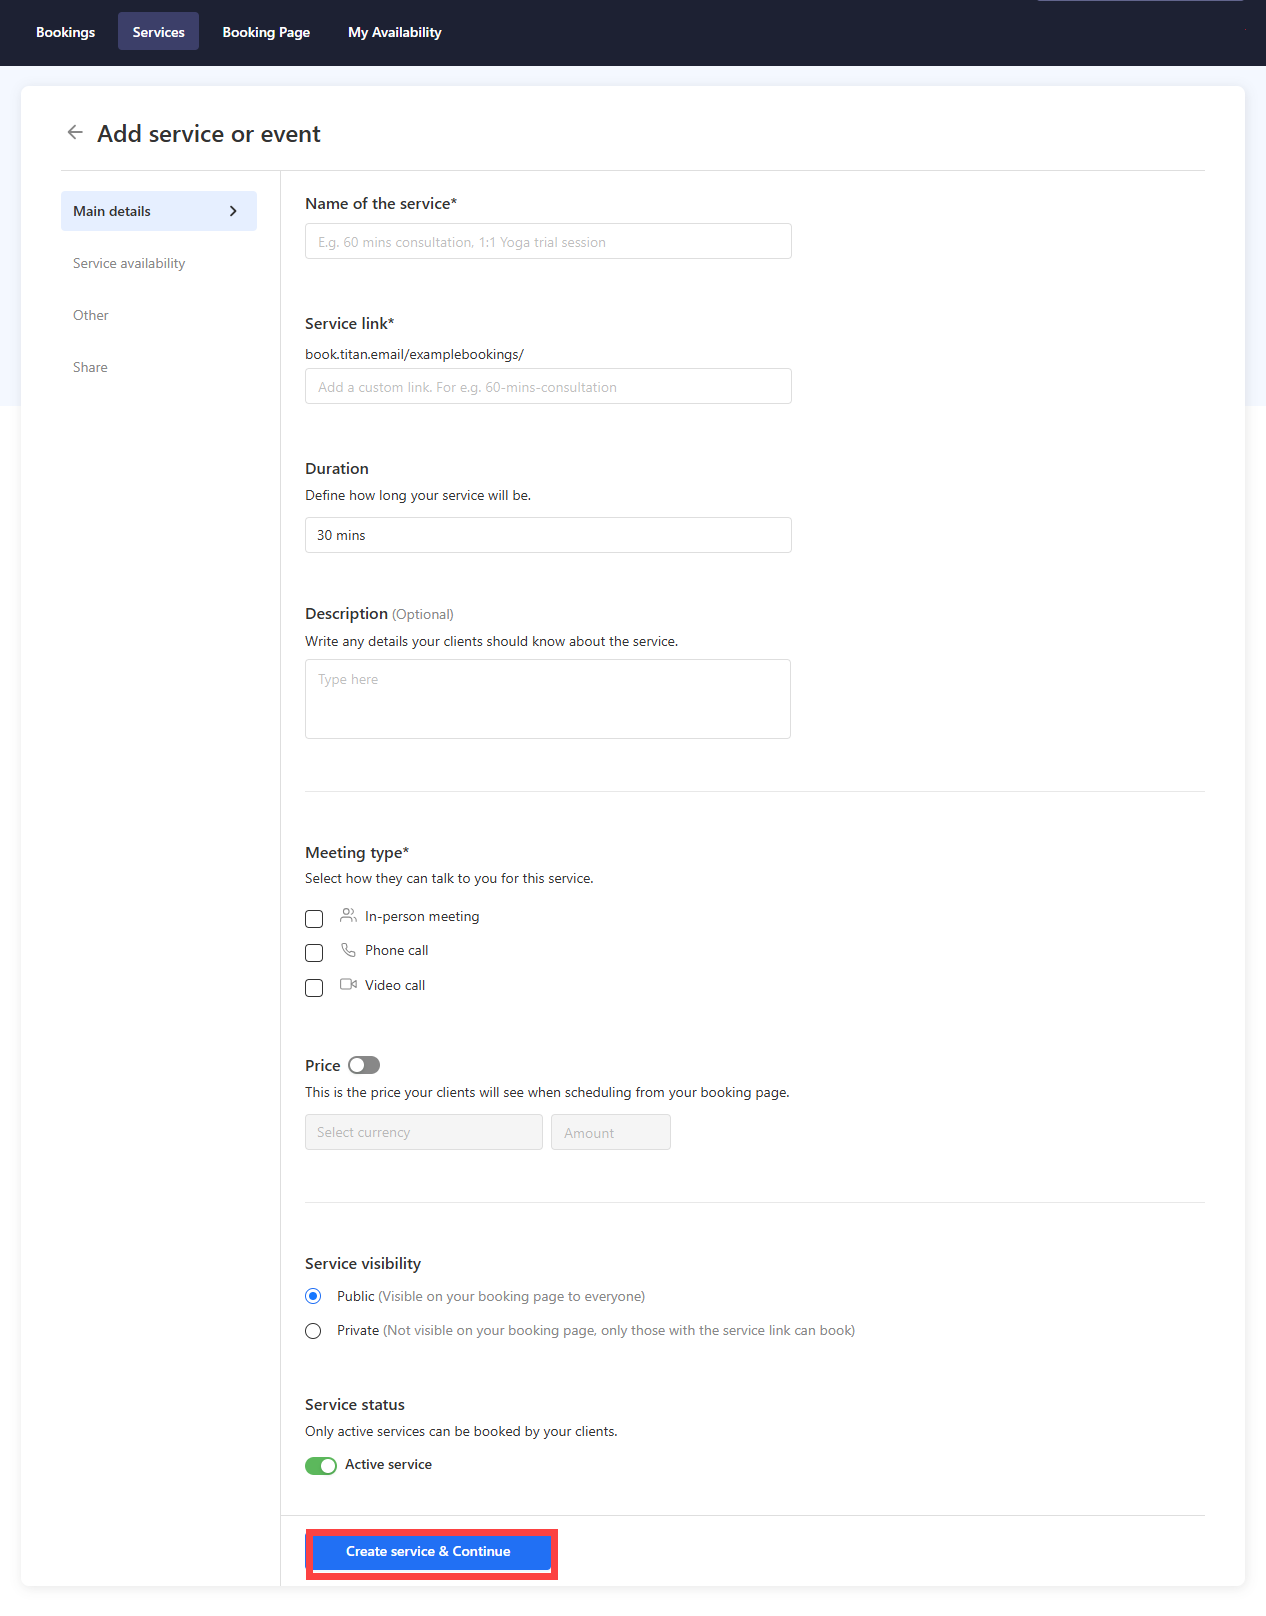
Main details
- Name of the service: Enter the name your clients will see, such as 30 mins consultation.
- Service link: Enter a custom ending for this service's link, such as 60-mins-consultation.
- Duration: Choose how long each appointment lasts.
- Description: Optional. Add details your clients should know about the service.
- Meeting type: Select one or more ways clients can meet with you: In-person meeting, Phone call, or Video call.
- Price: Optional. Turn on the toggle, select a currency, and enter an amount if you want clients to see a price when they book. Professional Email Bookings only displays the price. It doesn't collect payment, so you'll need to collect payment from your clients using your own preferred method.
- Service visibility: Select Public to show the service on your booking page, or Private to hide it so that only people with the service link can book it.
- Service status: Keep Active service turned on so clients can book it. Only active services can be booked.
When you're done, click Create service & Continue.
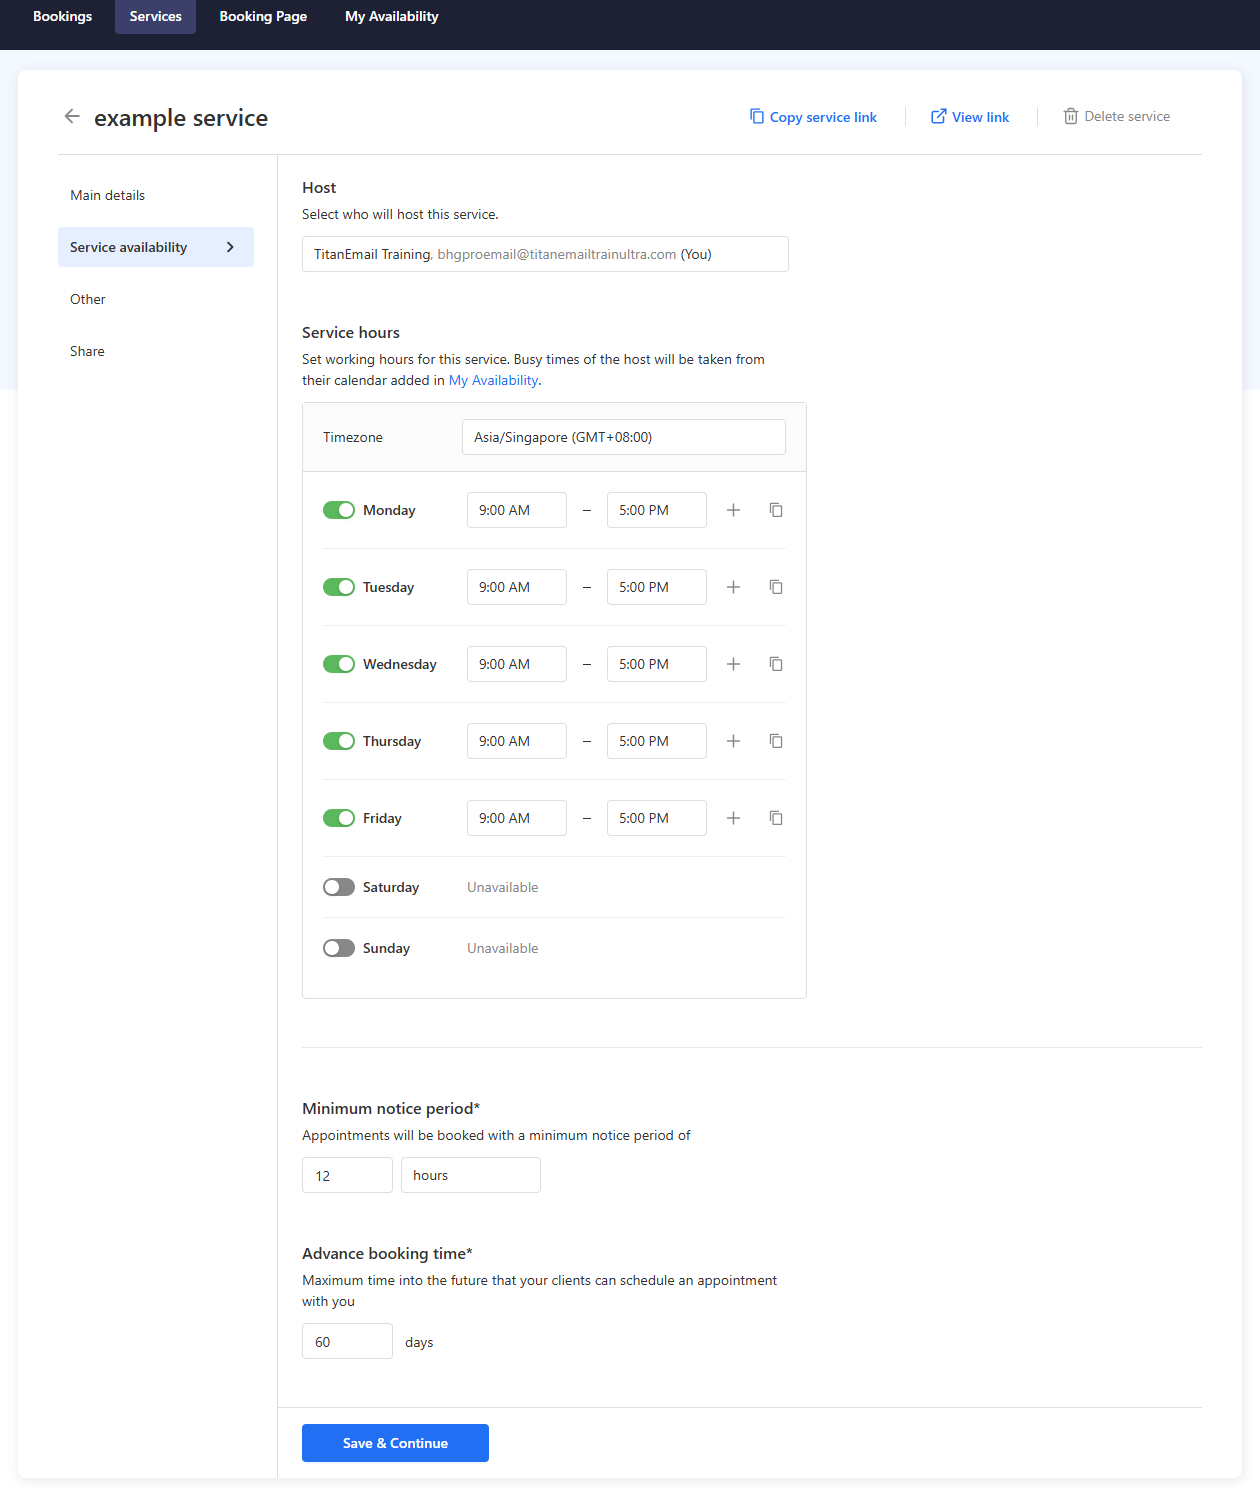
Service availability
Use this section to set when clients can book the service.
- Host: Select who will host the service. By default, it's you.
- Service hours: Select your Timezone, and then set the working hours for the service. Use the toggle next to each day to turn it on or off, and choose the start and end times. Days that are turned off show as Unavailable. Your busy times are taken from the calendars you added in My Availability, so clients can't book those times.
- Minimum notice period: Enter the minimum amount of time clients must book ahead of an appointment.
- Advance booking time: Enter the maximum number of days into the future that clients can schedule an appointment with you.
Click Save & Continue.
Notifications and booking form
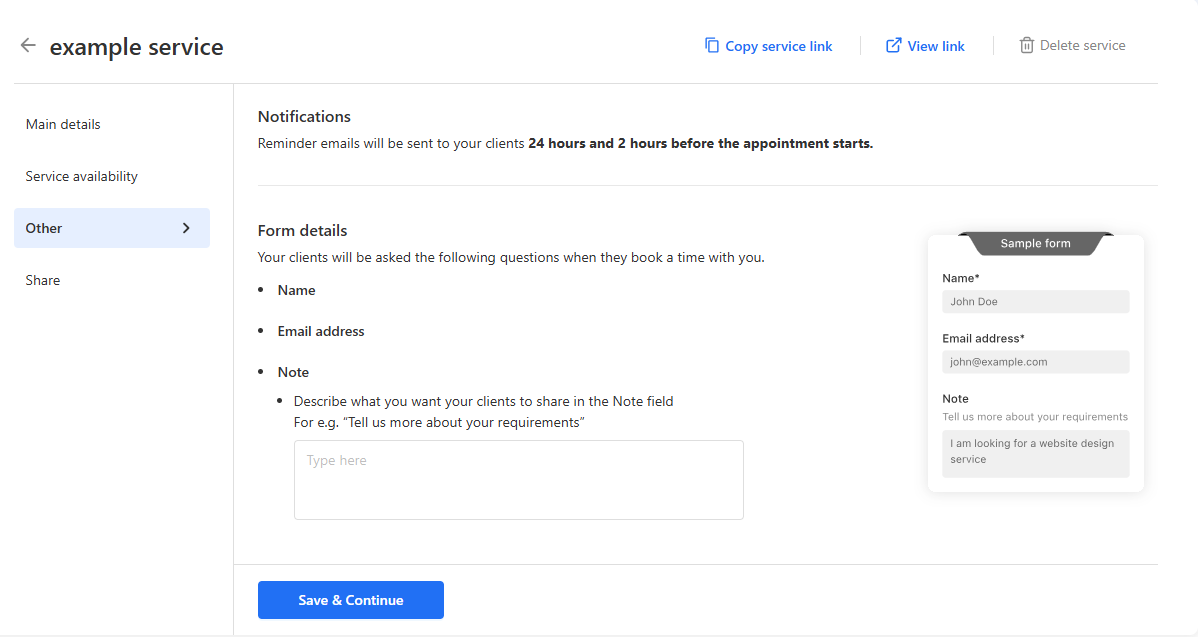
Open the Other section to review what your clients receive and what they're asked.
- Notifications: This section shows when reminder emails are sent to your clients: 24 hours and 2 hours before the appointment starts.
- Form details: Clients are asked for their name and email address, and they can add a note. In the box under Note, you can write a prompt that tells clients what to include, for example, "Tell us more about your requirements."
Click Save & Continue.
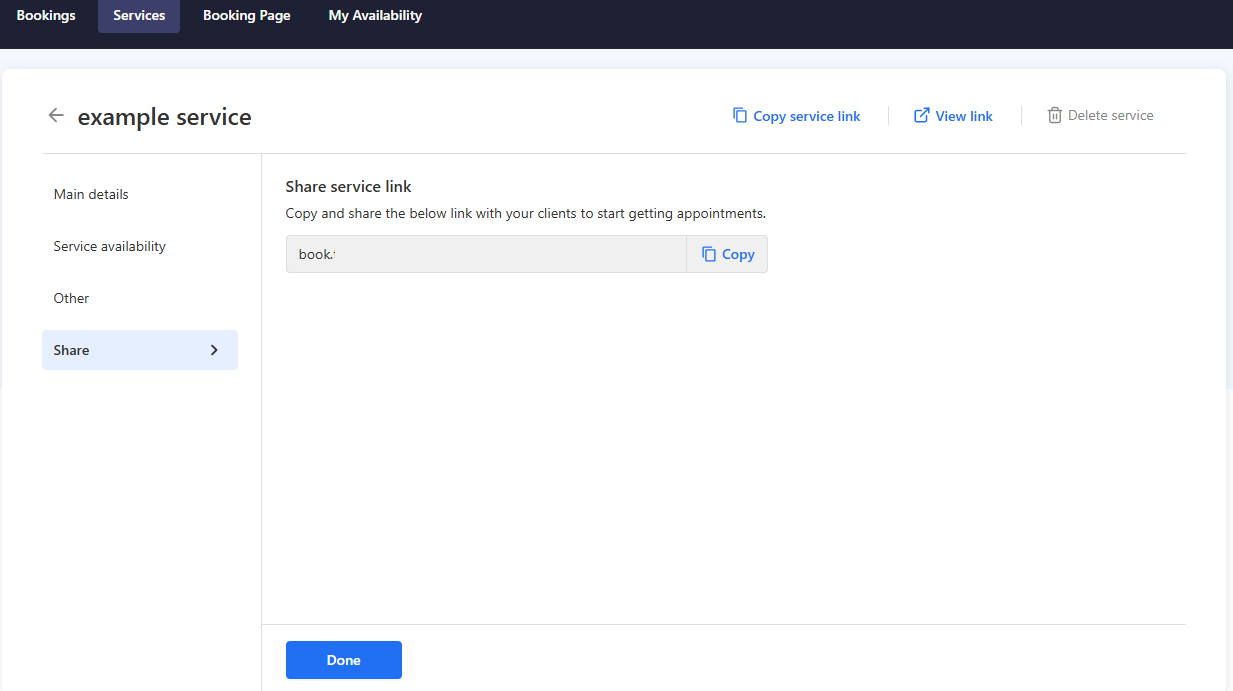
Share the service link
The Share section shows the link for this service. Click Copy to copy it, and then click Done.
Manage Your Services
On the Services tab, each service appears as a card. You can use the controls on a card to manage it:
- Click Edit to change the details of a service.
- Use the toggle at the bottom right of the card to turn a service on or off. Services that are turned off don't appear on your booking page and can't be booked.
- To delete a service, click Edit, and then click Delete service at the top right. The service is removed from your booking page, and its link stops working.
Change Your Booking Page Later
- Click the Booking Page tab.
- Under Main details, update the booking page name, link, picture, or description.
- Click Save changes.
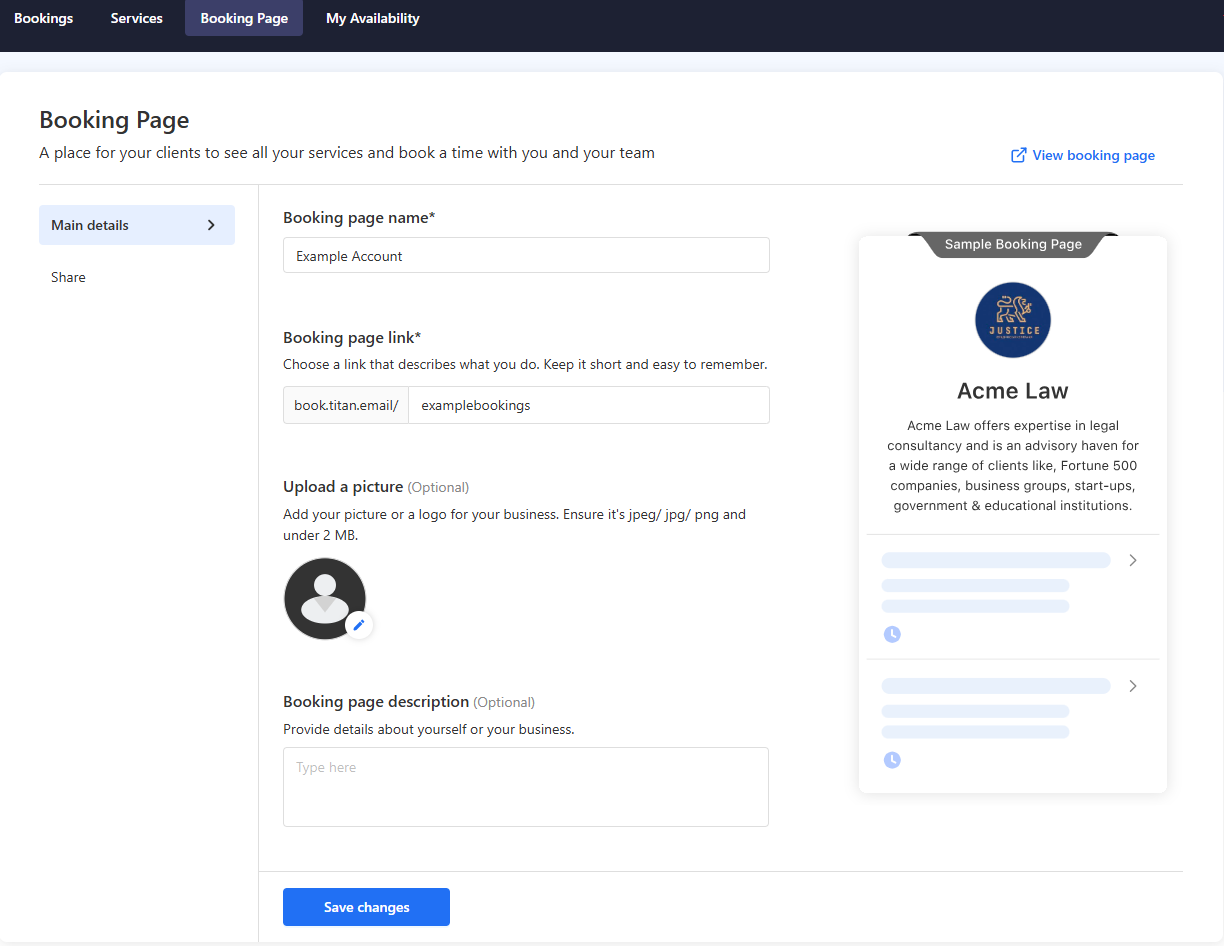
To see your booking page as your clients see it, click View booking page. If you change your booking page link, share the new link with your clients.
Share Your Booking Links
You can share two kinds of links with clients:
- Your booking page link: Shows all of your public services. It's displayed at the top right of Professional Email Bookings, and you can click Copy to copy it.
- A service link: Takes clients straight to one service. This is the only way to share a private service.
You can send the links by email, or publish them on your website or social media pages.
View Your Bookings
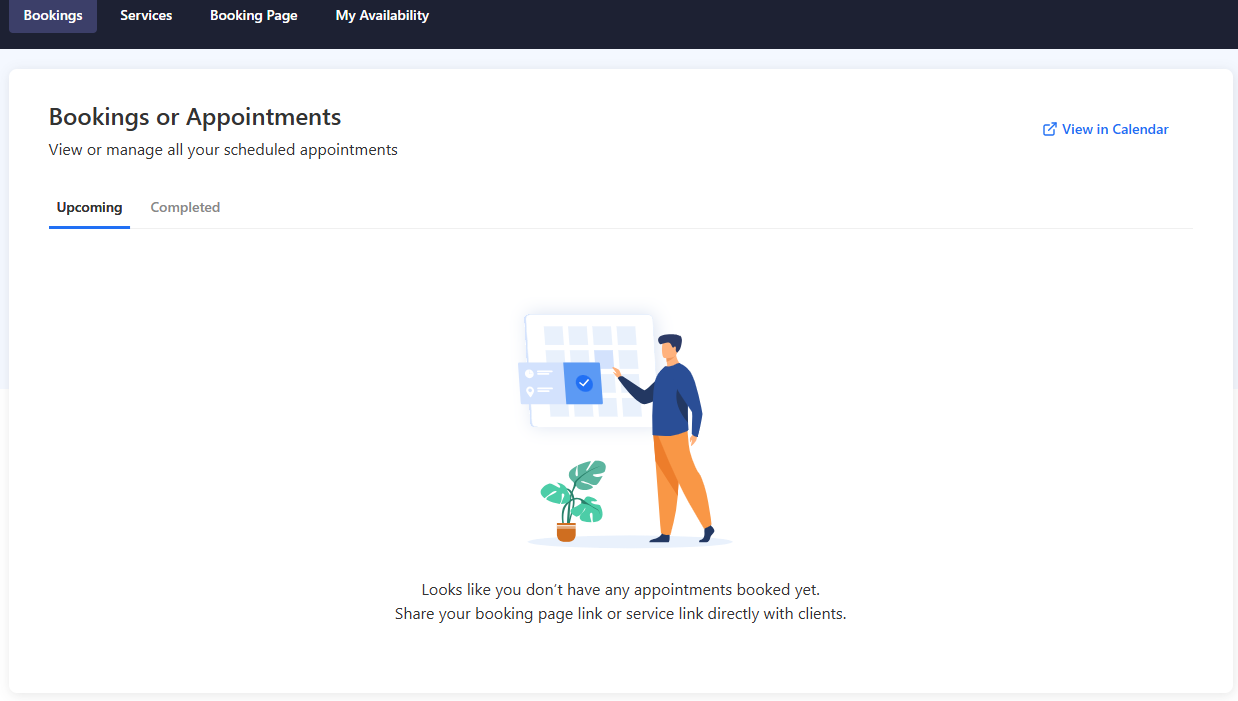
Click the Bookings tab to see your appointments. Upcoming shows appointments that haven't happened yet, and Completed shows past ones. To see them on your calendar, click View in Calendar.
Summary
Professional Email Bookings lets clients book time with you online. To get started, open Bookings and click Set up now, create your booking page, and choose the calendars that block your busy time. Then add a service from the Services tab by filling in its main details, availability, and booking form. Share your booking page link or a service link with clients, and view your appointments on the Bookings tab. You can change your services, booking page, and calendars at any time from the tabs at the top of Bookings. Professional Email Bookings is available with Professional Email Ultra.
If you need further assistance, Bluehost Chat Support is available 24 hours a day, 7days a week while Bluehost Phone Support is available 7 days a week from 7 am-12 midnight EST.
- Chat Support - While on our website, you should see a CHAT bubble in the bottom right-hand corner of the page. Click anywhere on the bubble to begin a chat session.
- Phone Support -
- US: 888-401-4678
- International: +1 801-765-9400
You may also refer to our Knowledge Base articles to help answer common questions and guide you through various setup, configuration, and troubleshooting steps.