Il 79% della popolazione statunitense preferisce fare acquisti online per la sua comodità e velocità. La domanda di acquisti online è in forte aumento e le aziende stanno approfittando di questa tendenza creando siti Web di e-commerce. Ma cosa succede se non sei un genio della tecnologia? Non c’è problema. L’intelligenza artificiale (AI) rende la creazione di un negozio online più facile e veloce che mai.
Con i costruttori di siti Web basati sull’intelligenza artificiale, come il costruttore di siti Web WordPress AI di Bluehost, puoi creare il tuo negozio di e-commerce in pochi minuti senza bisogno di codificare. Che tu sia un piccolo imprenditore, un imprenditore creativo o semplicemente qualcuno con un prodotto unico da vendere, gli strumenti di intelligenza artificiale possono trasformare i tuoi sogni di negozio online in realtà.
Questa guida completa ti guida attraverso come utilizzare l’intelligenza artificiale per creare un negozio online unico. Alla fine, avrai tutto ciò di cui hai bisogno per creare un sito Web di e-commerce, dalla scelta del piano di hosting giusto all’aggiunta di prodotti e all’impostazione dei pagamenti. Inoltre, non hai bisogno di alcuna competenza tecnica per iniziare!
Come utilizzare l’intelligenza artificiale per creare un negozio online
Passaggio 1: acquista l’hosting e scegli un nome di dominio
Per prima cosa, devi acquistare un piano di web hosting e registrare un nome di dominio. Pensa all’hosting come alla base del tuo negozio online: è il luogo in cui vivrà il tuo sito web. E il dominio? Questo è l’indirizzo del tuo negozio online, l’unico che il cliente digiterà per trovarti online.
Bluehost, consigliato da WordPress.org, offre fantastici piani di hosting WooCommerce perfetti per le aziende di e-commerce. Questi piani includono funzionalità avanzate di eCommerce insieme a un dominio gratuito per un anno, un certificato SSL gratuito (per la sicurezza) e un CDN. Inoltre, ottieni plugin WordPress e WooCommerce preinstallati, insieme ad altri strumenti SEO essenziali come il plugin Yoast SEO.

Puoi anche optare per i piani di hosting Bluehost Cloud . Offre un alto livello di flessibilità, aumentando le prestazioni e l’affidabilità del tuo sito. È come avere una rete di sicurezza che si adatta per accogliere un numero diverso di visitatori. Se un server riscontra problemi, gli altri intervengono automaticamente per mantenere il tuo sito in funzione, assicurandoti che il tuo negozio sia sempre aperto e dandoti un senso di sicurezza.
Suggerimento: scegli un nome di dominio facile da ricordare, pertinente al tuo marchio e che includa la tua parola chiave principale, se possibile.
Una volta che hai ordinato il tuo hosting e dominio, sei pronto per creare il tuo sito web di e-commerce.
Passaggio 2: configura il sito Web utilizzando un costruttore di siti Web AI
Costruire un sito web era un lavoro per gli sviluppatori web, ma i costruttori di siti web AI hanno cambiato tutto. Questi strumenti intelligenti sfruttano l’intelligenza artificiale per progettare e preparare layout in modo che tu possa concentrarti sulla tua attività. I costruttori di intelligenza artificiale non si limitano a seguire le tue istruzioni: imparano dai tuoi input per creare un sito web che rifletta il tuo stile unico.
Bluehost offre un costruttore di siti Web di e-commerce AI gratuito con i suoi piani di web hosting. Questo costruttore di siti Web AI è dotato di funzionalità specifiche per l’e-commerce come modelli personalizzabili, un editor drag-and-drop super semplice e un’interfaccia intuitiva che semplifica il processo di creazione del sito Web. Inoltre, non hai bisogno di alcuna competenza di progettazione o codifica: solo un’idea chiara di ciò che desideri e l’intelligenza artificiale farà il resto.
Ecco come:
Scegli un creatore di siti web AI
Quando aggiungi un nuovo sito in Bluehost, seleziona l’opzione “Creatore di siti Web AI” e fai clic su “Inizia”. Questo strumento ti guiderà attraverso i passaggi iniziali della creazione del tuo negozio.

Aggiungi una breve descrizione del tuo sito web
In questo passaggio, descriverai brevemente il tipo di sito web che desideri creare. Ad esempio, potresti descriverlo come un negozio online o un blog personale. Questo aiuta l’intelligenza artificiale a comprendere meglio le tue esigenze.
Collega il tuo account Facebook (facoltativo)
Puoi collegare il tuo account Facebook se desideri fornire ulteriori informazioni sul tuo sito di e-commerce. Ciò consente all’intelligenza artificiale di raccogliere dettagli sul tuo marchio e rendere il design più accurato. Se preferisci non collegarti a Facebook, fai semplicemente clic su “Salta per ora”.
Carica il tuo logo
Quindi, carica il logo del tuo sito di e-commerce. Se non ne hai uno, puoi crearne uno utilizzando uno strumento per la creazione di loghi come Canva. Un logo semplice ma accattivante aiuta a costruire il riconoscimento del marchio. Una volta che il tuo logo è pronto, trascina e rilascia l’immagine nella casella o sfoglia l’unità locale per caricarla.
Ottenere le versioni del sito web
Seleziona il tuo livello di esperienza in WordPress per aiutare l’intelligenza artificiale a personalizzare i suoi suggerimenti. Che tu sia un principiante o un utente esperto, l’intelligenza artificiale genererà tre versioni del tuo sito web di e-commerce. Puoi visualizzare l’anteprima di ciascuno di essi facendo clic sul pulsante “Anteprima”. Se non ti piace quello che vedi, premi “Rigenera” per ottenere nuove opzioni.

Personalizza il sito web
Dopo aver selezionato una versione, fai clic sul pulsante “Personalizza” per personalizzarla. Puoi modificare i colori, i caratteri e gli elementi di design del layout. Puoi scegliere la combinazione di colori e i caratteri per un tocco più personalizzato al tuo sito di e-commerce.
Modifica con i blocchi meraviglie
Per personalizzare ulteriormente il tuo sito, utilizza Wonder Blocks, una funzione che ti consente di trascinare e rilasciare vari elementi predefiniti, come testo, immagini e pulsanti, direttamente sulle tue pagine web.

Passaggio 3: aggiungi le opzioni di pagamento
Una volta che il design del tuo sito web di e-commerce è pronto, l’impostazione dei metodi di pagamento è il passo successivo. I gateway di pagamento sono i cassieri virtuali che gestiscono la transazione tra il tuo sito web e la banca del tuo cliente. Elaborano i pagamenti in modo sicuro, sia tramite carte di credito, portafogli digitali o persino servizi buy-now-pay-later. La chiave è offrire flessibilità in modo che i tuoi clienti possano pagare come vogliono.
WooCommerce, integrato con Bluehost, semplifica questo processo. Sarai in grado di collegare più gateway e iniziare ad accettare pagamenti da tutto il mondo in pochi clic. Ecco come puoi configurarlo:
Configurazione di PayPal
Per aggiungere PayPal come metodo di pagamento e abilitare le transazioni online:
- Vai alla scheda Pagamenti nella dashboard di Bluehost.
- Fai clic su “Connetti” e puoi collegare un conto PayPal esistente o crearne uno nuovo.
- Inserisci i dati richiesti, salvali e sei pronto per accettare pagamenti PayPal.

Altre opzioni di pagamento
Oltre a PayPal, WooCommerce ti consente di integrare altri gateway di pagamento noti e sicuri come Stripe e Amazon Pay, offrendo ai tuoi consumatori più opzioni per completare i loro acquisti.
Passaggio 4: configura la spedizione
Dopo aver impostato i metodi di pagamento, è il momento di configurare le opzioni di spedizione. L’impostazione di un processo di spedizione efficiente è fondamentale per qualsiasi negozio online.
Gli studi dimostrano che il 45% degli acquirenti abbandona il carrello a causa di opzioni di spedizione insoddisfacenti. Pertanto, è importante offrire soluzioni di spedizione flessibili che soddisfino le diverse esigenze dei clienti, che si tratti di spedizione gratuita, tariffe forfettarie o consegne rapide il giorno successivo. Inoltre, delineare chiaramente le politiche di spedizione crea fiducia con il tuo pubblico e riduce le possibilità di abbandono del carrello.
Che tu stia spedendo localmente o a livello internazionale, WooCommerce si integra con i corrieri più diffusi, consentendoti di fornire più metodi di spedizione e tariffe per soddisfare i tuoi clienti. Esaminiamo il processo:
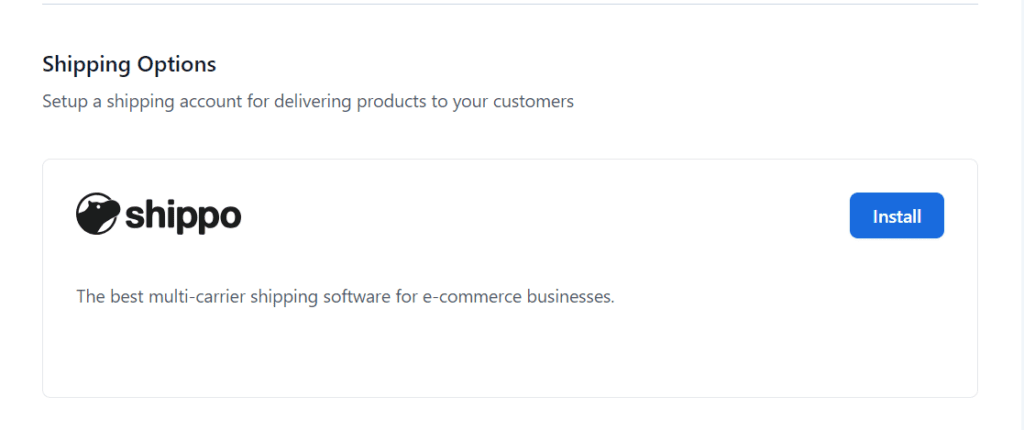
Configurazione di Shippo
Per impostazione predefinita, Bluehost utilizza Shippo come partner di spedizione. Per collegare Shippo al tuo negozio:
- Vai alla sezione Spedizione in Dettagli negozio nella dashboard di Bluehost.
- Puoi creare un nuovo account Shippo o collegarne uno esistente.
- Una volta connesso, Shippo gestirà la logistica di spedizione, semplificando l’invio degli ordini ai clienti.
Opzioni di spedizione aggiuntive
WooCommerce supporta anche altre opzioni di spedizione come USPS e FedEx. Puoi scegliere l’opzione migliore per la tua attività in base alla tua posizione e alle preferenze dei clienti.
Passaggio 5: aggiungi prodotti e servizi
Ora che la struttura della tua vetrina online è pronta, è il momento di aggiungere i prodotti o i servizi che desideri vendere. Quando aggiungi prodotti o servizi online, assicurati che le descrizioni dei tuoi prodotti non siano solo informative ma anche coinvolgenti. Evidenzia le caratteristiche chiave, i vantaggi e i punti di forza unici per aiutare i clienti a capire perché vale la pena acquistare il tuo prodotto. Le immagini di qualità sono altrettanto importanti per lasciare un’impressione duratura sui tuoi clienti.
La gestione del tuo inventario è semplificata dall’interfaccia user-friendly di WooCommerce. Puoi facilmente monitorare i livelli delle scorte, impostare variazioni (come taglie o colori diversi) e gestire i prezzi. Puoi anche utilizzare strumenti come ChatGPT, che può essere un’ottima risorsa per scrivere testi raffinati e persuasivi che risuonino con il tuo pubblico.
Collega ChatGPT a WordPress
Per scrivere le descrizioni dei prodotti utilizzando ChatGPT, devi prima collegarlo al tuo sito WordPress. Per fare ciò:
- Vai alla dashboard di WordPress, quindi alla scheda Plugin e fai clic su “Aggiungi nuovo plugin”.
- Cerca “AI Engine”, quindi installalo e attivalo.

- Nelle impostazioni di AI Engine, vai alla scheda Impostazioni e fai clic su “Apri account AI”.
- Accedi al tuo account ChatGPT o creane uno nuovo, se necessario.
- Fai clic su “Crea una nuova chiave segreta” e copia il codice.
- Torna alle impostazioni e incolla il codice nel campo “Chiave API”.

Aggiungi un prodotto
Una volta connesso ChatGPT, puoi iniziare ad aggiungere prodotti accedendo alla dashboard di Bluehost:
- Vai alla scheda Negozio e seleziona la scheda Prodotti e servizi.
- Infine, fai clic sul pulsante “Aggiungi un prodotto”.

- Nella nuova pagina, sei pronto per aggiungere la descrizione del tuo prodotto.
Genera descrizioni dei prodotti
Per generare una descrizione del prodotto con l’intelligenza artificiale:
- Vai su Post dal menu di navigazione a sinistra e fai clic su “Genera nuovo”.
- Inserisci il nome del tuo prodotto nella sezione Argomento, scegli la lingua, lo stile di scrittura e i prodotti alla fine. Quindi, fai clic su “Genera”.
- Una volta creati i campi, fai clic su “Scrivi tutti i campi” per modificare il contenuto.

- Fai clic sul pulsante “Imposta immagine prodotto” per caricare un’immagine del prodotto di alta qualità.
- Aggiungi le categorie di prodotti e imposta i prezzi dei prodotti.
- Infine, fai clic su “Salva bozza”, quindi su “Anteprima” per rivedere il contenuto del prodotto e fai clic su “Pubblica” quando sei pronto.
Passaggio 6: crea una home page con WonderBlocks
La tua homepage è il volto digitale del tuo marchio. Una homepage ben progettata dovrebbe comunicare chiaramente chi sei, cosa fai e, soprattutto, perché i clienti dovrebbero sceglierti. Elementi come titoli accattivanti, navigazione facile da trovare e accattivanti attirano i clienti e li guidano attraverso il tuo sito.
Con Wonder Blocks, una potente soluzione all-in-one del costruttore di siti Web di e-commerce AI di Bluehost, puoi creare quella home page perfetta. Offre modelli personalizzabili che ti consentono di organizzare elementi predefiniti, come testo, immagini e pulsanti, come preferisci. Diamo un’occhiata più da vicino a come personalizzare la tua home page utilizzando questo potente strumento:
Creare una nuova pagina
Vai alla scheda “Pagine” nella dashboard di WordPress e seleziona “Aggiungi nuovo” per creare una nuova home page. Puoi accedere agli strumenti di modifica standard per WordPress qui.
Usa i Wonder Blocks per creare la tua pagina
Fai clic sull’icona Wonder Blocks (pulsante verde) nell’area in alto a sinistra del pannello di modifica. Questo ti darà accesso a una serie di blocchi predefiniti, come sezioni di testo, gallerie di immagini e pulsanti di invito all’azione. Puoi aggiungere gli elementi del sito Web alla tua pagina trascinandoli e rilasciandoli, quindi modificarli in modo che corrispondano al tuo marchio.

Pubblica la tua homepage
Una volta che sei soddisfatto del design, fai clic su “Pubblica” per rendere attiva la tua home page. Puoi utilizzare passaggi simili per creare altre pagine essenziali, come una pagina Chi siamo, una pagina Contatti e una pagina Prodotto.
Passaggio 7: offri buoni regalo con i plugin YITH
Le carte regalo sono uno dei modi più semplici per aumentare il coinvolgimento degli utenti e aumentare le vendite. Sono perfetti per gli acquirenti dell’ultimo minuto o indecisi e offrono ai tuoi clienti la libertà di scegliere ciò che desiderano veramente. Inoltre, le carte regalo spesso portano a affari ripetuti e a spese persino più elevate del valore della carta.
I piani di hosting WooCommerce di Bluehost includono le YITH WooCommerce Gift Card. Questo strumento semplifica l’aggiunta, la personalizzazione e la gestione delle carte regalo direttamente dal tuo negozio di e-commerce.
Configura le carte regalo
Nella dashboard di Bluehost, vai alla scheda “Negozio”, scorri fino alla sezione Funzionalità aggiuntive e fai clic su “Gestisci” sotto YITH WooCommerce Gift Cards. Verrai reindirizzato alla pagina del prodotto WooCommerce, dove potrai creare la tua carta regalo come nuovo prodotto.
Personalizza le carte regalo
Segui i passaggi standard per aggiungere un prodotto, ma invece di aggiungere articoli fisici, crea una carta regalo digitale. Una volta configurate tutte le impostazioni, fai clic su “Pubblica” per rendere disponibile la carta regalo nel tuo negozio.
Le carte regalo sono un ottimo modo per aumentare il traffico organico verso il tuo negozio online, in particolare durante le festività!
Passaggio 8: crea una campagna di vendita con WonderCart
Le campagne di vendita sono essenziali per qualsiasi attività di e-commerce. Che si tratti di una vendita stagionale, di uno sconto lampo o di una promozione speciale, l’esecuzione di una campagna tempestiva può far salire alle stelle le tue vendite online e attirare nuovi clienti. Una buona campagna di vendita non consiste solo nel ridurre i prezzi, ma anche nell’evidenziare strategicamente i prodotti, creare un senso di urgenza e offrire offerte irresistibili che incoraggino i clienti a premere il pulsante “Acquista ora”.
WonderCart è un altro strumento importante che ottieni con i piani di hosting WooCommerce di Bluehost. Questo strumento ti offre la flessibilità di creare campagne che risuonino con il tuo pubblico e favoriscano le conversioni. Puoi impostare rapidamente vendite, offerte e sconti nei negozi online con pochi clic.
Impostare una campagna
Per creare una campagna di vendita, vai alla scheda “Vendite e promozioni” nella dashboard di Bluehost. Fai clic su “Crea campagna” da questo menu. È possibile selezionare una varietà di opzioni di campagna, come “Acquistati spesso insieme” e “Paghi uno prendi due gratis”.
Personalizza la tua campagna
Dopo aver selezionato un tipo di campagna, ti verrà chiesto di scegliere i prodotti che desideri presentare. Puoi anche applicare sconti, come importo fisso o percentuale, e personalizzare l’aspetto della campagna. Una volta impostato tutto, fai clic su “Fine” e pianifica l’esecuzione della campagna in una data specificata o immediatamente.
Passaggio 9: avvia il tuo negozio di e-commerce basato sull’intelligenza artificiale
Dopo aver seguito tutti questi passaggi, il tuo negozio online basato sull’intelligenza artificiale è pronto per essere pubblicato! Ricontrolla tutte le tue impostazioni, assicurati che le tue pagine abbiano un bell’aspetto e fai clic sul pulsante “Avvia il tuo negozio”.

Il tuo sito di e-commerce è ora attivo e pronto per i potenziali clienti!
Best practice per l’utilizzo dell’intelligenza artificiale nel tuo sito di e-commerce
Ora che il tuo negozio basato sull’intelligenza artificiale è attivo e funzionante, parliamo di alcune best practice per garantirne il successo a lungo termine:
- Dai priorità all’esperienza del cliente (UX): Assicurati che il tuo sito sia facile da navigare, ottimizzato per i dispositivi mobili e veloce da caricare. A nessuno piace un sito di e-commerce lento.
- Monitora le prestazioni dell’intelligenza artificiale: Gli strumenti di intelligenza artificiale sono fantastici, ma non sono perfetti. Tieni d’occhio le loro prestazioni e apporta le modifiche necessarie.
- Aggiorna regolarmente i tuoi contenuti: Contenuti freschi e pertinenti fanno sì che i clienti tornino. Usa i contenuti generati dall’intelligenza artificiale per i nuovi post del blog o le descrizioni dei prodotti, ma dai sempre un tocco umano.
- Prova, prova, prova: Testa regolarmente il tuo sito per eventuali problemi, come collegamenti interrotti o pagine lente. Conduci test A/B per vedere cosa funziona e cosa deve essere migliorato.
Pensieri finali
Felicitazioni! Ora hai completato tutti i passaggi per creare un negozio web completamente funzionale utilizzando il costruttore di siti Web WordPress AI di Bluehost e WooCommerce. Che si tratti di aggiungere prodotti, gestire i pagamenti o lanciare campagne, l’intelligenza artificiale rende il processo più fluido e intuitivo. Inoltre, con la flessibilità di WooCommerce, puoi facilmente scalare il tuo negozio online man mano che la tua attività cresce. Quindi, vai avanti: lancia il tuo negozio online e inizia a fare vendite oggi stesso!
Domande frequenti sul costruttore di siti Web di e-commerce AI
Sì, l’AI builder è progettato per gli utenti con zero esperienza di codifica. Puoi creare un sito di e-commerce professionale in pochi minuti anche se sei un principiante.
No, un account Facebook non è obbligatorio, ma collegarlo può semplificare la configurazione e garantire la coerenza tra le piattaforme.
WooCommerce supporta diversi gateway di pagamento, tra cui PayPal, Stripe e bonifici bancari diretti.
Sì, il costruttore di negozi online AI crea automaticamente design reattivi che hanno un bell’aspetto su tutti i dispositivi, compresi i dispositivi mobili.
Sì, WooCommerce offre plug-in che integrano strumenti di gestione dell’inventario basati sull’intelligenza artificiale per aiutare ad automatizzare il monitoraggio delle scorte, il riordino e gli avvisi per i livelli di scorte bassi.
Non ci sono limiti specifici all’interno di WooCommerce, ma il tuo piano di hosting potrebbe influire sulle prestazioni. Se prevedi di gestire cataloghi di prodotti di grandi dimensioni, prendi in considerazione l’aggiornamento a un piano che offra risorse server più elevate, come l’hosting Bluehost Cloud.
Sì, puoi modificare facilmente il tuo sito Web di e-commerce anche dopo che è stato pubblicato utilizzando il costruttore di siti Web di e-commerce Wonder Blocks e AI di Bluehost. In qualsiasi momento, puoi aggiornare il contenuto del sito web, aggiungere nuove funzionalità di eCommerce o modificare il layout.
Sì, WooCommerce ha estensioni che ti consentono di vendere in più valute. Ciò è particolarmente utile se ti rivolgi a clienti internazionali.
Sì, puoi aggiungere chatbot basati sull’intelligenza artificiale al tuo negozio online WooCommerce per assistere i clienti, rispondere alle loro domande, aumentare il coinvolgimento e i tassi di conversione. Opzioni popolari Il costruttore di chatbot AI di HubSpot.

Scrivi un commento