Key highlights
- Understand what Google Workspace offers and why businesses use it for email and collaboration.
- Prepare the essential details you need before starting the Google Workspace setup process.
- Follow a clear, step-by-step approach to setting up Google Workspace for your business.
- Avoid common address verification mistakes that can delay setup or cause errors.
- Resolve common setup issues by knowing what to check when something doesn’t work as expected.
Setting up Google Workspace for the first time can be confusing, especially when domain verification, DNS updates and email activation are involved. Missing or incorrect details at any step can slow things down.
This guide serves as a practical Google Workspace setup guide for businesses in 2026. It explains what Google Workspace is and what you need before getting started. It also walks through the setup process, how to avoid address verification issues and what to check if problems come up.
By following this guide, you can complete the setup in the correct order and get your business email and collaboration tools up and running without unnecessary delays.
What is Google Workspace and why do businesses use it?
Google Workspace is Google’s suite of tools built for business use. It combines email, file storage, calendars, video meetings and collaboration apps into one connected workspace. Instead of managing separate tools, everything is organized under one account, with users and settings managed through the Admin console.
The biggest difference between Google Workspace and a personal Google account is control. Business accounts use a custom domain for email and include administrative tools that let teams manage users, security settings and app access from one place. Personal accounts don’t offer this level of centralized management.
Businesses choose Google Workspace because it supports everyday work without adding complexity. Here’s why many teams rely on it:
- Professional business email: Email runs on a custom domain, helping build trust and consistent communication.
- Centralized file storage and sharing: Google Drive makes it easy to store files, control access and collaborate in real time.
- Built-in scheduling and meetings: Google Calendar and Meet work together to handle calls, events and availability.
- Simple user and access management: Admin tools make it easier to add users and manage permissions as teams grow.
- Tools that work together by default: Gmail, Docs, Sheets and Meet are already connected, reducing the need to switch between platforms.
When businesses choose to set up Google Workspace through us at Bluehost, we guide them through purchasing, domain connection and email configuration, so everything is set up correctly from the start.
What do you need before setting up Google Workspace?
Before you get started, having a few essentials ready can make the setup smoother. While the process itself is straightforward, preparing the right information upfront helps avoid delays and unnecessary interruptions.
To begin, you’ll need a few basic business details during the setup. These are used to create your Google Workspace account and configure initial settings:
- Your organization’s name, which appears across Google Workspace
- Your country or region, used for setup and verification
- A current email address where setup updates and alerts can be sent
Next, think about your domain name. This domain will be used for your business email address, such as you@[yourcompany.com] and is a key part of the Google Workspace custom domain email setup process. If you already own a domain, you’ll connect it during setup. If you don’t have one yet, you can choose and register a domain when getting started with us at Bluehost. This allows you to handle everything in one place.
Also read: How to Choose a Domain Name in 2026 | 15+ Expert Tips
Once a domain is selected, access to its DNS settings becomes important. This is where the Google Workspace DNS setup takes place to verify ownership and enable email delivery. This typically involves:
- Verifying domain ownership using a TXT record
- Adding or updating MX records to enable email delivery
Finally, be prepared for a few light technical steps. These don’t require advanced knowledge, but accuracy and patience are important. During setup, you may need to:
- Add DNS records exactly as provided
- Double-check values before saving changes
- Allow some time for DNS updates to apply
With these details in place, the setup process moves much more smoothly. From here, you are ready to set up Google Workspace for your business and complete the remaining steps without unnecessary interruptions.
Also read:What Are DNS Records? Types, How They Work & How to Update Them
How to set up Google Workspace for your business?
If you’re wondering how to set up Google Workspace for your business, the process follows a clear sequence. The steps below walk through each stage in order.
Step 1: Purchase Google Workspace
Begin by choosing a Google Workspace plan that fits your business needs.
- Visit our Bluehost website and go to the Google Workspace purchase page.
- Select the plan that works for your business.

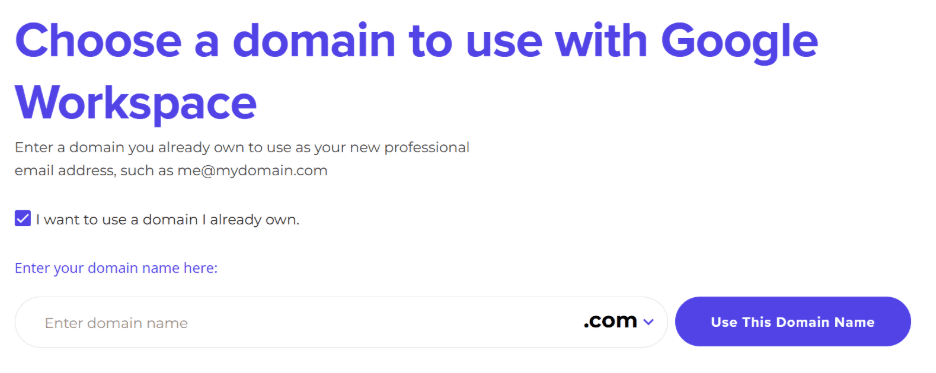
- After choosing a plan, you’ll be taken to a page where you can decide how to proceed with your domain.
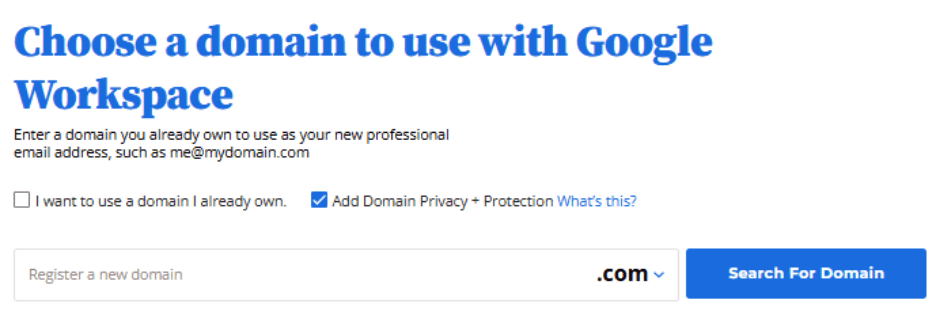
- If you already own a domain you want to use, select the option to use an existing domain, enter the domain name and click Use This Domain Name.
- If you don’t have a domain yet, you can register a new one at this stage by entering a domain name and checking its availability by clicking Search For Domain.
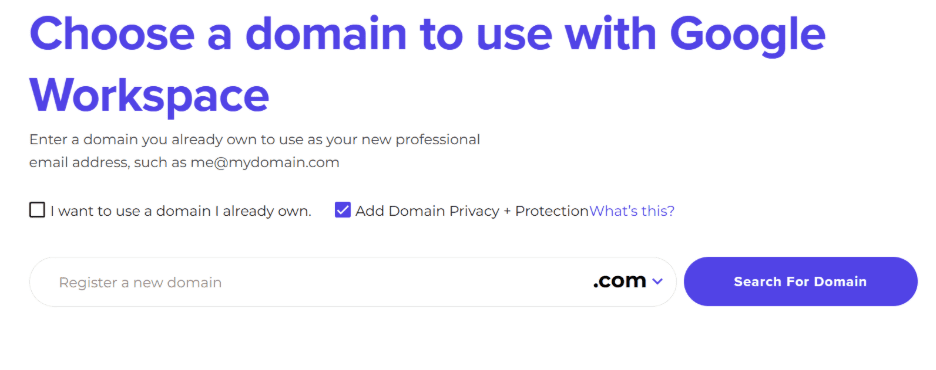
- On the next screen, you’ll also see the option to include Domain Privacy + Protection, if needed.
- Review your order details on the cart page, proceed to CONTINUE TO CHECKOUT and complete the purchase to move forward.
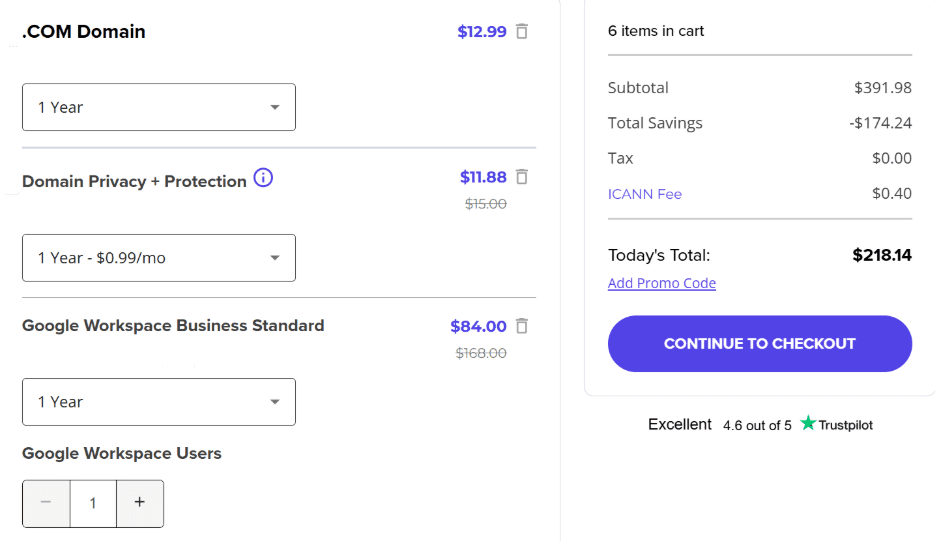
Once the purchase is complete, you’ll be guided through the setup process.
Step 2: Verify your domain ownership
During setup, domain ownership needs to be confirmed before email services can be activated.
To do this, you’ll be asked to:
- Add a TXT record provided during setup to your domain’s DNS settings at your domain registrar.
This step confirms that you own the domain you’re using for business email.
Step 3: Configure MX records for email delivery
After domain ownership is verified, Google Workspace MX records must be set up, so that email is delivered correctly to your domain.
This involves:
- Updating your domain’s MX records manually at your domain registrar.
- Pointing those records to Google Workspace email servers as instructed.
These changes may take some time to apply, which is normal during DNS updates.
Step 4: Create your email accounts and complete setup
Once DNS changes are in place, you’ll finish setup by:
- Creating your primary business email address.
- Adding a recovery email address.
- Accepting the required terms to activate your account.
At this point, your Google Workspace account becomes fully active.
Step 5: Start using and managing Google Workspace
After setup is complete, your business email and collaboration tools are ready to use and allowing your team to move straight into day-to-day work.
You can now access tools such as:
- Gmail for business email
- Google Drive for file storage and sharing
- Docs and Sheets for collaboration
- Google Meet for meetings and calls
If you need help at any stage, we remain available to guide you through setup steps or troubleshoot issues as needed.
Moreover, with day-to-day management in place, Google Workspace becomes more than just a setup task. It turns into a system your team relies on every day. Having visibility into users, email and settings from one place helps keep everything organized as your business grows.
Get started with Google Workspace on Bluehost and manage your email, domain and DNS together from a single dashboard.
If you’re an existing Bluehost customer and prefer to manage Google Workspace directly from your account, the optional steps below outline how the process works within Bluehost.
Google Workspace setup for existing Bluehost users
Setting up Google Workspace through our Bluehost platform involves a few guided steps, each designed to move you closer to a fully functional business email and collaboration setup. Starting from purchasing the service to activating email and managing users, the process follows a clear sequence that helps avoid confusion and missed configurations.
Step 1: Purchase Google Workspace
The first step is to select and purchase a Google Workspace plan that matches your business needs. This ensures your account is created correctly before moving into setup and configuration.
1.Sign in to your Bluehost Account Manager.
2. Select Marketplace from the left-hand navigation.
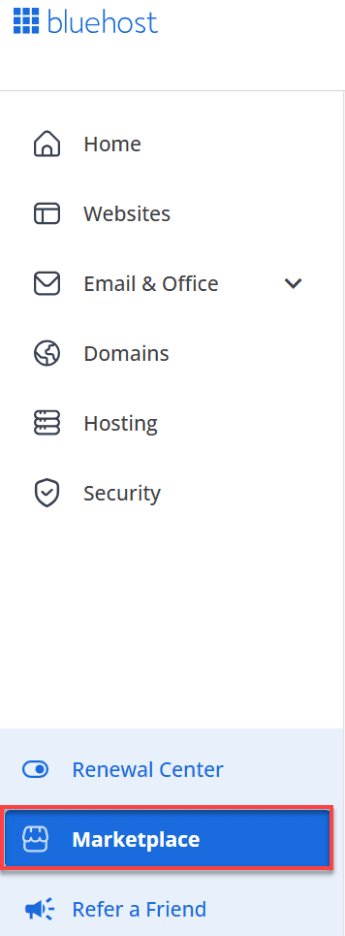
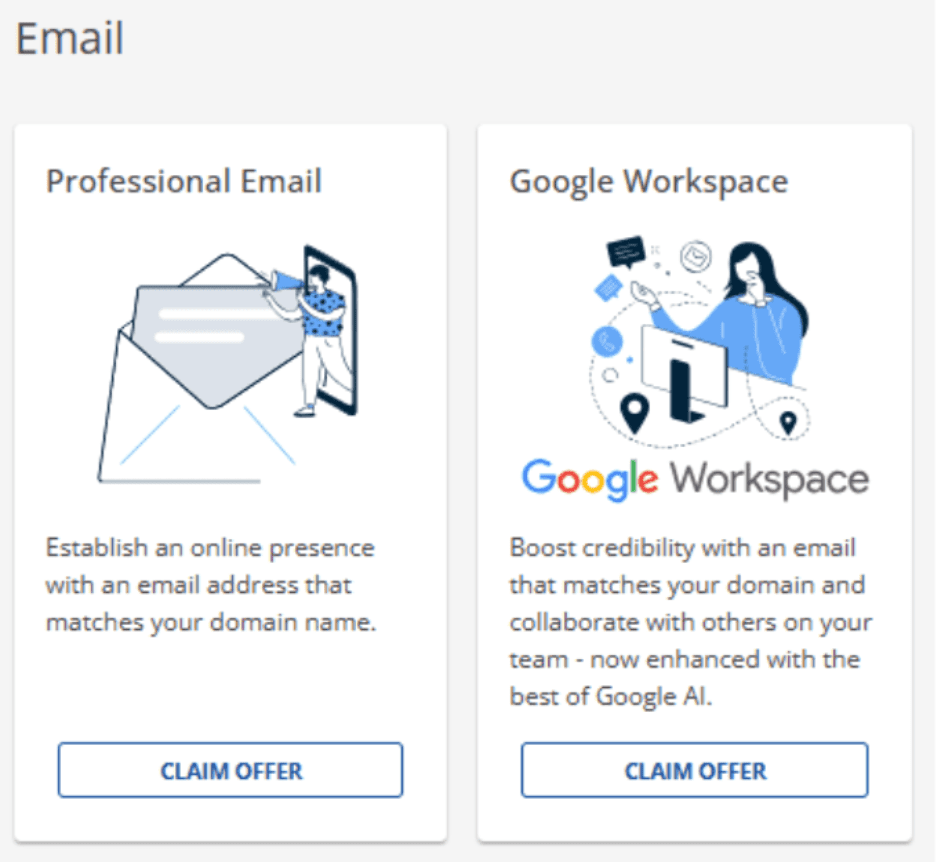
3. Scroll to the Email section and choose Claim Offer under Google Workspace.
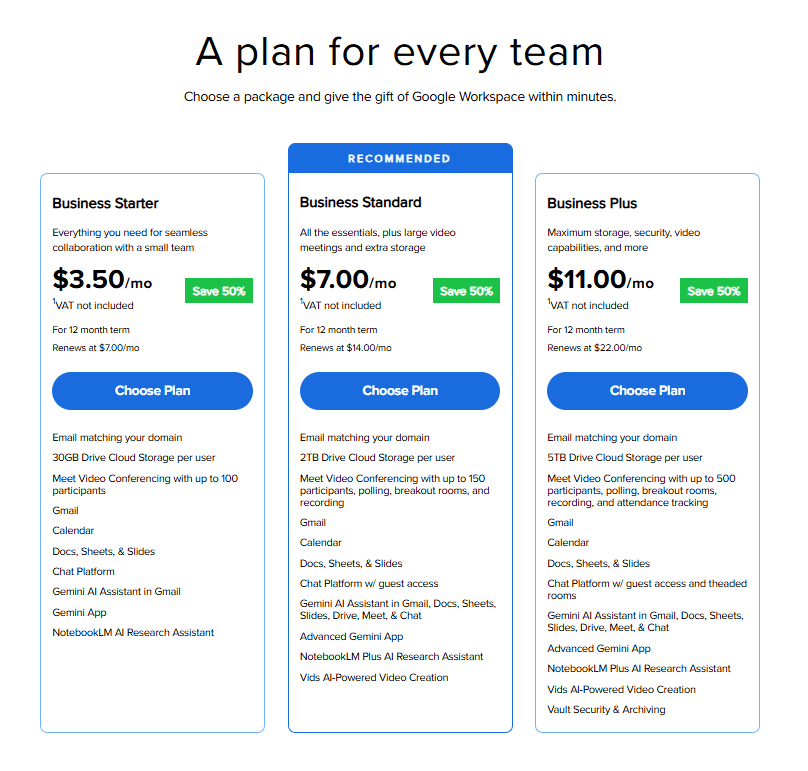
4. Select the plan that meets your requirements.
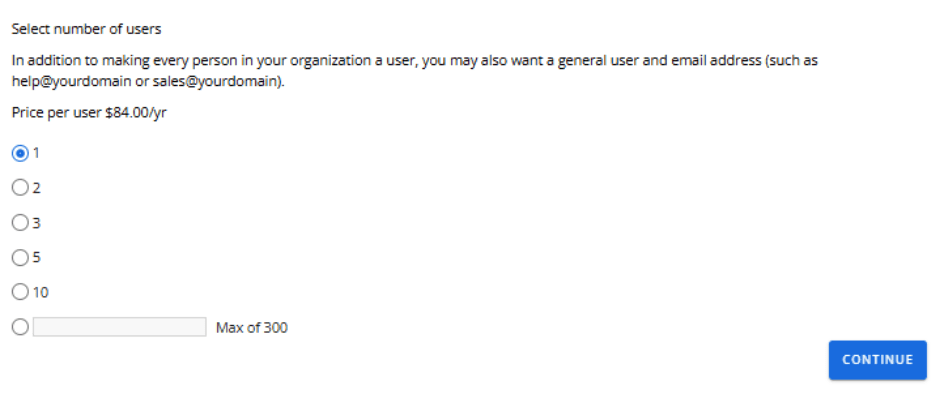
5. Then, choose the number of users and proceed to checkout.
6. Enter your existing domain if you already have one.
7. If not, register a new domain during this step.
8. Finally, complete the payment to continue.
Once your purchase is complete, the setup process becomes available directly from your account.
Step 2: Start the setup process
With Google Workspace added to your account, the next step is to begin the setup flow. This connects your purchase to the configuration steps needed to activate email and services.
1.After checkout, a setup notification appears in your Account Manager. Select Set Up to begin.

2. If the notification isn’t visible, open Google Workspace from the left-hand menu, locate your plan and select Set Up.
After starting the setup, you’ll be guided to enter the details required to create your workspace account.
Step 3: Enter your account details
At this stage, you’ll provide basic information that helps create your Google Workspace account and assign an administrator.
1.Enter your primary email address along with your first and last name.
2. Add your organization name if applicable.
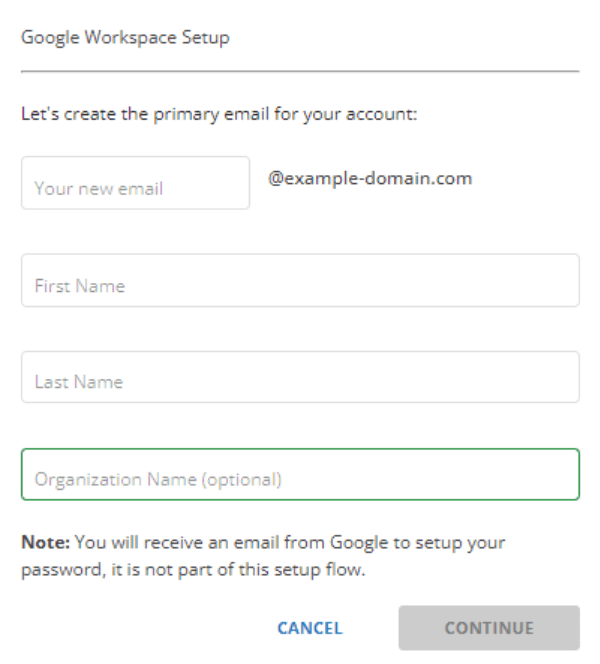
3. Provide a recovery email address and select Set Up to continue.

Once these details are submitted, the setup proceeds to confirm your domain and email configuration.
Step 4: Verify your domain and configure DNS
Domain verification ensures your business owns the domain used for email and allows email delivery to work correctly.
1.If your domain is registered with us, the required MX records are configured automatically during setup.
2. If your domain is managed elsewhere, you’ll be prompted to verify ownership by adding a TXT record to your DNS settings.
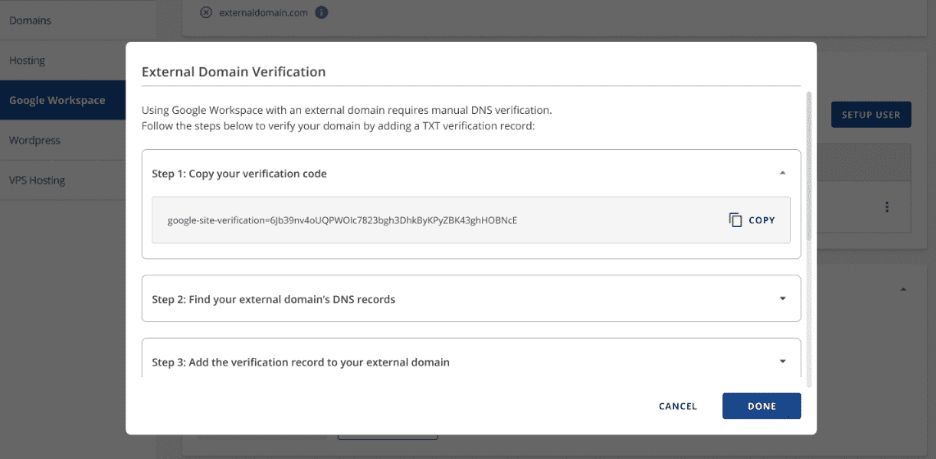
3. After verification, update your MX records to route email through Google Workspace as instructed.
After the domain and DNS steps are completed, the remaining task is to allow time for the changes to apply.
Also read: What is a TXT Record
Step 5: Confirm setup and allow time for changes
DNS updates don’t take effect immediately and require some time to propagate across the internet.
- Allow a few hours for DNS changes to apply.
- Once verification is complete, sign in to your Google Workspace account and accept the Terms of Service.
With the setup finalized, you can now begin managing your workspace and adding users as needed.
Step 6: Manage and start using Google Workspace
Once setup is complete, ongoing management and daily usage happen from a single place, making it easier to keep everything organized as your team grows.
From your Bluehost Account Manager, you can:
- Add or remove users as needed
- Manage account and email settings
- Access your Google Workspace dashboard
With management in place, your team can start using Google Workspace tools for everyday work, including:
- Gmail for business email
- Google Drive for file storage and sharing
- Docs and Sheets for collaboration
- Google Meet for meetings and calls
Now that the setup process has been covered for both new and existing users, the next focus is on a step that often causes delays if details are entered incorrectly. Address verification plays a key role during Google Workspace setup and is worth reviewing before moving ahead.
How to avoid address verification issues during Google Workspace setup?
Address verification issues during setup are usually caused by small formatting or data-entry mistakes. Taking a moment to review your details before moving forward can help keep the process on track.
Some common issues to watch for include:
- Leaving the postal or ZIP code field blank or entering an incorrect value
- Missing unit, suite or apartment numbers for shared buildings
- Selecting the wrong country or region
- Entering partial or abbreviated addresses that don’t match official records
- Entering an incorrect domain name or making a typo when adding your domain during setup
In regions where postal codes aren’t commonly used, a placeholder value may still be required. Following the on-screen instructions carefully helps prevent delays at this stage.
Before continuing, it’s worth double-checking that your address follows a standard format. You can do this by:
- Entering your full address exactly as provided during setup
- Confirming that the location is recognized correctly
- Using a standardized address format if one is suggested
If your address is adjusted or reformatted, applying that version during setup can improve verification success. If issues continue, checking with a local postal service or another trusted address source can help ensure accuracy.
Once your address is accepted, you can proceed to the remaining setup steps without revisiting this stage.
Also read: How to Verify Address When Setting Up Google Workspace
Troubleshooting common Google Workspace setup issues
Even when the setup is followed carefully, it’s normal to encounter minor issues along the way. Most setup-related problems are tied to timing, DNS updates or incomplete steps and they can usually be resolved without starting over.
This section outlines a few quick checks you can review before escalating the issue or seeking support.
1. Domain verification or DNS issues
If domain verification doesn’t complete successfully, the issue is usually related to DNS configuration rather than the account itself.
Before retrying verification, check the following:
- The TXT record was added exactly as provided
- The record was added to the correct domain
- There are no extra spaces, missing characters or formatting changes
- Enough time has passed for DNS updates to apply
In many cases, verification fails simply because DNS changes haven’t been fully propagated yet. Waiting a little longer and retrying often resolves the issue. Once verification is complete, the next area to review is email delivery.
2. Email not working after MX record setup
If email doesn’t start working immediately after MX records are added, it doesn’t always indicate a problem. DNS updates take time to propagate across the internet.
Before troubleshooting further, confirm that:
- MX record values match the required configuration
- Any old or conflicting MX records have been removed
- Enough time has been allowed for DNS propagation (up to 72 hours)
During this period, email delivery may be inconsistent. Once propagation is complete, delivery should stabilize.
3. Setup appears incomplete or needs correction
Sometimes setup may feel unfinished if a step was skipped or information needs to be updated.
If setup seems stuck:
- Review any remaining setup prompts
- Complete any steps that weren’t finalized
- Reconfirm domain verification and email configuration
When issues go beyond basic checks, getting help can save time. If you need assistance, we’re available to help guide you through setup-related issues or troubleshooting steps.
Final thoughts
Setting up Google Workspace involves a few technical steps, but once everything is configured, it runs smoothly in the background. Business email works reliably, files stay organized and teams can collaborate without juggling multiple tools.
At Bluehost, we make it easier to get started with Google Workspace by guiding you through setup and helping ensure your domain and email are configured correctly from the beginning. This reduces friction during setup and saves time when resolving issues.
With the right setup and support in place, Google Workspace becomes a reliable foundation for business email, collaboration and everyday work. Set up Google Workspace with us and get your business email up and running in no time.
FAQs
A Google Account is intended for personal use. Google Workspace is designed for businesses and includes custom domain email, administrative controls and collaboration tools like Gmail, Drive, Meet and Calendar, all organized under one business account.
Yes. You can use a domain you already own when setting up Google Workspace. During setup, domain ownership is verified and once verification is complete, email and other services are activated for your domain.
To use a custom email address, your domain needs to be connected and verified and email delivery settings must be configured correctly. Once setup is complete, your business email starts working with your domain.
If email delivery settings are missing or incorrect, messages won’t reach your custom inbox. This is usually resolved by reviewing the required values, correcting any errors and allowing time for changes to apply.
Yes. Once setup is complete, your email and collaboration tools are ready to use, allowing your team to start communicating and working together right away.
Start by reviewing the setup steps to make sure the domain verification and email settings were completed correctly. If issues continue, we’re available to help guide you through troubleshooting and next steps.

Write A Comment