The security of your WordPress site has never been more important in today’s digital world. With WordPress being one of the most widely used content management systems, it powers everything from personal blogs to large eCommerce sites. This popularity, however, makes it a prime target for cybercriminals.
When security is lacking, the risks can be serious. A single breach could lead to data loss, website downtime and damage to your reputation. It’s vital for site owners to understand potential threats like malware, unauthorized access and data breaches to keep them WordPress websites secure against evolving cyber threats.
One effective way to bolster your site’s security is by using security keys. These unique authentication keys play a crucial role in protecting your site from hacking attempts and keeping user login credentials safe.
In this guide, we’ll dive into what security keys are, how they function and why they’re essential for safeguarding your website from ever-evolving cyber threats.
Understanding WordPress security keys and salts
WordPress security keys are unique phrases found in your wp-config file that play a crucial role in enhancing your site’s security. They are essential for encrypting information stored in cookies, which include sensitive data like user authentication details. When users log in, these keys help ensure their sessions are secure, making it much harder for hackers to hijack accounts or access confidential information.
List of the four security keys
- AUTH_KEY: This key is vital for user authentication. It generates unique tokens to confirm a user’s identity during login, ensuring that only legitimate users can access their accounts.
- SECURE_AUTH_KEY: Designed for sites using HTTPS, this key secures cookies sent over the network, adding an extra layer of protection against threats like man-in-the-middle attacks.
- LOGGED_IN_KEY: This key manages session cookies, determining whether users are currently logged in. It helps maintain privacy by invalidating sessions when users log out.
- NONCE_KEY: Nonces are one-time tokens used to prevent cross-site request forgery (CSRF) attacks. The NONCE_KEY generates these tokens, ensuring actions like form submissions are legitimate.
In addition to the security keys, WordPress also uses salts random strings that add another layer of complexity to the encryption process. Salts make it even more difficult for attackers to crack passwords and impersonate users, enhancing the overall security of your website.
While both security keys and salts serve to protect user data, they have distinct roles. Security keys encrypt cookie data, while salts are used in conjunction with these keys to strengthen the encryption itself. Essentially, salts make the keys harder to crack, providing a more robust defense against potential threats.
Regularly updating your WordPress security settings to include new security keys and salts is an important practice. By doing so, you not only keep your site secure but also ensure that any compromised sessions are invalidated, helping protect your users’ information. Always refer to your wp-config.php file to manage these critical components of your WordPress security.
Importance of using WordPress security keys
WordPress security keys are vital for enhancing your website’s defenses. These keys add an extra layer of protection, making it harder for hackers to breach your site.
Defined in your wp-config.php file, security keys encrypt information stored in cookies for user authentication. When users log in, their sessions are validated with these keys, so even if a hacker obtains a cookie, they can’t easily impersonate the user. This process significantly reduces unauthorized access to sensitive areas.
Security keys also protect against session hijacking and replay attacks. Regularly changing these keys further strengthens security by invalidating old sessions.
While strong passwords are important, they can be vulnerable. Without security keys, even robust passwords can be cracked. However, with security keys in place, attackers would need both the password and access to the keys, adding a crucial barrier to your site’s defenses.
When to change your WordPress security keys
Keeping your WordPress site secure means regularly updating your security keys. Here are some key situations when you should consider changing them:
After a security breach
If you suspect that your site has been compromised, it’s important to change your security keys immediately. A breach could mean that an attacker has gained unauthorized access, putting user sessions and sensitive data at risk. By updating your keys, you invalidate existing sessions and effectively lock the attacker out, helping to protect your site from further damage.
Regular maintenance
Establishing a routine for changing your security keys is essential for ongoing security. Aim to update them every six months or at least annually. This practice limits the window of opportunity for attackers to exploit any vulnerabilities and reinforces good security habits within your team.
Plugin or theme installations
Whenever you add a new plugin or theme, it’s wise to change your security keys. New installations can sometimes introduce vulnerabilities or conflicts that may expose your site to risks. By updating your keys after installing something new, you help close any potential security gaps.
User account changes
Any significant changes to user accounts—like adding new administrators or altering user roles—should trigger a review of your security keys. These changes can affect access to sensitive areas, increasing the chance of unauthorized access. Updating your keys ensures that any sessions tied to previous privileges are invalidated, adding an extra layer of security.
Server migration
If you’re moving your site to a new server, make sure to update your security keys during the process. Server migrations can expose your site to risks, including configuration changes. Changing your keys helps safeguard your site against potential vulnerabilities during this transition.
After major updates
Whenever you conduct major updates to WordPress, themes or plugins, consider changing your security keys. Such updates can sometimes lead to vulnerabilities or unexpected behaviors that might compromise security. Updating your keys helps ensure that user sessions remain secure.
Malware response
If you discover malware on your site, take immediate steps to scan and clean the infection. Once you’ve addressed the issue, changing your security keys is crucial to prevent future attacks. Even after cleaning, lingering vulnerabilities could exist, so updating your keys ensures that any compromised sessions are invalidated.
How to change WordPress security keys
Changing your WordPress security keys is essential for maintaining the security of your site. These keys help protect user sessions and enhance overall security. In this guide, we’ll explore three effective methods to change WordPress salt keys.
Using a dedicated plugin
Maintaining a secure WordPress site is crucial for protecting your content and user data. One of the easiest ways to manage this task is by using a dedicated plugin like Salt Shaker. Here’s a straightforward guide on how to change your WordPress security keys with this plugin.
To get started, you’ll first need to install the Salt Shaker plugin:
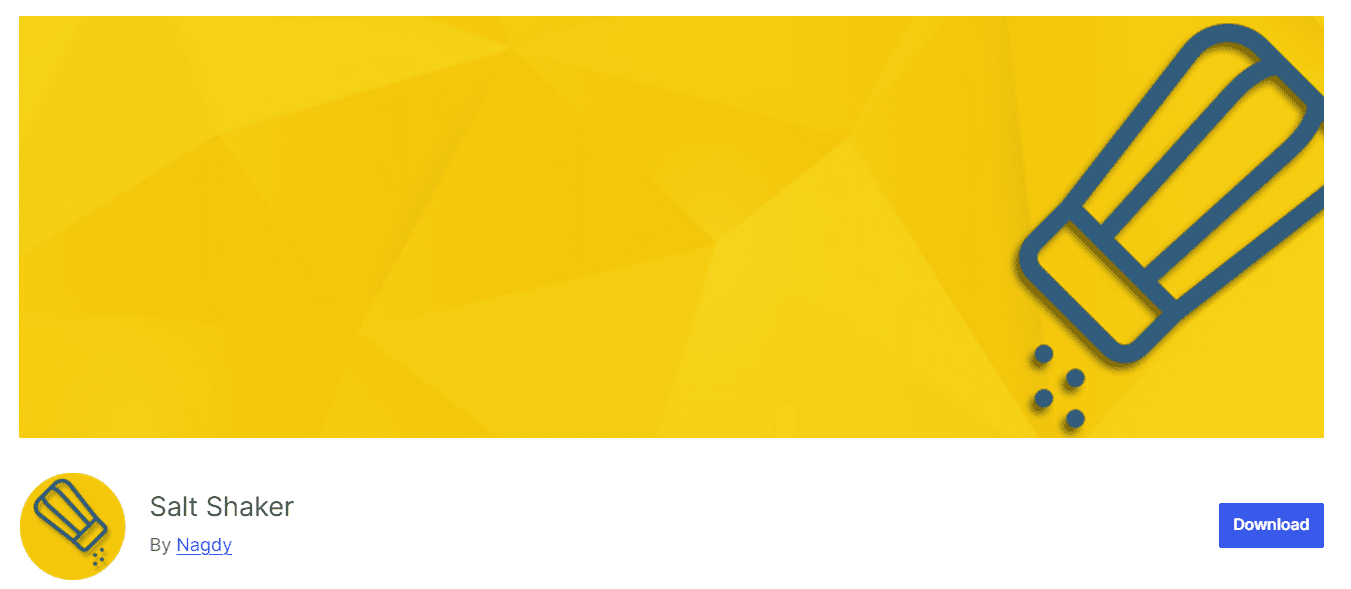
- Log into your WordPress dashboard: Navigate to your site’s admin panel.
- Go to plugins > Add new: In the search bar, type “Salt Shaker.”
- Install and activate: Once you find the Salt Shaker plugin, click “Install Now” and then “Activate.”
After activation, you’ll need to access the plugin settings to configure it:
- Navigate to tools > Salt Shaker: This section is where you’ll manage your security keys.
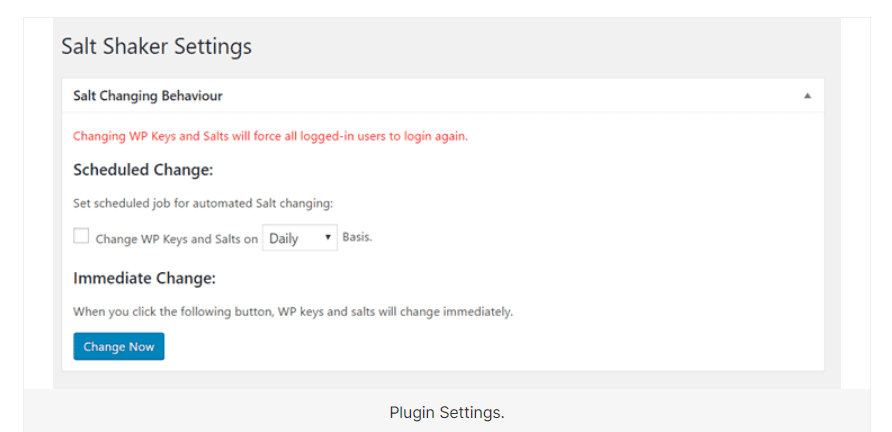
Salt Shaker allows you to automate the process of changing your security keys:
- Choose a schedule: You can set up regular intervals for key changes, such as weekly or monthly. This ensures that your keys are updated automatically generated without you having to remember to do it manually.
- Configure change settings: Adjust any additional settings that suit your security needs.
If you prefer to update your keys right away, Salt Shaker provides a quick option:
- Click on “change now”: This button will instantly regenerate your security keys and salts.
Utilizing a general security plugin
Changing your WordPress security keys using a general security plugin is a straightforward and effective approach. Here’s how to do it:
- Choose a security plugin: Select a reputable security plugin like Wordfence, Sucuri or iThemes Security. Install and activate it from your WordPress dashboard.
- Access plugin settings: Once activated, navigate to the plugin’s settings area. Look for sections related to security keys or general security settings.
- Regenerate security keys: Most security plugins have an option to regenerate your security keys and salts. Simply click the corresponding button to update them automatically.
- Save changes: After regenerating the keys, ensure you save your changes. The plugin will handle the rest, including logging out all users, who will need to sign back in.
Using a security plugin not only simplifies the process of changing your keys but also enhances your site’s overall security with additional features like malware scanning and firewall protection.
Change your WordPress security keys manually
While many users opt for plugins to simplify this process, it’s entirely possible to do it manually if you’re comfortable accessing your site’s files. Here’s a comprehensive guide on how to change your WordPress security keys manually.
Step 1: Generate new keys – Before making any changes, you’ll need new security key and salt values. To do this, head over to the WordPress secret key generator and grab the new codes.
Step 2: Back up your website – Always back up your website before making any changes, especially when editing core files. Consider using a staging environment to test changes safely. If you have a premium hosting plan, look for options to set this up easily.
Step 3: Locate and edit the wp-config.php file – Now it’s time to access your site files. You can do this via FTP or through your hosting provider’s File Manager. Here’s how to find and edit the wp-config.php file:
- Connect via FTP or file manager: Use an FTP client like FileZilla or log in to your hosting control panel.
- Navigate to the public folder: Look for the public_html folder. This is usually where your WordPress files are located.
- Find the wp-config.php file: This file is typically in the root directory of your WordPress installation.
Step 4: Update the keys and salts – Open the wp-config.php file in a text editor. Scroll down until you find the section labeled “Authentication Unique Keys and Salts.”
Replace the existing values with the new keys you generated earlier. Make sure to save your changes when you’re done.
Step 5: Save and exit -After updating the keys, save the wp-config.php file. If you’re using FTP, re-upload the modified file back to your server. If you edited it directly through File Manager, just hit save.
Step 6: Notify your users – Once you’ve saved the changes, all logged-in users will need to log back into your site. While their usernames and passwords remain unchanged, it’s a good idea to inform them about the update to avoid any confusion.
Additional ways to protect your WordPress logins
Securing your WordPress logins is essential for protecting your website from unwanted access. While using strong passwords and keeping your site updated are important first steps, there are plenty of additional measures you can take to enhance security. Here are some practical tips to help you safeguard your WordPress logins.
Promote strong passwords
One of the simplest and most effective ways to protect your site is by encouraging strong passwords. A solid password should combine uppercase and lowercase letters, numbers and special characters, ideally with at least 12 characters. Regularly changing your WordPress website’s password is also crucial for maintaining security. Help users by providing password strength indicators during registration and suggest they change their passwords periodically. A password manager can be a great tool for creating and storing complex passwords securely.
Enable two-factor authentication (2FA)
Two-factor authentication adds an important extra layer of protection by requiring users to verify their identity through a second method, such as a text message or an authentication app. This means that even if someone steals a password, they won’t be able to access the account without that second verification step. There are many WordPress plugins, like Google Authenticator and Authy, that make it easy to implement 2FA on your login page.
Limit login attempts
Brute force attacks where attackers try multiple username and password combinations are a common threat. By limiting the number of login attempts, you can significantly reduce the risk of these attacks succeeding. Plugins like Limit Login Attempts Reloaded can automatically block IP addresses after a certain number of failed attempts, making it much harder for attackers to get in.
Set up auto-logouts
Automatically logging users out after a period of inactivity can help protect against unauthorized access, especially on shared or public computers. This feature ensures that even if someone forgets to log out, they won’t stay logged in forever. Many security plugins, including Inactive Logout, allow you to set a timeout duration that automatically logs users out of your site after a specified period of inactivity, helping to enhance your site’s security.
Review user roles and permissions
Regularly checking user roles and permissions is crucial for keeping your site secure. Make sure each user has only the permissions they need for their tasks. For example, not everyone requires admin access to assign roles based on actual needs. This way, you can minimize the risk of accidental or malicious changes.
Disable XML-RPC
XML-RPC is a WordPress feature that allows remote access, but it can also be a target for attackers, leading to brute force and DDoS attacks. If you’re not using this feature, it’s wise to disable it to enhance your security. You can do this by adding a few lines of code to your functions.php file or using a security plugin to turn off XML-RPC easily.
Add CAPTCHA and security questions
Integrating CAPTCHA into your login page can help prevent automated attacks by requiring users to complete a challenge that proves they’re human. This adds an extra layer of security that can deter bots and reduce spam. Additionally, implementing security questions can provide another line of defense, ensuring that only authorized users can log in. Just remember to choose questions that aren’t too easy to guess!
Change the default login URL
The default WordPress login URL (wp-login.php) is well-known to attackers. Changing this URL to something less obvious can help obscure your login page and reduce the chances of automated attacks. You can easily customize the login URL using plugins like WPS Hide Login.
Add extra password protection
Consider adding an extra layer of password protection to your login page through a .htaccess file or a password-protected directory. This means users will need to enter a secondary password before they even reach the WordPress login screen. While this might add a slight inconvenience for users, it significantly boosts security by providing another barrier against potential attackers.
Final thoughts
Changing your WordPress security keys is a vital step in keeping your site safe. These keys help protect your data and ensure that your users’ information stays secure. Regularly updating them whether through plugins or manually is a straightforward way to enhance your website’s defenses.
It’s also essential to consider your hosting provider. Bluehost offers a variety of hosting plans that come with robust security features, including free SSL certificates, automatic backups and proactive malware detection. These built-in protections add an extra layer of security to your site, allowing you to concentrate on what matters most: your content and your audience.
Taking the time to review and strengthen your security practices today can make a significant difference in safeguarding your online presence tomorrow. So, don’t wait take a moment to update those keys and explore one of Bluehost’s hosting plans.
FAQs
WordPress security keys are unique authentication phrases found in your wp-config.php file. They encrypt information stored in cookies, helping to protect user sessions and sensitive data. Regularly updating these keys is crucial for preventing unauthorized access and enhancing your site’s overall security.
It’s recommended to change your WordPress security keys at least once every six months or after significant events like a security breach, plugin installations or major updates. Regularly update WordPress security keys to help invalidate old sessions and reduce the risk of exploitation.
Yes, you can manually change your security keys by editing the wp-config.php file. You can generate new keys using the WordPress secret-key service and then replace the old keys in your configuration file. Always remember to back up your site before making changes.
Bluehost provides robust security features, expert support and reliable performance specifically designed for WordPress. Choosing Bluehost means you can rest easy knowing your website is secure from potential threats. This peace of mind lets you focus on what really matters: growing your online presence.

Write A Comment