
Key highlights
- Secure temporary access: Ideal for granting secure, temporary website access to collaborators without creating permanent accounts.
- Flexible setup options: Offers methods to create temporary logins via the dashboard, code, or plugins, tailored to user comfort with technology.
- Varied use cases: Beneficial for freelancers, co-writers, training sessions, and client reviews, providing necessary access without permanent commitments.
- Plugin convenience: Emphasizes the simplicity of using plugins to create and manage temporary logins without needing to share passwords.
- Enhanced security: Automatically expiring logins prevent unused account buildup and enhance overall site security.
Introduction
Creating a temporary login for WordPress provides temporary access to your website without needing permanent accounts. This solution is perfect when collaborating with freelancers, developers, or clients. It improves security by limiting access for a set time and avoids the hassle of managing permanent accounts for a WordPress user.
In this detailed guide, you will learn how to set up a temporary login link that expires automatically. This process can enhance your site’s security while streamlining user access.
Why should you create a temporary login for WordPress?
Sometimes, you need to give someone temporary access to your WordPress website, such as a freelancer working on a project or a developer fixing issues. In these cases, creating a temporary login account is the perfect solution. It’s simple and secure and eliminates the hassle of managing accounts in the long term. Let’s explore the key benefits of providing temporary access using temporary logins:
For security purposes
Unused accounts can become a security threat on your WordPress site. Temporary users automatically expire, reducing this risk. When you provide temporary access, the account expires at a specified time, eliminating the need to delete it manually. Temporary account offers a secure way to manage short-term access without lingering threats.
Convenience to use
If you’re working with freelancers or developers, it’s much easier to set up a temporary account than to create and delete a permanent one. It’s quick and easy to give new user access for just the time they need it. You can revoke access to their login to maintain security when their work is done.
Save time & effort
Using a temporary user login without a password saves you the time and effort required for long-term account management. Creating and deleting user accounts for every freelancer or collaborator can be time-consuming. To make temporary user accounts, you only need to set the expiration date once. Plus, you can create unlimited temporary logins if you frequently work with multiple collaborators.
Prevents unused accounts
When you create temporary logins, they automatically disappear after the set expiration date, keeping your user management area clean and clutter-free. Permanent user accounts can accumulate and make your WordPress dashboard harder to manage, primarily if you work with many temporary users.
No password required
Sharing passwords with multiple users can be a hassle. Using a login without password plugin eliminates the need to share passwords. Instead, you create a temporary login link that users can access without entering any password. The password plugin ensures temporary users can log in securely and only for a set period.
When you may need a temporary login for WordPress
Temporary user logins are helpful in a variety of scenarios. Here are some everyday situations where creating a temporary login might be the best option:
Hiring freelancers & developers
When you hire a freelancer or developer to work on your website, you should provide them with something other than permanent access. A temporary login allows them to access the necessary parts of your site without requiring you to create users with permanent credentials that need to be managed later. Once their task is completed, you can quickly delete the login.
Collaboration with co-writers
If you run a blog or website that features guest posts, temporary logins make it easy to give writers access to submit their posts. After publishing the content, their access can automatically expire, keeping your WordPress installation secure while allowing collaboration. You can also manually delete it if necessary.
For training purposes
If you’re training someone to use WordPress or conducting a workshop, creating temporary logins for trainees can help them practice without giving them permanent access to your WordPress site.
Client access for agencies
As an agency, give your clients temporary user access to their new WordPress website so they can review the changes and provide feedback. Instead of creating a permanent account for them, you can set up a temporary login. Once the client is satisfied, their temporary login expires, ensuring they don’t retain access to areas they don’t need.

How to create a temporary login using a WordPress dashboard
One of the easiest ways to create a WordPress user is through the dashboard, without needing any password plugins or code.
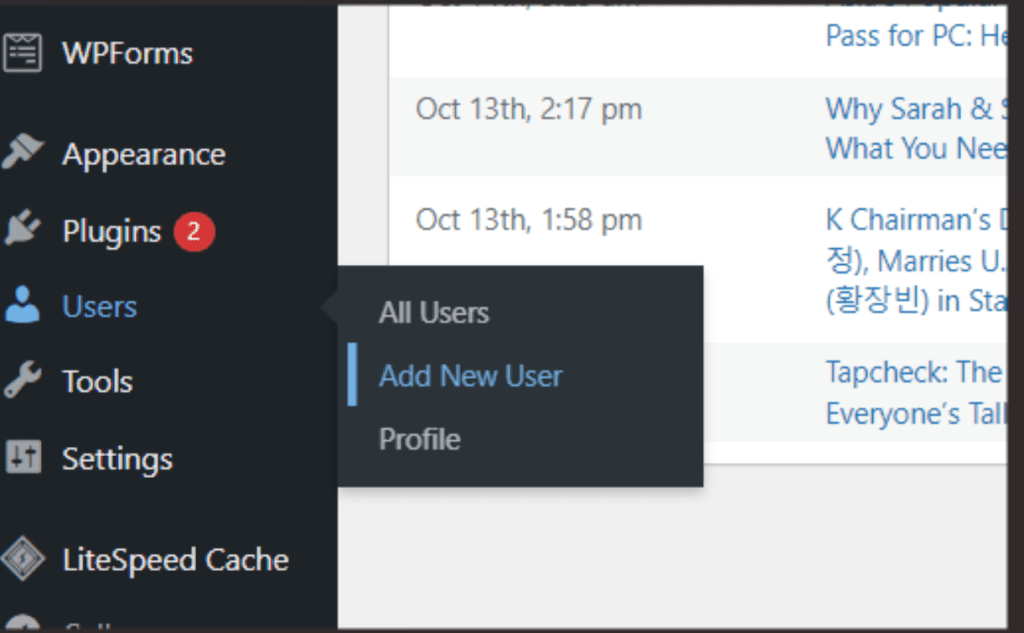
1. Log in to your WordPress dashboard
- Navigate to Users > All Users. You’ll see a list of all users, including their usernames, names, and email addresses.
2. Click add new
- In the All Users section, select the Add New button to begin creating a new user.
3. Fill in the user information
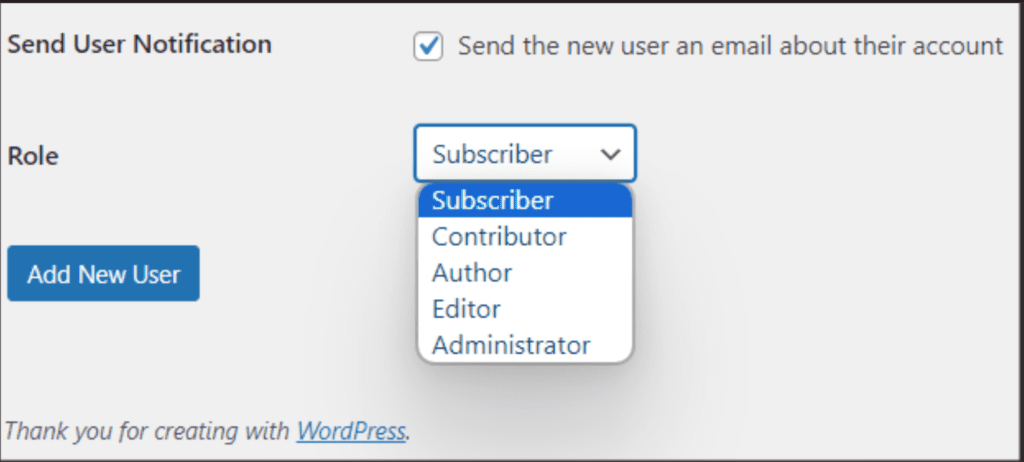
- You’ll be prompted to enter a username, email address, first and last name, website (optional), password, and role. The username, email, password, and role are required fields. Optionally, you can check the box to send a notification to the new user.
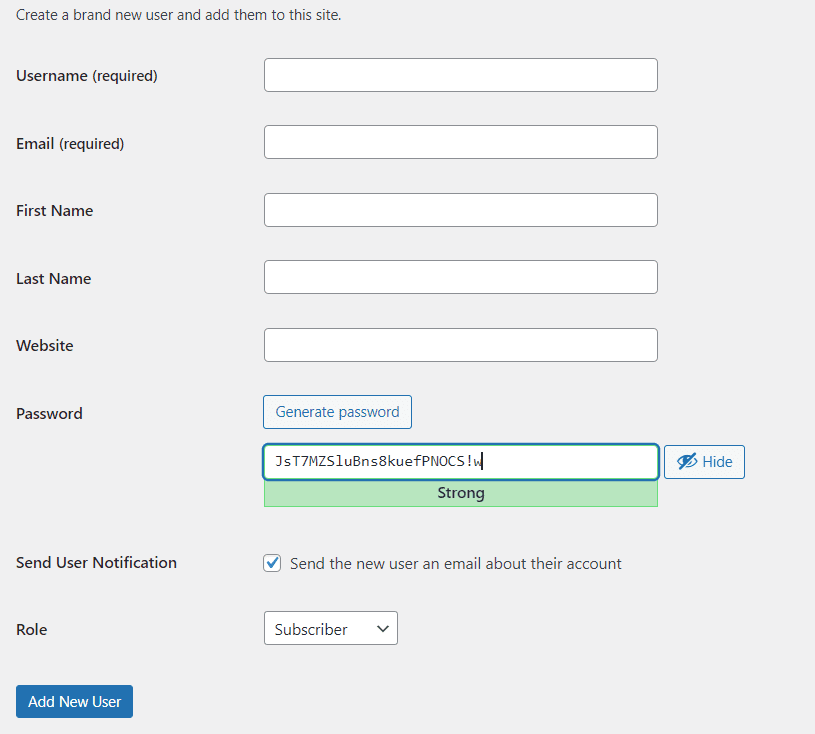
4. Select the appropriate role
- Assign the correct role based on what the user will need to do on your site. For example, choose Editor for someone managing content or Subscriber for someone with minimal access.
5. Click add new user
- Once all the necessary information is entered, press the Add New User button to finalize the process.
This method allows you to create permanent users. To remove access in the future, you’ll need to manually delete the account for security reasons.
How to create a temporary login using programmatically
Here’s a step-by-step guide to creating WordPress users programmatically with code:
1. Backup and use a child theme:
- Before editing the theme’s functions.php file, make sure to:
- Generate a complete website backup.
- Use a child theme to avoid losing changes during theme updates.
- If you don’t have a child theme, follow a guide to create one or use a child theme plugin.
2. Use the wp_create_user() function:
Example Code:
(wp_create_user( 'newuser', 'strongpassword', '[email protected]'); Replace ‘newuser’ with your preferred username, ‘strongpassword’ with the user’s password, and ‘[email protected]’ with the user’s email.
3. Add the code:
- You can add the code in two ways:
- Paste it directly into your child theme’s functions.php file.
- Use a plugin like Code Snippets to manage custom code easily.
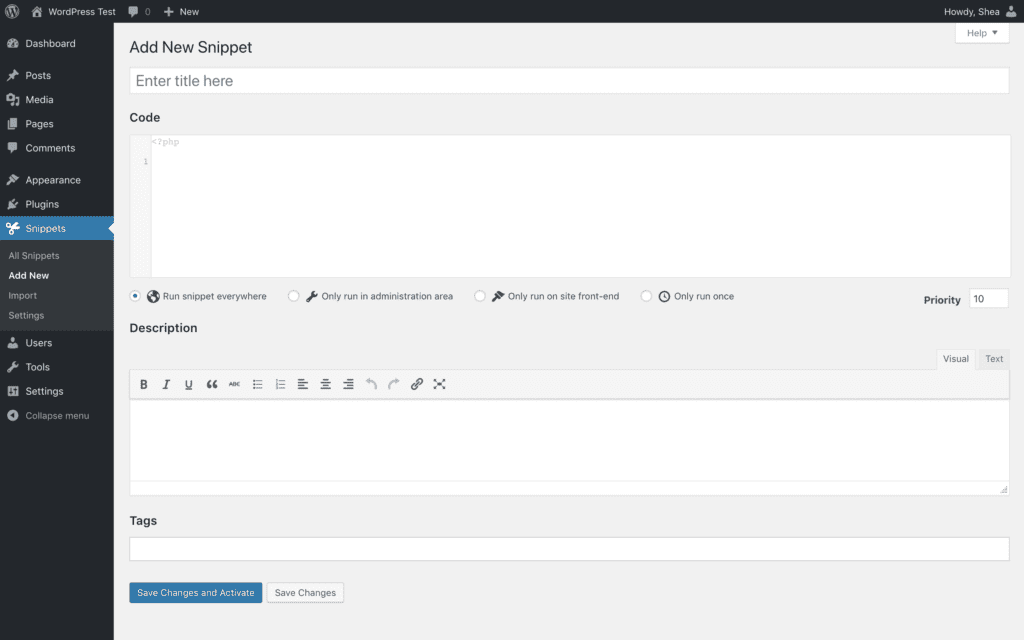
4. Using the code snippets plugin (recommended):
- Install and activate the plugin.
- Go to Snippets > Add New Snippet.
- Paste the user creation code.
- Save and activate the snippet.
How to create a temporary WordPress login using a plugin
While the easiest way to create a temporary login is through a WordPress plugin, you can manually create one directly from the admin dashboard. Here’s how you can set up a temporary login:
Log in to your WordPress dashboard
- Log in to your WordPress as an administrator. Ensure you have the correct permissions to install plugins and manage users and grant admin user access if needed.
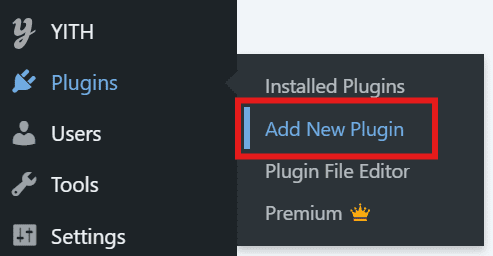
Go to the plugins section
- In the WordPress dashboard, navigate to “Plugins” on the left-hand menu and click “Add New.”
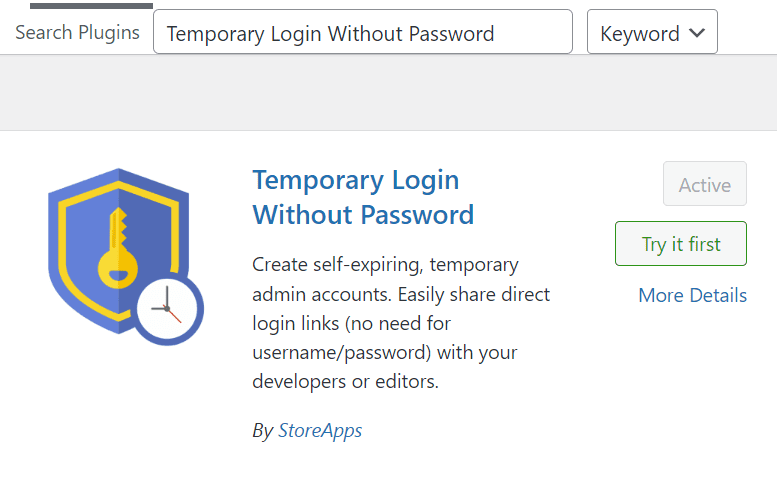
Search for “temporary login without password” plugin
- In the plugin search bar, type “Temporary Login Without Password.”
- Once the plugin appears, click “Install Now”.
- After installation, click “Activate” to enable the plugin on your WordPress site.
Go to the temporary logins page
- Once activated, go to “Users” > “Temporary Logins” in the WordPress admin dashboard.
- In the “Temporary Logins” page, click on the “Create New” button to create a new temporary login.

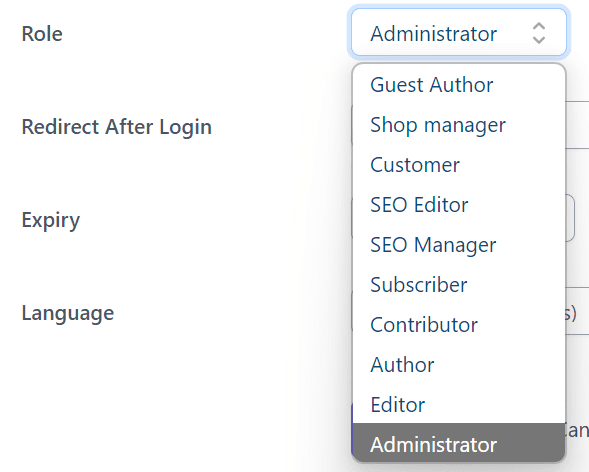
Enter user details
- Fill the user’s email address and name. Select the appropriate user role for the temporary user, such as Administrator, Editor or Author, depending on the level of access you want to provider.
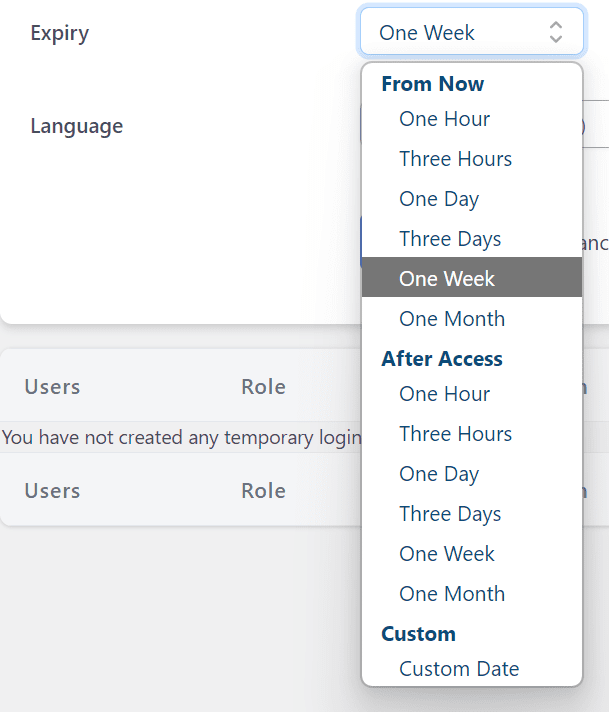
Set an expiration date
- Set an expiration date for the temporary login. This date determines when the user’s access to your site will expire. You can set the access for a few hours, a day, a week or any custom time frame you choose.
Generate and share the temporary login link
The plugin will generate a unique temporary login link. Copy the link and share it with the user who needs temporary access.
Manage temporary logins
- To manage existing temporary logins, go to “Users” > “Temporary Logins” to view all active accounts. You can see the expiration dates and the last login time.
Delete temporary logins
- Once the user no longer needs access, manually delete their temporary login to ensure site security. Temporary logins also automatically expire after the set time.
By following these steps, you can easily set up and manage temporary logins in WordPress using a WordPress temporary user account plugin.
Final thoughts
Creating a temporary login for WordPress is a smart way to provide short-term access to your site. It improves security by limiting access for a set time and avoids the hassle of managing permanent accounts.
The Temporary Login Without Password plugin makes this process quick and simple, even if you’re not familiar with coding. With just a few clicks, you can create temporary user logins and automatically set expiration times. Using the WordPress login without password plugin simplifies the entire process, making it easy to manage access securely. This useful password plugin is perfect for new users and for those managing multiple collaborators.
FAQs
Creating a temporary login allows you to grant short-term access to your site without setting up a permanent user account. It’s more secure, saves time and prevents unused accounts from lingering on your site.
The easiest way is using a plugin like Temporary Login Without Password. This plugin generates a unique WordPress login link for the user, so sharing passwords is unnecessary.
You can manually enable temporary logins using password plugins like Temporary Login Without Password by creating admin user accounts or programmatically through custom code.
When a temporary login expires, the user can no longer access your WordPress site. If you use a password plugin, the account will automatically be removed or deactivated.
A temporary login is a short-term user account that allows someone to access your WordPress site for a limited time. After the set period, the account expires, ensuring the user no longer has access.

Write A Comment