Key highlights
- Discover how subagent workflows break complex tasks into specialized, modular roles that scale effortlessly.
- Learn how to delegate tasks between agents and chain results into a unified final output.
- Explore how Claude Code hooks inject custom logic, logging, validation and error handling, without rewriting core code.
- Understand how a Master Control Program manages task queues, tracks state and dispatches jobs autonomously.
- Discover why Bluehost VPS delivers the root access, NVMe speed and scalability your Claude Code apps demand.
Building reliable, repeatable coding workflows takes more than a single back-and-forth prompt. As projects grow, developers need better ways to delegate tasks, enforce checks and connect to the right tools and data. They also need to avoid cluttering a single conversation.
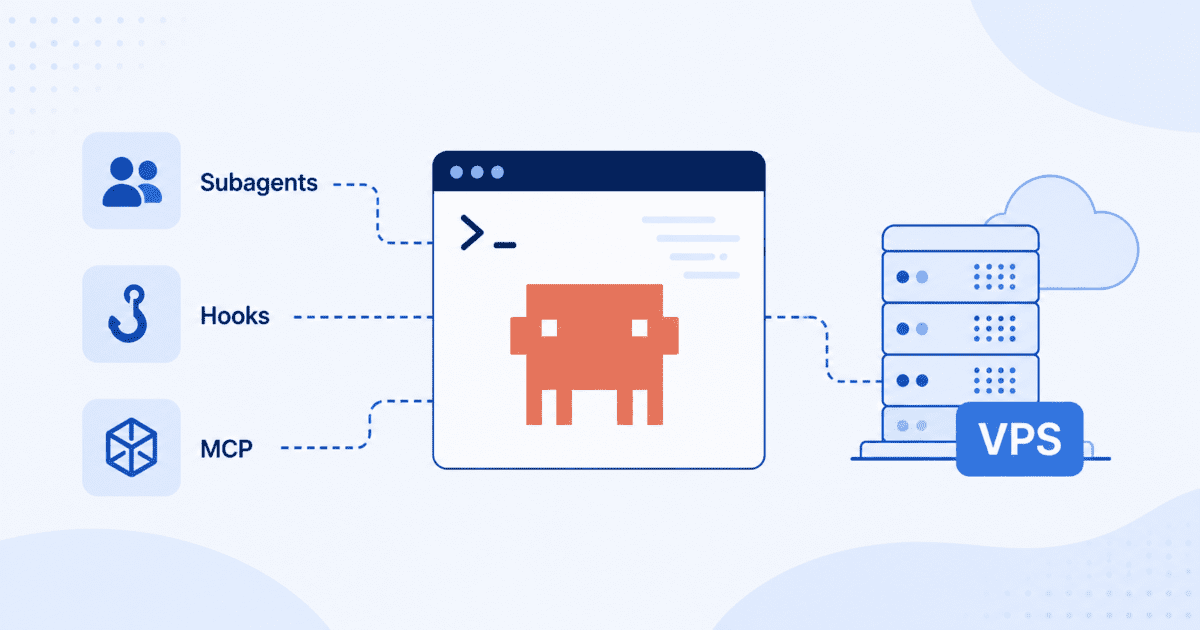
Claude Code is built for exactly this. It runs in your terminal against a real codebase. Subagents, hooks and MCP server connections extend its workflow without sacrificing speed or control.
In this guide, you’ll explore three Claude Code features built for that kind of workflow. You’ll learn how to delegate self-contained tasks to subagents, enforce consistent checks with hooks and connect to outside tools and data through MCP (Model Context Protocol) servers.
What are the prerequisites for this advanced guide?
You’ll need a VPS with root access, Node.js installed since Claude Code runs on Node and the Claude Code CLI installed and authenticated. Make sure your project repository is already cloned to the server so Claude Code can work with your codebase from the start. A persistent VPS helps maintain a consistent Claude Code workspace by keeping your subagent, hook and MCP configurations with your project across sessions. This lets you reconnect and continue working without reconfiguring your environment.
That stability is the whole point: nothing resets just because a local machine slept or restarted overnight. With your environment in place, you’re ready to start structuring how Claude Code handles bigger workflows. The next three sections walk through exactly how.
How do you implement a subagent workflow?
A subagent workflow lets you break down large tasks into smaller, specialized jobs. A primary agent acts as a controller, delegating work to Claude Code subagents that handle specific functions, like research or content generation. This creates a more organized and scalable AI system for your AI on VPS project.
Also read: Bluehost launches Claude Code VPS Hosting
We will walk through the steps to build this multi-agent workflow.
Step 1: Define subagent roles and responsibilities
The first step is to think about your task like a manager. You need to separate a large goal into smaller, distinct roles. For instance, to create a report, you might need one agent to find data and another to write the summary. In code, this means defining separate classes or functions for each subagent. This conceptual separation is the key to a powerful multi-agent system.
# Define the roles for our subagents
class ResearchSubagent:
    def execute(self, topic):
        print(f"RESEARCHER: Finding data on '{topic}'...")
        # In a real-world scenario, this would involve API calls or web scraping
        return f"Data report for {topic}: [details]"

class WritingSubagent:
    def execute(self, data):
        print(f"WRITER: Composing a summary based on data...")
        # This would use the data to generate prose
        return f"Here is a summary: {data}"
Step 2: Establish the agent-to-subagent communication bridge
Your primary agent needs a way to send tasks and receive results from its subagents. For this guide, we’ll use a simple function call to exchange instructions and results between agents. In more advanced deployments, you can use a message queue such as RabbitMQ or a REST API instead. The goal is to create a clear and reliable channel for instructions and data to flow between agents.
# Primary agent class that will delegate tasks
class PrimaryAgent:
    def init(self):
        self.researcher = ResearchSubagent()
        self.writer = WritingSubagent()

    def delegate_task(self, subagent_name, data):
        if subagent_name 'research':
            return self.researcher.execute(data)
        elif subagent_name 'write':
            return self.writer.execute(data)
        return "Error: Subagent not found."
Step 3: Delegate, execute and return a task
Now we can put all the pieces together. The primary agent will receive a high-level goal, delegate the research part to the ResearchSubagent and then send the result to the WritingSubagent. This completes the full lifecycle of a delegated task. The final output is a result of multiple specialized agents working in concert.
# Create an instance of the primary agent and run the workflow
main_agent = PrimaryAgent()

# 1. Delegate research task
research_data = main_agent.delegate_task('research', 'NVMe SSD performance')

# 2. Delegate writing task using the research data
final_summary = main_agent.delegate_task('write', research_data)

print("
--- FINAL OUTPUT ---")
print(final_summary)
Building this basic structure is the first step toward creating more sophisticated and autonomous AI systems. Now, let’s explore how to add more granular control over your agent’s behavior.
How can you customize agent logic with hooks?
Claude Code hooks let you inject custom logic into an agent’s workflow without altering its core code. This is a powerful way to add logging, validation or other behaviors at key moments. By registering functions to run before or after a task, you can modify agent behavior in a clean, modular way.
Step 1: Identify critical hook points
A hook point is a specific moment in the agent’s lifecycle where you can run custom code. The two most common types are pre-execution and post-execution hooks. A pre-execution hook runs right before the agent processes a prompt. This is useful for validating input or adding context. A post-execution hook runs after the agent generates a response, which is ideal for formatting output or logging results.
Common hookable events include: – before_prompt_execution: Runs before the agent processes the input. – after_prompt_execution: Runs after the agent generates a response. – on_error: Runs if an error occurs during execution.
Step 2: Write and register a pre-execution hook
Let’s create a simple hook that logs incoming prompts. This can be useful for debugging or monitoring how your agent is being used. First, we define a function for the hook. Then, we need a way to register this function with our agent so it knows when to call it. A simple hook manager can handle this registration process.
# A simple hook manager
hooks = {
    'before_prompt_execution': []
}

def register_hook(event, function):
    if event in hooks:
        hooks[event].append(function)

# Our custom hook function
def log_prompt_hook(prompt):
    print(f"HOOK: Intercepted prompt before execution: '{prompt}'")

# Register the hook to the 'before_prompt_execution' event
register_hook('before_prompt_execution', log_prompt_hook)
Step 3: Test the hook’s impact on agent output
Finally, we update our agent’s execution logic to check for and run any registered hooks. When the agent receives a prompt, it will first trigger our log_prompt_hook before proceeding with its main task. This confirms the hook is firing correctly and allows you to see its effect on the workflow in real-time without changing the agent’s primary logic.
class SimpleAgent:
    def run(self, prompt):
        # Trigger any pre-execution hooks
        for function in hooks['before_prompt_execution']:
            function(prompt)

        print(f"AGENT: Now processing the prompt: '{prompt}'")
        # Agent's core logic would go here
        return f"Processed response for '{prompt}'"

# Run the agent to see the hook in action
agent = SimpleAgent()
agent.run("What is a VPS?")
This modular approach makes it easy to add powerful new behaviors to your agents. Next, we will look at how to manage a whole team of agents from a central controller.
What is the process for building a master control program (MCP)?
A Master Control Program (MCP) acts as the brain for your entire multi-agent system. It orchestrates complex workflows by managing tasks, dispatching them to the correct Claude Code subagents and tracking their status. Building an MCP is the final step in creating a robust and autonomous application for your AI on VPS project.
Step 1: Design the state management and task queue
A successful MCP needs two core components: a task queue and a state manager. The task queue holds all the jobs that need to be done. The state manager tracks the status of each task, such as ‘pending’, ‘in_progress’, ‘completed’ or ‘failed’. This allows the MCP to know what to work on next and what to do if something goes wrong. A simple list can act as our queue and a dictionary can track state.
task_queue = []
task_states = {}

def add_task(task_id, description, target_agent):
    task = {'id': task_id, 'description': description, 'agent': target_agent}
    task_queue.append(task)
    task_states[task_id] = 'pending'
    print(f"MCP: Added task {task_id} to the queue.")
Step 2: Implement the core orchestration loop
The core of the MCP is an orchestration loop. This loop continuously checks the task queue for new jobs. When it finds a pending task, it changes its status to ‘in_progress’, sends it to the appropriate agent and waits for a result. This loop is what gives the MCP its autonomous nature, allowing it to work through a series of complex tasks without manual intervention.
# Pseudo-code for the MCP's main loop
def run_mcp_loop():
    print("MCP: Starting orchestration loop...")
    while len(task_queue) > 0:
        current_task = task_queue.pop(0)
        task_id = current_task['id']

        print(f"MCP: Dispatching task {task_id} to {current_task['agent']}.")
        task_states[task_id] = 'in_progress'

        # In a real system, this would call the actual agent
        # result = dispatch_to_agent(current_task['agent'], current_task['description'])

        task_states[task_id] = 'completed'
        print(f"MCP: Task {task_id} completed.")
    print("MCP: All tasks finished.")
Step 3: Integrate error handling and state recovery
Real-world tasks can fail. A robust MCP must know how to handle errors gracefully. This means wrapping task executions in error-handling blocks. If a subagent fails, the MCP should catch the error, mark the task state as ‘failed’ and decide on the next step. It could retry the task, delegate it to a different subagent or alert a human operator for assistance. This resilience is what makes an MCP suitable for production applications.
With these advanced structures, you have all the tools to build sophisticated AI applications. The final piece of the puzzle is ensuring you have the right infrastructure to support them.
Once your workflows are in place, the next step is ensuring they run reliably. Advanced Claude Code setups depend on stable infrastructure, making your hosting environment just as important as your configuration.
Why is Bluehost the right choice for hosting advanced Claude Code applications?
When building advanced AI on VPS systems with Claude Code subagents and MCP servers, your hosting environment is critical. Bluehost Claude Code VPS Hosting gives developers a persistent, terminal-first VPS setup where Claude Code can inspect repositories, run commands, edit files and verify results without local machine interruptions.
You also get full root access to install custom libraries, configure your development stack and control the environment your Claude Code workflows depend on.
Also read: How does VPS hosting work?
- Claude Code VPS hosting: Bluehost Claude Code VPS Hosting gives Claude Code a persistent server environment where it can work directly with your codebase, tools and terminal workflows.
- Stable runtime for long sessions: A VPS keeps Claude Code workflows available even when your local machine sleeps, restarts or runs out of resources.
- Terminal-first development: Bluehost VPS supports Claude Code’s CLI-based workflow, so it can run commands, inspect files, edit code and verify changes.
- Full root access: Developers can install custom libraries, configure runtimes, manage permissions and set up the tools Claude Code needs.
- MCP server support: A controlled VPS environment makes it easier to run MCP servers and connect Claude Code with external tools.
- Subagent-ready infrastructure: Bluehost gives Claude Code subagents a reliable foundation for handling specialized tasks within advanced AI workflows.
- Fast NVMe storage: NVMe storage helps Claude Code move faster through file reads, repo searches, dependency installs and test runs.
- Scalable resources: As projects grow, developers can scale CPU, RAM and storage without rebuilding their Claude Code environment.
As Claude Code workflows grow more advanced, they need infrastructure that can keep up with MCP servers, hooks and subagents. Bluehost Claude Code VPS Hosting gives developers a stable, terminal-first environment with the control, speed and persistent runtime needed to build and scale advanced AI applications.
What are your next steps in advanced AI development?
You now have the patterns to build highly capable AI systems. Using subagents, hooks and MCP servers, Claude Code helps you create modular, autonomous applications that can handle complex workflows with greater reliability and flexibility. While these capabilities are advanced, they unlock the full potential of Claude Code for building production-ready AI applications on a VPS.
The foundation for these workflows is reliable infrastructure. A VPS provides the dedicated resources, root access and flexibility needed to build, test and run advanced Claude Code applications with confidence.
Ready to take your Claude Code projects further? Get started with Bluehost Claude Code VPS hosting and build AI workflows on infrastructure designed for performance, reliability and complete control.
FAQs
Yes, you can run multiple MCPs on one VPS, but you must monitor your resource usage. Each MCP and its associated subagents will consume CPU and RAM. It is a good practice to start with one MCP and scale up while keeping an eye on your server’s performance metrics.
The biggest consideration is communication overhead. If your primary agent and subagents communicate frequently, the method matters. Direct function calls are fastest, but a message queue or API adds latency. Ensure your VPS has enough RAM to hold all your agents in memory if they need to run concurrently.
Start by adding detailed logging inside your hook function to confirm it is being triggered. Check the registration logic to ensure the hook is correctly associated with the event. Also, verify that the agent’s execution loop is calling the hook manager at the right time. Most issues are caused by incorrect registration or the hook function not matching the expected parameters.
Yes, but it requires a language-agnostic communication bridge. You cannot use direct function calls. Instead, you would build a simple REST API for each subagent. The MCP and other agents would then communicate with them over HTTP, allowing each component to be written in the best language for the job.
If agents are running on the same VPS, you can use local communication methods that do not expose them to the outside network. If they communicate over a network, use standard security practices. Implement API keys for authentication and use HTTPS to encrypt all traffic between them.
For a project of this size, the Bluehost VPS Enhanced plan is a strong starting point. It offers a good balance of CPU cores and RAM to run multiple agent processes at once. As your project’s complexity and traffic grow, you can easily scale up to the NVMe 8 or NVMe 16 plans for more resources.

Write A Comment