
Key highlights
- Know what DNS is and why configuring it can boost speed, strengthen security and improve privacy.
- Learn which DNS providers fit your needs, plus key features like malware blocking and low latency.
- Understand exactly how to configure DNS settings on Windows, macOS, Linux, routers, Android and iOS.
- Explore simple ways to verify your setup and safely revert changes if needed.
- Discover how Bluehost simplifies DNS with WHM + cPanel for rDNS migrations and complex records.
If your website feels slow or your emails keep going missing, there’s a good chance the culprit isn’t your code; it’s your DNS. DNS acts as the Internet’s switchboard. When it’s set up right, visitors reach your site faster, your emails pass authentication and security gets a powerful upgrade. When it’s not, you see delays, errors and headaches you don’t need.
The upside is big: smart DNS configuration can strengthen your brand and reduce risk during migrations. In this blog, we will explore how to configure DNS settings the smart way with Web Host Manager (WHM) at Bluehost.
Nameservers vs DNS resolvers: what’s the difference?
Authoritative nameservers are responsible for your domain’s records, telling the internet where to find your site.
- At your registrar, you set which nameservers your domain will use.
- Inside WHM at Bluehost, these nameservers store your domain’s DNS records, like A, CNAME, MX and TXT records, which guide visitors to your site.
Device/resolver DNS is used by your devices (like laptops, smartphones or tablets) to look up domain names more efficiently.
- Your phone or computer asks a DNS resolver (like Google’s 8.8.8.8 or Cloudflare’s 1.1.1.1) to find websites more quickly or securely.
- Changing this DNS only affects your device, not the whole domain.
In short: You update authoritative nameservers in WHM to change where your domain points for everyone, while resolver DNS is specific to your device’s internet connection.
Also read: What is a Nameserver? Guide to DNS, IPs & Website Setup
Why do you need to configure DNS settings?
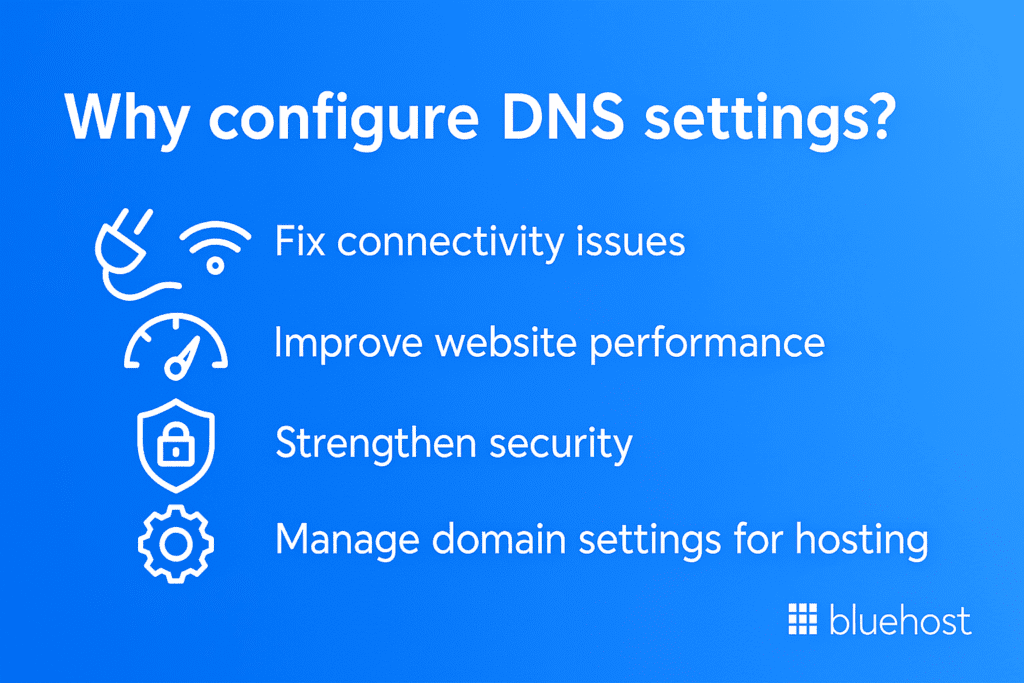
Configuring DNS settings is essential for ensuring a smooth and secure internet experience. Proper DNS configuration can help fix connectivity issues, improve website performance, strengthen security and effectively manage domain settings for hosting.
Let’s explore the primary reasons why configuring DNS settings is essential.
1. Fix connectivity issues
One of the main reasons to configure DNS settings is to resolve connectivity issues. Slow or unreliable DNS resolution can cause delays when loading your website, making it frustrating for users. By switching to a faster, more reliable DNS provider or fine-tuning your DNS settings, you can ensure that your visitors are quickly connected to your site.
Also read: 3 Most Common WordPress Issues and Their Solutions in 2024
2. Improve website performance
DNS configuration plays a pivotal role in how quickly your website loads for visitors. Choosing the right DNS provider, such as Google DNS or Cloudflare, can drastically reduce the time it takes for a domain name to resolve, speeding up your site’s load times.
This means faster website performance, which is not only critical for user satisfaction but also plays a role in improving your SEO ranking. Search engines like Google prioritize fast-loading sites, making DNS optimization a simple yet powerful tool for boosting your site’s visibility.
3. Strengthen security using DNS settings
A properly configured DNS setup can also significantly improve your website’s security. DNS providers like Cloudflare and OpenDNS offer features that block malicious sites, preventing your users from accessing harmful content.
Configuring DNS settings with advanced security protocols, such as DNS over HTTPS (DoH) or DNS over TLS (DoT), helps ensure that all DNS queries are encrypted, protecting your site from attacks.
4. Manage domain settings for hosting
When you configure DNS settings correctly, you gain better control over how your domain interacts with your hosting service. This includes managing important elements such as email deliverability (via MX records), verifying domain ownership and making sure your website is properly linked to the hosting provider.
With Bluehost’s WHM and cPanel integration, managing these DNS records becomes seamless, ensuring that your hosting environment is optimized for performance and security.
Also read: Domain Pointing: Step-by-Step Guide to Connecting Your Website
Prerequisites for DNS setting configuration with WHM
Before diving into DNS configuration, it’s important to ensure you have everything you need for a smooth and safe process. Proper preparation will help prevent errors and ensure your changes go live without disruption. Here’s what you’ll need to get started:
- Access you’ll need
- Back up your current DNS
- TTL plan for a safer cutover
Let’s understand in detail.
1. Access you’ll need
To configure DNS settings in WHM, you’ll need the appropriate access rights. Ensure that you have admin access to WHM and full control over your domain. This usually means having access to both your domain registrar and your hosting account at Bluehost.
If you’re managing the site with a team, ensure that the team members responsible for DNS configuration have the necessary permissions to access the server and make changes.
2. Back up your current DNS
Before making any changes to your DNS settings, always back up your current configuration. This step is crucial in case you need to revert to the previous settings. You can do this by exporting the current DNS zone records in WHM or simply taking notes of the current DNS settings in your registrar’s panel.
3. TTL plan for a safer cutover
Plan the Time to Live (TTL) values for your DNS records to minimize downtime during DNS propagation. Lowering TTL values before changes can help speed up DNS update propagation across the internet.
Step-by-step: configure DNS in WHM (Bluehost)
Configuring DNS in WHM at Bluehost is very simple. With these step-by-step instructions, you’ll be able to point your domain to Bluehost nameservers, set up your DNS records and ensure that everything runs smoothly.
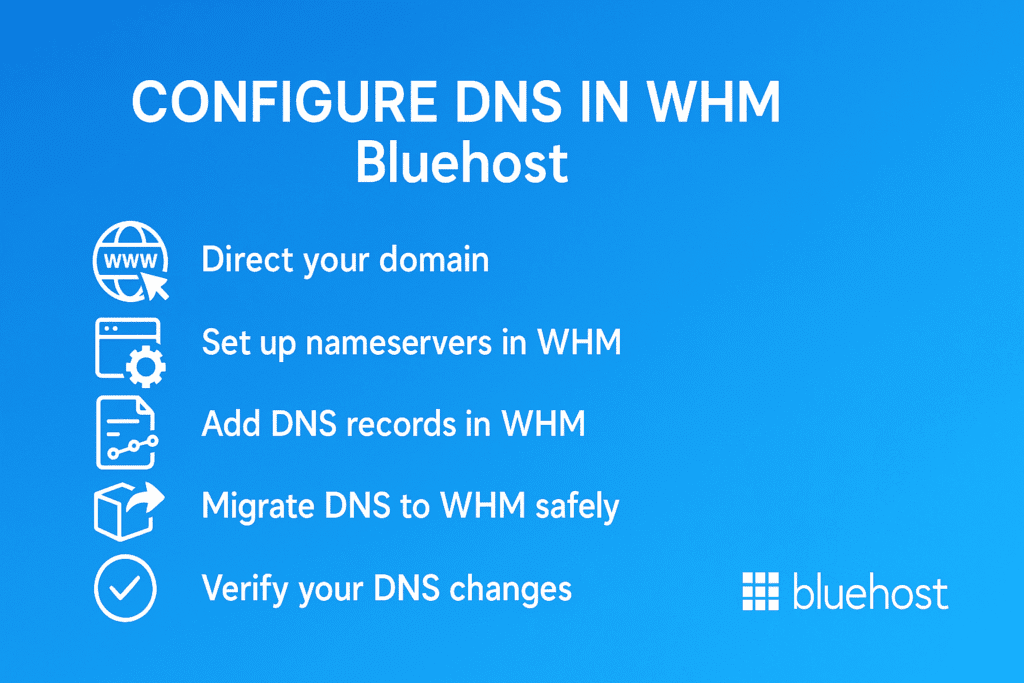
1. Point your domain to Bluehost nameservers
To begin, you need to direct your domain to Bluehost’s nameservers:
- Log in to your domain registrar’s control panel (the company where you purchased your domain).
- Navigate to the DNS settings or Nameservers section.
- Replace the current nameservers with Bluehost’s following DNS server addresses:
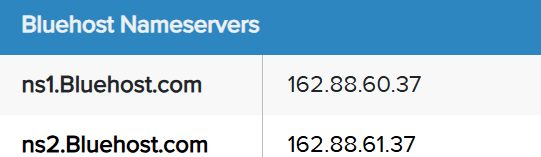
- Save the changes and allow up to 24-48 hours for DNS propagation.
Note: DNS propagation typically takes 24-48 hours to fully complete. During this time, some users may still be able to access your old website or experience delays when accessing your site. This delay is normal and it ensures that the following DNS server addresses around the world are synchronized with your new settings.
Also read: Change Nameservers with Other Registrars
2. Set up nameservers inside WHM
After your domain is pointing to Bluehost, follow these steps to set up nameservers in WHM:
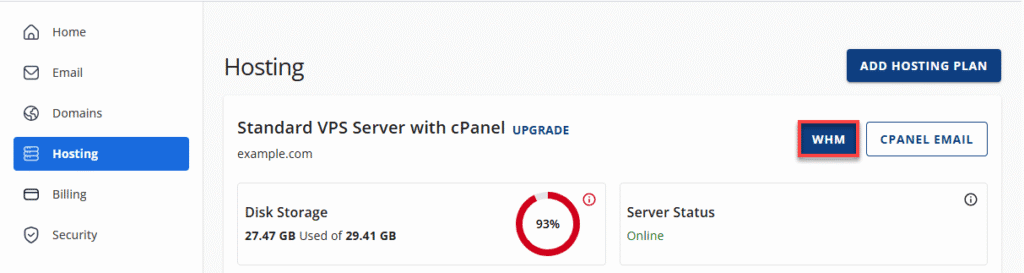
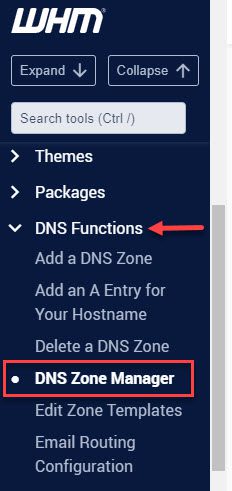
- Step 1: Log in to your WHM (Web Host Manager) account at Bluehost.
- Step 2: Under the DNS Functions menu, select “DNS Zone Manager”.
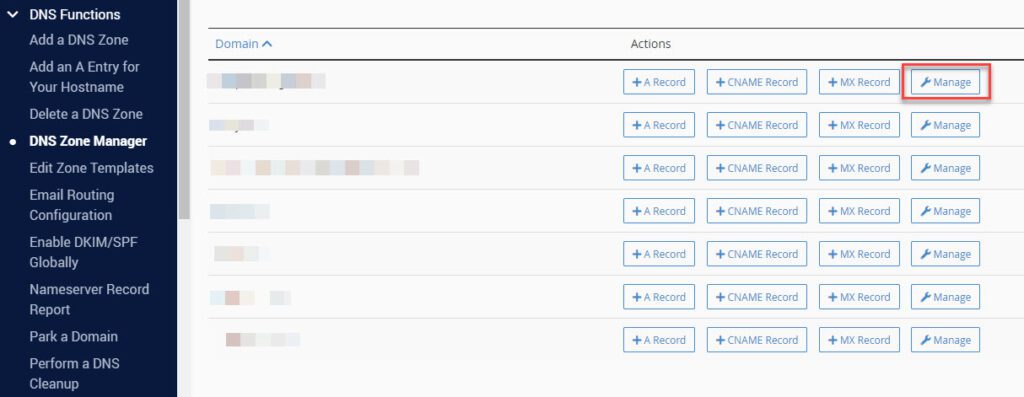
- Step 3: From the list of domains, choose your domain and click “Manage”’
- Step 4: To edit available DNS records, select a particular DNS record, then click “Edit”.
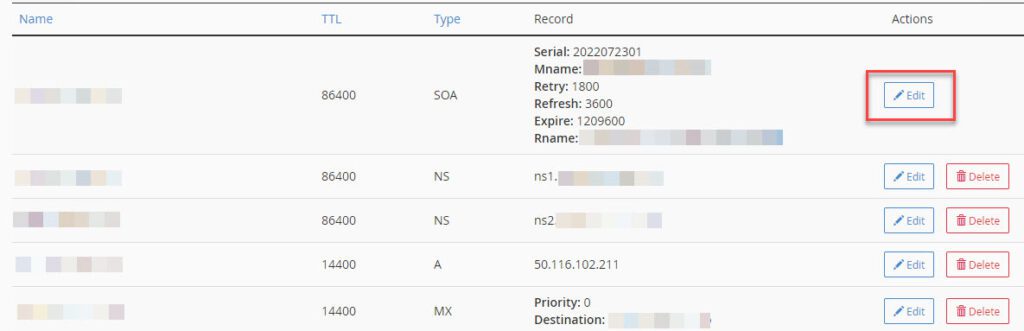
- Step 5: If you need custom nameservers (like ns1.yourdomain.com), add them here, ensuring they point to your server’s IP address.
- Step 6: Select a Record type and click “Save” to apply the changes.
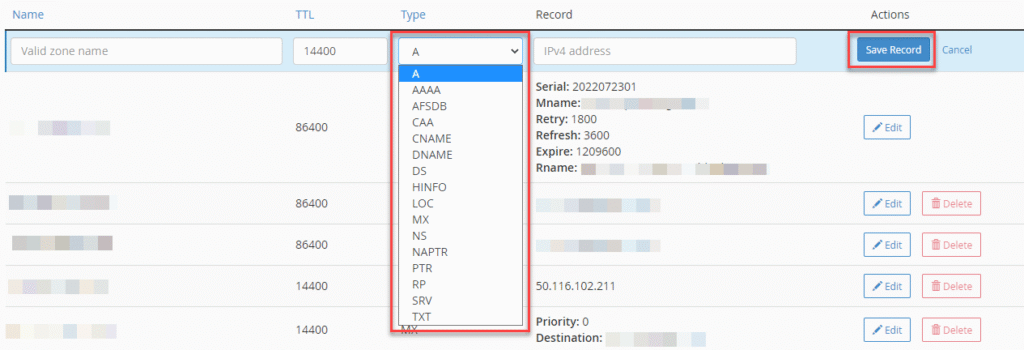
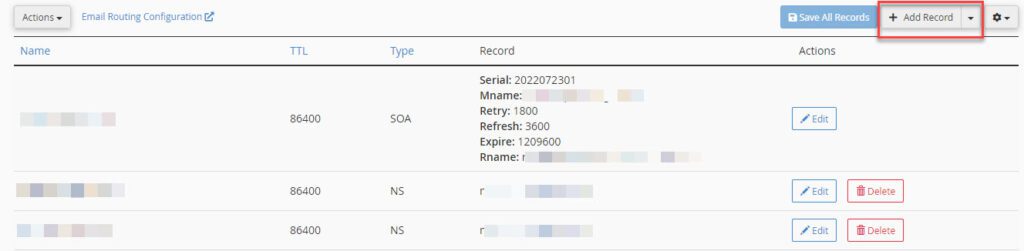
3. Add common DNS records in WHM
Once you’re in the DNS Zone Editor in WHM, you’ll need to add a variety of DNS records to ensure your website, email and other services function smoothly.
Here are the most common DNS server record types you’ll use, along with examples of how they work:
| DNS Record type | Description | Example |
| A Record | Points a domain or subdomain to an IP address. | yourdomain.tld → 12.345.678.90 mail.yourdomain.tld → 12.345.678.90 |
| CNAME Record | Points a subdomain to another domain or subdomain. | [www].[example].[com] → [example].[com] [imap].[example].[com] → [mail].[example].[com] |
| MX Record | Directs email to a specific mail server with priority. | [mail].[yourdomain].[tld] → 12.345.678.90 |
| TXT Record | Stores human-readable text, often used for email verification and security. | SPF record, DKIM record, DMARC record |
| SRV Record | Points one domain to another domain name using a specific port (used for services like VOIP or IM). | xmpp-server.[tcp].[gmail].[com] → xmpp-[server].[l.google].[com] |
| AAAA Record | Similar to the A record, but points to an IPv6 address. | [yourdomain].[tld] → 2001:0db8:85a3:0000:0000:8a2e:0370:7334 (Note: Not supported by Bluehost) |
4. Migrate DNS to WHM safely
If you are migrating DNS records from another provider to Bluehost, ensure a smooth transition by:
- Backing up your current DNS server settings before making any changes.
- Recreating all necessary DNS records (A, MX, CNAME, TXT) in WHM based on your old DNS configuration.
- After the migration, verify that all services (website, email, etc.) are functioning correctly and monitor for any issues.
Also read: WordPress Self-Service Migration – How to Migrate Your WordPress Website
5. Verify your DNS changes
Once the DNS configuration is done, it’s crucial to verify that everything is working:
- Use tools like WhatsMyDNS or DNSstuff to check if your domain is correctly pointing to Bluehost’s nameservers.
- Test email deliverability by sending a test email to ensure the MX records are working.
- Allow time (24-48 hours) for DNS changes to propagate across the internet and then test your website and services to confirm that everything is functioning as expected.
Note: DNS changes in WHM may take a few minutes to sync with cPanel if both are managed under separate WHM users
How to configure DNS settings on other platforms
Even after you’ve set up authoritative DNS in WHM, device-level DNS can speed up lookups, add privacy or help with troubleshooting.
Below are quick, copy-ready steps for major platforms.
1. How to configure DNS settings Windows 10
- Open network settings: Start → “Settings “→ “Network & Internet” → “Status” → “Change adapter options.”
- Edit adapter: Right-click your active Wi-Fi/Ethernet → “Properties” → double-click Internet Protocol Version 4 (TCP/IPv4).
- Set DNS addresses: Choose Use the following DNS server addresses → enter Preferred and Alternate DNS server addresses→ “OK” → “Close”.
Tip: Repeat for TCP/IPv6 if you use IPv6. Run ipconfig /flushdns in Command Prompt to refresh for windows 10 configure dns settings.
2. How to configure DNS settings over HTTPS in Windows 11
- Open settings: Start → “Settings” → “Network & internet” → your active connection → Hardware properties or “DNS settings”.
- Switch to manual: Set “Edit DNS settings” to Manual, enable IPv4 (and IPv6 if needed).
- Enter DNS server addresses: Add DNS addresses and set DNS over HTTPS (DoH) to On for each.
- Save and reconnect.
Verify: Visit Cloudflare’s 1.1.1.1/help to confirm DoH status in order for an easy Windows 11 configure DNSover https settings.
3. How to configure DNS settings on macOS
- Open system settings: Apple menu → System Settings → Network → select “Wi-Fi/Ethernet” → Details.
- DNS Panel: Go to DNS → set Configure DNS to Manual → click “+” to add DNS server addresses.
- Apply: Click “OK” → Apply.
Tip: Drag DNS server addresses to reorder; top entries are tried first. To refresh, turn Wi-Fi off/on or run sudo dscacheutil -flushcache.
4. How to configure DNS settings on Android and iOS
Android (Private DNS / DoT):
- Settings → Network & Internet → Private DNS.
- Choose Private DNS provider hostname and enter a DoT host (dns.google, [1dot1dot1dot1].[cloudflare-dns].[com], [dns].[quad9].[net]) → Save.
Note: Private DNS applies to Wi-Fi and mobile data.
Android (Per-Wi-Fi network):
- Settings → Wi-Fi → tap your network → “Edit” → Advanced → IP address settings: Static.
- Enter DNS 1 / DNS 2 (1.1.1.1, 1.0.0.1) → ”Save”.
iOS (Wi-Fi networks):
- Settings → Wi-Fi → tap “i” next to your network.
- Configure DNS → Manual → Add DNS server addresses (1.1.1.1, 1.0.0.1) → “Save”.
Note: iOS applies custom DNS per Wi-Fi network; cellular DNS addresses are carrier-controlled.
5. How to configure DNS in Wi-Fi settings
Changing DNS addresses on your router applies to all devices on the network and is great for homes/offices.
- Log in to Router: In a browser, go to your gateway IP address(commonly 192.168.1.1, 192.168.0.1 or 10.0.0.1) and sign in.
- Find DNS fields: Look under Internet / WAN / Network / Advanced.
- Enter DNS server addresses: Add Primary and Secondary DNS (IPv4 and, if supported, IPv6). Example: 1.1.1.1, 1.0.0.1.
Save & reboot: Apply changes; reboot the router if prompted.
Tip: Renew device leases (toggle Wi-Fi) to pick up new DNS. Keep your registrar/authoritative nameserver settings unchanged unless you’re moving hosting.
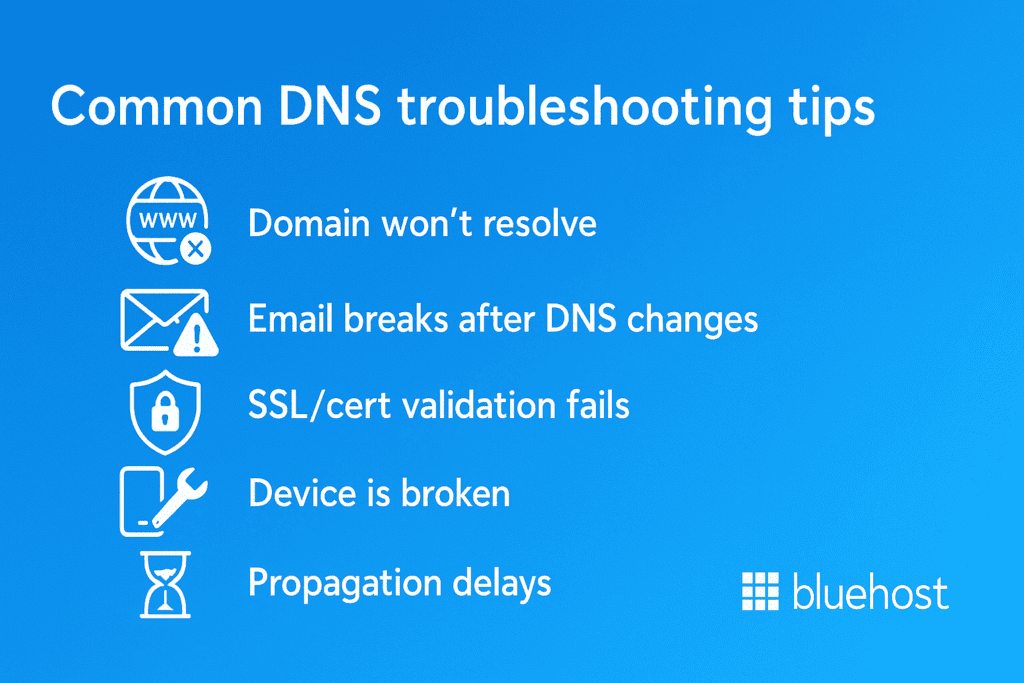
Common DNS configuration errors and troubleshooting tips
Even a small typo in DNS addresses can cause big headaches. Use this checklist-style guide to quickly diagnose and resolve the most common issues that arise after changing DNS addresses in WHM at Bluehost.
1. If your domain won’t resolve
Start here to confirm nameservers and A records so your domain points to the right server fast.
- Check nameservers first: Confirm your registrar points to the correct nameservers.
- Validate A/AAAA records: In WHM → Edit DNS Zone, make sure the root and www point to the correct DNS server addresses and there’s no stray AAAA if you don’t use IPv6.
- Look for typos & trailing dots: Hostnames in CNAME/MX/TXT should end with a dot.
- Test resolution: Use nslookup or an online DNS checker to see which records the world sees.
2. If email breaks after DNS changes
Verify that MX records are correctly set up in your DNS zones. Incorrect MX records can disrupt email delivery.
- MX records: Ensure MX points to the right host and that host has a valid A record.
- SPF/DKIM/DMARC: Recreate TXT records exactly (SPF starts with v=spf1). A missing/invalid SPF or DKIM can push messages to spam or cause bounces.
- Autodiscover/IMAP/SMTP: If clients fail, verify the relevant A/CNAME records and ports; update mail client settings if hostnames have changed.
- RBL/forwarders: Check if new IPs are blocked or if you rely on external mail and need their required DNS addresses.
3. If SSL/cert validation fails
Confirm every hostname resolves correctly and your CA is allowed to issue certificates.
- Certificate name match: Your certificate must cover every hostname in use.
- CAA records: If present, CAA must allow your certificate authority.
- A/CNAME correctness: ACME (Let’s Encrypt) and other CAs need the hostname to resolve to the correct DNS server addresses during validation.
4. If only one device is broken
Rule out local caching, custom resolvers, VPN or browser issues on that device.
- Local DNS cache: Flush the device’s cache (Windows: ipconfig /flushdns; macOS: dscacheutil -flushcache). Toggle Wi-Fi off/on.
- Resolver mismatch: The device may use custom resolver DNS server settings, which can display older records. Set to automatic or align with your preferred resolver.
- Hosts file/VPN: Check for a stale hosts entry or VPN/DNS-over-HTTPS/Private DNS settings overriding results.
- Browser cache: Try a hard refresh or use another browser/incognito mode to rule out cached redirects/HSTS.
5. Propagation delays & expectations
Plan TTLs and be patient while global resolvers refresh your records.
- TTL planning: If you didn’t lower TTLs 24–48 hours before a move, some resolvers will cache old data longer.
- Global variance: Some regions update within minutes; others take hours. Use global DNS checkers to monitor spread.
How Bluehost makes DNS Configuration easier
Configuring DNS shouldn’t slow you down. Bluehost streamlines DNS server settings so you can point domains, secure email and launch SSL with fewer clicks and less guesswork. Trusted by over 5 million WordPress users, Bluehost delivers hosting built to power high-performing WordPress sites with rock-solid uptime, built-in caching and one-click SSL.
1. WHM + cPanel integration for fast DNS changes
With Bluehost, WHM and cPanel work together, allowing you to add or modify A, CNAME, MX, TXT and CAA records in seconds, label zones clearly and roll back safely if needed.
If you’re planning complex routing, heavy APIs or high-volume promotions, dedicated hosting gives you full control over DNS zones and server-level configuration..
2. Guided email deliverability (SPF/DKIM) and SSL setup
Inbox placement and padlocks matter most during peak sales. Our guided support team helps you publish SPF/DKIM correctly on your TXT records, add DMARC for reporting and validate CAA before you issue certificates.
One-click SSL (including Let’s Encrypt) handles renewal and hostname checks, so carts and customer portals stay trusted.
3. 24/7 support for rDNS, migrations and complex records
Peak season exposes weak links; our experts close them. From rDNS for clean mail reputation to SRV records, split delivery, multi-provider DNS and TTL cutover plans, Bluehost specialists are available 24/7 to troubleshoot propagation and keep issuance and routing on track.
Final thoughts
Good DNS is the quiet backbone of a smooth site. Keep it simple: lower TTLs before edits, update records in WHM + cPanel, verify globally and monitor. If something drifts, recheck the nameservers and A/MX/TXT records first, then clear the caches and retest.
If you’d rather not deal with DNS complications, let Bluehost handle the heavy lifting. Our WHM + cPanel workflow, guided by SPF/DKIM and 24/7 experts for rDNS and migrations, keeps you focused on your customers.
Power your stack with Bluehost. Choose Bluehost Hosting for precise WHM/cPanel control.
FAQs
In the Domain Name System (DNS), DNS queries resolve domain names to a specific IP address so browsers can connect. Your operating system consults the resolver, checks cache and zone files, then fetches zone data if needed. Using reputable third-party DNS providers reduces risks like cache poisoning and malicious websites.
You can set a preferred DNS server and secondary DNS servers such as Google Public DNS with the following IP addresses 8.8.8.8 and 8.8.4.4. Many internet service provider defaults are fine, but public DNS can speed up lookups and add security features. Document your new settings for future reference in your network setup.
Open Control Panel from the Start menu, go to Network and Sharing Center, then Change adapter settings. Right-click your active network connection, Select Properties, choose Internet Protocol Version 4 (TCP/IPv4) and pick Use the following DNS to add your preferred DNS. Repeat for Internet Protocol Version 6 if required and confirm everything is configured correctly.
Use Server Manager to add the DNS Server role, then set server options and zone files for your domain name system DNS. You can assign a static IP addresses first, then apply the following command or GUI to finalize settings. This lets the server resolve domain names for your network and host authoritative zones.
Open Control Panel, navigate to Network and Sharing Center and click Change adapter settings. Right-click the adapter, Click Properties, then select Internet Protocol Version 4 to set a preferred DNS and secondary servers. Verify on the DNS tab or status screen that the dns server assignment matches your new settings.
If lookups feel slow, change DNS settings to a faster resolver like Google DNS or another public DNS. Switching the DNS server assignment can cut latency and improve reliability across your operating system. Always test the resolution of your domain name after applying new settings.
Inside WHM, create or edit zones, update zone data (A, CNAME, MX, TXT) and ensure nameservers are configured correctly. Bluehost’s WHM + cPanel simplifies network setup so you can publish records safely and avoid downtime. This helps your services resolve domain names consistently across Linux servers and clients.
In the DNS console, add configure forwarders to trusted public DNS so unresolved queries are sent upstream. Point to preferred DNS server addresses and keep reliable secondary DNS servers for failover. Forwarders can reduce recursion load and improve security features against cache poisoning.
On macOS, open Network settings, choose your adapter and add servers in the DNS tab for Internet Protocol Version 4 and 6. On Linux servers, update resolvers via Network Manager or system resolver files and confirm the DNS server page shows the new entries. Always restart networking and test lookups to ensure the changes are configured correctly.
Yes, you can change the DNS on each computer while leaving the router untouched. Set protocol version 4 (TCP/IPv4) with Use the following DNS on the device, then add a secondary DNS for redundancy. This is useful when testing third-party DNS providers without altering the whole network.
Install a DNS service, bind it to a specific IP address and load your zone files for the Domain Name System (DNS). Add records for the domain name, confirm server options and test queries locally before exposing it. Many admins also add forwarders to public DNS for speed and resilience.
With Bluehost, WHM + cPanel centralizes DNS server assignment, zone data and SSL, so updates are configured correctly the first time. You can set preferred DNS for your stack, verify records and defend against malicious websites with guided best practices. This makes it easier to resolve domain names fast and keep your eCommerce site reliable.
Typically, 24–48 hours worldwide, depending on TTL and ISP caching. Bluehost’s OCI-powered DNS infrastructure ensures faster propagation.
Yes. You can create branded nameservers directly within WHM and assign them to your Bluehost server IPs.


Write A Comment