
Belangrijkste hoogtepunten
- Een stapsgewijze handleiding voor het toevoegen van een CNAME-record in Bluehost.
- Meer informatie over hoe CNAME-records helpen bij het koppelen van Google Workspace, CDN’s en andere services van derden.
- Los veelvoorkomende problemen op, zoals CNAME die niet wordt omgezet, onjuiste doelen en conflicten met andere DNS-records.
- Zorg ervoor dat uw subdomeinen georganiseerd, geoptimaliseerd voor SEO en correct zijn geconfigureerd voor naadloze prestaties.
- Maak gebruik van gebruiksvriendelijk DNS-beheer, WordPress-integratie met één klik en deskundige 24/7 ondersteuning voor probleemloze hosting.
Introductie
Denk aan de laatste keer dat je probeerde het nieuwe huis van een vriend te vinden zonder hun exacte adres – frustrerend, toch? Het internet werkt op dezelfde manier. Zonder duidelijke aanwijzingen kunnen gebruikers moeite hebben om websites te vinden. Dat is waar CNAME-records om de hoek komen kijken. Ze fungeren als de GPS van het internet en zorgen ervoor dat bezoekers moeiteloos op het juiste webadres terechtkomen.
Of je nu een blog opzet op ‘blog’. [voorbeeld].com” of wil je je onlinewinkel op “winkel. [voorbeeld].com”, zijn CNAME-records de helden achter de schermen die het allemaal mogelijk maken.
In deze gids laten we u zien hoe u een CNAME-record toevoegt, veelvoorkomende problemen oplost en ervoor zorgt dat alles naadloos werkt.
Wat is een CNAME-record?
Een CNAME (Canonical Name) record is een soort DNS (Domain Name System). Het verbindt het ene domein of subdomein met het andere. In tegenstelling tot een A-record, waarmee een domein aan een IP-adres wordt toegewezen, wijst een CNAME-record de ene domeinnaam toe aan de andere, waardoor meerdere domeinaliassen kunnen bestaan zonder het IP-adres te wijzigen.
Bijvoorbeeld, als je wilt bloggen. [uwwebsite].com u dezelfde inhoud wilt weergeven als [uwwebsite].com, kunt u een CNAME-record gebruiken. Hiermee wordt “blog” gekoppeld aan uw hoofdsite. Dit is handig voor zaken als aangepaste e-mail, CDN-instellingen en andere platforms.
Door een CNAME-record op de juiste manier in te stellen, zorg je ervoor dat het domein soepel doorverwijst. Dit zal de prestaties van uw website niet schaden.
Het belang van CNAME-instellingen voor uw domein
Een goed geconfigureerd CNAME-record helpt bij domeinbeheer, websiteprestaties en integratie met derden. Dit is waarom het belangrijk is:
- Gecentraliseerd domeinbeheer: In plaats van meerdere A-records bij te werken wanneer het IP-adres van uw hoofddomein verandert, zorgt een CNAME-record ervoor dat alle gekoppelde subdomeinen de update automatisch weergeven, wat tijd en moeite bespaart.
- Snellere websiteprestaties met een CDN: Door subdomeinen via een CNAME-record naar een Content Delivery Network (CDN) te verwijzen, wordt de snelheid van de website verbeterd door inhoud van de dichtstbijzijnde server aan te bieden, waardoor de latentie wordt verminderd en de gebruikerservaring wordt verbeterd.
- Betere branding door georganiseerde subdomeinen: Beheer eenvoudig subdomeinen zoals bloggen. [uwwebsite].com of winkel. [uwwebsite].com terwijl u de structuur van uw website duidelijk en professioneel houdt. CNAME-records vereenvoudigen het koppelen van deze subdomeinen aan verschillende services.
- Eenvoudige e-mailverificatie: Veel e-mailproviders, zoals Google Workspace en Microsoft 365, vereisen CNAME-records om het eigendom van het domein te verifiëren. Dit helpt problemen met de afleverbaarheid van e-mail te voorkomen en zorgt voor veilige communicatie.
- SEO & URL-consistentie: Een CNAME-record gebruiken om www. [uwwebsite].com naar het hoofddomein helpt problemen met dubbele inhoud te voorkomen. Dit zorgt ervoor dat zoekmachines uw voorkeursdomein herkennen en correct rangschikken.
Lees ook: Wat is DNS (Domain Name System) en hoe werkt het?
Stapsgewijze handleiding voor het toevoegen van een CNAME-record in Bluehost
Het toevoegen van een CNAME-record volgt een soortgelijk proces bij de meeste domeinproviders, zodat u moeiteloos subdomeinen kunt aanwijzen. In deze stappen zullen we zien hoe u een CNAME-record toevoegt in Bluehost, waar DNS-beheer eenvoudig en gebruiksvriendelijk is.
Hier leest u hoe u het kunt instellen.
1. Log in op uw Bluehost-account
- Ga naar uw Bluehost-account en voer uw inloggegevens in (e-mail/gebruikersnaam en wachtwoord).
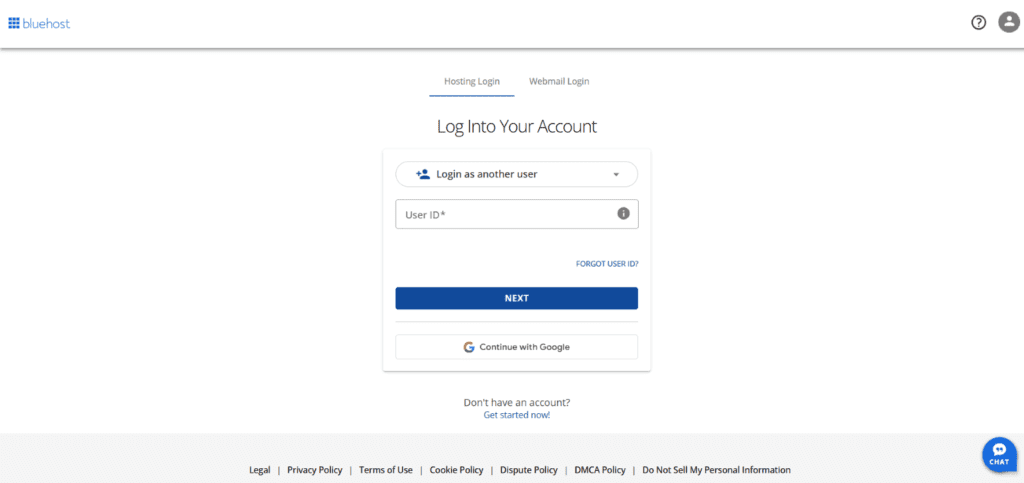
- Klik op Inloggen om toegang te krijgen tot uw Bluehost-dashboard.

2. Navigeer naar het gedeelte met domeinen
- Nadat u bent ingelogd, kijkt u naar het navigatiemenu aan de linkerkant.
- Klik op Hosting en selecteer vervolgens Instellingen.

- En dan ga je naar het domeingedeelte

3. Toegang tot DNS-beheer
Methode 1: De DNS-manager van Bluehost gebruiken
- Zoek het domein waaraan u een CNAME-record wilt toevoegen.
- Klik op de knop Beheren naast de domeinnaam.
- Selecteer in het vervolgkeuzemenu DNS om de pagina DNS-beheer te openen.
Methode 2: cPanel gebruiken
- Klik op Geavanceerd in het linkermenu om cPanel te openen.

- Scrol omlaag naar het cPanel en klik op beheren.

- Ga naar de sectie Domeinen en klik op Zone Editor.

- Zoek uw domein en klik op Beheren.

4. Voeg een CNAME-record toe
Nu u zich in DNS-beheer bevindt, volgt u deze stappen:
- Schuif omlaag naar de sectie CNAME (Alias) Records .
- Klik op Record toevoegen om een nieuw item te maken.

Vul de vereiste gegevens in:

- Hostrecord: voer het subdomein in waarnaar u wilt verwijzen. Als je bijvoorbeeld een blog aan het opzetten bent .[ domein].com, voer je Blog in als de hostrecord.
- Verwijst naar: Voer het bestemmingsdomein of de service-URL in waarnaar u wilt dat het subdomein doorverwijst. Dit kan een ander domein zijn of een service van derden (bijv. ghs.[ google].com voor Google Sites).
- TTL (Time to live): Dit bepaalt hoe vaak het record wordt bijgewerkt. U kunt het op de standaardinstelling laten staan.
Nadat alle gegevens zijn ingevoerd, klikt u op Opslaan om de toevoeging van CNAME-records te voltooien.
Ondersteuningsgids: CNAME Help-artikel
Problemen met de installatie van CNAME oplossen: Veelvoorkomende fouten oplossen
Zelfs na het volgen van de stappen voor het toevoegen van een CNAME-record, kunnen DNS-configuraties soms lastig zijn. Als uw CNAME-record niet werkt zoals verwacht, vindt u hieronder enkele veelvoorkomende problemen en tips voor het oplossen van problemen om u te helpen deze efficiënt op te lossen.
1. CNAME-record wordt niet doorgegeven
Uitgeven: Na het toevoegen van een CNAME-record werkt het niet direct.
Mogelijke oorzaken:
- DNS-propagatie kan wereldwijd tot 24-48 uur duren.
- Het is mogelijk dat uw internetprovider (ISP) de oude records nog steeds in de cache opslaat.
- De domeinregistrar of hostingprovider heeft zijn DNS-records nog niet bijgewerkt.
Oplossingen:
Gebruik een DNS-opzoektool zoals Whois om de doorgifte op meerdere locaties te controleren.
Wis uw DNS-cache met behulp van de volgende opdrachten:
- Windows: ipconfig /flushdns
- macOS: sudo dscacheutil -flushcache
- Linux: sudo systemd-resolve –flush-caches
Probeer de site te openen met een ander netwerk of VPN om ISP-caching te omzeilen.
Als de record na 48 uur nog niet is gepropageerd, neemt u contact op met uw DNS-provider voor ondersteuning.
2. Conflicterende DNS-records
Uitgeven: U ontvangt een foutbericht bij het toevoegen van een CNAME-record.
Mogelijke oorzaken:
- Een CNAME-record kan niet naast andere records voor dezelfde hostnaam bestaan.
- Als er al een A-, MX-, TXT- of een andere CNAME-record bestaat voor hetzelfde subdomein, mislukt de toevoeging ervan.
Oplossingen:
- Controleer bestaande DNS-records voordat u een CNAME toevoegt. U kunt dit doen in de DNS-instellingen van uw domeinregistrar.
- Verwijder conflicterende records als een CNAME vereist is. Als er bijvoorbeeld een A-record bestaat voor sub.[example].com, verwijdert u deze voordat u sub.[example].com CNAME-doel toevoegt. [voorbeeld].com.
- Als u meerdere records nodig hebt voor een subdomein, kunt u overwegen A- of ALIAS-records te gebruiken in plaats van een CNAME.
3. Onjuist CNAME-doel
Uitgeven: De CNAME-record wordt toegevoegd, maar wordt niet correct omgezet.
Mogelijke oorzaken:
- Het CNAME-doel verwijst naar een IP-adres in plaats van een hostnaam.
- Het doeldomein bestaat niet of is verkeerd gespeld.
- Het doeldomein beschikt niet over de benodigde DNS-configuratie.
Oplossingen:
Zorg ervoor dat het CNAME-record verwijst naar een geldige hostnaam (FQDN), niet naar een IP-adres. Voorbeeld:
- Correct: blog. [voorbeeld].com CNAME example.net
- Onjuist: blog. [voorbeeld].com CNAME 192.168.1.1
Controleer of het doeldomein bestaat en actief is door het in een browser te controleren of de ping-opdracht te gebruiken.
Controleer bij uw hostingprovider of het doeldomein correct is geconfigureerd.
4. CNAME-record wordt niet opgelost
Uitgeven: Het domein wordt niet correct omgeleid of omgezet.
Mogelijke oorzaken:
- Uw lokale DNS-cache bevat nog steeds verouderde informatie.
- De DNS-resolver die door uw netwerk wordt gebruikt, wordt traag bijgewerkt.
Oplossingen:
Verander je DNS-resolver in een publieke resolver zoals:
- Google DNS: 8.8.8.8 en 8.8.4.4
- Cloudflare DNS: 1.1.1.1
- OpenDNS: 208.67.222.222 en 208.67.220.220
Gebruik NSLookup of de opdracht nslookup om te controleren of de CNAME correct wordt omgezet: (nslookup blog.[ voorbeeld].com)
5. Meerdere CNAME-ketens (geketende CNAME-records)
Uitgeven: U hebt een CNAME ingesteld, maar deze wordt niet correct omgezet vanwege meerdere omleidingen.
Mogelijke oorzaken:
- CNAME-ketening vindt plaats wanneer een CNAME-record naar een andere CNAME verwijst in plaats van naar een eindbestemming. Dit kan de oplossingstijden vertragen en wordt mogelijk niet ondersteund door sommige DNS-providers. Sommige DNS-providers bieden geen ondersteuning voor meerdere CNAME-zoekopdrachten (bijv. sub.example.com → alias.example.net → final.example.org).
Oplossingen:
Vermijd onnodige CNAME-ketens.
In plaats van:
- sub.example.com CNAME alias.example.net
- alias.example.net CNAME final.example.org
Gebruik: sub.example.com CNAME final.example.org rechtstreeks.
Sommige CDN’s en hostingproviders ondersteunen het afvlakken van CNAME-records, waardoor de beperkingen kunnen worden omzeild.
6. CNAME werkt niet met e-mailservices
Uitgeven: E-mailservices werken niet na het toevoegen van een CNAME-record.
Mogelijke oorzaken:
- Een CNAME-record in het hoofddomein (example.com) overschrijft alle andere DNS, inclusief MX-records die nodig zijn voor e-mail.
- Sommige e-mailproviders bieden geen ondersteuning voor het verzenden van e-mails vanaf domeinen met CNAME’s in plaats van A-records.
Oplossingen:
- Gebruik een A-record in plaats van een CNAME als e-mailfunctionaliteit vereist is.
- Zorg ervoor dat uw MX-records correct zijn geconfigureerd en niet zijn vervangen.
- Als u Google Workspace of Microsoft 365 gebruikt, raadpleegt u de DNS-installatiehandleiding om te controleren of u aan de regels voldoet.
Tot slot
Het opzetten van een CNAME-record lijkt misschien intimiderend, maar met een beetje aandacht voor detail wordt het toevoegen van een record een eenvoudige maar essentiële vaardigheid voor iedereen die zijn online aanwezigheid uitbreidt. Het beheersen van DNS-records zorgt voor een soepeler beheer en meer controle over uw digitale reis.
Klaar om de controle over uw online aanwezigheid te nemen? Met Bluehost WordPress-hosting kunt u moeiteloos DNS-instellingen beheren, gebruikmaken van WordPress-installaties met één klik en toegang krijgen tot 24/7 deskundige ondersteuning voor domein- en hostingbeheer. altijd.
Of je nu een persoonlijke blog lanceert of een bedrijf opschaalt, onze betaalbare hostingplannen zorgen voor een probleemloze ervaring.
Verwacht u veel verkeer? Met maximaal 100 GB NVMe-opslag en bandbreedte voor 100 websites is Bluehost Shared Hosting de slimme keuze om de prestaties van uw site te verbeteren.
Ga vandaag nog aan de slag met Bluehost en beheer moeiteloos uw DNS-instellingen!
Veelgestelde vragen
1. Log in to Bluehost.
2. Go to Domains > DNS Management.
3. Click Add Record under the CNAME (Alias) Records section.
4. Enter Host Record (subdomain) & Destination URL.
5. Click Save and wait up to 48 hours for propagation.
If your CNAME record isn’t resolving, check for conflicts with existing A or CNAME records for the same subdomain. Also, verify that the destination URL is correct. DNS changes can take 24–48 hours to propagate, so be patient. If the issue persists, clear your DNS cache or contact Bluehost support for assistance.
To add any DNS record (A, CNAME, MX, TXT, etc.), log in to Bluehost, go to Domains > DNS Management and find the relevant record section. Click Add Record, choose the record type, enter the necessary details and save. Ensure all information is correct to avoid disruptions.
Bluehost allows you to add CNAME, A, MX, TXT and other DNS through its DNS Management panel. Simply access your domain settings, locate the DNS Manager and select the appropriate record type. Follow the prompts to enter the required details, then save your settings.


Schrijf een reactie