
Key highlights
- A step-by-step guide on how to add a CNAME record in Bluehost.
- Learn how CNAME records help in connecting Google Workspace, CDNs and other third-party services.
- Fix common issues like CNAME not resolving, incorrect targets and conflicts with other DNS records.
- Ensure your subdomains are organized, optimized for SEO and properly configured for seamless performance.
- Leverage user-friendly DNS management, one-click WordPress integration and expert 24/7 support for hassle-free hosting.
Think of the last time you tried to find a friend’s new house without the exact address. It felt confusing, right? The internet works the same way. Without the right DNS records, a browser can’t reach the correct website. This is where a CNAME record helps. It acts like a GPS inside the Domain Name System, guiding every DNS query to the right fully qualified domain name.
If you’re setting up a blog at blog.example.com, pointing www to your root domain, or adding an alias for your FTP or mail server, a CNAME makes the process simple. It helps your domain resolve to another hostname without using the same IP address or creating two different records.
In this guide, you’ll learn how to add a CNAME record, how CNAME DNS records work and how to fix common issues so your site, store, or home page resolves smoothly every time.
What is a CNAME record?
A CNAME record (Canonical Name record) is a DNS record in the Domain Name System that points one domain or subdomain to another fully qualified domain name. Instead of linking a domain to an IP address like an A record, a CNAME creates an alias. This lets multiple hostnames resolve to the same destination without updating the IP or creating two different records.
For example, if you want blog.example.com to show the same content as example.com, you can create a CNAME alias that points “blog” to your root domain. The DNS server will handle the DNS lookup and route the browser to the correct web server. This is also useful for FTP, mail servers, CDNs, custom platforms and other DNS settings that need clean host changes.
A valid CNAME makes domain routing smooth, keeps your configuration simple and avoids issues when the IP changes. It helps your DNS client resolve the right hostname every time without hurting website performance.
The importance of CNAME setup for your domain
A well-configured CNAME record helps with domain management, website performance and third-party integration. Here’s why it matters:
- Centralized domain management: Instead of updating multiple A records when your primary domain’s IP changes, a CNAME record allows all linked subdomains to automatically reflect the update, saving time and effort.
- Faster website performance with a CDN: Pointing subdomains to a Content Delivery Network (CDN) via a CNAME record improves website speed by serving content from the nearest server, reducing latency and enhancing user experience.
- Better branding through organized subdomains: Easily manage subdomains like blog.[yourwebsite].com or store.[yourwebsite].com while keeping your website structure clear and professional. CNAME records simplify linking these subdomains to different services.
- Easy email verification: Many email providers, such as Google Workspace and Microsoft 365, require CNAME records to verify domain ownership. This helps prevent email deliverability issues and ensures secure communication.
- SEO & URL consistency: Using a CNAME record to point www.[yourwebsite].com to the root domain helps avoid duplicate content issues. This ensures search engines recognize and rank your preferred domain correctly.
Difference between DNS and a CNAME record
| Aspect | DNS (Domain name system) | CNAME record (Canonical name) |
|---|---|---|
| What it is | A global naming system that manages DNS records, routing domain names to IP addresses through many record types (A, AAAA, MX, TXT, etc.) | A specific DNS record type that creates a canonical alias, pointing one hostname to another fully qualified domain name |
| Main purpose | Resolve and manage domain names for websites, mail servers, FTP and other internet services | Make a domain or subdomain an alias, such as pointing www or blog to another hostname |
| Points to | Typically maps domains to IP addresses using A/AAAA, MX, NS and other records | Always points one hostname to another hostname (never to an IP address) |
| Scope | Entire DNS system: zones, DNS servers, resolvers, root servers and all resource records | A single resource record inside a DNS zone file |
| Typical use case | Website routing, mail delivery, service connections, DNS lookup and other record management | Aliasing subdomains (blog.example.com → example.com) or connecting services without updating the same IP address in multiple places |
| Effect on changes | Depends on which DNS settings or record type you update | Inherits the target’s data, so if the IP changes on the main record, all CNAME points update automatically |
| Root domain use | Required to host records like SOA, NS, A, MX, TXT, etc. | Cannot be used on the root domain due to DNS protocol restrictions |
| Coexistence rules | Different record types can coexist under the same zone | A CNAME cannot coexist with other records (A, MX, TXT) on the same hostname |
| Performance | Varies by server and record type | Adds one extra DNS query, so resolution is slightly slower than a direct A or AAAA record |
Also read: What is DNS (Domain Name System) and How Does it Work?
Step-by-step guide on how to add CNAME record in Bluehost
Adding a CNAME record follows a similar process across most domain providers, helping you point subdomains effortlessly. In these steps we will see how to add a CNAME record in Bluehost, where DNS management is simple and user-friendly.
Here’s how you can set it up.
1. Log in to your Bluehost account
- Visit your Bluehost account and enter your login credentials (email/username and password).
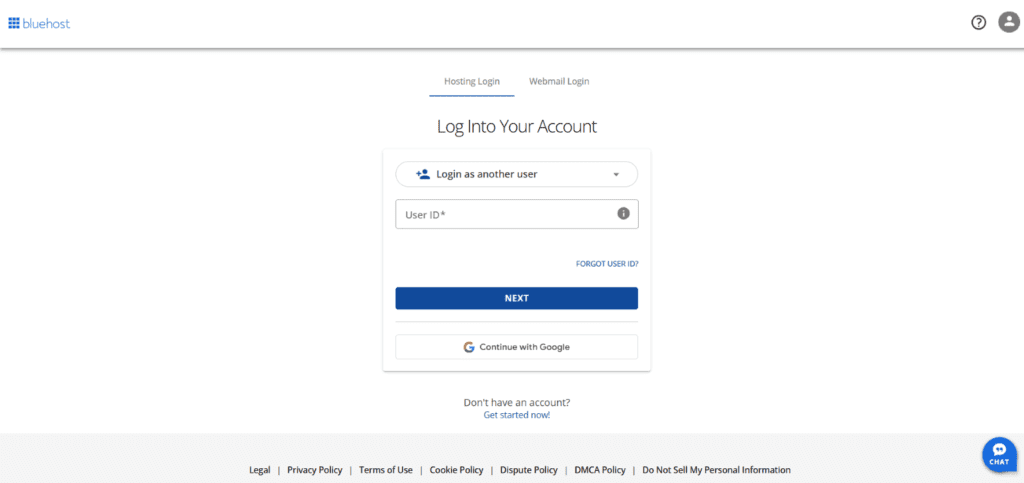
- Click Log In to access your Bluehost dashboard.

2. Navigate to the domains section
- Once logged in, look at the left-hand navigation menu.
- Click on Hosting, then select Settings.

- And then go-to domain section

3. Access DNS management
Method 1: Using Bluehost’s DNS manager
- Locate the domain where you want to add a CNAME record.
- Click the Manage button next to the domain name.
- In the dropdown menu, select DNS to open the DNS management page.
Method 2: Using cPanel
- Click on Advanced in the left menu to open cPanel.

- Scroll down to the cPanel and click manage.

- Go to Domains section and Click on Zone Editor.

- Find your domain and click Manage.

4. Add a CNAME record
Now that you’re in the DNS Manager, follow these steps:
- Scroll down to the CNAME (Alias) Records section.
- Click on Add Record to create a new entry.

Fill in the required details:

- Host record: Enter the subdomain you want to point. For example, if you’re setting up blog.[domain].com, enter blog as the host record.
- Points to: Enter the destination domain or service URL you want the subdomain to redirect to. This could be another domain or a third-party service (e.g., ghs.[google].com for Google Sites).
- TTL (Time to live): This determines how frequently the record updates. You can leave it at the default setting.
Once all details are entered, click Save to finalize the CNAME record addition.
Quick step checklist: How to add a CNAME record in Bluehost
1. Log in to your Bluehost account
- Open your Bluehost login page
- Enter your email or username and password
- Access your dashboard
2. Go to the Domains section
- Click Hosting in the left menu
- Select Settings
- Open the Domains tab
3. Open DNS management
Method 1: DNS Manager
- Find your domain
- Click Manage
- Select DNS to open DNS settings
Method 2: cPanel (Advanced)
- Click Advanced to access cPanel
- Go to Zone Editor under the Domains section
- Click Manage next to your domain
4. Add a new CNAME record
- Scroll to CNAME (Alias) Records
- Click Add Record
- Enter:
- Host: Subdomain (example: blog)
- Points to: Target hostname or fully qualified domain name
- TTL: Keep default
- Click Save
Support Guide: CNAME help article
Troubleshooting CNAME setup issues: Fix common errors
Even after following the steps for how to add a CNAME record, DNS configurations can sometimes be tricky. If your CNAME record isn’t working as expected, below are some common issues and troubleshooting tips to help you resolve them efficiently.
1. CNAME record not propagating
Issue: After adding a CNAME record, it does not work immediately.
Possible causes:
- DNS propagation can take up to 24-48 hours worldwide.
- Your internet service provider (ISP) may still be caching the old records.
- The domain registrar or hosting provider has not yet updated its DNS records.
Solutions:
Use a DNS lookup tool like Whois to check propagation across multiple locations.
Clear your DNS cache using the following commands:
- Windows: ipconfig /flushdns
- macOS: sudo dscacheutil -flushcache
- Linux: sudo systemd-resolve –flush-caches
Try accessing the site using a different network or VPN to bypass ISP caching.
If the record has not propagated after 48 hours, contact your DNS provider for support.
2. Conflicting DNS records
Issue: You receive an error message when adding a CNAME record.
Possible causes:
- A CNAME record cannot coexist with other records for the same hostname.
- If an A, MX, TXT or another CNAME record already exists for the same subdomain, its addition will fail.
Solutions:
- Check existing DNS records before adding a CNAME. You can do this in your domain registrar’s DNS settings.
- Remove conflicting records if a CNAME is required. For example, if an A record exists for sub.[example].com, delete it before adding sub.[example].com CNAME target.[example].com.
- If you need multiple records for a subdomain, consider using A or ALIAS records instead of a CNAME.
3. Incorrect CNAME target
Issue: The CNAME record is added but does not resolve correctly.
Possible causes:
- The CNAME target points to an IP address instead of a hostname.
- The target domain does not exist or is misspelled.
- The target domain does not have the necessary DNS configuration.
Solutions:
Ensure the CNAME record points to a valid hostname (FQDN), not an IP address. Example:
- Correct: blog.[example].com CNAME example.net
- Incorrect: blog.[example].com CNAME 192.168.1.1
Verify that the target domain exists and is active by checking it in a browser or using the ping command.
Confirm with your hosting provider that the target domain is properly configured.
4. CNAME record not resolving
Issue: The domain is not redirecting or resolving correctly.
Possible causes:
- Your local DNS cache still holds outdated information.
- The DNS resolver used by your network is slow to update.
Solutions:
Change your DNS resolver to a public one like:
- Google DNS: 8.8.8.8 and 8.8.4.4
- Cloudflare DNS: 1.1.1.1
- OpenDNS: 208.67.222.222 and 208.67.220.220
Use NSLookup or the nslookup command to verify that the CNAME is correctly resolving: (nslookup blog.[example].com)
5. Multiple CNAME chains (Chained CNAME records)
Issue: You set up a CNAME, but it does not resolve correctly due to multiple redirections.
Possible causes:
- CNAME chaining occurs when one CNAME record points to another CNAME instead of a final destination. This can slow resolution times and may be unsupported by some DNS providers. Some DNS providers do not support multiple CNAME lookups (e.g., sub.example.com → alias.example.net → final.example.org).
Solutions:
Avoid unnecessary CNAME chains.
Instead of:
- sub.example.com CNAME alias.example.net
- alias.example.net CNAME final.example.org
Use: sub.example.com CNAME final.example.org directly.
Some CDNs and hosting providers support Flattening CNAME records, which can bypass its restrictions.
6. CNAME not working with email services
Issue: Email services are not working after adding a CNAME record.
Possible causes:
- A CNAME record on the root domain (example.com) overrides all other DNS, including MX records required for email.
- Some mail providers do not support sending emails from domains with CNAMEs instead of A records.
Solutions:
- Use an A record instead of a CNAME if email functionality is required.
- Ensure your MX records are correctly configured and have not been replaced.
- If using Google Workspace or Microsoft 365, check their DNS setup guide to ensure compliance.
Final thoughts
Setting up a CNAME record may seem intimidating, but with a bit of attention to detail, adding a record becomes a simple yet essential skill for anyone expanding their online presence. Mastering DNS records unlocks smoother management and more control over your digital journey.
Ready to take control of your online presence? With Bluehost WordPress hosting, you can effortlessly manage DNS settings, leverage one-click WordPress installations, and access 24/7 expert support for domain and hosting management. anytime.
Whether you’re launching a personal blog or scaling a business, our affordable hosting plans ensure a hassle-free experience.
Expecting high traffic? With up to 100 GB of NVMe storage and bandwidth for 100 websites, Bluehost Shared Hosting is the smart choice to elevate your site’s performance.
Get started with Bluehost today and manage your DNS settings effortlessly!
FAQs
1. Log in to Bluehost.
2. Go to Domains > DNS Management.
3. Click Add Record under the CNAME (Alias) Records section.
4. Enter Host Record (subdomain) & Destination URL.
5. Click Save and wait up to 48 hours for propagation.
A CNAME isn’t a file. It’s a CNAME DNS record stored inside your DNS zone. You don’t create a file; you add the record through your DNS manager. If you need how to create a CNAME or steps for adding a CNAME record, use your DNS provider’s dashboard to create a new CNAME entry.
A valid CNAME has three parts:
Host (example: blog, www, shop)
Points to (a fully qualified domain name like example.com)
TTL (time to live)
It should always point to another hostname, not an IP address. When learning how to add a CNAME record, check that the target domain is correct and does not include http or https.
To add a DNS entry manually, open your DNS settings, choose Add Record, select the record type (A, CNAME, MX, TXT, etc.), enter your host, value and TTL, then save. When adding a CNAME record, remember that it can’t coexist with A, MX or TXT on the same hostname.
A CNAME record in DNS is a canonical name record that maps one hostname to another. Instead of pointing to an IP address, it points to a domain name. This keeps your setup simple and avoids updating IPs in multiple places. If you’re searching for how to add a CNAME record, CNAME DNS record basics or how to create a CNAME, this is the record type you use to create aliases like blog.example.com or www.example.com.

Write A Comment