 ChatGPT,
  Claude,
  Gemini,
  Grok — all four for
 Yoast SEO Premium Initial Setup For Your AI Website
Yoast SEO helps improve how your Bluehost AI Website appears in search engines by allowing you to manage SEO settings, metadata, and search appearance. Properly configuring Yoast SEO ensures that search engines can better understand your website, making it easier for potential customers to discover your products and content.
This article walks you through enabling Yoast SEO and configuring the key settings needed to optimize your AI Website.
For a visual walkthrough, watch our short video on configuring Yoast SEO Premium for your AI Website.
How to Access Yoast SEO Premium's First-Time Setup Wizard
- Log in to your Bluehost Portal.
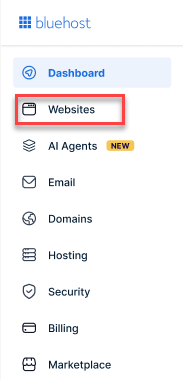
- Click Websites from the left -hand menu.
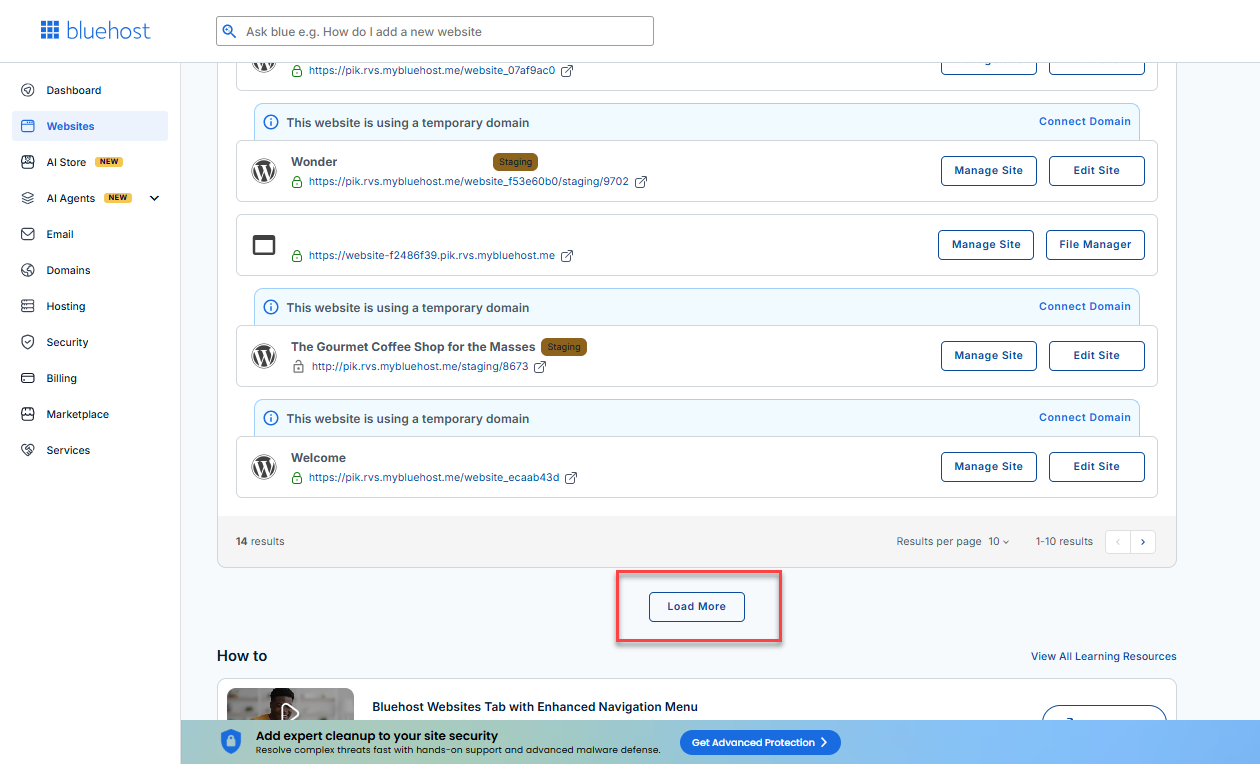
- Locate your AI Website. If you have multiple websites you need to scroll down and click the Load More link.
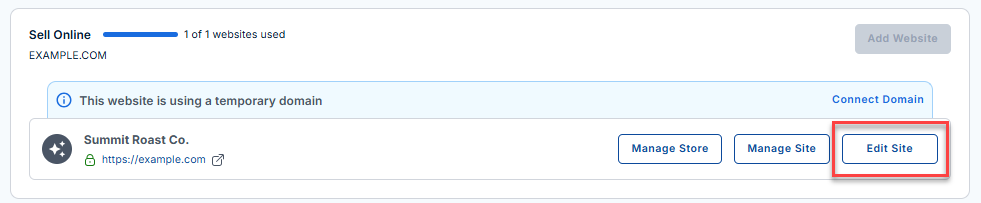
- Navigate to the website you want to update. Then, click Edit Site.
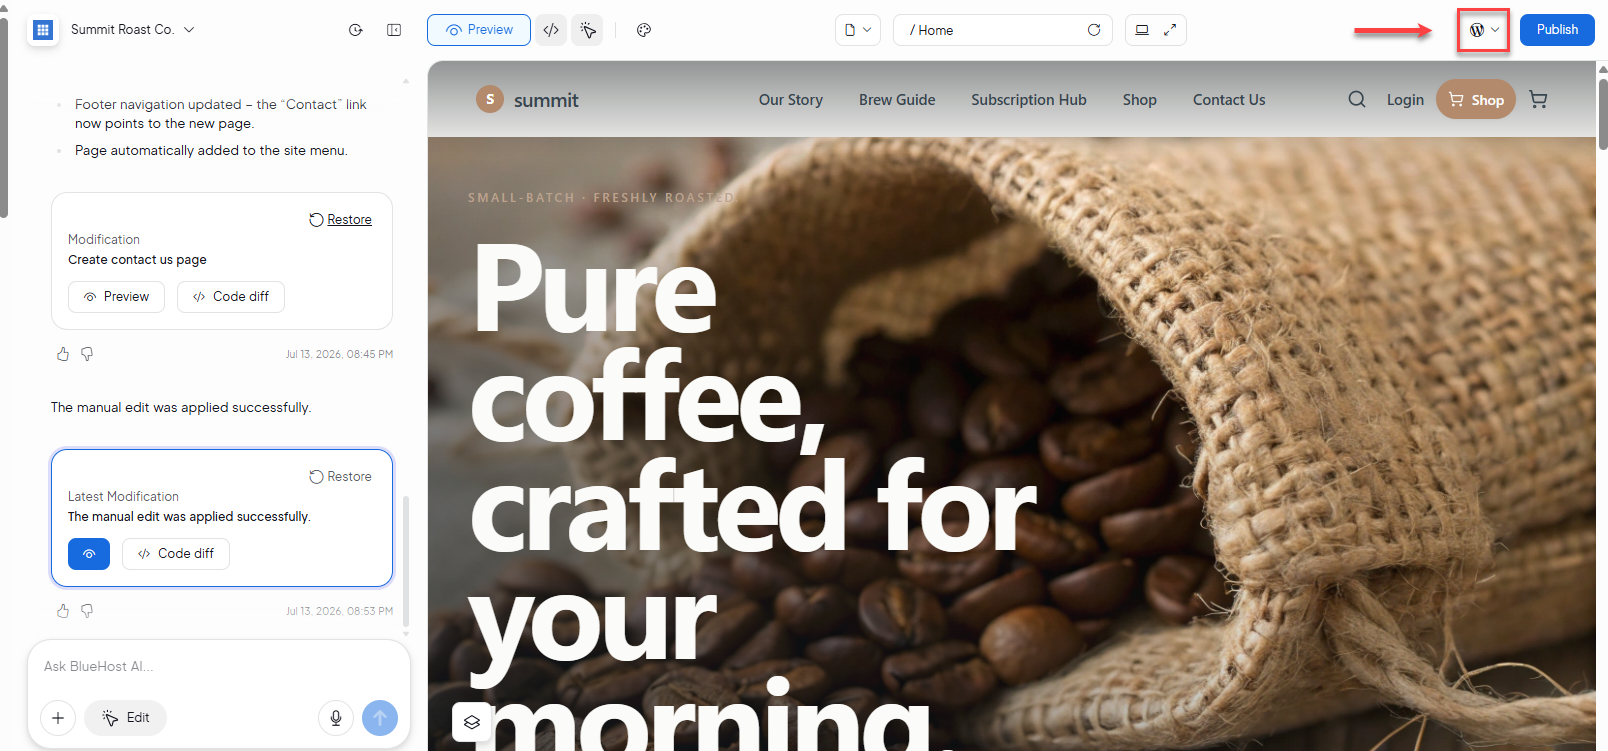
- Click the WordPress icon in the top menu of the site editor.
- Select WP Admin.
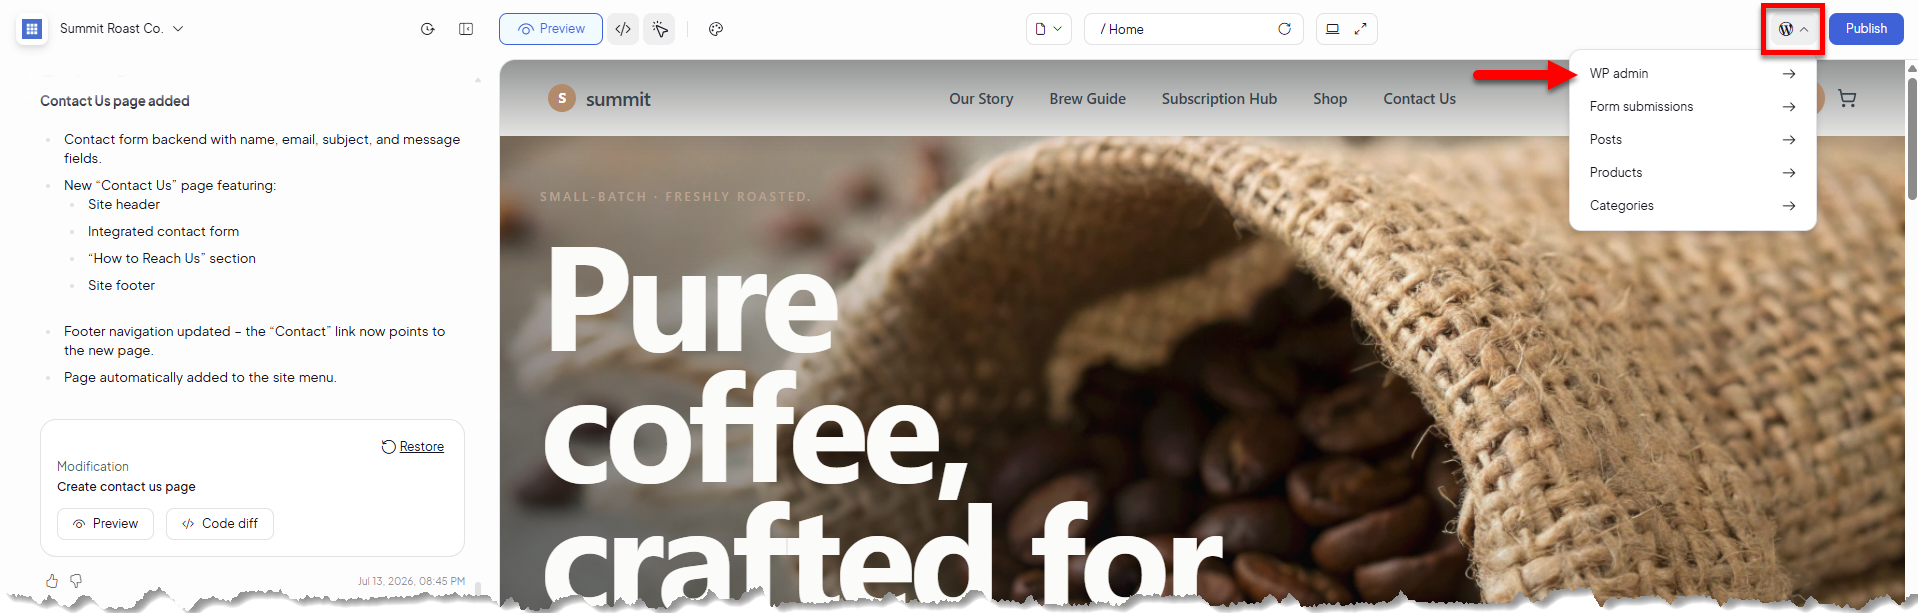
- You'll be redirected to the WordPress dashboard.
To help keep your AI-generated website secure and running smoothly, access to certain WordPress Admin features is limited. You won't be able to install, deactivate, or delete plugins, or install and switch themes. These safeguards are in place to protect your website's performance, functionality, and design, ensuring everything continues to work as intended.
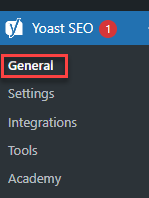
- Click on Yoast SEO in the left-hand menu and then select General.
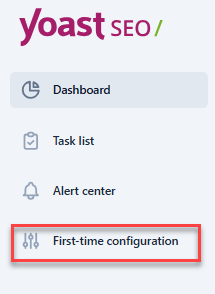
- Click on First-time configuration.
Yoast SEO Initial Setup Process Guide
The setup wizard guides you through the most important SEO settings, step by step. You can return to this section at any time.
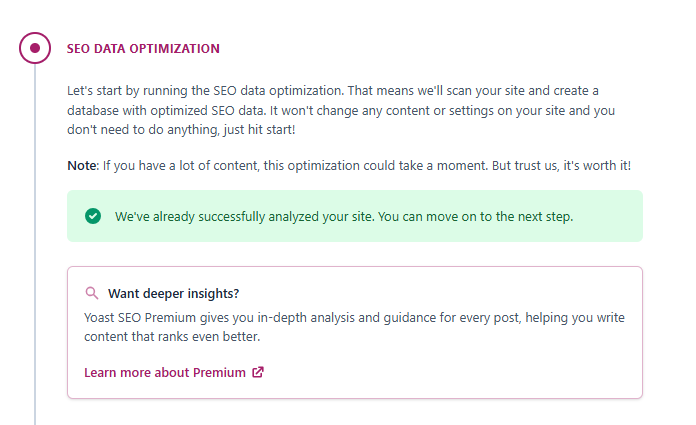
Step 1: Optimize Existing SEO Data
When you start the setup process, Yoast SEO automatically scans and updates your website's existing SEO data. This optimization helps ensure your current pages, posts, and products are compatible with Yoast's latest SEO features and recommendations before you continue with the configuration.
Step 2: Configure Site Representation
The Site Representation section helps search engines identify who owns or manages your website. Providing accurate information can improve how your brand appears in search results and allow Yoast SEO to generate structured data for your site.
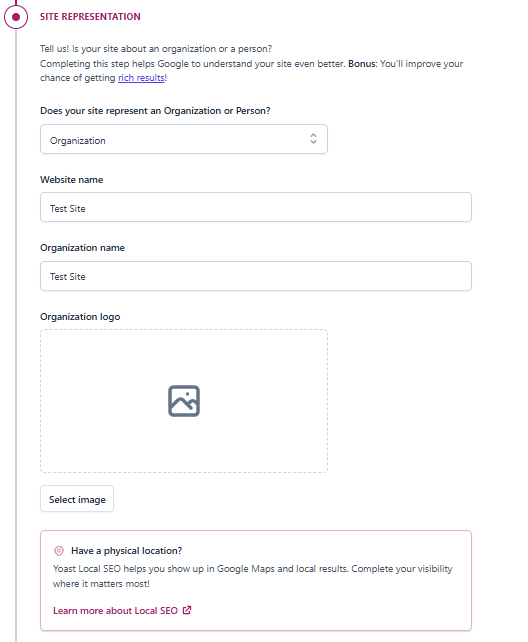
In this step, you can:
- Specify whether your website represents an Individual or an Organization
- Enter your personal name or business name
- Upload a logo or profile image
- Add relevant business or personal information
Yoast SEO uses these details to create structured data that helps search engines better understand your website and display your brand more accurately in search results.
Step 3: Configure Search Engine Visibility
For your website to appear in search results, search engines must be able to crawl and index your content. Yoast SEO includes IndexNow, a feature that automatically notifies supported search engines whenever you publish, update, or delete content. This can help search engines discover changes to your site more quickly and keep search results up to date.
To verify that IndexNow is enabled:
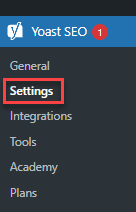
- In the WordPress Admin dashboard, click on Yoast SEO, then select Settings.
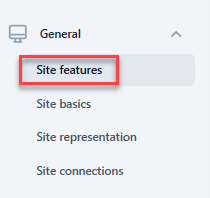
- Select Site Features.
- Scroll down to the Technical SEO section.
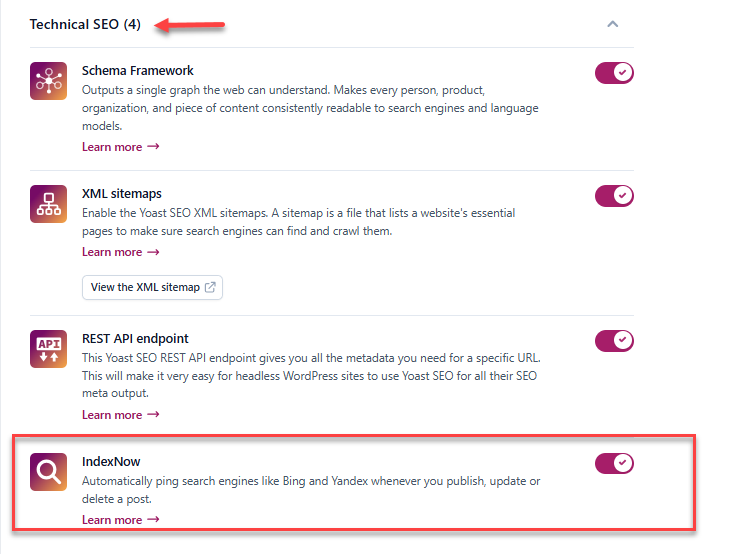
- Confirm that IndexNow is enabled.
Keeping IndexNow enabled helps ensure that your latest pages, posts, and products are submitted to supported search engines for faster indexing.
Step 4: Configure Content Types
The Content Types settings allow you to control how your website's content appears in search engine results and when it is shared on social media. By configuring default SEO settings for each content type, you can maintain consistent optimization across your entire website.
To access the Content Types settings:
- Navigate to Yoast SEO, then click on Settings.
- Select Content Types.
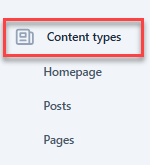
From here, you can customize SEO settings for the following content types:
Homepage
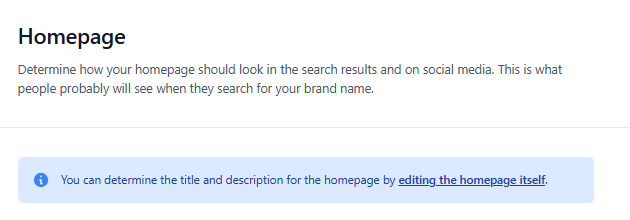
Configure your site's default:
- SEO Title
- Meta Description
- Social Sharing Image
These settings may appear in search engine results and when your homepage is shared on social media platforms.
Posts
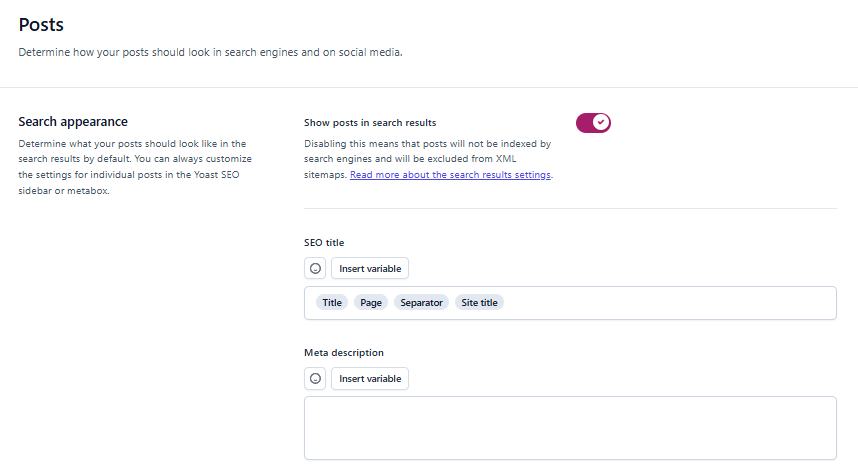
Set default SEO templates for your blog content, including:
- SEO Titles
- Meta Descriptions
- Social Media Titles
- Social Media Descriptions
- Social Sharing Images
These defaults help ensure that new blog posts are optimized for both search engines and social networks.
Schema Settings
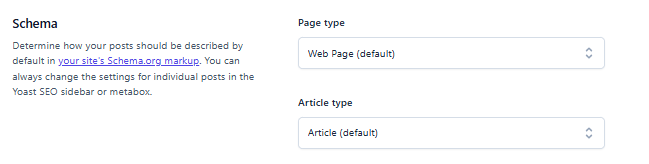
Schema markup provides additional information that helps search engines better understand and display your content.
You can configure schema settings to define how your content should be categorized and presented in search results. Similar options are available for Pages and Products, allowing you to apply consistent SEO settings across your entire Bluehost AI Website.
Step 5: Complete the Setup
Once you've finished the configuration and saved your settings, your site's core SEO setup is complete. Your website is now ready to be crawled, indexed, and displayed more effectively in search results.
You can update these settings at any time as your site grows.
Summary
You have now completed the Yoast SEO Premium setup for your Bluehost AI Website. With your site's core SEO settings configured, search engines can better crawl, index, and understand your content, helping improve your visibility in search results.
To further enhance your SEO strategy, explore Yoast SEO Premium's advanced features, such as content optimization, redirect management, and schema settings, to maximize your AI Website's search performance.
If you need further assistance, Bluehost Chat Support is available 24 hours a day, 7days a week while Bluehost Phone Support is available 7 days a week from 7 am-12 midnight EST.
- Chat Support - While on our website, you should see a CHAT bubble in the bottom right-hand corner of the page. Click anywhere on the bubble to begin a chat session.
- Phone Support -
- US: 888-401-4678
- International: +1 801-765-9400
You may also refer to our Knowledge Base articles to help answer common questions and guide you through various setup, configuration, and troubleshooting steps.