 ChatGPT,
  Claude,
  Gemini,
  Grok — all four for
 Reimage Your Server for cPanel Installation
Managing a website can feel like trying to pilot a plane without a dashboard—but it doesn't have to. If your hosting account comes with cPanel, you already have the industry's most trusted, user-friendly "control tower" for your online presence. Instead of dealing with complex technical code or confusing server commands, cPanel gives you a clean, visual interface where you can manage your site, email, and security with just a few clicks.
How to Reimage Your Server for cPanel Installation
This guide walks you through installing and setting up cPanel using the Bluehost Portal.
This applies to both VPS and VDS.
- You can install only one application using the one-click installer.
- To change or delete your application, follow the guide: How to Change an Application. Create a backup of your existing applications or templates.
- To keep your current template, install the new application manually using SSH. Follow the same steps for both Self-Managed VPS and Virtual Dedicated Server (VDS). The system automatically selects the recommended operating system for cPanel.
- Log in to your Bluehost Portal.
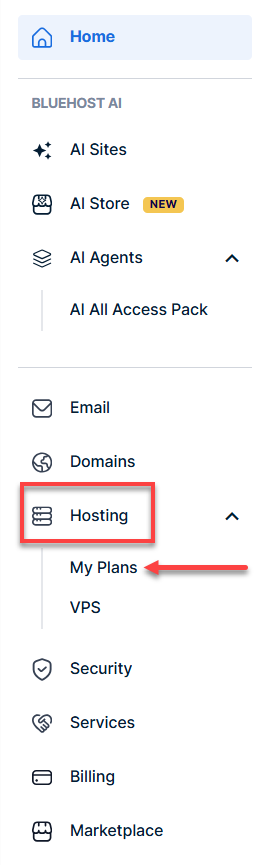
- In the left-hand menu, click Hosting, then select My Plans.
- Click the Manage button on the hosting package you want to reimage.

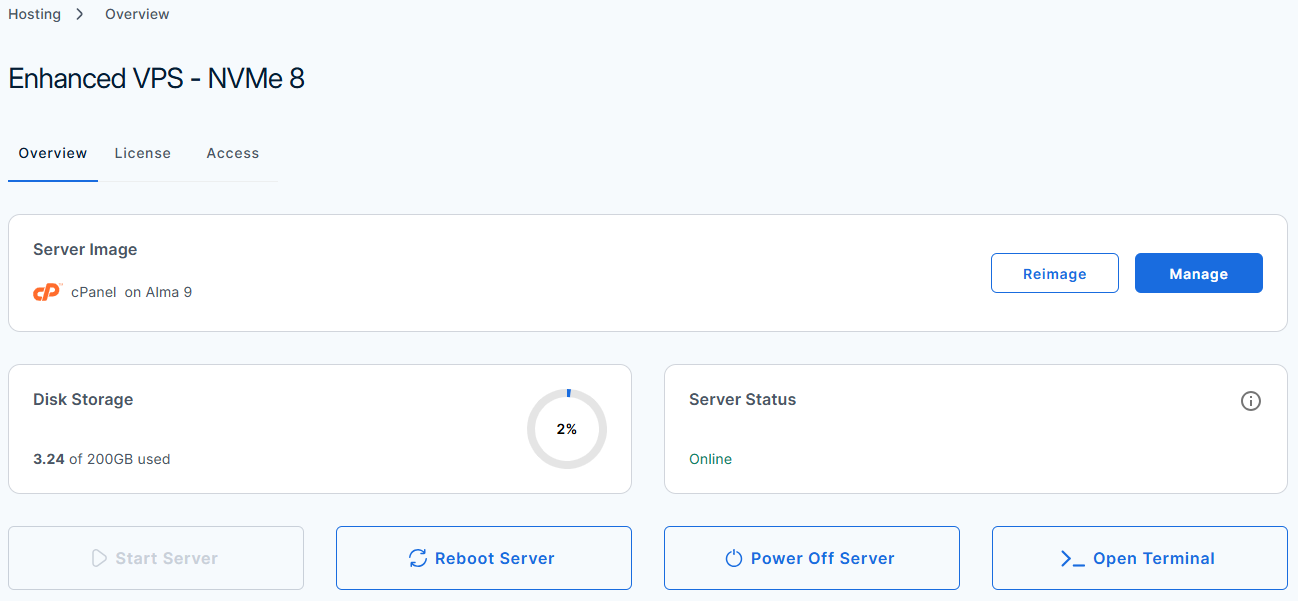
- Click the Reimage button.
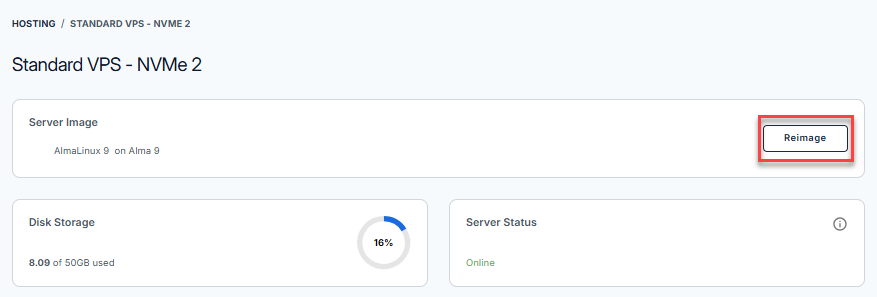
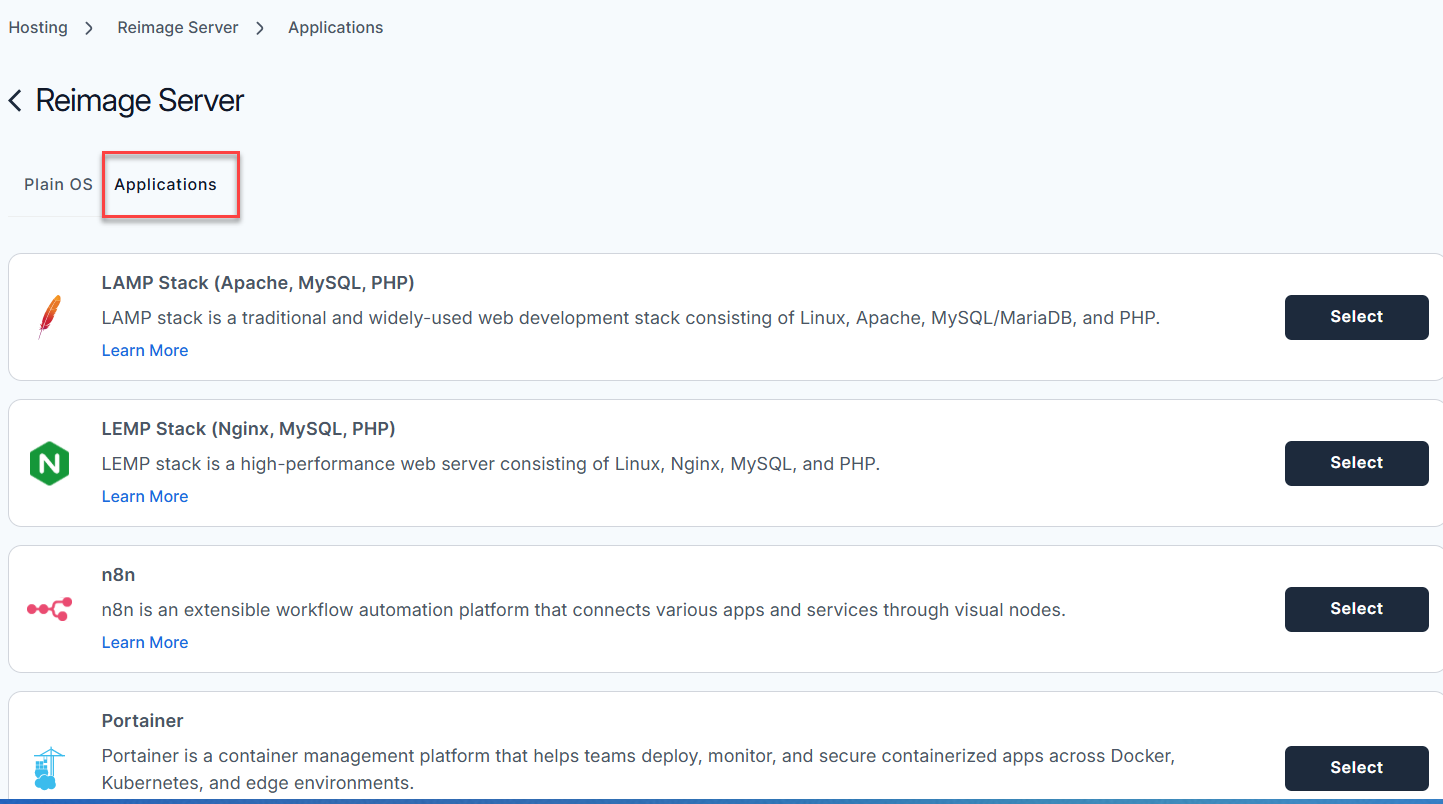
- Select the Applications tab.
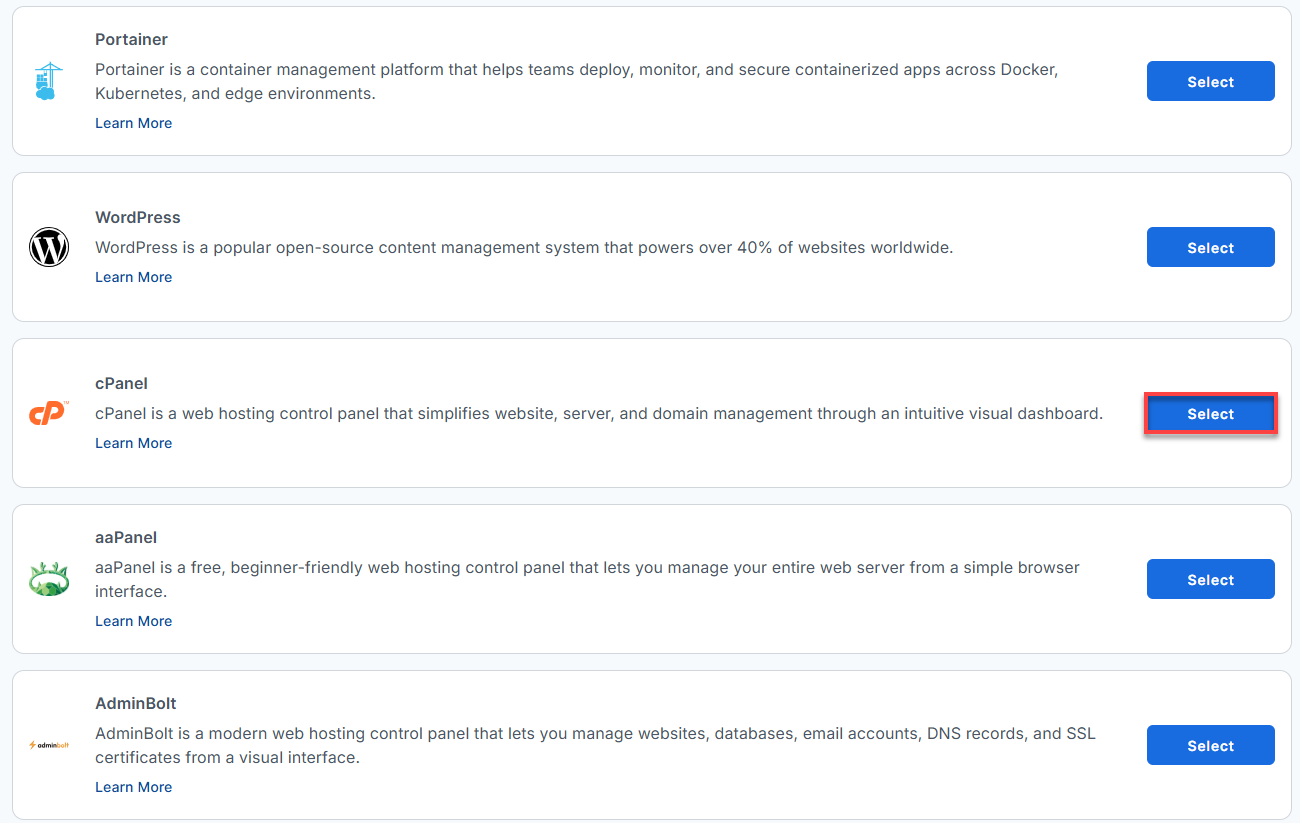
- From the list, locate cPanel and click Select.
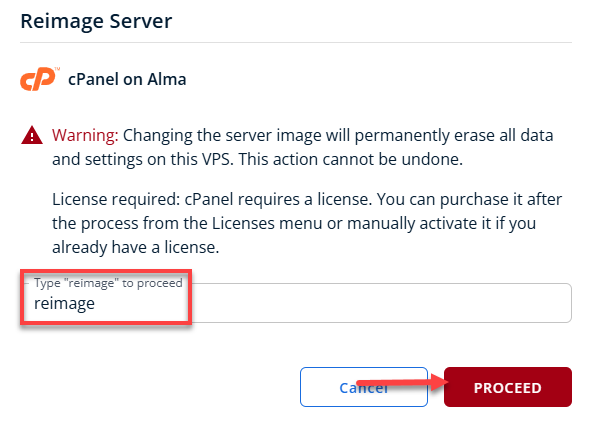
- To confirm, type "reimage" and then click Proceed to start the process.
- Wait a few minutes while the installation completes.

- Once completed, you will see cPanel listed in the Server Image section.
Access Your cPanel Dashboard
After installation completes, follow these steps to log into your server and complete your initial configuration. Make sure you have your account login credentials ready before proceeding.
Step 1: Reset Your Root Password
Before you begin, set your root password so you can log into your server.
- Log in to your Bluehost Portal.
- In the left-hand menu, click Hosting, then select My Plans.
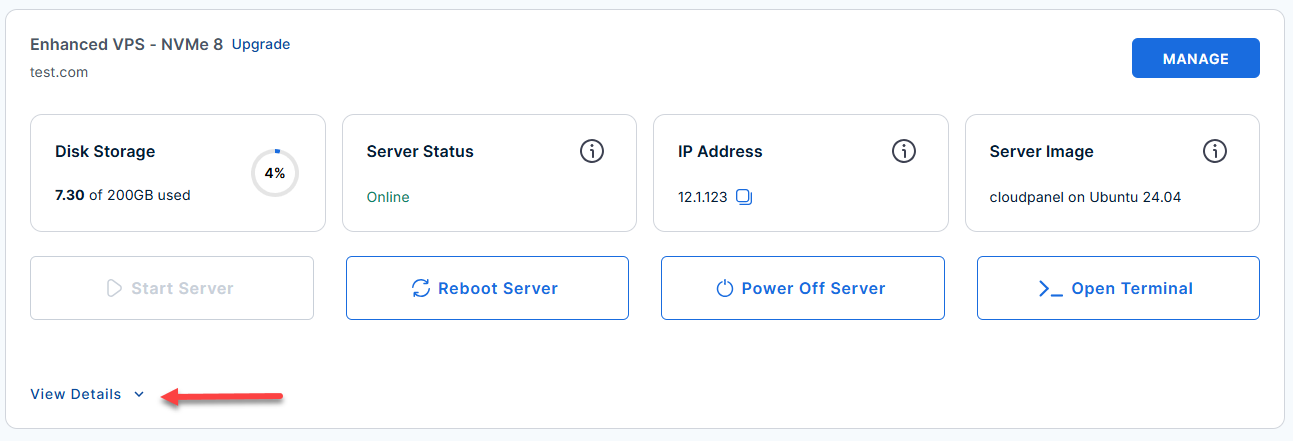
- Locate the server you want to manage, then click View Details in the bottom-left corner to expand the section and access additional server information.
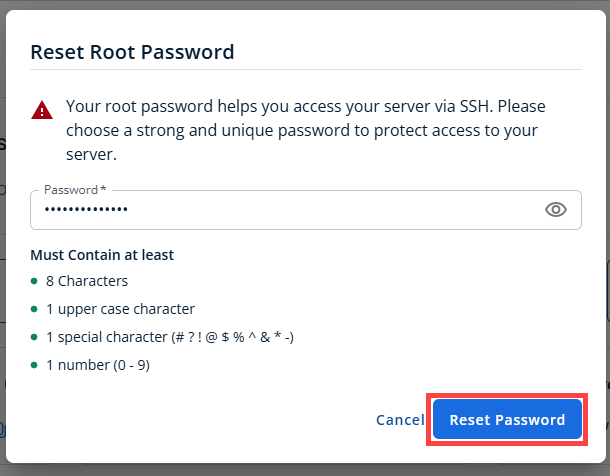
- Click the Reset Password.
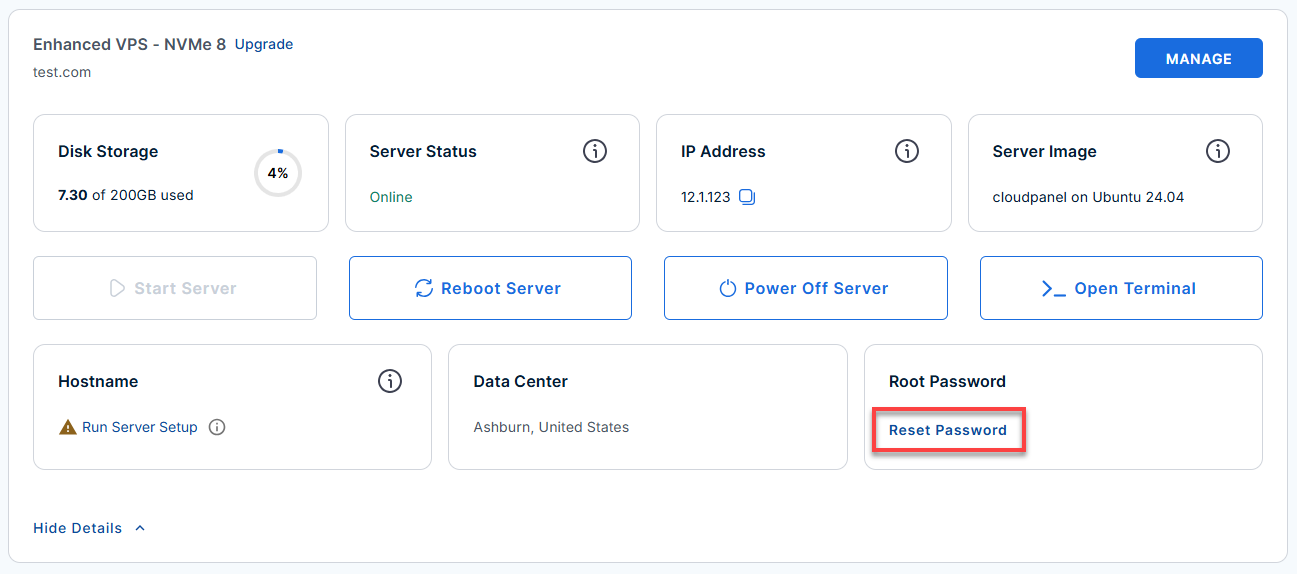
- In the pop-up window, type your new root password, then click Reset Password again to confirm and save the changes.
Step 2: Set up Your cPanel
Once your password is set, you can access your account dashboard to begin configuring cPanel.
- Log in to your Bluehost Portal.
- In the left-hand menu, click Hosting, then select My Plans.
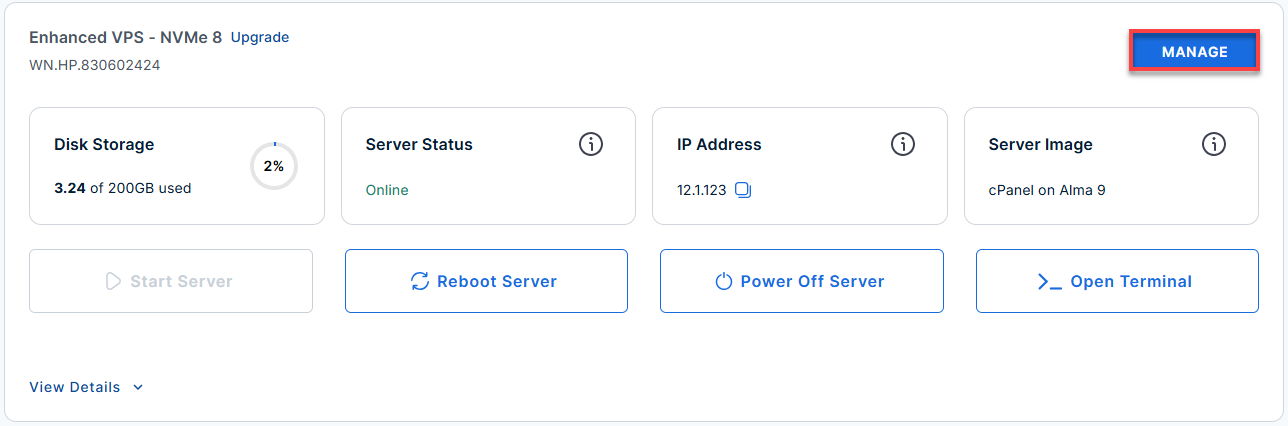
- Select the package where cPanel is installed, and click Manage.
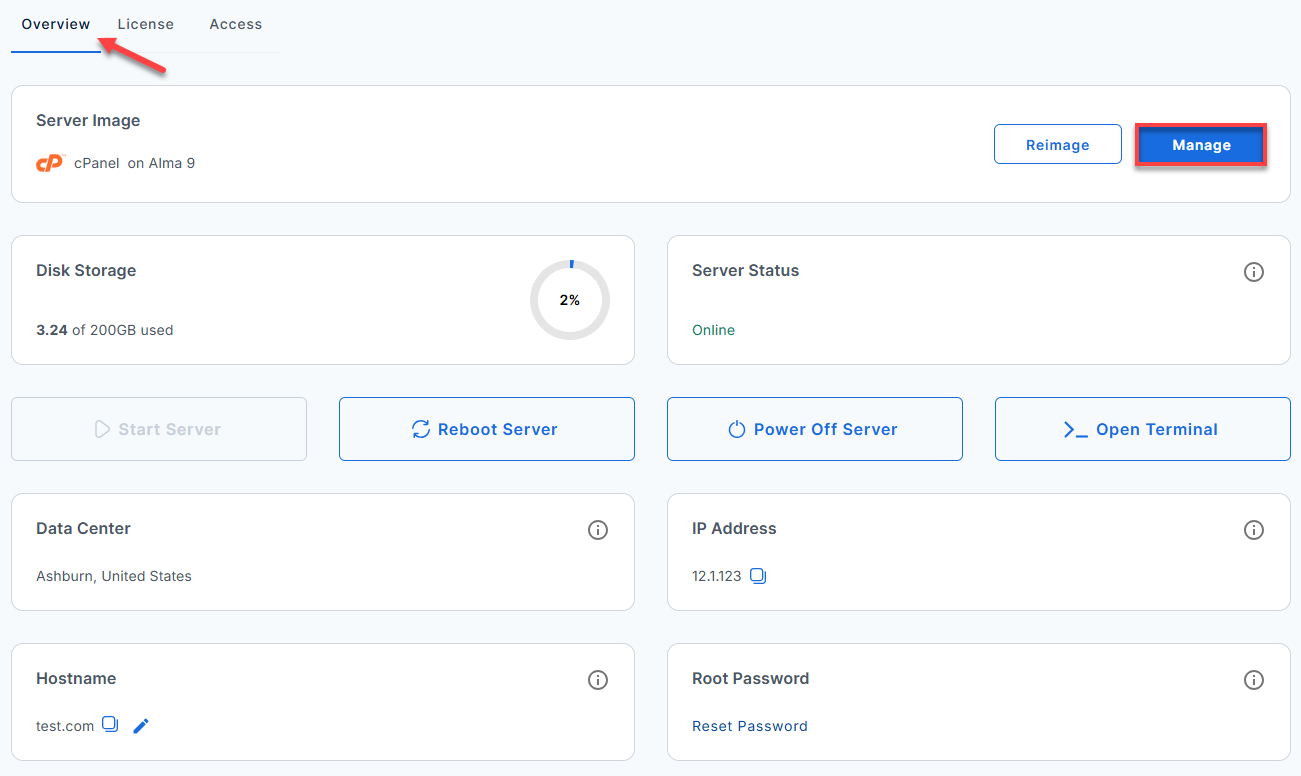
- In the Overview tab, click Manage under the Server Image tab.
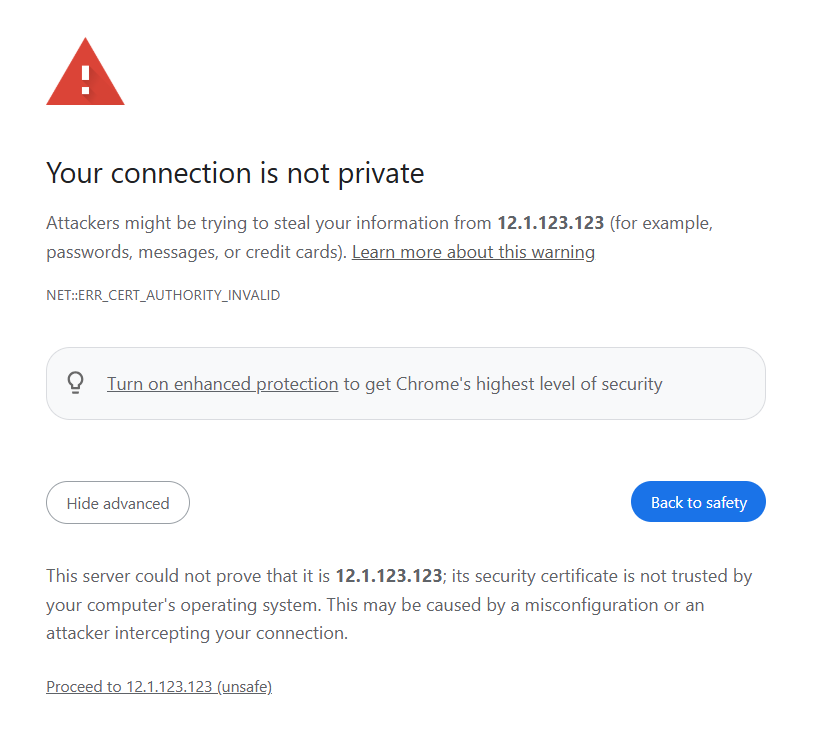
- Click Advanced, then select Proceed to 12.1.123.123 (unsafe) to open the page.
Note: This grants access for your current session, but your browser will still show a "Not Secure" warning in the address bar.
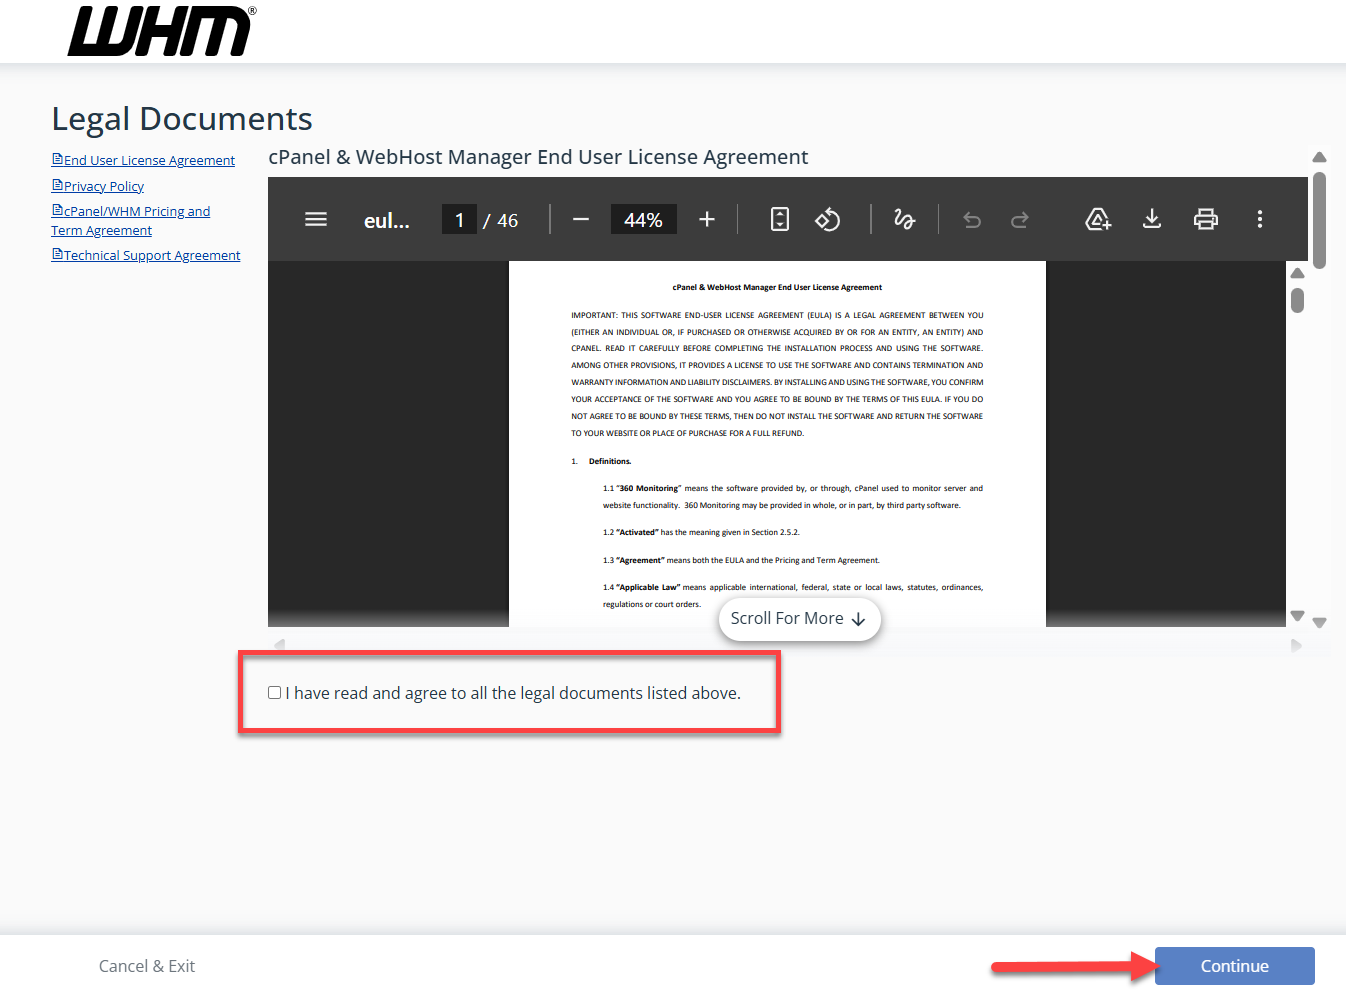
- Check the box for I have read and agree to all the legal documents listed above, then click Continue.
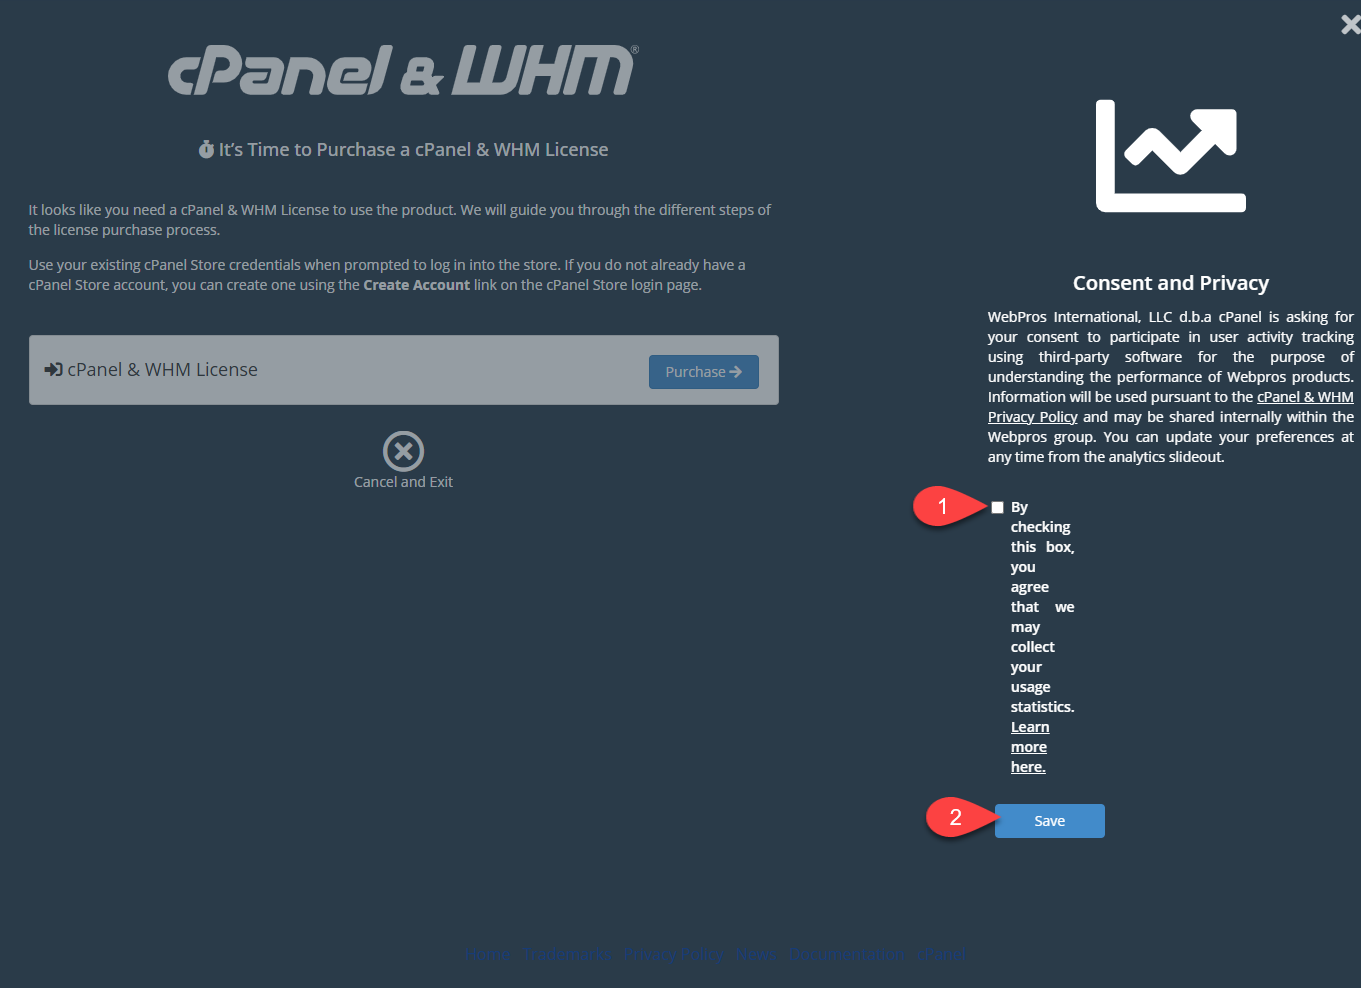
- Check the Consent and Privacy box if you agree to share usage statistics, then click Save.
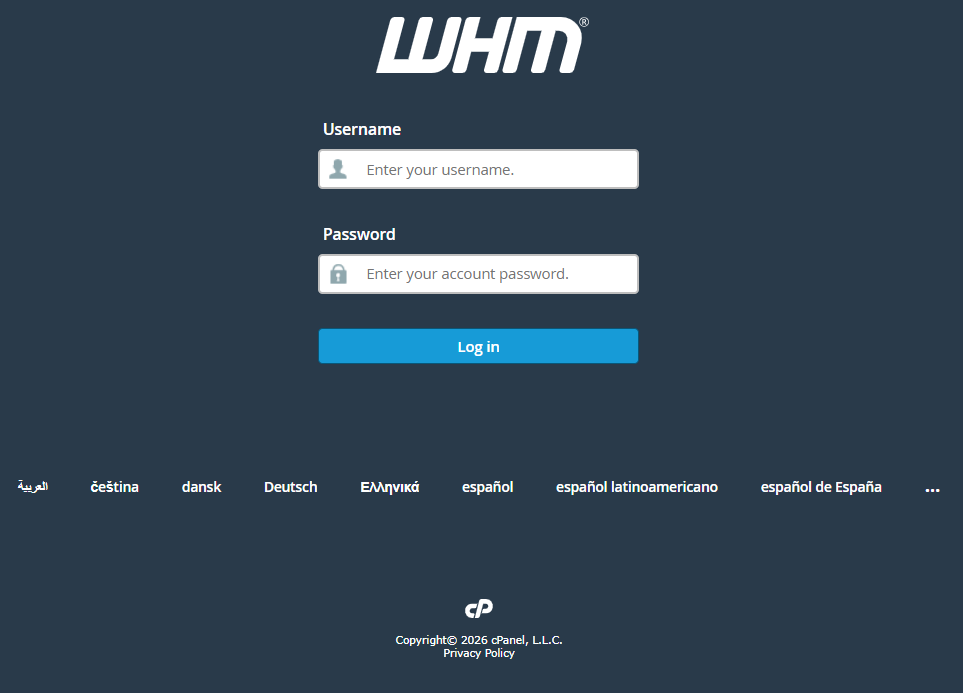
- Log in to your Root account.
- Username: root
- Password: Password you created.
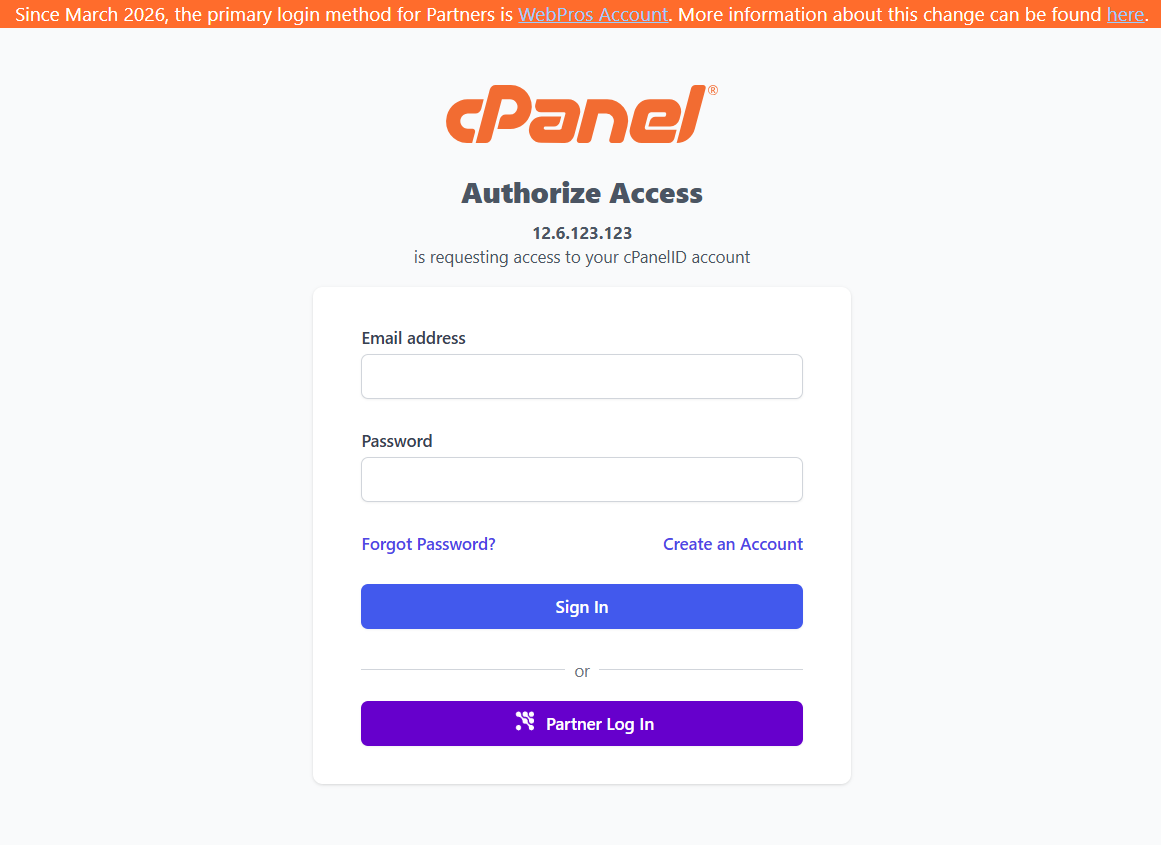
- Enter your cPanel Store credentials and click Sign In if you already have an account, or click Create an Account to set one up.
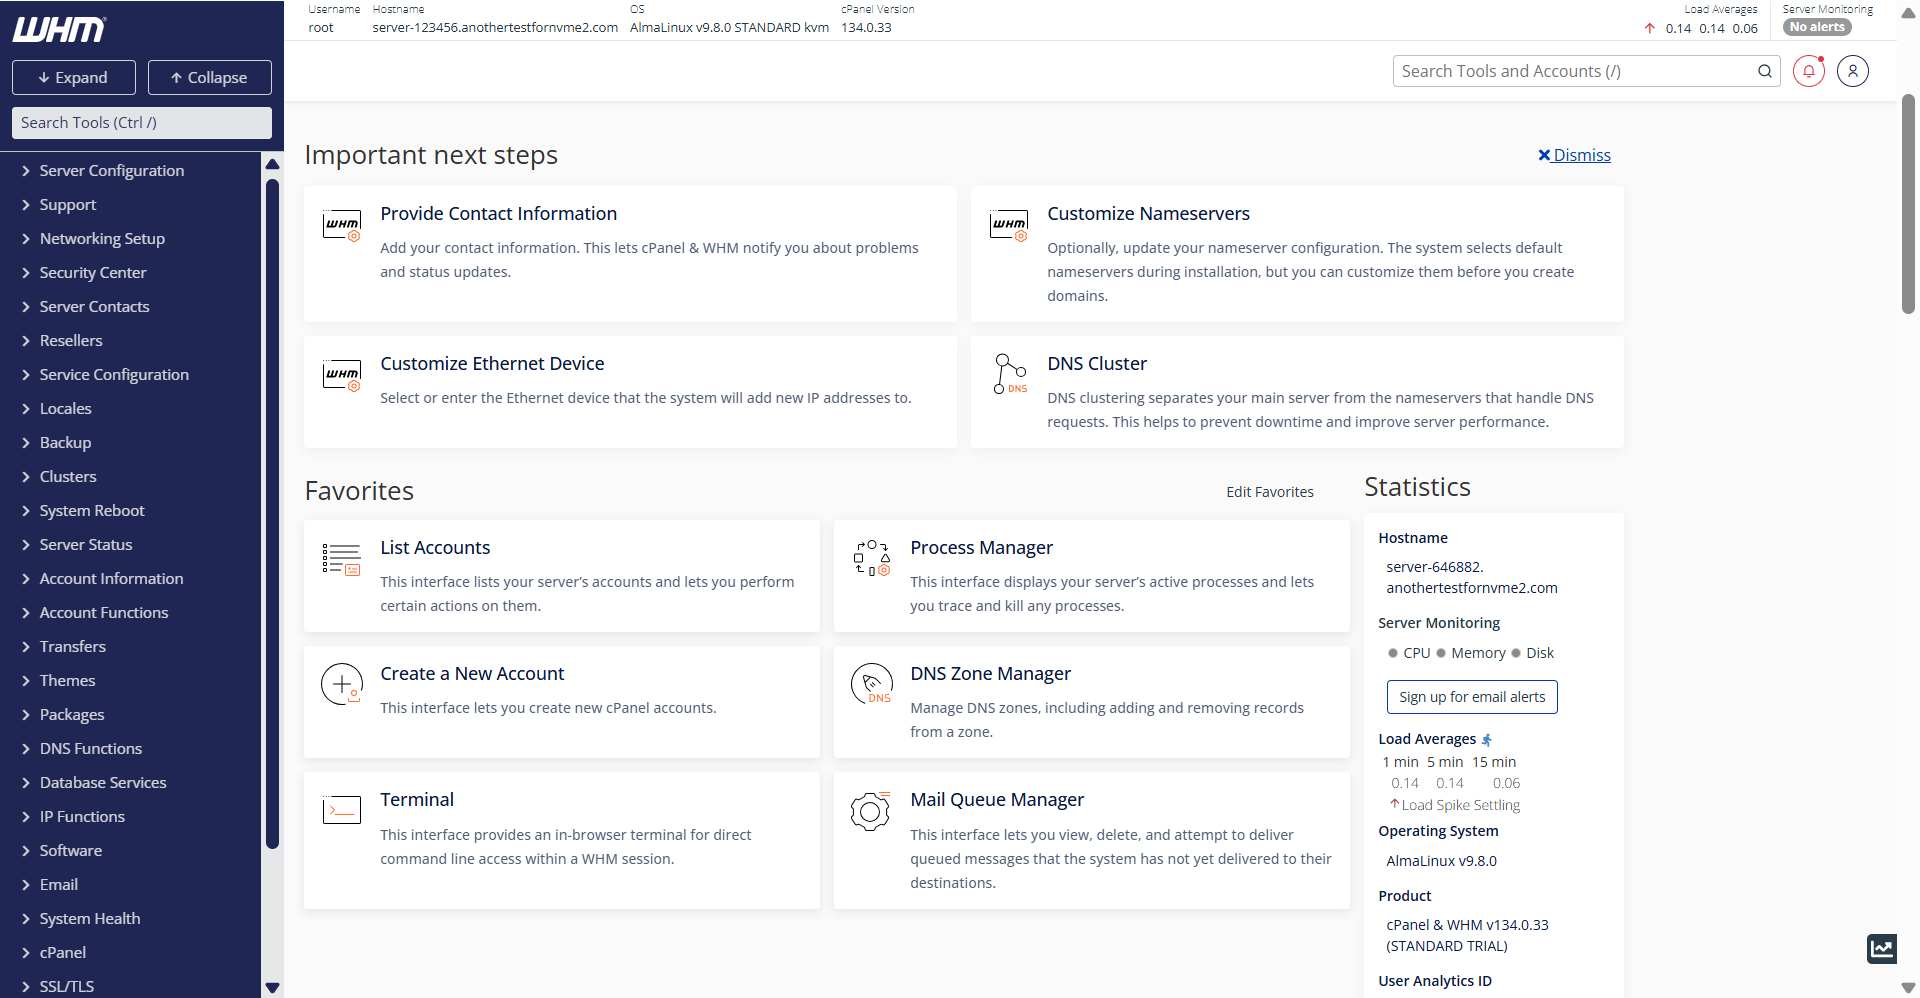
- You have successfully logged in to your WHM dashboard!
Summary
Ultimately, cPanel is there to make your life easier. It takes all the complicated "behind-the-scenes" tech and turns it into a simple dashboard you can use without any special training. By handling everything from your professional email to your website files in one place, it saves you time and takes the stress out of managing your online home. Think of it as your own personal control room—giving you the power and confidence to grow your website exactly the way you want, whenever you need to. You're in the driver's seat, and we've made sure you have everything you need to succeed.