 ChatGPT,
  Claude,
  Gemini,
  Grok — all four for
Purchase a Virtual Dedicated Server with CloudPanel Installation
CloudPanel iis a modern server management platform designed to simplify website, application, and database hosting. With its clean, intuitive web-based interface, users can easily manage a wide range of server administration tasks without requiring advanced technical expertise. CloudPanel streamlines hosting operations, making server management more efficient, accessible, and user-friendly for both developers and businesses.
This article explains how to purchase a Bluehost Virtual Dedicated Server with CloudPanel installed.
Why Choose CloudPanel?
CloudPanel simplifies tasks that typically require command-line expertise and ongoing server maintenance by providing an intuitive, centralized dashboard. From a single interface, you can manage websites, databases, domains, SSL certificates, and server resources with ease. When installed on a Bluehost Virtual Dedicated Server (VDS), CloudPanel allows you to spend less time on server administration and more time focusing on your projects. It streamlines website deployment, enhances resource management, and makes it easier to oversee multiple websites and applications efficiently.
Uses of CloudPanel
CloudPanel supports a wide range of website hosting and server management tasks, including:
- Centralized Website Management: Manage one or multiple websites from a single, streamlined dashboard.
- Fast Application Deployment: Deploy web applications quickly without the complexity of manual server configuration.
- Database Administration: Create, configure, and manage databases for your websites and applications with ease.
- Domain Management: Connect, configure, and manage domains through an intuitive interface.
- SSL Certificate Management: Secure your websites with SSL certificates, including simplified installation and renewal processes.
- Development and Staging Environments: Create isolated environments for testing and development before deploying changes to production.
- Server Monitoring: Monitor server health, resource utilization, and performance metrics in real time.
- Multi-Project Administration: Efficiently manage multiple websites, applications, and client projects from a single platform.
Server Requirements
Before deploying CloudPanel, verify that your server meets the minimum hardware requirements listed below. For production environments, it is recommended to use resources that exceed the minimum specifications to ensure optimal performance, stability, and scalability
- Do not purchase a server that only meets the minimum requirements. The minimum specifications represent the software's bare survival threshold and do not account for operating system overhead or production workloads. Running with only 2 vCPUs, 2 GB RAM, and 20 GB disk space can result in severe performance slowdowns, system freezes, or unexpected crashes during traffic spikes.
- For a stable deployment, we recommend using at least 4 vCPUs, 8 GB DDR5 RAM, and 200 GB NVMe storage. While lower specs might be sufficient for basic installation, consider allocating additional disk space if you plan to store recordings, logs, or other application data.
| Resource | Minimum | Recommended |
|---|---|---|
| CPU | 2 vCPUs | 4 vCPUs |
| RAM | 2 GB | 8 GB DDR5 |
| Disk | 20 GB | 200 GB NVMe |
How to Purchase a Virtual Dedicated Server with CloudPanel Installation
- In your browser, go to https://www.bluehost.com.
- Click Hosting in the top menu, then select Virtual Dedicated Server.

You can also go to this link directly: https://www.bluehost.com/vds-hosting.
- On the Virtual Dedicated Server Hosting page, click Explore Plans. You can also scroll down to the hosting plans section.

- Choose a plan from either tab — Standard or High Performance — by clicking Choose Plan.
 Pricing is subject to change. Please visit https://www.bluehost.com/vds-hosting for the current introductory/sign-up offer for the Bluehost Virtual Dedicated Server hosting. For the most up-to-date renewal pricing, visit your Bluehost Portal's Renewal Center.
 - On the next page, configure your VDS hosting to meet your requirements. The configuration options are divided into the following sections:
- Location: Select your data center in this section.

- Hardware: This section shows your pre-selected plan. You can also switch to another Virtual Dedicated Server plan in this section.

- Software:
If the selected plan does not meet the app's minimum requirements, the app will be grayed out.
- Click the OS With Panel tab, then select CloudPanel.
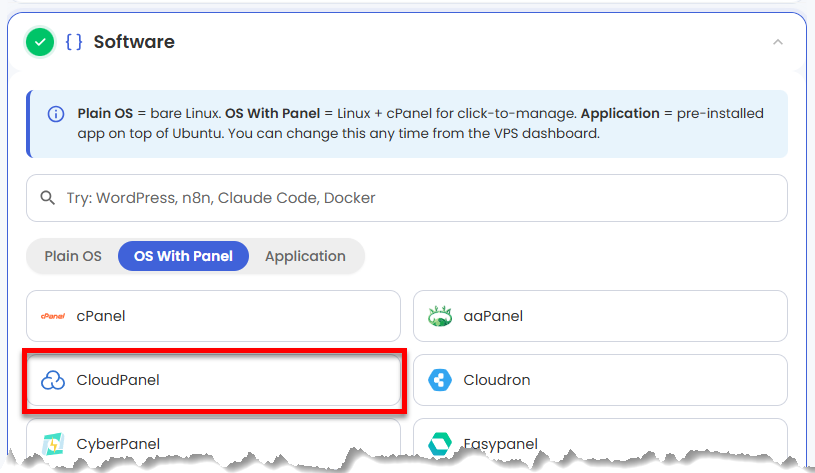 You can install only one application per purchase; the system will automatically select the best operating system for it.
 - In the pop-up, click Confirm.
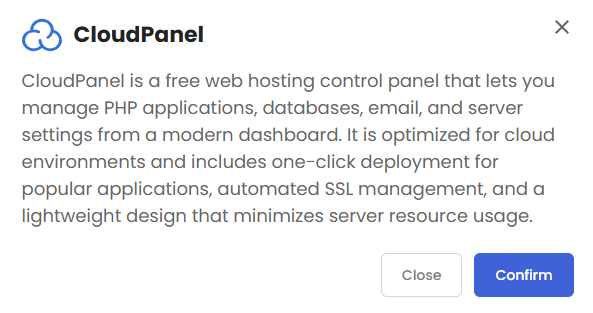
- Click the OS With Panel tab, then select CloudPanel.
- Location: Select your data center in this section.
- Support & Security: You can add Premium Support - Recurring, which provides priority access to expert assistance and faster response times.

Pricing for optional add-ons is subject to change. Please visit https://www.bluehost.com/vds-hosting for current add-on pricing. - AI Credits: Select a credit pack to access multiple AI models with one API key and consolidated billing.
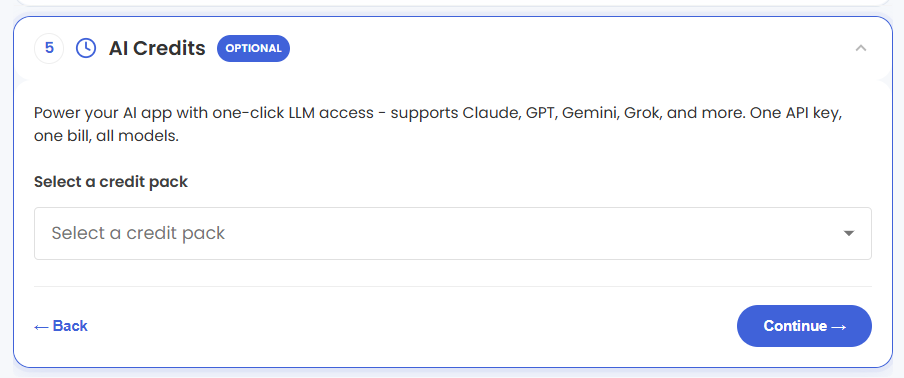
Pricing for optional add-ons is subject to change. Please visit https://www.bluehost.com/vds-hosting for current add-on pricing. - Advanced Options:
- Extra IPs: You can add IP addresses for an additional fee. Pricing changes based on how many IPs you add.
- Hostname (Optional): Assign a custom hostname to identify your server.
- SSH Key (Optional): Add an SSH public key to enable secure, passwordless access after provisioning.
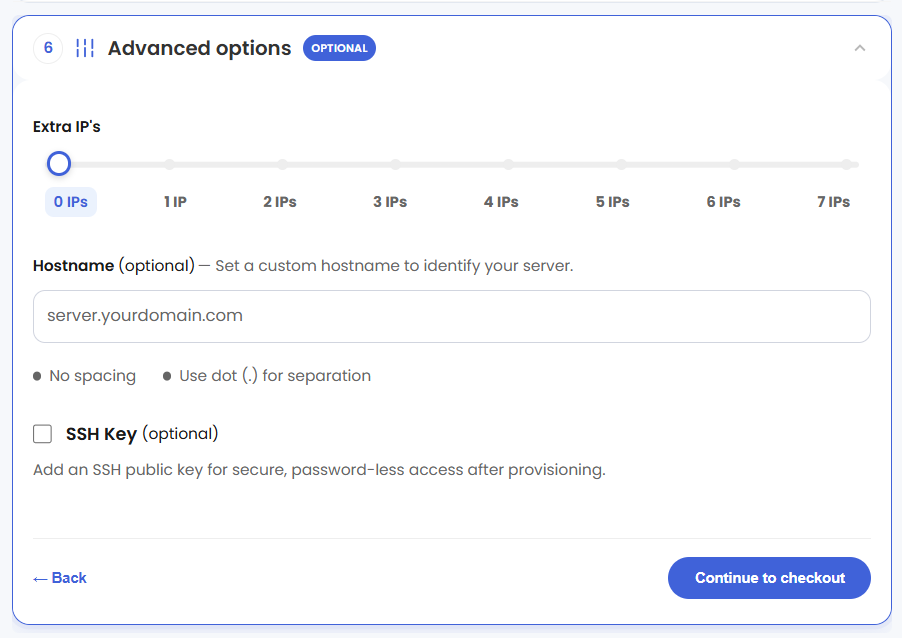
Pricing for optional add-ons is subject to change. Please visit https://www.bluehost.com/vds-hosting for current add-on pricing.
- Select your billing term and review your selected items on the right pane, along with the summarized total cost.
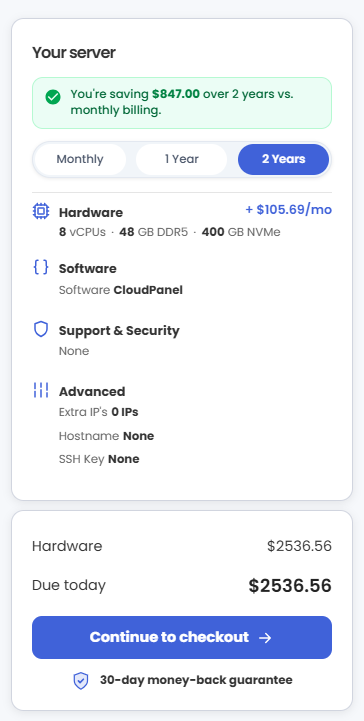
*Please review the current pricing plans available on Bluehost.com.
- Click Continue to checkout.
- Do the following on the Checkout page:
If you're new to Bluehost:- Create your Bluehost account by using your email address or by connecting with your Google, Apple, or GitHub account — whichever you prefer!

- Select your preferred payment method: credit card, Google Pay, or PayPal. Enter your billing information.

If you already have a Bluehost account, click Log In. If you're already signed in to your Bluehost Portal, your account details will be filled in automatically.

- Create your Bluehost account by using your email address or by connecting with your Google, Apple, or GitHub account — whichever you prefer!
- In the Shopping Cart, choose your billing term if you did not choose one on the previous page.
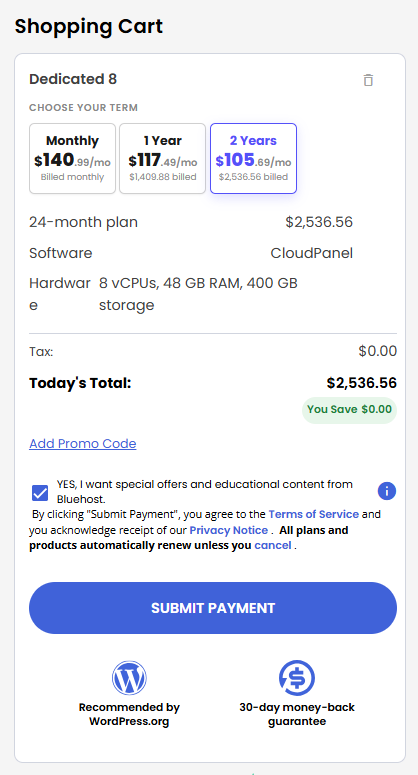
- Add a Promo code if you have one and then click Submit Payment to complete your purchase.
After completing the purchase, your VDS hosting will begin provisioning. You can access and manage your new VDS hosting in the Hosting tab of your Bluehost Portal.
How to Set Up CloudPanel on Your Server
Here is a step-by-step walkthrough to get your CloudPanel server up, running, and secured.
After installation completes:
- Log in to your Bluehost Portal.
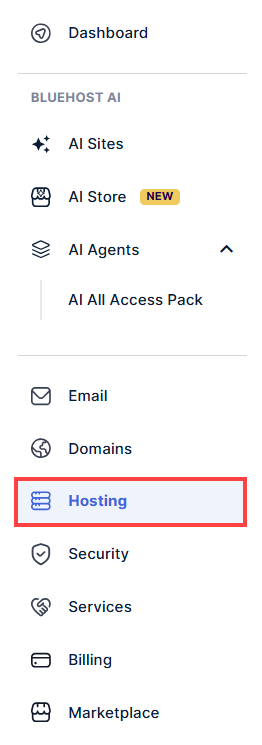
- In the left-hand menu, click Hosting, then select My Plans.
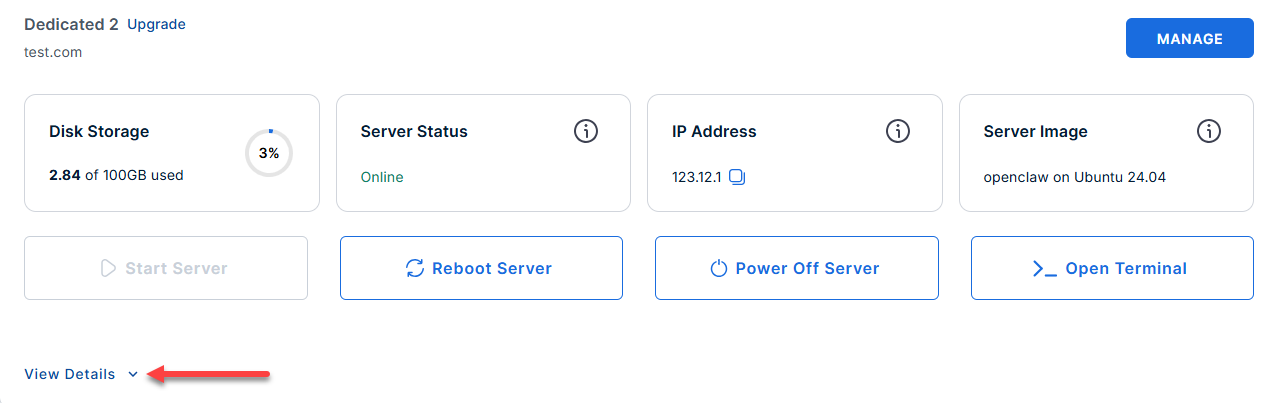
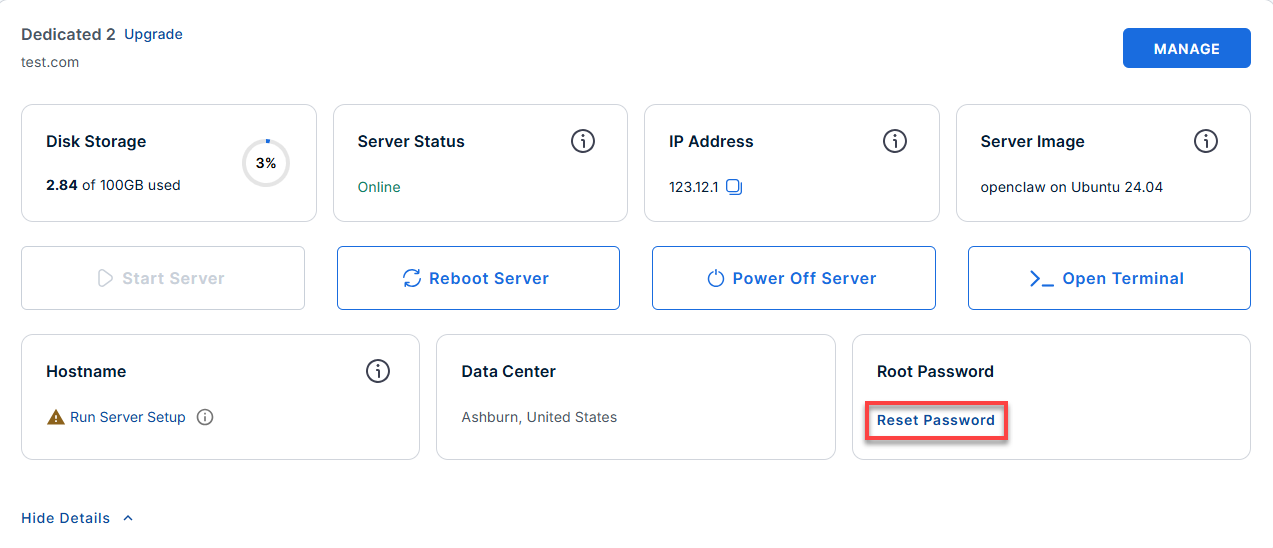
- Locate the server you want to manage, then click View Details in the bottom-left corner to expand the section and access additional server information.
- Click the Reset Password.
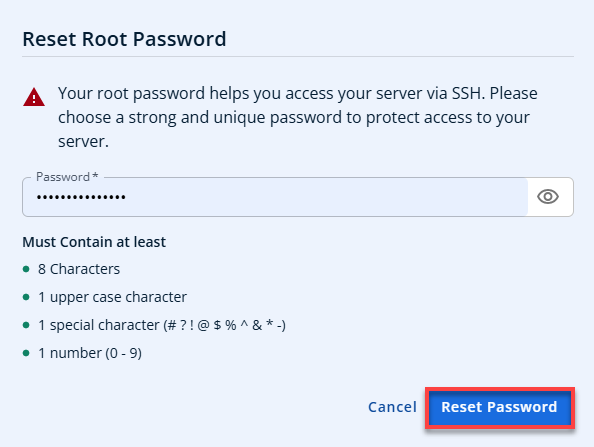
- In the pop-up window, type your new root password, then click Reset Password again to confirm and save the changes.
- Connect to your server via SSH.
Use your server IP and credentials with an SSH client, follow the prompts, and enter your root password when asked:ssh root@your_server_ipReplaceyour_server_ipwith your actual server IP address.Example Output:
########################################################
###            Welcome to CloudPanel                 ###
########################################################

* Website:         https://www.cloudpanel.io
* Documentation:   https://www.cloudpanel.io/docs/v2/
* Best Practices:  https://www.cloudpanel.io/docs/v2/best-practices/
* CloudPanel:      https://12.1.1.123:8443
* CloudPanel CLI:  clpctl

********************************************************************************

 CloudPanel v2

 Firewall (UFW) is active.
 Open ports: 22 (SSH)  80 (HTTP)  443 (HTTPS)  8443 (CloudPanel UI)

 Access CloudPanel:
   https://12.1.1.123:8443

 Note: Accept the self-signed certificate warning on first access.

 Admin account:
   An admin user has been pre-created. Credentials are in /root/.app_passwords.

 Important locations:
   Credentials  : /root/.app_passwords
   Nginx logs   : /var/log/nginx/
   MySQL logs   : /var/log/mysql/
   README       : /root/README.md

 Useful commands:
   systemctl status clp-nginx          Check CloudPanel Nginx
   systemctl status clp-php-fpm        Check PHP-FPM
   systemctl status mysql              Check MySQL
Step 1: Retrieve Your Admin Password
CloudPanel generates a secure random password upon installation, you need to log into your server via SSH to grab it.
- Run the following command to reveal your login credentials:
cat /root/.app_passwords
Example Output:
Last login: Mon Jun 22 13:40:03 2026 from 180.190.20.45 root@123456:~# cat /root/.app_passwords CLOUDPANEL_ADMIN_PASSWORD=AbC123xyZqWErTyu CLOUDPANEL_ADMIN_USER=admin CLOUDPANEL_URL=https://12.1.1.123:8443 CERT_TYPE=self-signed - Copy the password displayed on the screen.
CERT_TYPE=self-signedTake note of the
CERT_TYPElisted there as well (it will tell you if it's using a self-signed cert or Let's Encrypt).
Step 2: Log In to the CloudPanel Web UI
To ensure a smooth login, please follow the steps below:
- Open your web browser and navigate to:
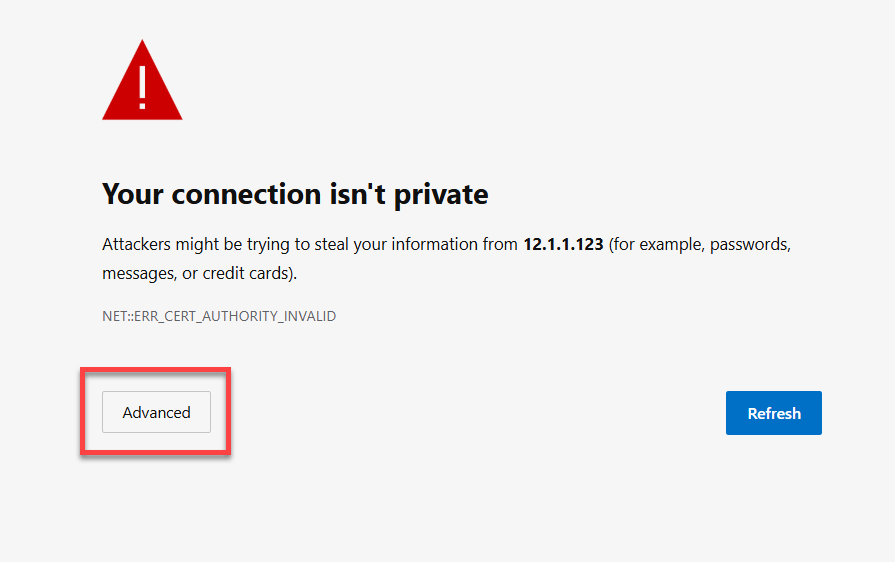
https://your-server-ip:8443Replaceyour-server-ipwith your actual server IP address. - Bypass the browser security warning.
CloudPanel uses a temporary self-signed SSL certificate, your browser will flag it. Click Advanced and then Proceed/Continue to bypass it safely.
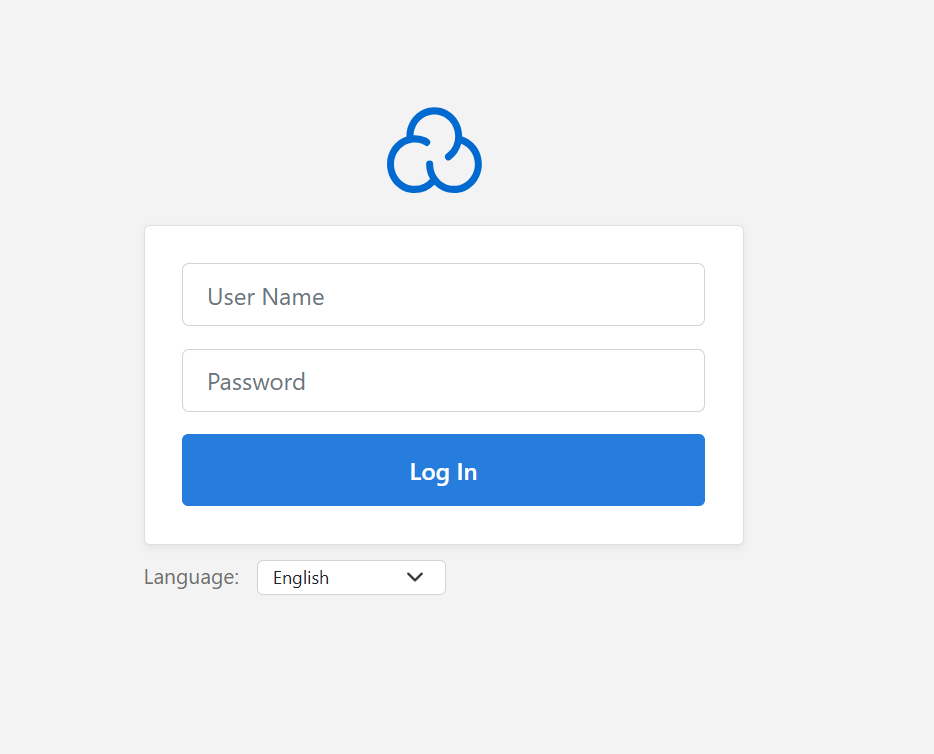
- Log in using the following credentials:
- Username: admin
- Password: (The password you copied in Step 1)
Step 3: Configure a Custom Domain and SSL
Running your control panel over an IP address with a security warning isn't ideal. Let's point a real domain to it.
- Update your DNS: Go to your domain registrar and create a DNS A Record:
- Type: A
- Name/Host: panel (or whatever subdomain you want, like cp)
- Value/Points to: your-server-ip
- Install the Let's Encrypt SSL Certificate. Go back to your SSH terminal and run the following command to give your panel a secure, valid HTTPS certificate.
Ensure port 80 is open and your DNS has fully propagated, otherwise Let's Encrypt will fail.
clpctl lets-encrypt:install --domainName=panel.yourdomain.com --subDomainName=Replaceyourdomain.comwith your actual domain.Example Output:
Starting Let's Encrypt SSL certificate installation for domain "panel.yourdomain.com"... [INFO] Validating domain ownership via HTTP-01 challenge... [INFO] Requesting certificate from Let's Encrypt CA... [INFO] Certificate received successfully! [INFO] Saving certificate files to /etc/nginx/ssl/panel.yourdomain.com/ [INFO] Updating Nginx configuration... [INFO] Testing Nginx configuration... [INFO] Reloading Nginx service... Success: The Let's Encrypt SSL certificate has been successfully installed for "panel.yourdomain.com". - Set the Custom Domain in the UI.
Inside the CloudPanel web interface, navigate to Settings and update the CloudPanel URL to your new domain (https://panel.yourdomain.com:8443).
Step 4: Add Your First Website
Now that your panel is secure, you can start hosting applications.
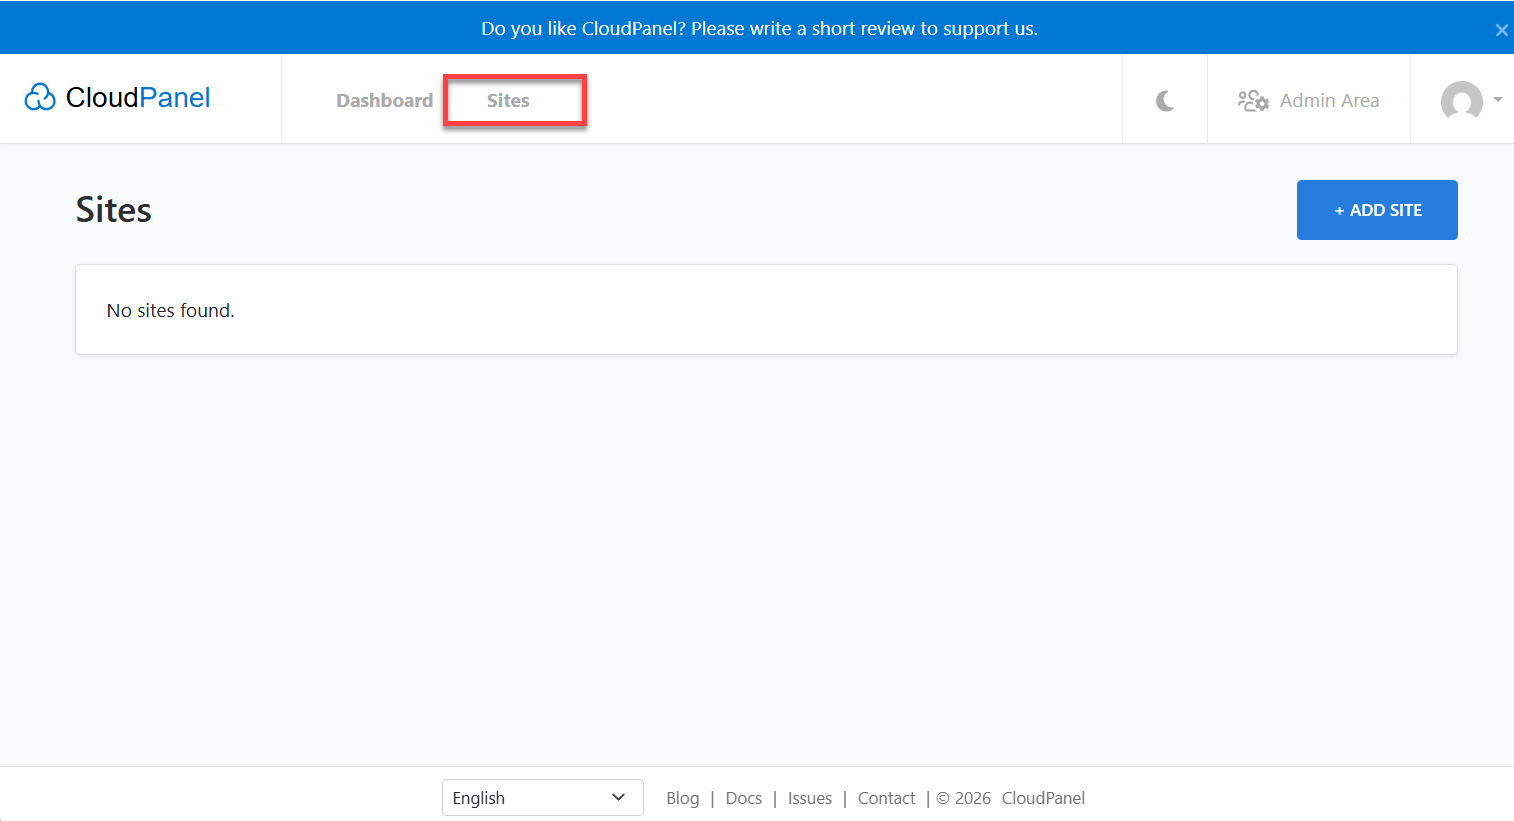
- In the CloudPanel dashboard, click on the Sites menu.
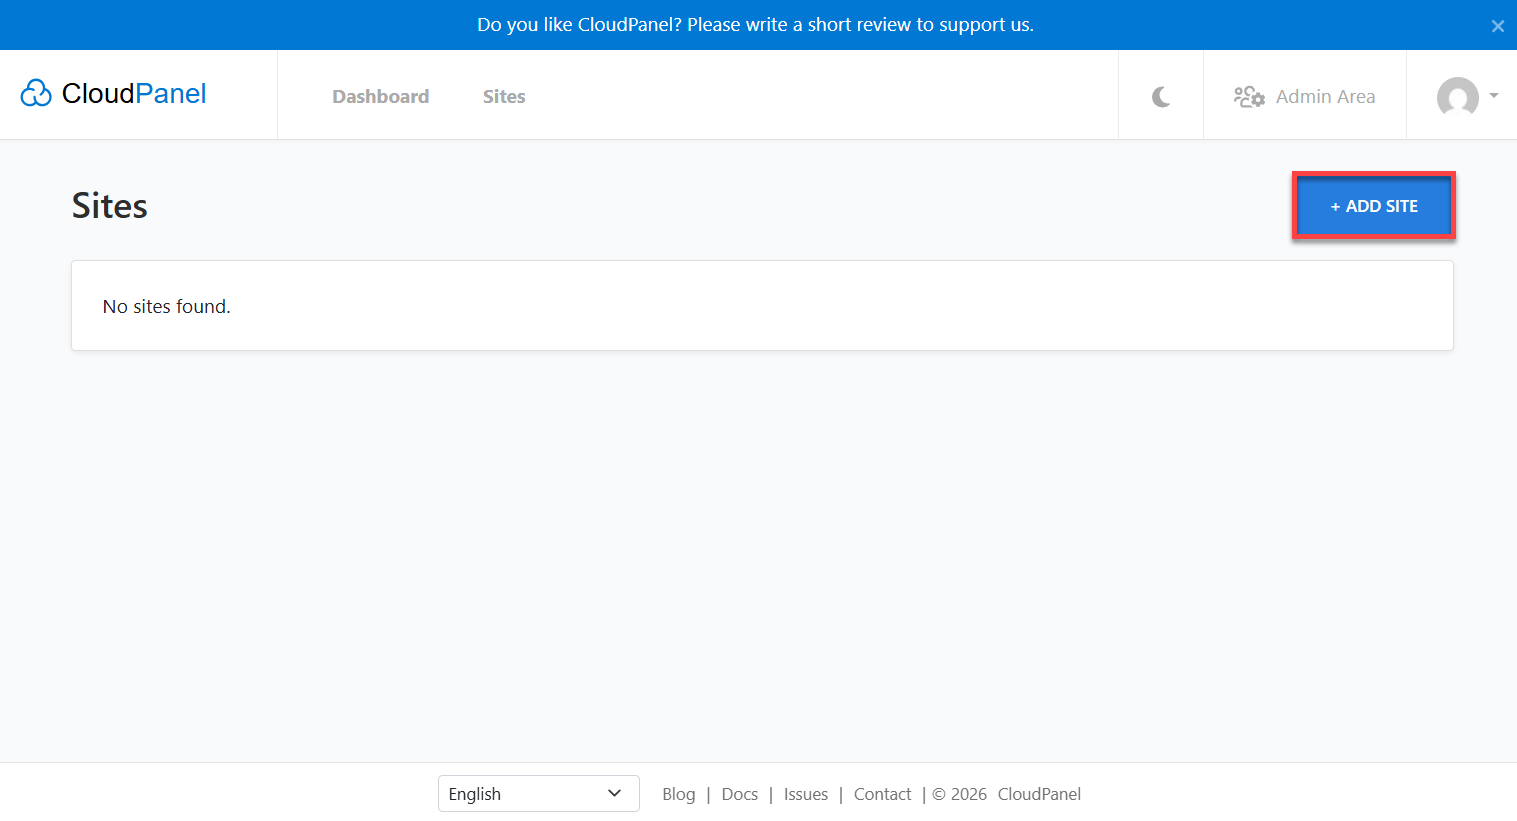
- Click Add Site.
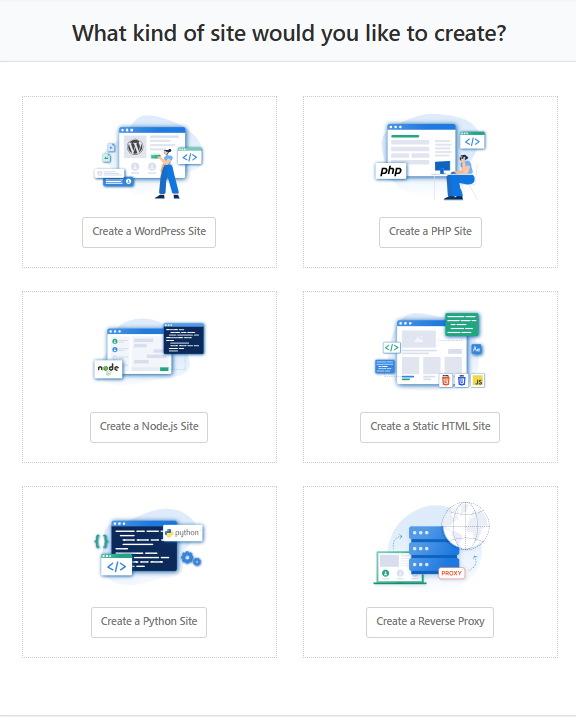
- Choose your website application type.
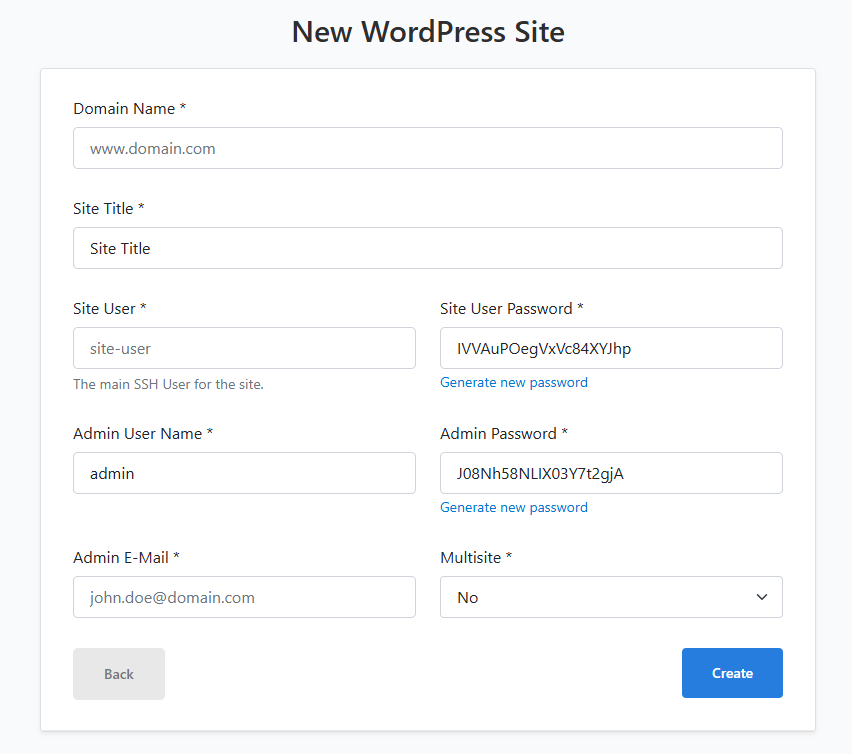
- Enter the following:
- Domain Name
- Site Title
- Site User
- Site User Password
- Admin E-Mail
- Multi-site
-
Click Create.
Useful Maintenance Cheat Sheet
If you ever need to check if things are running smoothly from the command line, use these commands:
-
Check if CloudPanel's Web Server is running:
systemctl status clp-nginx -
Check if PHP is running:
systemctl status clp-php-fpm -
Check if the Database service is running:
systemctl status mysql -
List all Databases:
clpctl db:list
Supporting Information and Sample Output
You can run cat /root/README.md to see more information and useful commands:
Last login: Fri Jun 19 18:25:04 2026 from 162.214.41.61
root@123456:~# cat /root/README.md
# CloudPanel

## Description

CloudPanel is a free web hosting control panel that lets you manage PHP applications, databases, email, and server settings from a modern dashboard. It is optimized for cloud environments and includes one-click deployment for popular applications, automated SSL management, and a lightweight design that minimizes server resource usage.


## Services

| Service      | Port  | Purpose                                        |
|--------------|-------|------------------------------------------------|
| CloudPanel   | 8443  | CloudPanel web UI (HTTPS, self-signed cert)    |
| Nginx        | 80    | HTTP - serves hosted sites                     |
| Nginx        | 443   | HTTPS - serves hosted sites with SSL           |
| MySQL 8.4    | 3306  | Database backend (localhost only)              |
| OpenSSH      | 22    | Remote SSH access                              |

All ports are managed by UFW. MySQL port 3306 is blocked externally.


## How-to-use

After the instance boots, open your browser and navigate to:

```
https://server-ip:8443
```

Accept the self-signed certificate warning and you will be directed to the
CloudPanel admin login page.

1. Log in with username admin and the password found in /root/.app_passwords.
2. Set a custom domain for CloudPanel under Settings if required.
3. Add your first site via the Sites menu.

### Useful commands

```bash
systemctl status clp-nginx            # CloudPanel Nginx status
systemctl status clp-php-fpm          # PHP-FPM status
systemctl status mysql                # MySQL status
clpctl self:version                   # CloudPanel version
clpctl db:list                        # List databases
```

### Retrieve admin credentials

```bash
cat /root/.app_passwords
```

### SSL / HTTPS certificate behaviour

On first boot, the server automatically handles certificate generation:

- **If a valid domain name is set** (e.g. `panel.yourdomain.com`) - Let's Encrypt certificate is requested automatically via `clpctl lets-encrypt:install`
- **If no domain / IP only** - a self-signed certificate valid for 10 years is generated for the server IP
- **Fallback** - self-signed certificate is always generated if Let's Encrypt fails

The certificate type used is recorded in `/root/.app_passwords` as `CERT_TYPE=letsencrypt` or `CERT_TYPE=self-signed`.

To manually request a Let's Encrypt certificate after deployment:

```bash
clpctl lets-encrypt:install --domainName=yourdomain.com --subDomainName=
```

Note: Let's Encrypt requires port 80 to be publicly reachable and a valid DNS A record pointing to the server IP.


## Minimum Resources

| Resource | Minimum |
|----------|---------|
| CPU      | 2 vCPUs |
| RAM      | 2 GB    |
| Disk     | 20 GB   |


## Image contents

This image installs and configures:

- CloudPanel v2 installed via official installer
- MySQL 8.4 as the database engine
- Nginx (system) for reverse proxy and site serving
- PHP-FPM managed by CloudPanel
- UFW firewall with ports 22, 80, 443, and 8443 open initially (can be configured with CloudPanel once it is set up)
- Log rotation at /etc/logrotate.d/cloudpanel
- This README at /root/README.md


## Links

- Manage: [https://{server_ip}:8443](https://{server_ip}:8443)
- CloudPanel documentation: [https://www.cloudpanel.io/docs/v2/](https://www.cloudpanel.io/docs/v2/)
Summary
This article explains how to purchase Bluehost Virtual Dedicated Server (VDS) with CloudPanel pre-installed and highlights the platform's benefits for simplified server, website, database, domain, and SSL management. It outlines CloudPanel’s key features, recommended server requirements, and the step-by-step process for selecting, configuring, and purchasing a VDS plan through Bluehost. The guide also covers post-purchase setup, including accessing CloudPanel, retrieving administrator credentials, securing the panel with a custom domain and SSL certificate, and deploying your first website. Additionally, it provides essential maintenance and status-check commands to help you monitor your CloudPanel server.