Bluehost Portal Websites Plugins Tab
Update your WordPress plugins frequently to keep your website safe, running well, and functional. This article provides steps to update WordPress plugins using the updated Websites Plugins tab and WP Admin dashboard so you can benefit from security patches, the latest features, and bug fixes. With regular updates, you avoid potential vulnerabilities in your WordPress site.
Backup Your Website Before Updating
Before updating plugins, creating a backup is important to prevent data loss or site crashes.
Why? Backups help restore your site if an update causes issues.
Update WordPress Plugins in Bluehost Portal
- Log in to your Bluehost Portal.
- In the left-hand menu, click Websites.
- Click the Manage Site button located next to the website you want to manage.

- In the website's management page, click Plugins in the top navigation menu.
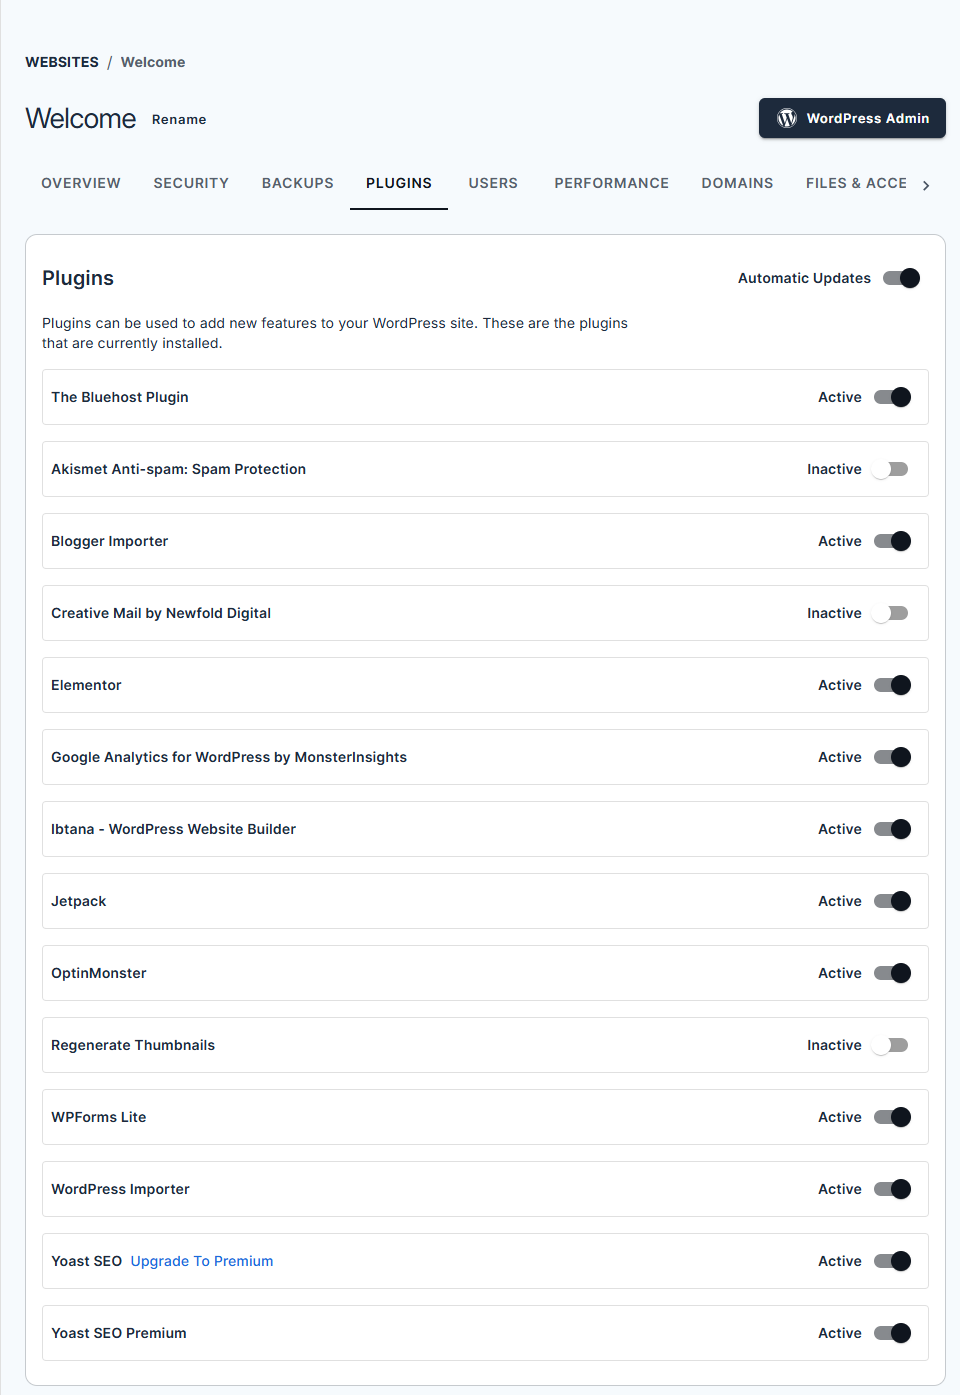
From here, you can:
- Activate Automatic Updates
- Ensures your plugins are always up-to-date.
- Helps protect against vulnerabilities with the latest security patches.
- Introduces new features that can enhance site functionality.
- Deactivate Automatic Updates
- Provides control over which plugin versions are active.
- Useful for maintaining compatibility with custom themes or other plugins.
- Ideal for sites requiring stability without unexpected changes.
- Manual Control of Updates
- Allows you to schedule when updates occur.
- Enables testing updates in a staging environment before applying them to your live site.
- Helps identify potential issues early, ensuring smooth operation.
Each plugin listed indicates its status: Active (blue toggle), which means the plugin is currently running. In contrast, Inactive (grey toggle) means the plugin is installed but not active. - Activate Automatic Updates
Alternative Way to Update Plugins
- Log in to your WordPress Admin Dashboard.
- Navigate to Plugins.
- Locate plugins with available updates (highlighted with an update notice).
- Click Update Now next to each plugin that needs updating.
- To update multiple plugins at once, select them, choose Bulk Actions, and then click Apply
Enable Automatic Plugin Updates (Optional)
To automate plugin updates, follow these steps:
- Go to Installed Plugins.
- Choose the plugin or plugins you want to enable auto-updates by clicking the checkbox.
- Click the Bulk actions dropdown, Enable Auto-updates, and click the Apply button.
Troubleshooting Plugin Update Issues
If a plugin update fails or causes issues, try the following:
- Clear your cache and refresh the page.
- Roll back the update.
- Disable conflicting plugins and try updating again.
- Check your PHP version in your hosting settings to ensure compatibility.
If the issue persists, consider restoring your backup and contacting the plugin developer for support.
Summary
Updating your WordPress plugins is simple but important because it ensures your site is secure and functional. This article explains how to easily update WordPress plugins directly from your WordPress dashboard, protect the site from various security attacks, run at maximum speed, and exploit its new functionalities.
If you need further assistance, Bluehost Chat Support is available 24 hours a day, 7days a week while Bluehost Phone Support is available 7 days a week from 7 am-12 midnight EST.
- Chat Support - While on our website, you should see a CHAT bubble in the bottom right-hand corner of the page. Click anywhere on the bubble to begin a chat session.
- Phone Support -
- US: 888-401-4678
- International: +1 801-765-9400
You may also refer to our Knowledge Base articles to help answer common questions and guide you through various setup, configuration, and troubleshooting steps.