Key highlights
- Discover how to install and configure CyberPanel on your self-managed VPS infrastructure.
- Learn the precise steps to deploy OpenLiteSpeed caching for maximum application performance.
- Explore Docker and Git integrations to streamline your CI/CD deployment workflows.
- Compare CyberPanel versus cPanel to understand the cost and performance trade-offs for scaling startups.
- Understand which Bluehost NVMe VPS tier aligns perfectly with your application’s workload requirements.
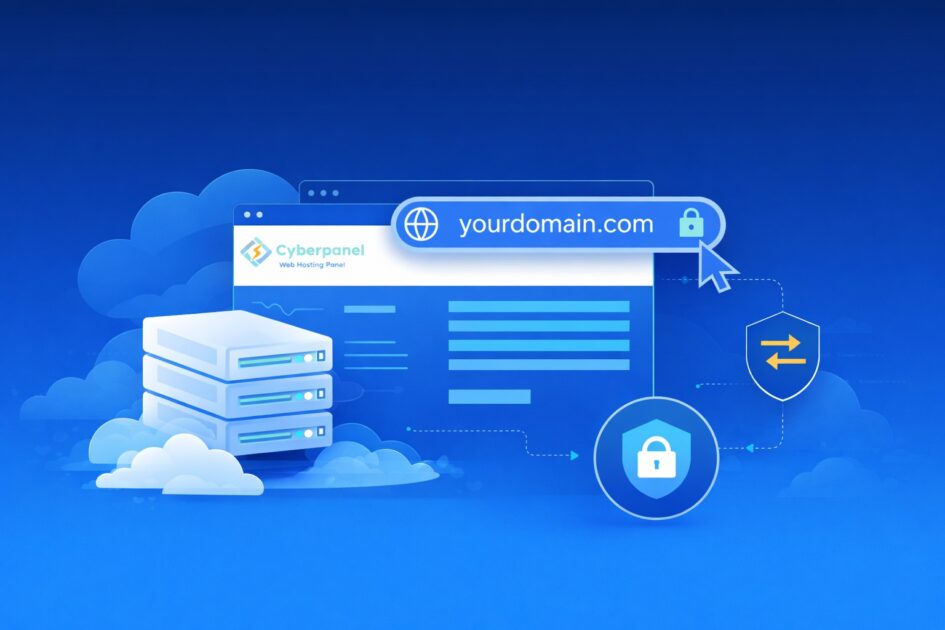
Setting up a CyberPanel VPS is one of the fastest ways to take full control of your server and performance. CyberPanel runs on OpenLiteSpeed, which is built to handle traffic efficiently without consuming unnecessary resources.
You get a lightweight control panel, faster load times and no recurring licensing costs. That combination makes it a strong choice for developers and technical founders who want a clean, high-performance setup.
But this is not a one-click environment. You will be working directly with your VPS, accessing it over SSH and configuring the stack yourself. If you are comfortable with that, the flexibility and speed gains are worth it.
In this guide, you will learn how to install CyberPanel on a VPS, secure your setup and optimize OpenLiteSpeed for performance. You will also see how Docker and Git fit into a smoother deployment workflow.
But before diving into the setup, it is important to understand where CyberPanel actually fits and why it stands out.
Why should technical founders consider a CyberPanel VPS?
CyberPanel offers a different approach to managing cloud infrastructure. It focuses on performance, flexibility and cost efficiency, making it a practical choice for technical founders. However, it is not without trade-offs. Understanding both the advantages and limitations will help you decide if it fits your setup.
Why consider a CyberPanel VPS?
- Custom environment setup
You can configure the exact stack your application needs without restrictions. - High performance with OpenLiteSpeed
CyberPanel runs on OpenLiteSpeed, which is built to handle traffic efficiently while keeping resource usage low. - No licensing overhead
Unlike traditional control panels, there are no recurring licensing fees, which helps reduce long-term costs. - Cost-effective scaling
You can scale your infrastructure without worrying about increasing panel costs as your projects grow. - Full root access and control
It is ideal for technical founders who want complete control over their server environment.
What to consider before choosing CyberPanel?
- Steep learning curve
A self-managed VPS setup requires a solid understanding of server management. - Command-line dependency
You will need to work with SSH and handle configurations manually. - Greater responsibility
Maintenance, updates and troubleshooting are fully in your hands. - Need for architectural understanding
Knowing how your server works makes it easier to manage performance and avoid issues.
With that in mind, let us move on to the step-by-step process of installing CyberPanel on your VPS.
What are the requirements for installing CyberPanel?
Before you begin the installation, make sure your server meets the following requirements:
- Supported operating systems
Ubuntu 18.04, Ubuntu 20.04, Ubuntu 22.04, AlmaLinux 8, AlmaLinux 9 or CloudLinux 8 - Minimum RAM
At least 1 GB RAM (2 GB or more is recommended for production use) - Disk space
Minimum 10 GB of available storage - Fresh OS installation
It is strongly recommended to use a clean server to avoid conflicts during installation
Once your server meets all the required configurations, you are ready to begin the installation process.
Setting up CyberPanel on a VPS is straightforward if you follow the steps carefully. Let us walk through the process step by step.
How do you install CyberPanel on your VPS?
The CyberPanel installation setup is largely automated, but it still requires careful execution. You will be working through the command line, making a few key decisions during installation and ensuring everything is configured correctly.
Follow the steps below to install CyberPanel on your VPS.
Step 1: Connect to your VPS via SSH as root
Log in to your server using SSH with root access (this is required for installation):
ssh root@your-server-ipNote: CyberPanel installation requires root privileges. Using only a sudo user may not work properly.
Step 2: Update system packages
For Ubuntu:
apt update && apt upgrade -yFor AlmaLinux:
yum update -yKeeping packages updated ensures better compatibility during installation.
Step 3: Run the CyberPanel installation script
Run the official installer:
sh <(curl https://cyberpanel.net/install.sh || wget -O - https://cyberpanel.net/install.sh)This script automatically installs CyberPanel and required components.
If you are not logged in as the root user, run the installer using sudo:
sudo su - -c "sh <(curl https://cyberpanel.net/install.sh || wget -O - https://cyberpanel.net/install.sh)"This ensures the installation runs with the required root privileges.
Step 4: Complete the installation prompts
During installation, CyberPanel will ask you a series of configuration questions. You will need to select options by entering the corresponding number or letter. Below is what each prompt means and what you should choose.
- Choose web server
You will first select which web server to install. OpenLiteSpeed is free and recommended for most users.
1 # Select OpenLiteSpeedIf you choose LiteSpeed Enterprise, you will need to provide a license key:
TRIAL # Use trial license or enter your key- Full service installation
This option installs essential services like DNS, FTP and email. It is recommended to enable this to avoid setup issues later.
Y- CyberPanel version
You will be asked which version to install. It is best to use the latest version for security and stability.
<Enter>- Set admin password
You can either generate a password or set your own. It is recommended to set a strong custom password.
SThen enter your password when prompted.
- Enable caching tools
CyberPanel allows you to install caching tools that improve performance. It is recommended to enable both.
Y   # Install Memcached
Y # Install Redis- Enable WatchDog
WatchDog monitors your server and automatically recovers it in case of failures.
YOnce you confirm these inputs, the installer will complete the setup automatically.
Below is a sample of how the installation process will look in your terminal, along with what each step means:
Select installation type [1-Install CyberPanel, 2-Exit]:
1

Select web server [1-OpenLiteSpeed, 2-LiteSpeed Enterprise]:
1

Full service installation (DNS, FTP, Email) [Y/n]:
Y

Which version to install? (Press Enter for latest):
<Enter>

Set admin password [d] default / [r] random / [s] set manually:
S

Enter your password:
YourStrongPassword123!

Install Memcached? [Y/n]:
Y

Install Redis? [Y/n]:
Y

Enable WatchDog? [Y/n]:
Y
What each step means
| Step | Input | Description |
|---|---|---|
| Select installation type | 1 | Starts the CyberPanel installation |
| Select web server | 1 | Chooses OpenLiteSpeed, which is free and recommended for most users |
| Full service installation | Y | Installs DNS, FTP and email services so you don’t need to configure them later |
| Version selection | <Enter> | Installs the latest stable version for better security and performance |
| Set admin password | S | Lets you create your own secure password instead of using a default or random one |
| Enter password | YourStrongPassword123! | This will be your CyberPanel login password. Use a strong combination of characters |
| Install Memcached | Y | Enables caching to improve website performance |
| Install Redis | Y | Adds advanced caching support for faster applications |
| Enable WatchDog | Y | Activates automatic monitoring and recovery if your server encounters issues |
Step 5: Access the CyberPanel dashboard
Once installation is complete, open your browser and go to:
https://your-server-ip:8090
Log in using:
- Username:
admin - Password: the one you set during installation
Step 6: Secure your setup
After installation, secure your server:
- Allow only required ports (22, 80, 443, 8090)
- Enable ModSecurity for protection against common attacks
- Keep CyberPanel and system packages updated
- Use strong credentials
Optional: Restart your server
A reboot after installation helps ensure all services run correctly.
Once your installation is complete and secure, the next step is to optimize OpenLiteSpeed and LSCache to handle high traffic efficiently.
How can you optimize OpenLiteSpeed and LSCache for high traffic?
Performance tuning ensures your applications remain fast and stable, even under heavy load. CyberPanel, combined with OpenLiteSpeed and LSCache, provides built-in tools to handle high traffic efficiently.
How do you configure LSCache for WordPress and custom apps?
LSCache reduces server load by serving cached content instead of processing every request. To activate it, follow the steps below:
- Enable LSCache plugin
Install and activate LSCache for WordPress or configure it for your application. - Cache dynamic content
Store static HTML versions of pages to reduce database and PHP load. - Use object caching
Enable Redis or Memcached from the CyberPanel dashboard for faster database queries. - Set TTL (Time To Live)
Define how long cached content is stored before refreshing. - Configure purge rules
Automatically clear cache when content updates to avoid stale data.
How do you optimize OpenLiteSpeed for high traffic?
OpenLiteSpeed handles requests efficiently, but proper tuning improves performance under load.
- Adjust worker processes and connections
Increase connection limits and worker settings based on your server capacity. - Enable HTTP/2 and GZIP compression
Improve load speed and reduce bandwidth usage. - Optimize keep-alive settings
Reduce connection overhead for repeat requests. - Use Brotli compression (if available)
Further reduce file sizes for faster delivery. - Configure static file handling
Serve static assets directly without hitting PHP.
What are the best practices for resource allocation?
Efficient resource management helps prevent slowdowns during traffic spikes.
- Monitor server performance
Track CPU and RAM usage in the CyberPanel dashboard. - Optimize PHP settings
Increase memory limits and execution time for heavy scripts. - Tune concurrent connections
Ensure OpenLiteSpeed can handle multiple users without timeouts. - Plan for scaling
Upgrade resources or optimize workloads as traffic grows.
Beyond these optimizations, modern applications also require efficient deployment workflows to stay agile and scalable.
How do you streamline deployments with Docker and Git?
Automation plays a key role in modern application deployment. It reduces manual work, minimizes errors and ensures faster updates. CyberPanel makes it easier to integrate Git and Docker into your workflow.
How do you set up Git webhooks for automatic deployment?
CyberPanel includes a built-in Git Manager that simplifies deployment from repositories.
- Connect your repository
Go to the Git Manager in the CyberPanel dashboard and add your GitHub or GitLab repository URL along with the branch you want to deploy. - Configure deployment settings
Define the deployment path and ensure your application files are correctly mapped. - Set up webhooks
In your Git provider, create a webhook that triggers on every push event. - Enable auto-deployment
Each time you push new code, the webhook triggers an automatic pull to your server.
This eliminates the need for manual uploads and keeps your application in sync with your repository.
How do you run containerized apps using the Docker Manager?
CyberPanel also supports containerized applications through its Docker Manager.
- Install Docker
Enable and install the Docker daemon directly from the CyberPanel interface. - Pull container images
Search and pull images from Docker Hub or your private repositories. - Deploy containers
Launch applications by configuring:- Port mappings
- Volumes for persistent storage
- Environment variables
- Manage containers
Start, stop and monitor containers alongside your existing web applications.
This setup allows you to run microservices and isolated environments efficiently within the same VPS.
With deployment workflows streamlined, the next step is to understand how CyberPanel compares to traditional control panels like cPanel.
How does CyberPanel compare to cPanel for scaling startups?
Choosing the right control panel directly impacts your performance, costs and scalability. CyberPanel and cPanel take very different approaches, especially when it comes to pricing and underlying technology. Understanding these differences helps you make a more informed infrastructure decision.
CyberPanel vs cPanel: Key differences
| Feature | CyberPanel | cPanel |
|---|---|---|
| Pricing model | Free (OpenLiteSpeed included) | Paid, per-account licensing |
| Cost at scale | No additional cost for more sites | Costs increase as you add accounts |
| Web server | OpenLiteSpeed (event-driven) | Apache (process-based) |
| Performance | High performance with lower resource usage | Higher resource consumption under load |
| Scalability | Easily handles high traffic efficiently | Requires more resources to scale |
| Domain limits | Unlimited domains | Limited by plan/licensing |
| Best for | Startups, developers, self-managed VPS users | Beginners, managed hosting environments |
CyberPanel stands out as a cost-efficient and performance-focused option, especially for startups that want to scale without increasing licensing expenses. Its OpenLiteSpeed foundation gives it a clear advantage in handling traffic with fewer resources.
That said, cPanel remains a more beginner-friendly choice with a mature ecosystem. The right option ultimately depends on how much control, performance and cost efficiency you need for your setup.
To fully benefit from CyberPanel’s performance and flexibility, it is equally important to choose the right hosting infrastructure.
Why choose Bluehost for self-managed VPS?
Bluehost provides self-managed VPS hosting that gives you full control over your server environment and creates a high-performance setup designed for scalability and flexibility.
Key benefits of Bluehost VPS
- High-performance NVMe storage
All plans include NVMe SSD storage, ensuring faster data access and improved application performance. - Flexible plans for different workloads
- Entry-level tiers are ideal for prototyping, testing and lightweight staging environments
- Advanced tiers support high-traffic SaaS applications with higher RAM and processing power
- Full root access
Complete control over your server, allowing you to configure CyberPanel exactly as needed. - Reliable uptime
A 99.99% uptime SLA helps keep your applications consistently available. - Scalable infrastructure
Upgrade resources easily as your traffic and application demands grow. - Infrastructure-related support
Get assistance with infrastructure-level concerns such as network, hardware and uptime reliability.
Investing in the right infrastructure early can simplify scaling, reduce bottlenecks and give your application the performance edge it needs. If you are aiming for a faster, more scalable setup, this is a good time to explore Bluehost plans now and see what aligns with your application’s needs.
Final thoughts
CyberPanel paired with a high-performance VPS gives you speed, control and the flexibility to scale on your terms. It is a solid foundation if you are comfortable managing your own setup.
From there, the real difference comes down to choosing infrastructure that aligns with how you want to build and grow. If you are exploring your options, you can take a closer look at Bluehost VPS plans and see what fits your workload best.
FAQs
The base version of CyberPanel is completely free. It comes bundled with OpenLiteSpeed, which handles high traffic excellently. However, Enterprise features require a paid license. These premium licenses include the commercial LiteSpeed Web Server and advanced support options.
Yes, migration is generally a smooth process. CyberPanel includes a built-in cPanel importer tool. This tool automates the transfer of files, databases and emails. Note that complex setups might require some manual reconfiguration after the initial import.
CyberPanel includes integrated email capabilities using Postfix and Dovecot. You can host your email server on a VPS using OpenLiteSpeed and CyberPanel relatively easily. For optimal deliverability, we strongly recommend using an external SMTP service for outgoing mail.
Yes, CyberPanel is highly optimized for WordPress environments. It features one-click installations for rapid deployment. The native LSCache integration ensures your WordPress sites load incredibly fast. It is one of the best platforms for hosting demanding WordPress applications.

Write A Comment