Key highlights
- Understand how to easily access your WordPress admin dashboard through the correct login URL and various login methods.
- Learn to navigate the WordPress admin panel efficiently using the left side menu and upper navigation bar for streamlined site management.
- Explore essential features like managing posts, pages, plugins and user accounts to gain full access and control over your WordPress site.
- Discover troubleshooting tips to resolve common login page issues and enhance security with two-factor authentication and security plugins.
- Uncover ways to customize the WordPress admin interface and toolbar to improve usability and tailor the dashboard to your needs.
WordPress offers a wealth of customization options that allow users to create stunning and functional websites.
As WordPress continues to grow, more and more people are looking to learn how to use WordPress every day. People such as marketers, content writers, designers and web developers don’t need to own a website to have the need to learn WordPress.
Like any advanced tool, there’s a bit of a learning curve. WordPress admin dashboard-also known as the WordPress control panel, the WordPress backend or WP admin-can feel overwhelming at first. With its many tabs, settings and controls, it might not be the most visually appealing or intuitive interface to navigate.
That’s why we’ve crafted this article. It’ll help you navigate the WordPress admin area. Keep reading for more useful information.
What is the WordPress admin dashboard?
The WordPress admin dashboard is the central control panel for managing a WordPress website. It’s a private, secure area accessible to users with administrative privileges.
This dashboard provides a user-friendly interface to oversee all aspects of the website. It allows user management, facilitating control over access and roles. The users receive notifications for updates, ensuring the site remains secure and up to date.
In essence, the WordPress admin dashboard empowers website administrators to efficiently control content, design and functionality without the need for coding expertise.
Accessing your WordPress admin dashboard
You may already know how to access your WordPress Dashboard, but let’s quickly go over it again.
There are multiple ways to log in to your WordPress account. But the most common two are through your web hosting dashboard and by logging directly into your WordPress site.
Your WordPress admin login page
The default URL to log in to WordPress is the same as you use to visit your site. But with “/wp-admin” added at the end.

For example, to access the WordPress backend of the website www.example.com, enter “www.example.com/wp-admin” to your browser’s address bar.
Note: The WordPress login URL can be changed by an admin.
Logging into your WordPress backend
To access the WordPress backend of your website, you need to:
- Go to your WordPress login URL: “www.[YourSiteURL].[com]/wp-admin.”
- Enter your WordPress username and password.
- Click “Log in.”
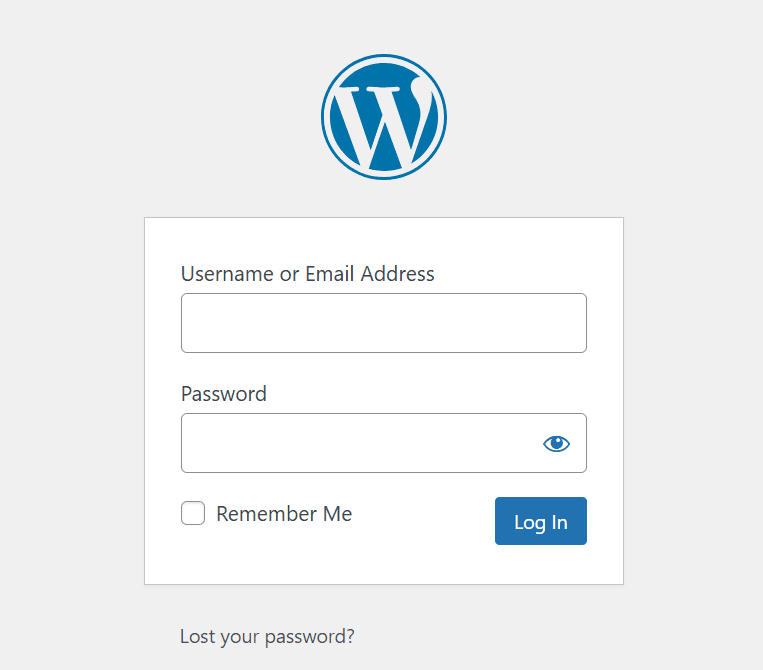
You now have access to your WordPress admin dashboard, where you can manage your WordPress site.
Troubleshooting tips for WordPress login issues
Here are some common problems and solutions to help you troubleshoot login issues:
- Forgotten username or password: WordPress provides a password reset feature if you forgot your username or password. Click the “Lost your password?” link and enter an email address associated with your WordPress account. Then, follow the instructions to reset your password.
- Incorrect login URL: If your WordPress login URL has been customized, double-check the exact URL in your hosting settings. You can also contact your administrator if you are unsure.
- Browser cache and cookies: Clear your browser’s cache and cookies, then try accessing the WordPress login page again. Alternatively, try logging in from an incognito or private browsing window.
- Server-side errors: If you see a server error, such as a 500 Internal Server Error, contact your hosting provider for support. They can investigate server logs to identify and resolve the issue.
- Exceeded login attempts: If your site has a security plugin that limits login attempts, you may be temporarily locked out for too many attempts. Wait for the lockout period to expire or access your hosting control panel to disable the security plugin temporarily.
How to use your WordPress admin dashboard?
Before diving into the specific tasks you can accomplish, let’s take a moment to understand the core functionalities and navigation of the WordPress admin dashboard.
1. Create and manage pages and posts
Use the dashboard to craft and organize content. Pages are for static information like an ‘About Us’ page, while posts are for dynamic, time-based entries such as blog articles. You can draft, edit and publish them easily.
2. Create and manage WordPress categories and tags
Organize your content by categorizing and tagging posts. Categories provide a broad structure, while tags offer specific keywords, enhancing navigation and user experience.
3. Upload and manage media files
The media library lets you upload, organize and insert images, videos and other media into your content. It simplifies handling multimedia on your site.
4. Manage WordPress comments
Control and moderate user comments to engage with your audience effectively and maintain a clean, interactive website environment. You can approve, reply to or delete comments as needed.
5. Design your website’s appearance
Select and customize themes to change your site’s look and feel. Themes control layout, colors, fonts and more, allowing you to tailor your website’s design.
6. Use plugins and tools
Extend your site’s functionality by installing and configuring plugins. These add-ons can enhance SEO, security, contact forms and more.
7. Manage WordPress updates
Stay secure and up to date by regularly checking and installing WordPress core, theme and plugin updates. It benefits from the latest features and security patches.
8. Control user accounts in WordPress
Administer user accounts by creating, editing and assigning roles and permissions. It helps them to control access to various parts of your website.
9. Configure WordPress settings
Fine-tune your site’s behavior with various settings. These encompass general, writing, reading, media, permalink and privacy settings.
Also read: A guide to WordPress settings
10. WordPress general settings
Set your site’s title, tagline, time zone and other basic information to define its identity and global attributes.
11. WordPress writing settings
Adjust writing-related preferences, including default post categories, post format and text editor settings for content creation.
12. WordPress reading settings
Control how your site displays content, including front page displays, blog page settings and syndication feed preferences.
13. WordPress media settings
Configure image sizes and thumbnail settings for media files uploaded to your site, ensuring they display correctly.
14. WordPress permalink settings
Define how your website’s URLs are structured for better search engine optimization and user-friendliness. Learn more about how to customize WordPress permalink settings.
15. WordPress privacy settings
Set your site’s privacy policy and determine how it handles personal data in compliance with privacy regulations, such as GDPR.
Understanding the WordPress admin interface and menu
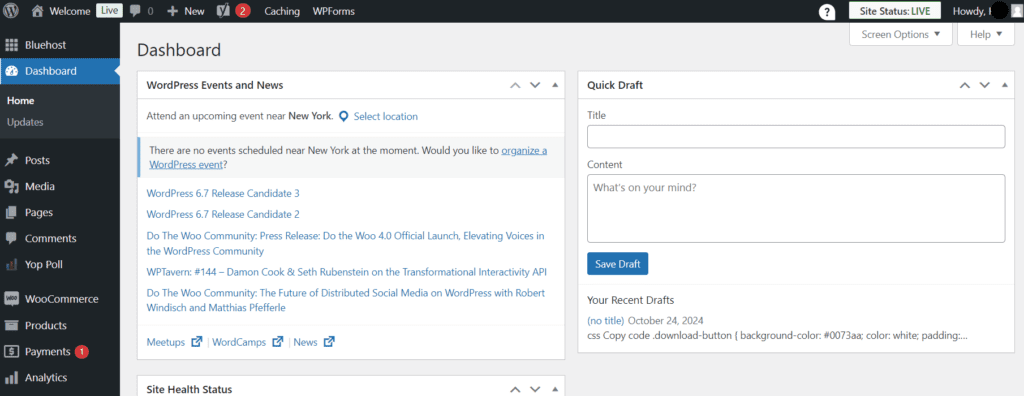
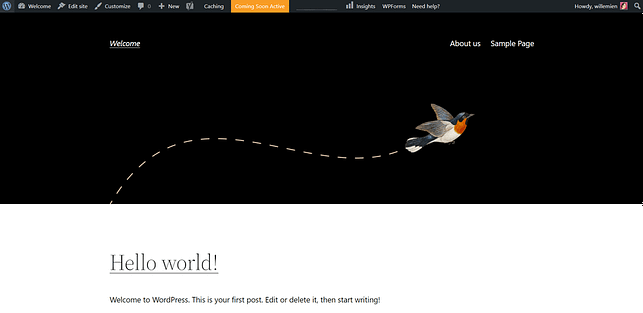
Your WordPress dashboard will look something like this with a clean installation:
If you’re a new user, the “Welcome to WordPress” toolset will appear in the dashboard’s top position with helpful links to get you started. If you’ve already seen this panel and you’ve installed different plugins, you may see notifications from the plugins you’re using instead.
For your navigation menus, keep in mind that your menus might look different compared to the screenshots in this article. Depending on the user role, plugins and the hosting service that you use, there might be more or fewer items on your menus.
In addition, the Bluehost section in the left navigation menu is only available to customers who bought Bluehost’s subscription.
Let’s first explore the navigation menus in your WordPress control panel.
WordPress upper navigation bar
Besides the left-hand navigation bar, you’ll see a black bar with white text running across the top. This bar contains plenty of helpful shortcuts to help you save time navigating. For example:
- The plus icon lets you quickly add a post, page, media and users to your backend.
- The message icon takes you to the comment area where you can approve, edit, delete and answer comments.
Unfortunately, there are no options available in the admin panel to add custom links to the bar. However, plugins and themes can create custom navigation on the top admin bar that will be useful when working in the panel.
For instance, in the above image, you can see a tab called “Caching” which might not exist in your upper navigation bar. It is a shortcut to access some functions of the Endurance Page cache plugin which is activated automatically by Bluehost if you use our service. Next to that, the tab with the letter Y is available when you install the Yoast SEO plugin.
You’ll want to pay particular attention to “Visit Site” which you’ll access by hovering over your site’s name within this bar. Clicking the text will open your site in the same tab (right-click it to open in a new tab if you’d like to keep your dashboard open).
As you access your live site, you’ll see that the black bar remains, giving you access to the same shortcuts and an easy path back to your WordPress Dashboard.
WordPress left navigation menu
This is where you’ll spend the bulk of your time within WordPress. All the controls and settings you use in WordPress can be found in this main menu.
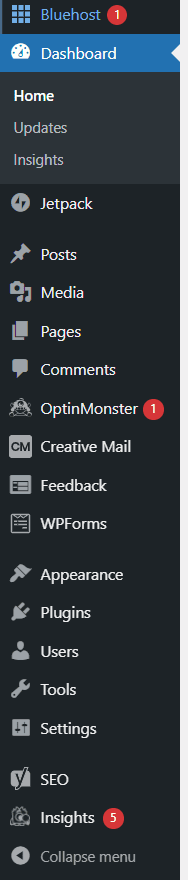
The menu shown in this screenshot is for someone who has an administrator user role within WordPress. If you don’t see all the menu items, then you probably have a different user role.
Furthermore, you can see options such as OptinMonster or Creative Mail in the screenshot above. Don’t worry, these are not a part of the standard menu. They’re listed because these plugins were installed. You can think of plugins as “apps” for your WordPress site. The more plugins you install on your site, the more icons you’ll see in the menu.
Diving into the WordPress menu
Let’s dive further into the left navigation menu. We will be covering options in the standard menu:
- Dashboard: The Dashboard is basically the control center for your WordPress site. You can manage everything of your WordPress site from here. You’ll also find an overview of updates for your WordPress core, as well as for themes and plugins.
- Posts: This section is where you can create new blog posts and manage existing ones. Here, you’ll also find options to organize content with Categories and Post Tags. If you need to make fast changes, the Quick Edit feature allows you to modify details like the publish date, tags and categories without fully opening the post. You can also switch the status of a post, making it easy to draft, schedule or publish content as needed.
- Media: All your images, documents or media files are stored here. You can browse through your Media library, add new media and edit/update the media files.
- Pages: All the pages of your website (such as the homepage and about us) can be found here. Go to this section if you want to create a new page or make changes to existing ones.
- Comments: You’ll manage your blog comments in this section. You can approve, delete, modify or reply to comments that come into your blog. Of course, you can always disable comments on your site if you want. This can be done in the “Settings” area.
- Appearance: Settings in the appearance area directly affect how your site looks and navigates. You can change or customize your website themes, add background images and edit/control your website navigation menu here. And you’ll spend a good amount of time in this area when you want to change your site’s design or its layout.
- Plugins: Plugins are like “apps” for your WordPress site. They are pieces of software that add or extend the functionality of your site. They are quite easy to use and you don’t need any coding knowledge to download and use plugins. Go to this section to manage your installed plugins or to browse the WordPress plugin directory and install new ones.
- Users: This section contains a list of all the users who have a login on your website. WordPress has various permission levels for the corresponding user’s role. Depending on the role you’re assigned, you may see different items in your WordPress navigation menu.
- Tools: This section can be referred to as the “utilities” area of WordPress. It allows you to import and export various data such as posts, pages, form responses or your personal data. You can also check your site health status or access your plugins/themes file editor here.
- Settings: This section contains the “global settings” for your site. There are loads and loads of options and settings for you to explore. You can edit things such as your site title, URL structure and other important settings.
- Collapse Menu: Click on the icon to “collapse” the left bar menu. Instead of seeing descriptive text, you’ll only see the icons.
- Bluehost dashboard: This area is only available if you use the Bluehost hosting service. It contains various shortcuts to other settings. We’ll dive deeper into this area later in this post.
Can you customize the appearance and functionality of the WordPress admin panel?
Yes! There are several ways to tailor the look and functionality of your WordPress admin panel to better suit your preferences. Let’s explore a couple of the most popular methods:
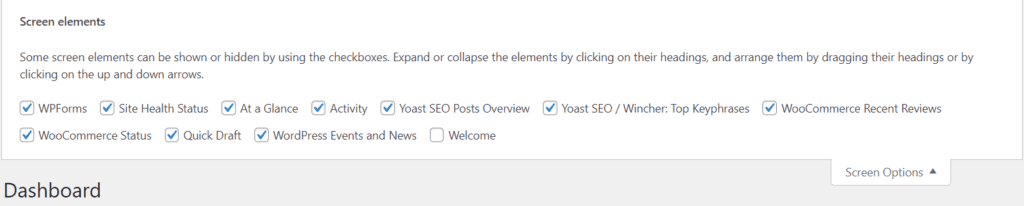
Hiding unused elements in the WP admin panel
To streamline your workspace, WordPress allows you to hide any admin panel elements you don’t frequently use. Simply click on the Screen Options button located in the top-right corner of any admin page:

Then, uncheck the boxes for any items you’d like to remove from view.
Changing the color scheme of your WP admin panel
If you’re interested in customizing the color scheme of your WordPress admin panel, navigate to Users → Profile.

Now, select a new Admin Color Scheme that fits your aesthetic:
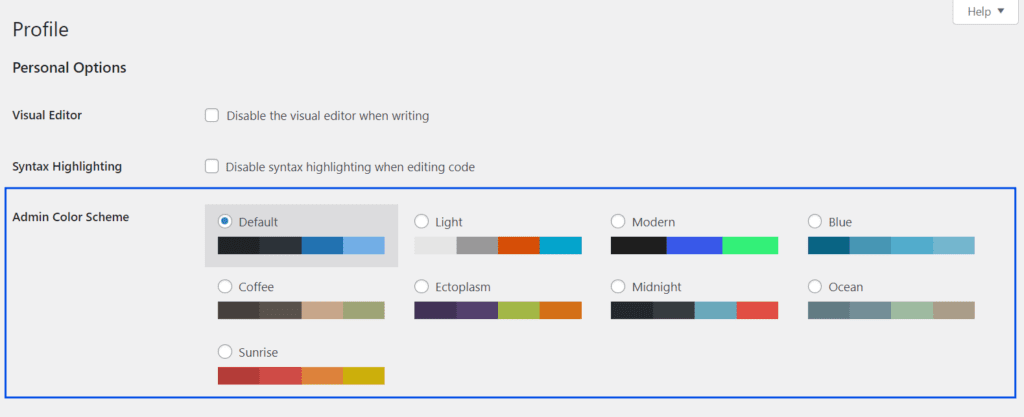
Additionally, there are plugins available that let you apply custom admin themes, offering even more styling options for your dashboard.
Additional customization options for the WordPress admin
Customizing the WordPress admin dashboard can be especially useful when working with clients. Also, if you simply want a cleaner, more personalized workspace. Here are a few ways you can customize your WP admin area:
- Hide or rearrange items in the admin menu.
- Use drag-and-drop to organize dashboard elements.
- Disable the toolbar entirely or limit it to specific user roles.
- Add your branding with custom logos and colors.
- Build custom menus unique to your site’s needs.
Here are some free plugins that you can check for additional WordPress admin customization: Adminimize, Admin Menu Editor and Absolutely Glamorous Custom Admin.
Understanding the WordPress toolbar
The WordPress toolbar (previously known as the Admin Bar) is a slim bar that appears at the top of your screen when you’re logged into WordPress. It is visible both on your live site and within the admin dashboard. Regular visitors won’t see this toolbar; only logged-in users will see this floating bar across all pages on the site:

This toolbar includes a variety of menu options that allow you to quickly perform actions from anywhere on your site.
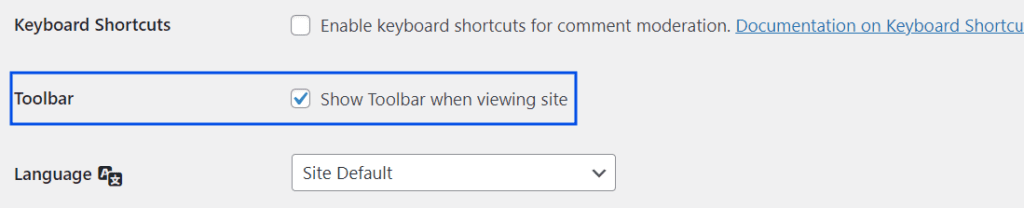
Can you disable the WordPress toolbar?
Yes, you can. If you prefer not to see the toolbar when viewing your site, go to Users → Profile and uncheck the Show toolbar when viewing site box.
Actual WordPress dashboard
We’ve introduced the navigation menus in the WordPress backend. Now let’s dive into the actual WordPress Dashboard.

- Welcome to the WordPress box: This box has quick links to take you to various areas in the backend of your site. Feel free to dismiss this box as it takes up quite a bit of space.
- Activity: This box shows recent activities such as comments you received, as well as scheduled and recent blog posts.
- At a Glance: Here you can find some statistics for your site such as how many posts and pages you have.
- WordPress News: You can read news about WordPress and see if there are upcoming events near you.
- Quick Draft: This box allows you to quickly type up a draft post which is very handy for noting down ideas.
As we mentioned earlier, this dashboard is basically the control center for your WordPress site. By enabling your plugin’s widgets in the dashboard, you’ll easily get an overview of how your site is performing.
For example, you can quickly check how many contact form entries you get if you use a contact form plugin such as WPForms. To display or remove widgets in the dashboard, find the “Screen options” in the top right corner of your dashboard.
Keep in mind that dashboard widgets can be moved around by clicking and dragging them to a different position. You can also collapse them by clicking the arrow on the top right of the box. This is very convenient as you can arrange widgets according to your needs and usage.
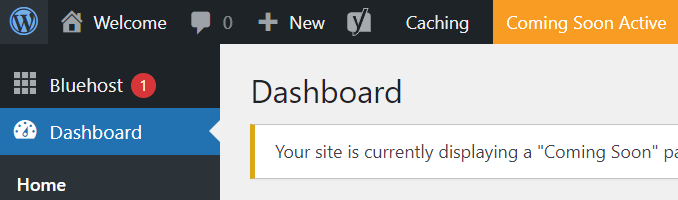
Bluehost hosting dashboard
The Bluehost tab appears only when your website is hosted on a Bluehost plan and built using WordPress as your CMS. Clicking this icon opens the Bluehost dashboard inside your WordPress admin area (not to be confused with the Bluehost Account Manager).

The Bluehost dashboard provides another way for you to navigate, build and make changes to your WordPress site. This is especially helpful for new website owners. We try to make it simpler for you to get started with building your website.
You can see right away in the home tab a list of things you should do for your new site. For instance, if you go to the “Add contact page” section and click on the button, you’ll be taken to a new screen where you can create your page.
Here, Bluehost will also come in and provide you with a bit of assistance by setting up a simple contact form for you. There are also quick tips in the help box, which can be very handy if you’re learning WordPress.
If you scroll down below from the home section, you’ll find the Bluehost account box. Clicking on any of these icons will take you to the corresponding controls in the Bluehost hosting dashboard.

There are other tabs in the dashboard such as:
- Themes: You can browse and purchase premium themes from the Bluehost theme directory. Tip: If you’re looking for an easy-to-use eCommerce theme, we recommend trying out our YITH.
- Plugins: You can browse and purchase premium plugins from the Bluehost plugin directory. Most of the plugins here will cost you money. But there are a few free ones as well.
- Services: Navigate here if you need professional services to help you build your site.
- Staging: You can quickly create a staging site in this tab. A staging site is a copy of your site where you can safely test changes before publishing them to your main site. It gives you a way to try new things, test updates and then deploy them when you’re ready.
- Settings: Some general website settings can be found here. You can set automatic updates as well as manage comments and caching settings.
- Help: As the name suggests, visit this section if you need help from us. You can chat in real-time with us. Next to that, you can request services such as website consulting or marketing and design assistance from Bluehost. And if you scroll down below, you can browse through our resource center for helpful how-to articles and guides.
Want the same guided dashboard experience for your WordPress site? Explore our Bluehost WordPress hosting plans and manage your site, hosting tools and support all from one place.
Final thoughts
We hope you’ll find it a bit easier to navigate your WordPress dashboard after reading this post. It will take some time to get used to all the controls and settings, but that’s totally okay! Keep on practicing, keep on exploring and you’ll get the best out of WordPress in no time.
For any further information or step-by-step guides, refer to the official WordPress Codex or consult with a WordPress expert.
If you have any questions about any aspects of website building, website management, you can access our knowledge base. And our support team is available 24/7 to help with any concerns you have.
FAQs
Yes, you can modify the appearance of the WordPress admin page interface. While there are native options for basic changes, for a more customized look, you may want to use plugins or develop a custom admin theme.
Absolutely. The WP admin toolbar can be disabled for individual users via their profile settings. Simply navigate to “Users” -> “Profile” in the admin panel. Then, uncheck the box that says, “Show Toolbar when viewing site”. If you want to disable it globally or programmatically, there are plugins and code snippets available.
Access to the WordPress admin area is typically restricted to registered users with given user roles and permissions. Visitors or users without proper permissions cannot access it.
There could be various reasons, ranging from incorrect login details, a disabled account, website issues or potential server problems. It’s important to diagnose the issue step-by-step or consult with your hosting provider.
The WordPress admin login URL is usually your website address followed by “/wp-admin” or “/wp-login.php”. This login link takes you to the login screen where you enter your login credentials to gain access. If the default login URL has been changed for security reasons, check with your administrator or hosting provider to get the correct login link.
You can use the password reset feature available on the login screen. Click the “Lost your password?” link and enter your username or email address associated with your WordPress installation. Follow the instructions sent to your email to reset your WordPress password and regain access.
Yes, many hosting providers allow you to manage multiple WordPress websites through a centralized control panel. This makes it easier to access the admin dashboard of each site without needing separate login credentials for each.
Security plugins can limit the number of login attempts, block IP addresses showing suspicious behavior and add features like two-factor authentication. These measures help protect your site’s security and reduce the risk of unauthorized access through brute force attacks.
WordPress plugins add new features and tools to the admin area, allowing you to extend your site’s functionality without coding. They can help with SEO, security, backups, design customization and much more, making the admin panel more powerful and user-friendly.
To prevent future login issues, use strong, unique passwords, keep your WordPress installation and plugins updated, enable two-factor authentication and regularly back up your site. Also, avoid sharing login credentials with other users unless necessary and monitor login attempts for suspicious activity.
A slow-loading WordPress admin dashboard can be caused by excessive server resource usage, often due to too many active plugins or outdated PHP versions. Try deactivating plugins one by one to identify any causing issues and ensure your hosting environment uses a recent PHP version for optimal performance.
If you can’t find the default login URL, try appending “/wp-admin”, “/admin” or “/login” to your website’s address. If these don’t work, a security plugin may have changed the URL. In that case, contact your site’s support team or access your hosting control panel to retrieve or reset the WordPress login page link.
Yes, WordPress includes user roles and permissions that allow other users to access the same tools or a limited set of features in the admin panel based on their assigned role. This helps you control who can manage content, plugins, settings and other aspects of your site.
The WordPress editor is accessible from the WordPress admin dashboard when creating or editing posts and pages. It allows you to add and format content, insert media and customize layouts using blocks or classic editing tools, providing a user-friendly way to manage your site’s content.

Write A Comment