Key highlights
- Learn when to disable WordPress indexing and when to avoid it so you do not accidentally wipe out organic traffic on a live site.
- Understand what the Discourage Search Engines setting actually changes and why it reduces indexing without securing your site.
- Explore practical ways to exclude your WordPress site or specific pages from Google using WordPress settings, SEO plugins, noindex, and robots.txt.
- Know how to confirm indexing is disabled by checking your WordPress settings, robots.txt output, and page source for robots directives.
- Uncover what to do if your site still shows up in search and how to safely turn indexing back on without creating SEO issues later.
If you’re Googling how to exclude a WordPress site from Google, chances are you’re in one of these situations: your site is still in progress, you’re working on a staging copy, you’re rebuilding a redesign, or you’ve got content that simply shouldn’t show up in search yet. And the last thing you want is a half-finished homepage or a duplicate staging domain.
WordPress gives you a built-in switch to discourage search engines from indexing your site, and it takes about a minute to turn on. The important part is knowing what that switch really does and what it doesn’t. People can still access your pages directly if they have the URL, and search engines don’t treat it like a hard “lock.”
In this guide, you’ll learn the fastest way to disable indexing in WordPress, plus stronger options and what to do if your site still appears in results after you flip the setting. Let’s take a closer look.
What does “Discourage Search Engines” actually do?
When you tick “Discourage search engines from indexing this site” in WordPress, you’re telling crawlers like Googlebot and Bingbot: “Don’t crawl or index this site right now.” In practical terms, WordPress signals this mainly through robots directives, which ask bots to stay out (often showing up in your robots.txt as a sitewide block.
Under the hood, WordPress implements this mainly through robots.txt, the standardized instructions search engines use to decide what they’re allowed to crawl. In many setups, you’ll see the impact reflected in your robots.txt output. That means search engines are asked to back off, which helps prevent unfinished pages from being picked up and displayed publicly.
Indexing vs ranking
People often say “Google isn’t ranking my site,” when the real problem is that Google hasn’t indexed it (or has stopped indexing parts of it). These are two different steps:
- Indexing means Google has discovered a page and stored it in its database, so it’s eligible to appear in search results at all. If a page isn’t indexed, it won’t show up, no matter how good the content is.
- Ranking is what happens after indexing. Google decides where that indexed page should appear for a specific query based on relevance and quality signals.
So when you enable “Discourage search engines from indexing this site,” you’re not “lowering rankings,” you’re telling search engines not to add your pages to their index in the first place (which prevents them from appearing in search results).
Also read: How to Get Google to Index Your Website in 2026 (Step-by-Step Guide)
What WordPress changes when you enable it?
When you turn on “Discourage search engines from indexing this site,” WordPress doesn’t “hide” your pages or put them behind a wall, it simply starts publishing stronger signals to crawlers that they shouldn’t crawl your site.
Here’s what changes when you enable it:
- WordPress updates your crawler instructions. Your site will typically show a “don’t crawl” rule in
yourdomain.com/robots.txt(oftenDisallow: /). - Search engines back off. Since bots are told not to crawl, they may stop finding new pages and updating old ones so your site is less likely to appear in search results over time.
- Visitors can still access the site. This doesn’t password-protect anything; it only affects search engine crawling/indexing.
Robots directives are not security controls; they guide crawler behavior but don’t restrict user access. If you need true privacy, you’ll want authentication/password protection on top of (or instead of) “discourage indexing.”
Also read: Change index.html File & Set a Custom Homepage in WordPress
When you should (and shouldn’t) disable search engine indexing?
Disabling indexing is a smart move in the right situation and a traffic killer in the wrong one. Use it when you’re protecting an unfinished or duplicate version of your site from appearing in Google but avoid it on any site you expect to earn organic traffic from right now.
Good use cases
- Staging, development or redesign sites where pages are incomplete and you don’t want them publicly discoverable in search.
- Pre-launch websites (new domain, new build) while you’re still testing layouts, content, tracking or checkout flows.
- Temporary private projects where search visibility isn’t a goal (internal docs, limited-audience pages). Just remember: this still isn’t real access control.
- Duplicate copies of a live site (For example, a clone made for testing) to avoid search engines finding two versions of the same content.
When NOT to use it
- Your live production site (or any site that depends on SEO). Leaving indexing disabled can wipe out search visibility and stall growth.
- When you’re trying to “hide” sensitive content. Disabling indexing doesn’t protect pages with a password—anyone with the URL can still access them. Use authentication for real privacy.
- As a quick fix for low-quality pages you still need users to reach from Google. In those cases, it’s usually better to noindex specific pages rather than shutting off the whole site.
Also read: Index of Error Website: How to Fix & Prevent It
How to disable search engine indexing in WordPress?
If your goal is to exclude your WordPress site from Google search results, you have a few ways to do it, and the “right” one depends on whether you’re hiding the entire site (common for staging/pre-launch) or only specific pages.
The built-in WordPress setting is the fastest place to start, but you can also use SEO plugins for more control and add noindex rules when you only want certain URLs kept out of search.
Method 1: Disable indexing using WordPress settings
This is the quickest way to tell search engines not to index your WordPress site. It is most useful for a staging site, a site under redesign, or anything you do not want showing up in Google yet.
To disable search engine indexing using WordPress settings, log in to your WordPress dashboard and go to Settings, then Reading. Scroll to the Search engine visibility section, tick the option that says Discourage search engines from indexing this site, then click Save Changes. This is the quickest option and it works well for staging sites, redesigns, and pre-launch builds where you do not want unfinished pages appearing in Google yet.
After saving, you can do a quick check by opening https://yourdomain.com/robots.txt in your browser. On many WordPress sites, enabling this setting results in a sitewide rule that tells crawlers not to crawl the site, often shown as Disallow: /.
Keep in mind, this does not secure your site or hide it behind a password. It simply asks search engines not to index it, so anyone with the URL can still access the site.
Also read: Mastering WordPress SEO: Essential Tips for Optimal Site Performance
Method 2: Disable indexing using an SEO plugin
Yoast SEO is one of the simplest ways to control search engine indexing in WordPress without editing theme files. You can use it to stop Google from indexing a single page, a group of pages, or entire sections like archives so your site stays focused on the pages you actually want showing up in search.
- Install Yoast SEO from the WordPress plugin directory and activate it.

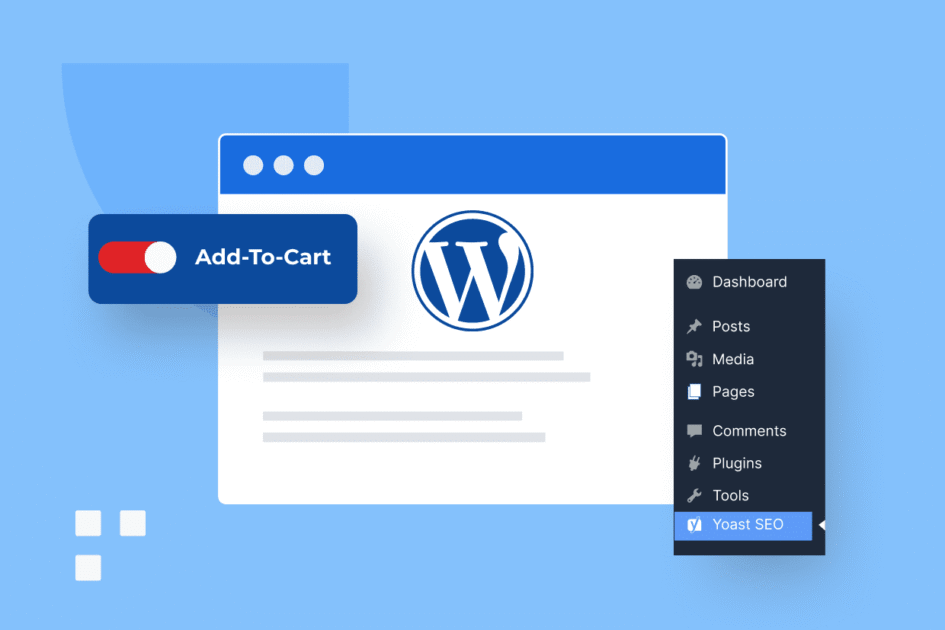
- Navigate to Pages > All Pages. Here find the ‘Add to Cart’ Page, and click edit.

- Under “Advanced,” set “Allow search engines to show this page in search results” to “No.”

- Save changes to finalize settings.
Yoast SEO also offers meta robots settings, enhancing control over your site’s index.
By excluding WooCommerce cart URLs, Yoast ensures that only essential pages get indexed, focusing on product categories and posts.
If you are using Bluehost, Yoast is already part of the toolkit you can add to your site. The free version covers the essentials like basic SEO analysis and optimizing around a single focus keyword, which is enough for many smaller sites and simple setups.
If you want more automation and stronger SEO controls, Yoast SEO Premium adds features like multi-keyword optimization, internal linking suggestions, a redirect manager to help prevent 404 issues, and AI-powered help for titles and meta descriptions, plus access to support. That is why a lot of site owners start with free and upgrade when they are ready to grow traffic and reduce manual SEO work.
Method 3: Use noindex when you only want to hide specific pages
Noindex is a good fit for pages like thank you pages, login pages, internal search results, account pages or any temporary campaign page you do not want showing up long term. It is also useful for thin pages that add little SEO value but still need to exist for visitors.
In WordPress, the simplest way to add noindex is with an SEO plugin that lets you toggle it per page or per section. If you prefer a manual approach, developers can also add noindex through a robots meta tag or an X-Robots-Tag header, but most site owners should stick to plugin settings to avoid mistakes.

In Yoast SEO, you can edit the page, open the Yoast settings, go to the advanced or robots options and set the page so it is not allowed to appear in search results, then update the page.

One thing to remember is that Google needs to be able to crawl the page to see the noindex directive. If you block the page in robots.txt, Google may not see the noindex tag, which can slow down the page dropping out of results.
Also read: What is a Robots.txt File? Complete Guide & Best Practices
Method 4: Use robots.txt to control crawling
The important thing to know is that robots.txt does not work like noindex. Blocking a URL in robots.txt can stop Google from crawling it but the URL may still show up in search results in some cases, especially if other pages link to it. That is why robots.txt is not the best tool if your only goal is to remove something from Google completely. (support.google.com)
A common WordPress robots.txt setup blocks the admin area but keeps the admin AJAX endpoint available since some themes and plugins rely on it. It usually looks like this
User-agent: *
Disallow: /wp-admin/
Allow: /wp-admin/admin-ajax.php
If you plan to use robots.txt, keep it simple and double-check you did not block important sections by accident. If you already added noindex to a page, avoid blocking it in robots.txt because Google needs to crawl the page to see the noindex directive.
Also read: Optimizing for AI Search with llms.txt and Yoast SEO
How to confirm indexing is disabled
After you change indexing settings, do a quick sanity check. The goal is to make sure WordPress is sending the right signals to crawlers and that you did not only change something in the dashboard without it showing up on the public site.
1. Check WordPress setting
Go to your WordPress dashboard and open Settings, then Reading. Find Search engine visibility and make sure the checkbox for “Discourage search engines from indexing this site” matches what you want.
If it is checked, WordPress is telling search engines to stay away from the whole site. If it is not checked, your site is allowed to be indexed.
Also read: How to Optimize WordPress Website Speed & Performance
2. Check robots.txt in the browser
Type https://yourdomain.com/robots.txt in your browser. This file shows the crawl rules your site is giving to bots. When the discourage setting is on, many WordPress setups show a sitewide block here, often Disallow: /.
If you do not see crawl rules you expect, a plugin or your host may be generating a different robots.txt.
3. Check page source for robots meta directives
Open the page you are trying to hide, right-click, then choose View page source. Use find and search for “robots”. If the page is set to noindex through an SEO plugin, you should see something like meta name="robots" content="noindex"
in the head section. If you do not see noindex, the page is still eligible to appear in search results.
What to do if results still show up?
It is normal to still see your site or a few URLs in Google for a while after you change indexing settings. Google needs to crawl the site again before it can update what it shows. Here is what to do, in order.
- Confirm what you changed is visible to bots: Open
yourdomain.com/robots.txtand make sure it is actually showing the crawl rules you expect. If you turned on the WordPress discourage setting, many setups show a sitewide block likeDisallow: /. If robots.txt does not reflect your change, a plugin or host setting may be overriding it. - Check whether the URL is blocked by robots.txt: If you are using noindex on a page, do not block that page in robots.txt. Google needs to crawl the page to see the noindex directive. If crawling is blocked, Google may still list the URL in some cases if it finds links to it, and removal can take longer.
- Use Google Search Console to request a recrawl: If you have Search Console set up, use URL Inspection on a page that is still showing and request a recrawl. This is the fastest way to get Google to revisit a URL after you have changed indexing signals.
- Use the Removals tool if you need it gone quickly: If something is live in search and you need it hidden fast, use the Search Console Removals tool. This can hide a URL from results quickly, but it is temporary, about six months, unless you also keep it blocked or noindexed on your site.
Even after all of the above, you may still see older listings for a bit. Recheck after Google has recrawled. If the setting is correct and the page is crawlable with noindex, it should drop over time.
Also read: Google Search Console verification: How to verify your website
How to re-enable indexing without damaging SEO?
Turning indexing back on is simple, but it is also where people accidentally break SEO. The goal is to remove the blocks you added and make sure Google can crawl the site normally again.
- Turn off the WordPress discourage setting: Go to WordPress dashboard, Settings, Reading, then untick “Discourage search engines from indexing this site” and save changes.
- Check robots.txt is not blocking your site: Open
https://yourdomain.com/robots.txtand look for rules that block everything, likeDisallow: /. Remove or adjust them so Google can crawl the pages you want indexed. - Remove any sitewide noindex from your SEO plugin: If you used an SEO plugin to noindex the whole site or large sections, turn that off before you go live. Then spot check key content types and archives so you do not leave important sections set to noindex by accident.
- Confirm your key pages are indexable: Open your homepage and a couple of important landing pages, view page source, and search for “robots”. Make sure you do not see
noindexon pages that should rank. If you use Search Console, URL Inspection is an even cleaner check. - Nudge Google to pick up the change: In Search Console, submit your sitemap and request indexing for a few important URLs so Google recrawls sooner.
Also read: Yoast SEO Checker: Features That Boost Your Rankings
Troubleshooting: “Why is my site still indexed / not disappearing?
Even after implementing steps to exclude the “Add to Cart” page, you may encounter issues where the page still appears in search results.
Indexing errors can occur for several reasons, ranging from caching issues to misconfigured settings. Here are common indexing errors and solutions to fix them effectively.
1. Cached pages in search results
Google may show cached or outdated versions of your site’s pages. This occurs when Google hasn’t re-crawled your website since the last update, leading to discrepancies between your settings and what’s displayed in search results.
Clearing the page from Google’s cache usually resolves this issue. Use Google Search Console’s Remove URLs tool to temporarily hide the page, which removes it from search results until Google re-crawls your site.
After using this tool, re-check the indexing settings for your WooCommerce cart page to confirm they’re accurate.
2. Misconfigured robots.txt rules
Errors in the robots.txt file can cause Google to ignore your desired indexing rules.
Check that your robots.txt file includes a clear disallow directive, such as Disallow: /your-add-to-cart-page/. (As stated above)
Even a tiny error or extra character can prevent search engines from following your instructions. Ensure the robots.txt settings are aligned with other noindex commands, as conflicts may confuse crawlers.
Verifying your robots.txt file helps search engines navigate your site according to your SEO goals.
Also read: Robots.txt Disallow Explained: Syntax, Use Cases & SEO Best Practices
3. Conflicting SEO plugins or settings
Using multiple plugins or settings to control indexing can lead to conflicts.
For example, Yoast SEO might apply “noindex” while another plugin overrides it, causing indexing errors.
Identify which plugin should handle indexing and disable other conflicting settings if plugins conflict. Some WooCommerce sites use multiple SEO tools, but limiting indexing controls to one plugin often prevents these conflicts.
Test your settings in a staging environment before changing your live site.
4. Googlebot or other crawler issues
Occasionally, indexing issues may stem from crawler-specific behaviours. Googlebot, for example, may have difficulties with specific page formats or parameters.
Check that your page URLs and parameters are compatible with search engine requirements. Adjusting parameters or simplifying URLs can help Googlebot accurately interpret your page indexing settings.
Review Google’s guidelines on preferred URL formats if issues persist to ensure optimal compatibility.
5. Improper meta-robot setup
If you’ve added a meta robots tag to the “Add to Cart” page, verify it’s correctly placed in the section.
Errors in tag placement or syntax can cause search engines to overlook the “noindex” directive. If you’re using a plugin, double-check that the plugin has correctly applied the tag across various pages.
Meta-robot tag placement issues should be resolved promptly, as they directly impact indexing control.
Final thoughts
Disabling search engine indexing in WordPress is one of those changes that looks tiny but can completely change how your site shows up on Google. Once you are done keeping search engines out, the next challenge is making sure the right pages get found and perform well.
Yoast SEO Premium goes beyond basic checks by helping you optimize for multiple keywords, spot internal linking opportunities, clean up broken paths with a redirect manager and speed up day-to-day optimization with AI support for titles and meta descriptions.
If you are building on Bluehost, you can add Yoast SEO Premium directly through Bluehost and use it to move from indexing control to consistent, scalable SEO improvements.
Get Yoast SEO Premium on Bluehost and start turning your best pages into search ready pages.
FAQs
How do I disable search engine indexing in WordPress?
Go to your WordPress dashboard, open Settings, then Reading, and tick Discourage search engines from indexing this site, then save changes. This tells crawlers not to crawl or index your site.
Does “Discourage search engines from indexing this site” block Google completely?
No. It asks search engines not to crawl or index your site, but it does not password-protect anything. People can still visit your site if they have the URL.
How do I stop Google from indexing specific pages in WordPress without hiding my whole site?
Use noindex on the pages you want hidden, such as thank you pages, login pages, internal search results, or account pages. The easiest way is through an SEO plugin that lets you toggle noindex per page.
Why is my WordPress site still showing on Google after I disabled indexing?
Google may not have recrawled your site yet. Also, check that your robots.txt and page source reflect your changes. If you blocked crawling in robots.txt, Google may not be able to see a noindex directiv,e which can delay removal.
What is the safest way to re enable indexing after a staging site or redesign?
Untick the discourage setting, confirm robots.txt is not blocking the site, remove any sitewide noindex settings from your SEO plugin, and then check a few key pages to confirm they are indexable before you promote the site.


Write A Comment