
Key highlights
- Google Tag Manager (GTM) simplifies adding and managing tracking codes on any WordPress website without editing theme files.
- GTM helps manage Google Analytics, Facebook Pixel, Google Ads and other tags efficiently from a centralized dashboard.
- WordPress users benefit from faster workflows, privacy-first tag deployment and improved marketing insights using GTM.
- Integrating GTM with Bluehost ensures fast-loading, optimized and error-free tracking through built-in caching and CDN support.
- Install, test and optimize Google Tag Manager in WordPress to improve tracking accuracy and marketing performance.
Introduction
Want to track your WordPress website’s performance without adding endless lines of code? That’s where Google Tag Manager (GTM) comes in. It lets you manage tracking tools like Google Analytics, Facebook Pixel and other marketing tags all from a single, centralized dashboard.
If you’re using WordPress, integrating GTM is simpler than you might think. Whether you’re a marketer, developer or small business owner, GTM gives you full control over tracking and helps improve site performance.
At Bluehost, we make it easy to install Google Tag Manager to your WordPress site, whether you prefer using a Google Tag Manager plugin or inserting the GTM container code snippets manually.
In this guide, we will walk you through the process step-by-step, so you can install Google Tag Manager in WordPress confidently and correctly. But first, let’s start with understanding what Google Tag Manager is.
What is Google Tag Manager (GTM)?
Google Tag Manager (GTM) is a free tool from Google that lets you easily add and manage tracking codes called “tags” on your WordPress website, without having to edit the site’s code every time.
It’s especially useful for WordPress users who want better control over their Google Analytics, conversion tracking and other tracking tools, all from one central place.
It removes the need to manually insert multiple tracking pixels or custom code snippets across your WordPress site. Instead, you can control everything from a single Google Tag Manager dashboard.
How does GTM work in a WordPress environment?
Integrating Google Tag Manager (GTM) into your WordPress site gives you a centralized way to manage tracking tools without editing your site’s JavaScript code or manually placing tracking pixels each time.
Here’s how it all fits together.
1. GTM containers and tags explained
Once you create a Google Tag Manager account, you’ll set up a GTM container, a snippet of code installed on your WordPress website. This container holds all your tags (like Google Analytics), triggers (when tags should fire) and variables (what data to track).
Think of it like a toolbox: GTM stores all your tools (tags) in one place and lets you decide when and how to use them.
2. GTM vs Manual code placement
Without GTM, you’d have to manually insert individual tracking codes into your theme files or rely on plugins often time-consuming and error prone.
Key benefits of using a tag management system
- No need to edit the WordPress theme files for every new tracking tool.
- Faster website updates and marketing campaign rollouts.
- Reduced chances of code errors or broken tracking codes.
- Built-in version control and debugging tools.
- Improved site performance by controlling when and how tags load.
With GTM, you can install a single GTM code snippet and manage all your tracking codes through the Google Tag Manager dashboard. It’s faster, cleaner and easier to scale your WordPress Google Tag Manager code setup.
By simplifying code management and improving flexibility, GTM has become a must-have tool for modern websites. But why is it especially important for WordPress users in 2025? Let’s dive deeper.
Why does Google Tag Manager matter for WordPress in 2025?
As websites grow more complex and digital privacy standards evolve, managing multiple tracking codes the old-fashioned way just isn’t scalable anymore.
Google Tag Manager (GTM) has become essential for WordPress website owners who want to stay agile, data-driven and compliant without relying heavily on developers.
1. Increasing complexity of web tracking requirements
Today’s websites often use a combination of tools like Google Analytics 4, Meta Pixel, LinkedIn Insights, conversion tracking and heatmaps. Each requires different code snippets and configurations.
GTM centralizes these tracking pixels, making it easier to manage everything without cluttering your theme files or inserting custom HTML repeatedly.
2. The rise of privacy-first tag management
In 2025, stricter regulations like GDPR, CCPA and global data privacy laws make it essential to manage how and when tags. GTM supports conditional tag deployment, so you can delay or block tracking pixels until users provide consent. This helps your site stay compliant while still collecting meaningful website analytics.
3. Faster workflow and centralized code management
With GTM, you can control all tracking tools from one centralized Google Tag Manager dashboard. Instead of manually updating your WordPress theme files or inserting JavaScript, you simply modify or publish tags in GTM. This streamlines your workflow, especially during marketing campaigns or A/B tests.
4. Flexible deployment for marketing and analytics tags
You can configure triggers to fire tags based on user behavior like clicking a button, visiting a page or scrolling to a section. This flexibility helps run targeted campaigns and gather meaningful website analytics. GTM also allows you to connect Google Analytics, Google Ads and other conversion tracking tools easily.
5. Easier maintenance without developer dependence
Website owners no longer need to rely on developers to manage tracking codes. GTM’s user-friendly interface allows marketers, analysts and business owners to make real-time updates, no manual coding, no delays and less risk of breaking your WordPress site.
Mastering these key advantages of Google Tag Manager will set you up for success. Now, let’s go through what you need before you start the actual installation on your WordPress site.
What do you need before installing GTM in WordPress?
Before you install Google Tag Manager plugin in WordPress, it’s important to set up a few key components. These steps will ensure your integration is smooth, effective and aligned with your tracking goals.
1. Set up a Google Tag Manager account
To get started and add Google Tag Manager, visit tagmanager.google.com and sign in with your Google account. Click on “Create Account,” enter your business name, country and choose Web as the target platform to create account. This account will store your GTM containers and tags.
2. Create your first GTM container
Once your account is set up, create a GTM container, this is where you’ll manage all your tracking codes and triggers. Name your container (typically after your WordPress website), choose “Web” as the platform and GTM will generate two GTM code snippets to add to your WordPress dashboard during the setup.
3. Identify the tracking tags you want to use
Knowing which advanced tracking features, you plan to use will help you configure your GTM setup more efficiently. Below are some of the most commonly used tracking tags for WordPress sites:
Google Analytics 4 (GA4)
Track user behaviors link such as clicks, page views and engagement metrics with GA4. If you want to connect to Google Analytics 4, create a property in your Google Analytics account and get your Measurement ID, which you’ll need to configure as a tag in GTM.
Google Ads conversion tracking
If you’re running Google Ads, use GTM to track conversion tracking and improve ad performance. You’ll need to generate a Conversion ID and Label from your Google Ads account to connect it properly.
Meta Pixel / Facebook Events
Use the Meta Pixel (formerly Facebook Pixel) to track user actions and retarget visitors via Facebook Ads. Implement this via a custom HTML tag in GTM or through Meta’s Events Manager.
Custom event or HTML tags
If you only need to track events for specific actions like form submissions, scroll tracking or button clicks? GTM allows you to add custom event tags or custom HTML snippets for full flexibility in your tag manager setup.
Once you’ve gathered all the essentials, you’re ready to move on to the actual process of adding Google Tag Manager to your WordPress site.
How to add Google Tag Manager to WordPress (Step-by-step instructions)
There are a few different ways to add Google Tag Manager (GTM) to your WordPress site. Whether you’re comfortable editing theme files or prefer using WordPress plugins, each method works, just choose the one that best fits your comfort level and website setup.
Method 1: Manual insertion via theme files
If you’re confident editing your WordPress theme, this method gives you full control and works well for those who prefer a hands-on approach.
Where to paste GTM header and body snippets
After creating your GTM container, Google provides two pieces of GTM code:
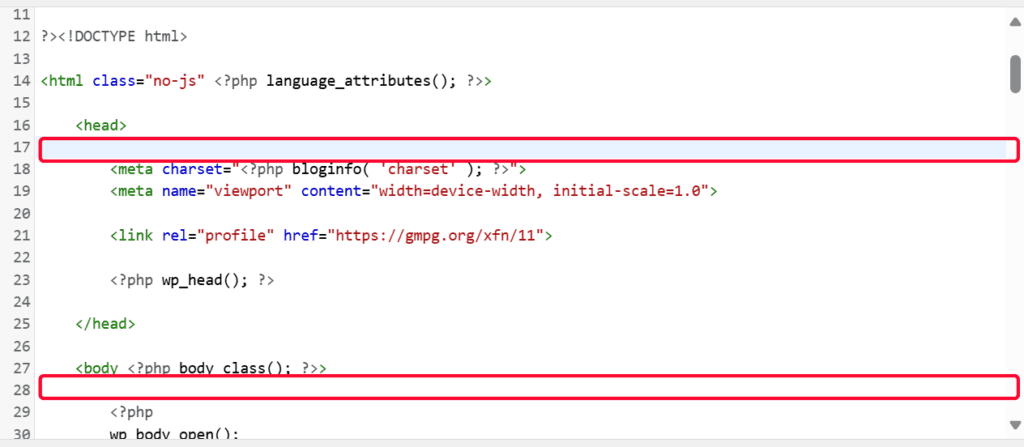
- Header snippet: paste this right after the <head> tag
- Body snippet: paste this immediately after the opening <body> tag
To add these:
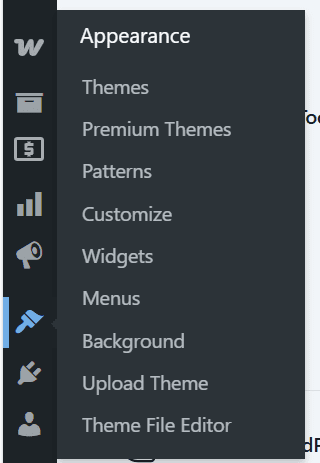
- From your WordPress dashboard, go to Appearance > Theme File Editor
- Open the header.php file
- Paste the header snippet after <head> and the body snippet after <body>
This method ensures your tracking codes are directly embedded into your WordPress theme, ideal for precise tag manager placement.
Precautions for theme updates and child themes
Editing theme files directly can result in your Google Tag Manager code being overwritten during theme updates. To avoid losing your configuration:
- Use a child theme to preserve your changes
- Or consider a plugin-based method using a trusted Google Tag Manager WordPress plugin for safer, long-term integration
Method 2: Using a GTM WordPress plugin (Beginner-friendly)
This method is perfect for users who prefer a code-free setup and want a simplified process for Google Tag Manager WordPress integration.
Best plugins in 2025 (DuracellTomi, GTM4WP, etc.)
- DuracellTomi’s Google Tag Manager for WordPress (GTM4WP): The most popular Google Tag Manager WordPress plugin.
- Site Kit by Google: Official plugin for connecting Google tools including GTM, GA4 and Search Console.
- Insert Headers and Footers: Simple and effective for adding code snippets like GTM.
These plugins help you add Google Tag Manager ID to your WordPress website with just a few clicks, no need to edit theme files or insert raw JavaScript.
Plugin configuration steps
- Install and activate your preferred GTM plugin from the WordPress plugin library.
- Go to the plugin settings in your WordPress dashboard.
- Paste your GTM Container ID (e.g., GTM-XXXXXXX).
- Save changes: the plugin will automatically insert the GTM code in the appropriate sections of your site.
This is the safest and easiest method for most WordPress users, especially beginners who want to manage tracking pixels, conversion tracking or marketing tags without editing code.
Method 3: Adding GTM via the Bluehost hosting dashboard
If you host your WordPress site with us at Bluehost, we make it even easier to add Google Tag Manager without touching complex code.
Where to insert scripts in the Bluehost control panel
- Log in to your Bluehost dashboard

2. Navigate to website > edit site
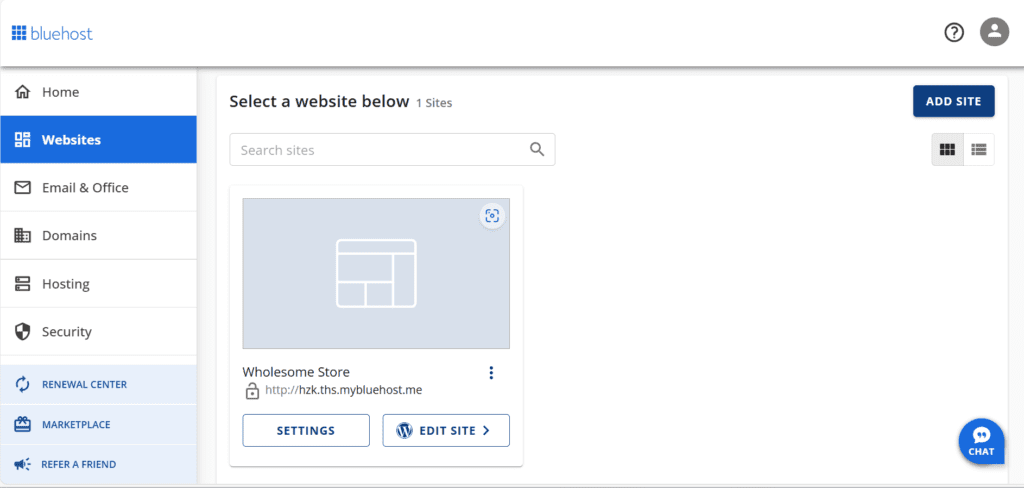
3. It will navigate to the WordPress dashboard

4. From your WordPress dashboard, go to Appearance > Theme File Editor
5. Open the header.php file

6. Paste the header snippet after <head> and the body snippet after <body>
Alternatively, some users prefer to use WordPress plugins or custom HTML widgets to insert GTM scripts using Bluehost’s built-in code injection tools, great for avoiding manual edits in theme files.
Advantages of GTM setup on Bluehost Hosting
- Our optimized WordPress hosting ensures your GTM code loads fast and performs reliably.
- Built-in caching and CDN compatibility support smooth delivery of all your tracking pixels and tags.
- We support full plugin integration, so your Google Tag Manager plugin works without issues.
- Our 24/7 support team is always available if you need help verifying your setup or troubleshooting errors.
Whether you’re managing conversion tracking, eCommerce tracking or other advanced tracking features, we give you complete control to set up Google Tag Manager securely and efficiently.
After successfully adding Google Tag Manager to your WordPress site, the next crucial step is to verify and test your setup to ensure everything works smoothly.
Also read: Bluehost GTM WordPress Hosting
How to verify and test your GTM setup?
After you install the Google Tag Manager container on your WordPress website, it’s essential to test your setup to ensure that your tracking codes and tags are firing correctly.
A fully functional GTM container helps prevent data loss and ensures all your marketing tags are working as expected.
1. Use Google Tag Assistant Chrome extension
One of the simplest ways to verify if your Google Tag Manager code is firing is by using the new Tag Assistant Chrome extension by Google. Here’s how:
- Install the Tag Assistant extension from the Chrome Web Store.
- Visit your WordPress site in a new tab.
- Click on the Tag Assistant icon in your browser and enable recording.
- Refresh the page and check for your GTM container ID and tags.
If installed correctly, you’ll see your container ID and a list of active tracking tags on that page.
2. Preview mode in GTM: How it works
Google Tag Manager has a built-in Preview Mode that lets you test GTM events and triggers before going live.
- In your GTM dashboard, click Preview (top right).
- Enter your WordPress site’s URL and click Connect.
- A new tab opens with a debug console at the bottom, showing which tags are firing.
This helps identify misconfigured tags, missing trigger rules or other tracking issues before you publish updates.
3. Common mistakes in verification
Even when using the right tools, issues may arise. Below are common problems and how to fix them:
Misplaced code
If you added the GTM code snippets manually to your WordPress theme files, verify the placement:
- The header snippet must go just after the <head> tag.
- The body snippet must be placed immediately after the opening <body> tag.
Incorrect placement can stop tracking tools from functioning properly.
Plugin conflicts
Some WordPress plugins, especially those related to security, performance or page builders, may block or alter GTM scripts. Disable plugins one by one to identify any conflicts.
Caching and CDN delays
Caching plugins or Content Delivery Networks (CDNs) can delay tag updates. Always:
- Clear your WordPress cache
- Purge your CDN cache
- Refresh your browser cache
This ensures you’re testing the latest version of your site with all tracking features active.
Once your GTM setup is tested and running properly, it’s equally important to have the right hosting environment to ensure optimal tag performance — and that’s where Bluehost comes in.
Why should you use Bluehost for GTM in WordPress?
If you’re using Google Tag Manager with WordPress, your WordPress hosting environment plays a key role in how well your tracking codes and tags perform. Here’s how we make it easier at Bluehost.

1. Performance-optimized WordPress environment
We power your WordPress site with a high-performance infrastructure designed for speed and reliability. That means faster page load times for both users and the Google Tag Manager container. It ensures that all your tracking features and marketing tags fire smoothly. You won’t face lag or miss valuable user interactions.
2. One-click plugin installations
Need to manage tags or to install plugins using the Google Tag Manager plugin, such as GTM4WP or Site Kit by Google? You can do it in just a few clicks from your WordPress dashboard or Bluehost panel. We make plugin settings and installations easy, so you can quickly start tracking form conversion tracking, click events or ecommerce transactions.
3. Built-in tools to boost tracking accuracy
Our platform includes built-in caching and Content Delivery Network (CDN) features, which are fully compatible with tracking pixels and JavaScript code used by GTM.
You can easily clear cache, configure CDN exceptions and make sure your GTM tags and analytics tools run without delay or error.
4. Simplifying analytics setup for beginners
We know diving into analytics tools like Google Tag Manager can feel overwhelming at first, so we’ve designed our WordPress hosting platform to make setup simple and stress-free.
5. Supportive documentation and 24/7 help
Whether you’re installing Google Tag Manager in WordPress for the first time or troubleshooting a tracking tag, we’re here to help. Our expert support team is available 24/7 and we offer step-by-step documentation that covers everything, from inserting GTM code snippets to configuring plugin settings.
6. Seamless code integration with fast loading times
When you insert GTM scripts whether manually, via the theme file editor or through a WordPress plugin, we make sure your site’s architecture supports fast, accurate and reliable delivery. Our system is built to handle tracking pixels, JavaScript code and complex tracking features without slowing down your WordPress website.
With Bluehost, you’re not just getting hosting, you’re getting a powerful platform optimized for Google Tag Manager WordPress integration, advanced website analytics and whatever tools you need to grow smarter.
How to troubleshoot Google Tag Manager issues in WordPress?
Even with the right Google Tag Manager WordPress setup, things can go wrong. If your tags aren’t firing or your events aren’t being tracked in Google Analytics 4 (GA4), don’t worry. Most issues can be resolved quickly. A few simple checks using GTM’s built-in tracking tools are usually enough to fix them.
1. GTM code not firing? Here’s what to check
If your GTM container code isn’t firing on your WordPress site, the issue might stem from one of the following:
Plugin conflicts
Some WordPress plugins especially those for performance optimization, security or design can interfere with tracking pixels or GTM scripts. Disable plugins one at a time to find the source. If you’re using the GTM4WP plugin, double-check that it’s updated and that your plugin settings are properly configured.
Caching plugins or CDN interference
Caching tools and Content Delivery Networks (CDNs) like Cloudflare can block GTM updates. After editing your GTM container, clear your WordPress cache, purge the CDN and refresh your browser. At Bluehost, we make this easy with built-in caching options accessible right from your WordPress dashboard.
Theme structure and header/footer issues
If you’ve manually inserted your Google Tag Manager code, ensure it’s placed correctly in the <head> and after the opening <body> the Google Tag Manager terms using the theme file editor. Some WordPress themes may require custom integration or support plugins like Insert Headers and the Footers plugin for accurate placement.
2. GTM events not tracking in GA4
If your GTM configuration looks right but events aren’t showing in your Google Analytics account, try the following:
Missing trigger configuration
Each GTM event tag needs a trigger, like a pageview, scroll, form conversion tracking or click. Without it, nothing fires. Check that your Google Analytics event tags are set up with the correct triggers.
Real-time debugging tools for 2025
Use Preview Mode in GTM or Chrome’s new Tag Assistant extension to verify in real time. These tracking tools reveal which tags are firing, misfiring or blocked making it easier to fine-tune your tracking setup without editing code or tracking pixels.
With your GTM properly integrated and optimized, you’re now ready to fully leverage its power. Let’s wrap up with some final thoughts and how to make the most of your GTM and WordPress setup going forward.
Final thoughts
Integrating Google with the new Tag and Manager container gives you centralized control over all your tracking tools from simplified tag setup to advanced website analytics. GTM helps you manage everything in one place, from Google Analytics to conversion tracking pixels, without digging into code.
With the right GTM setup, you can automate insights, scale your marketing and make smarter decisions that drive engagement without needing technical expertise.
We’ve built our WordPress hosting environment at Bluehost to fully support fast, secure and accurate Google Tag Manager WordPress integration. This ensures your tags fire correctly and your data stays reliable, so you never miss a lead or insight.
Ready to take the next step toward data-driven growth? Sign up for Bluehost WordPress hosting today and start optimizing your site with ease and confidence.
FAQs
GTM manages multiple tracking tags (like Google Analytics, Ads) from one place. Google Analytics only collects and reports data.
No, you can install Google Tag Manager in WordPress using beginner-friendly plugins like GTM4WP—no coding needed.
Not if set up properly. GTM loads scripts efficiently. Use optimized WordPress hosting like Bluehost for best performance.
Top plugins include GTM4WP, Site Kit by Google and Insert Headers and Footers. They simplify GTM WordPress integration.
Yes, GTM is free and fully compatible with Bluehost WordPress hosting for seamless tag management and tracking.
Yes, but it’s better to pick one to avoid duplicate tracking. GTM gives more control over analytics setup.
Delete the GTM plugin or remove the GTM code snippets from your WordPress theme or header/footer settings.

Write A Comment