Key highlights
- Multiple ways to customize WordPress header include Full Site Editor (FSE), Theme Customizer, plugins and manual coding.
- Headers are more than visual elements—they enhance usability and boost site performance.
- FSE and manual code editing (HTML, CSS, PHP) allow for precise and unique header designs.
- It is easy to add images, videos and dynamic elements to create engaging headers.
- Optimize headers with ALT tags, keywords and responsive designs for better search visibility.
Introduction
WordPress is undoubtedly the leading choice among content management systems, and it’s evident why. Whether you want to create a brand-new website or customize WordPress header, it offers a straightforward process.
A site header is the top section of your site that typically displays your logo and navigation bar. But it’s more than just a visual element. It’s a powerful tool for improving usability and boosting your site’s performance.
With WordPress, you can include additional elements like a search bar, images or even an engaging video to this area.
In this guide, we’ll explore different methods to customize website header. We’ll also learn how you can add an image or video to your WordPress header.
Method 1: Edit the header in WordPress with Full Site Editor (and WonderBlocks)
For more advanced customization options, the WordPress Full Site Editor (FSE) is a go-to tool. Powered by the Gutenberg block editor, FSE allows you to create a personalized header design.
Follow this step-by-step guide to get started:
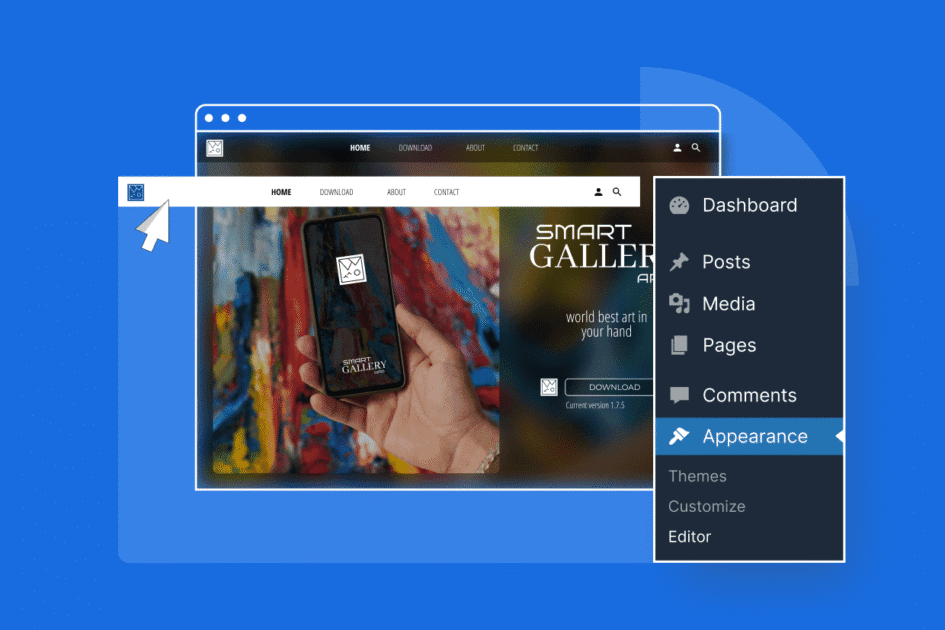
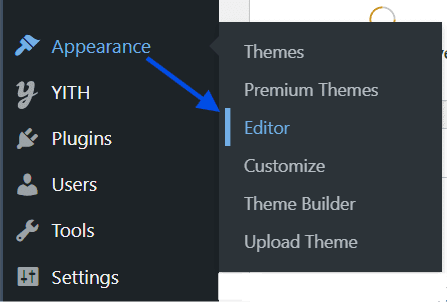
- On the left navigation panel of WordPress dashboard, click on the ‘Appearance’ tab > ‘Editor.’ This will open the Full Site Editor, where you can explore advanced customization options.
- In the Full Site Editor, you’ll see a live preview of your WordPress website. The header will typically appear at the top of the page, labeled as ‘Header’ or ‘Site Header.’ Click on this section to access the available full site editing options.
- Alternatively, click on the site header and select Edit option.

Customize WordPress website header with Bluehost WonderBlocks
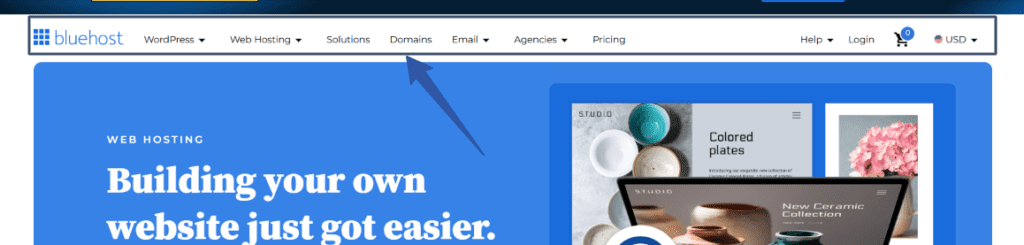
Bluehost offers an AI website builder with its web hosting plans. This AI tool has a block-based builder, called WonderBlocks. It comes equipped with pre-made patterns and templates that are fully customizable.
To utilize WonderBlocks for customizing your site header via the Site Editor, follow these steps:
- Click on the WonderBlocks button in the top menu.
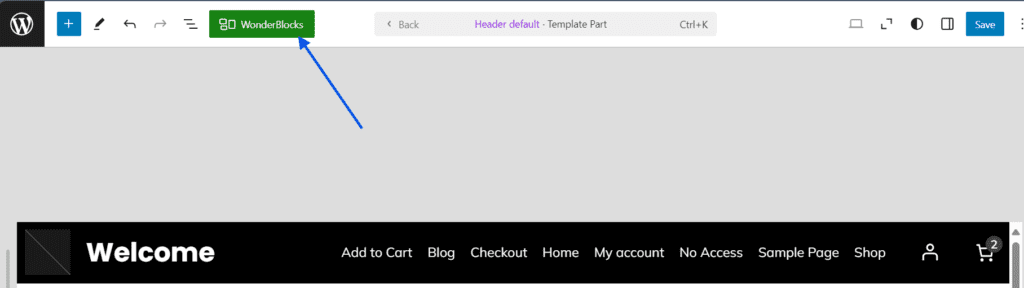
- Navigate to the Patterns section and choose Header.
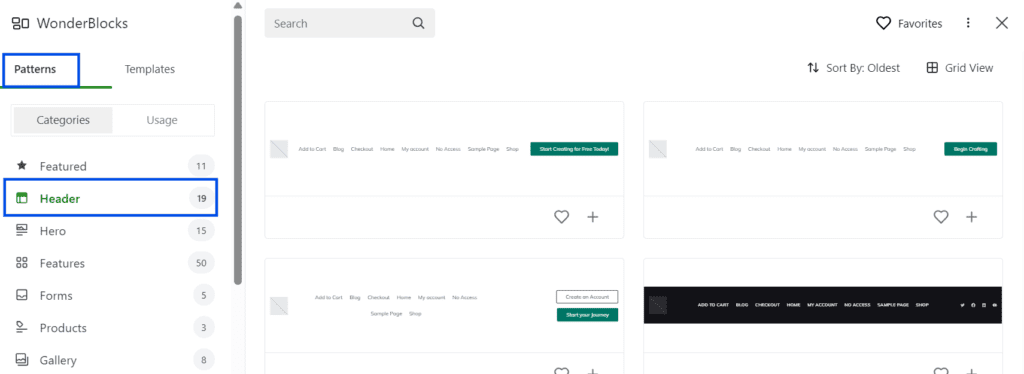
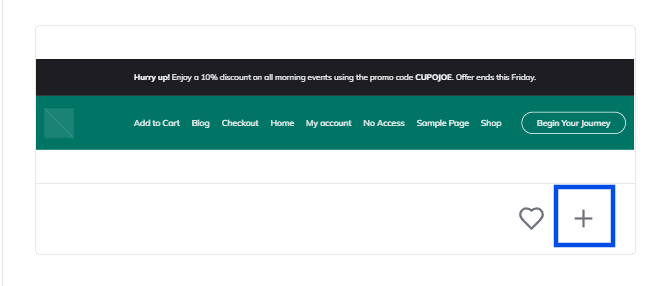
- Browse through the available options, and when you find a header you like, click on it or the plus (+) button to add it to your site.
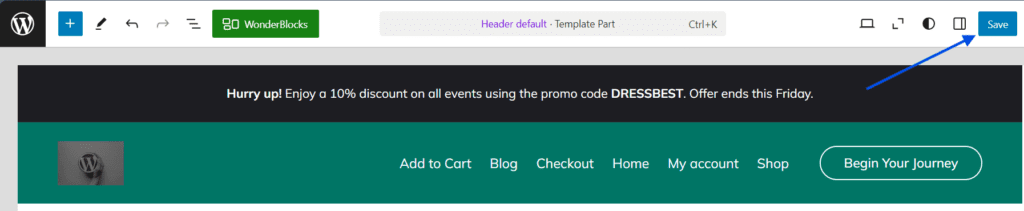
- After adding a header section, you can personalize it using the following features:
- Change your logo: Replace your current site logo image with a new one or adjust its size and placement to match your vision.
- Add blocks: Insert blocks such as text, images, buttons or even a search block. This functionality allows you to design a header that’s as functional as it is visually appealing.
- Adjust header height: Modify the height of your header to suit your website’s design—whether you prefer a large, bold banner or a streamlined, minimalistic look.
- Arrange header elements: You can easily align and position header elements like text, buttons or images to the left, center or right.
- Once you’re satisfied with your header design, click the Save button to make it live.
Check your website header in a new browser tab to view the updated header. If the changes don’t appear immediately, clear your browser cache to ensure the latest design is visible.
Also read: Alternate Header Benefits
Method 2: Customize WordPress header using the WordPress Theme Customizer
The WordPress Theme Customizer is a user-friendly tool for modifying your website’s header. This tool allows you to make adjustments quickly and efficiently without requiring advanced technical skills.
Follow these step-by-step instructions to update your header with ease:
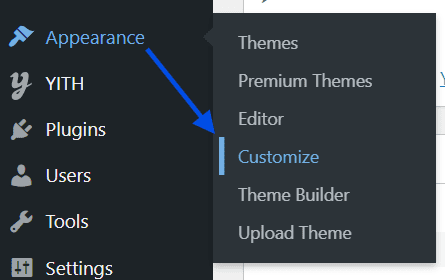
- On the left navigation panel of WordPress dashboard, click on the ‘Appearance’ tab and then ‘Customize’.
- Depending on your active theme, header settings may vary in location and naming. Look for sections such as ‘Header,’ ‘Header & Navigation,’ or ‘Header Options.’ Once you locate the relevant section, click to access the customization options.

- Your theme may offer various options to personalize the header. Here are some common features:
- Site title/logo: Update your site title or upload a custom logo to give your header a distinct identity.
- Site tagline: Choose whether to display your tagline or keep it hidden.
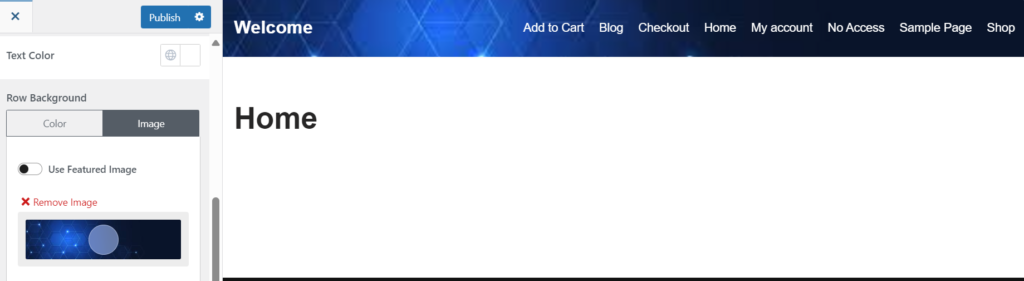
- Header image or gradient: Add a visual touch by setting an image or gradient background for your header.
- Navigation menu: Customize your primary menu by selecting its placement and styling.
- Header layout: Adjust dimensions, alignment and other layout elements to achieve the desired look.
- Header text and colors: Experiment with text colors, typography and link styles to create a polished appearance.
- As you make modifications, the WordPress Customizer provides a real-time preview of your adjustments. This feature allows you to ensure your header looks perfect before saving any changes. When satisfied, click the ‘Publish’ or ‘Save & Publish’ button to make your updates live.
- Open your website in a new browser tab to view the updated header. If the changes don’t appear immediately, clear your browser cache to ensure you’re viewing the most recent version.
Additional tips
- Theme limitations: Keep in mind that customization options vary by theme. If your current theme doesn’t offer flexibility, consider a new theme or invest in a custom WordPress design service.
- Backup first: Always create a backup of your website or work on a staging site before making significant changes. This ensures you can go to a previous version if needed.
Method 3: Customize WordPress header using the Insert Headers and Footers plugin
WordPress, with its robust open-source community, offers a variety of plugins to simplify tasks. Insert Headers and Footers plugin helps you make header edits without touching a single line of code.
Here’s how you can use this plugin to customize your WordPress header effortlessly:
Install and activate the plugin
- Log in to your WordPress admin dashboard.
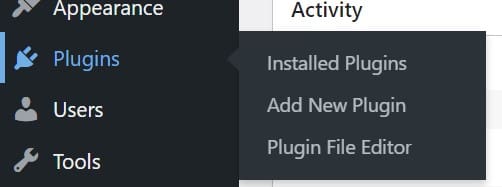
- Navigate to ‘Plugins’ in the left-hand menu and click ‘Add New Plugin’.
- In the search bar, type ‘Insert Headers and Footers’.
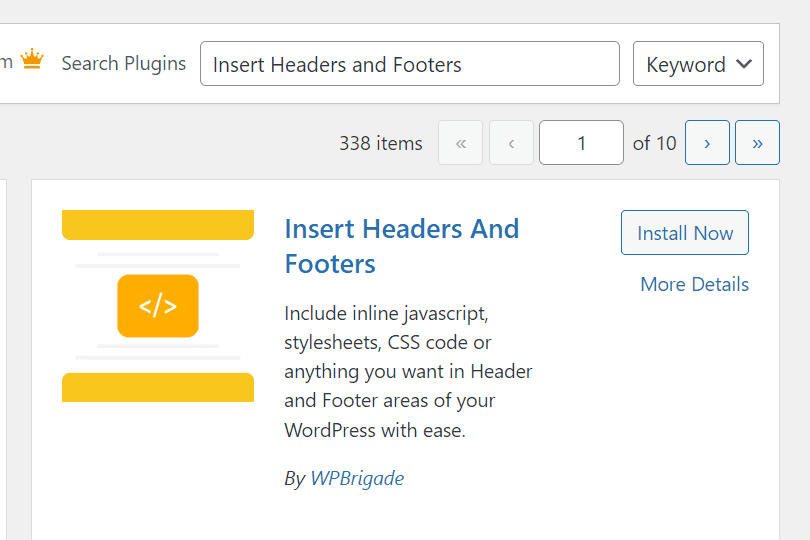
- Once the plugin appears, click ‘Install Now’ and then ‘Activate’.
Access the plugin settings
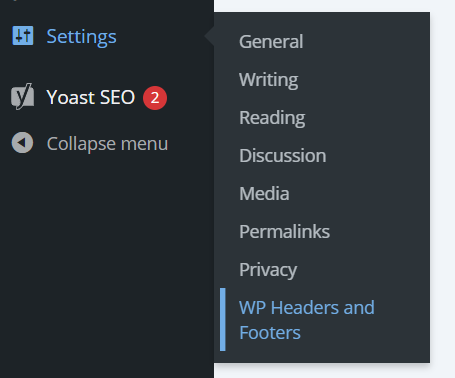
- Now, go to the ‘Settings’ tab and click ‘WP Headers and Footers.’
- This will open a simple interface where you can manage custom code for your header, body and footer.

Add custom code to customize WordPress header
- In the Scripts in Header box, paste your custom code.
- Click ‘Save’ to apply your changes.
- Your customizations will now appear in your site’s header without requiring you to manually edit theme files or write code.
Method 4: Editing your WordPress header by adding custom code
Custom coding your WordPress header offers unmatched precision and control over your website’s design and functionality.
This method requires familiarity with HTML, CSS and PHP. If you’re new to coding, consider consulting a professional WordPress developer to avoid potential missteps.
For those ready to take on the challenge, here is a step-by-step guide to customize WordPress header using code:
- Before making any modifications, ensure your site is fully backed up. Use a trusted plugin like Jetpack or perform a manual backup. This precaution serves as your safety net if anything goes wrong during the process.
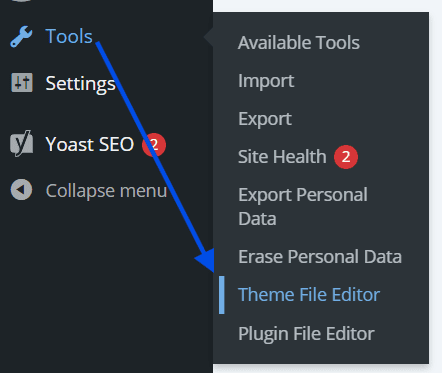
- On the left navigation panel of WordPress dashboard, click on the Tools tab and select Theme File Editor (in some themes, this option may appear under Appearance > Theme File Editor). Select your child theme, as editing the parent theme directly can lead to complications during updates.
- Within the Theme File Editor, find the header.php file (or a similarly named file such as header-template.php). This file contains the code for your website’s header. Open it in the editor to begin customization.
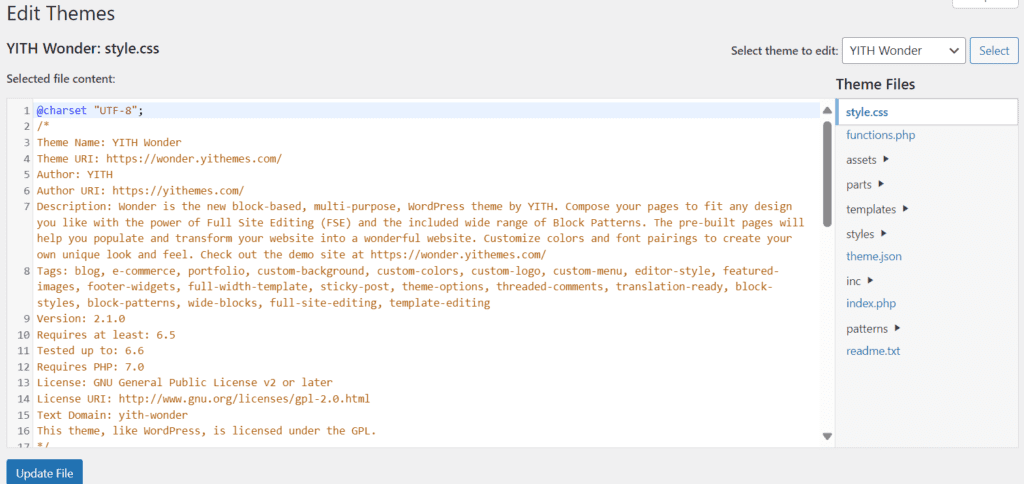
- Use HTML, CSS and PHP to adjust your header’s structure and style:
- Logo replacement: Update the HTML to change your site’s logo.
- Styling adjustments: Edit the CSS to refine the appearance, including colors, fonts or layout.
- Advanced functionalities: Modify PHP code to add dynamic elements but proceed with caution. Incorrect PHP syntax can cause errors or your site may crash.
- If you’re unsure about specific changes, consult your theme’s documentation or seek advice from a professional WordPress developer.
- Once you’ve made your edits, save the file and view your site to verify the changes. Ensure all updates appear as expected and that the site remains functional.
- Use your browser’s Inspect tool to preview your header on desktop, tablet and mobile devices. Confirm that the design is responsive and visually consistent across all screen sizes.
- If issues arise (e.g., the dreaded “White Screen of Death”), refer to your backup to restore the site to its previous state. Review your code for syntax errors or conflicts with other plugins and correct them as needed.
Related read: How to Hire a WordPress Developer
Important considerations
- Document your changes: Keep a record of the edits you make for future reference.
- Proceed with caution: Custom coding provides significant flexibility but requires careful attention to avoid disrupting your site.
- Leverage professional support: If in doubt, enlist the help of a WordPress developer to ensure smooth and effective customization.
Method 5: Customize WordPress header via FTP
If you’ve strong technical skills, editing your WordPress header via FTP offers another way to achieve precision.
This method provides direct access to your website’s files. But it requires familiarity with HTML, CSS and PHP to avoid unintentional errors. Follow these steps to get started:
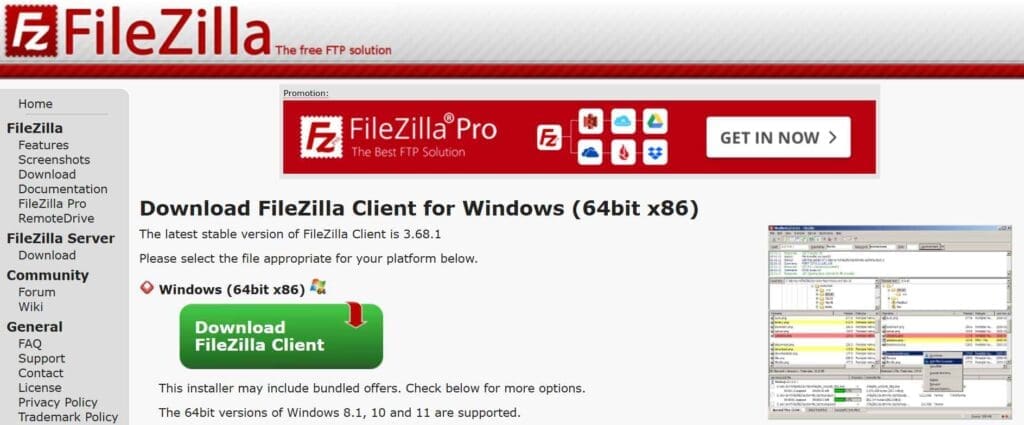
- To access your server, you’ll need an FTP client. FileZilla is widely considered the best FTP client.
- Before connecting, ensure you have the following details. These are usually provided by your hosting provider:
- Host/server address: Typically, your domain name (e.g., ftp.yoursite.com) or server IP address.
- FTP username and password: Credentials provided by your hosting provider.
- Port number: FTP commonly uses port 21. But confirm with your hosting provider if uncertain.
- Once you have this information, open your FTP client and connect to your server.
- After connecting, locate the WordPress root directory, often labeled as public_html or www. Within this directory, navigate to /wp-content/themes/ to access your active theme’s files.
- Find the file named header.php (or possibly header-template.php based on your theme). Right-click the file and select Download to save a copy to your local computer. This serves as a backup and allows you to work on the file safely.
- Open the downloaded header file in a text editor such as Notepad++ or Visual Studio Code. You can now make your desired changes, including:
- Adding images or elements: Insert custom header images or additional HTML elements.
- Modifying navigation menus: Adjust the structure or style of your navigation bar.
- Styling updates: Use CSS to refine the appearance of your header.
- Proceed with caution when editing PHP code, as even a minor syntax error can disrupt your website’s functionality.
- Once you’ve completed your edits, save the file and return it to your FTP client. Navigate back to the same directory where you found the original header.php file. Right-click on your updated file and select Upload to overwrite the existing header file on the server.
- Visit your website to verify the updates. Ensure everything displays correctly and functions as intended. If the changes are not visible, clear your browser cache and refresh the page.
Important considerations
- Backup your files: Always create a backup of your site and the original header file before making changes.
- Document edits: Keep a record of any modifications for future reference or troubleshooting.
- Seek assistance: If you encounter difficulties, consult your hosting provider’s support team or enlist the help of a professional WordPress developer.
Creating multiple header templates for your WordPress website
WordPress doesn’t limit you to a single header for your entire site. With its advanced template editing features, you can design custom headers for specific pages or post templates. So, you can create unique experiences for different sections of your website.
Let’s walk through the process of creating a custom header for a specific header template, such as the Single Post Template:
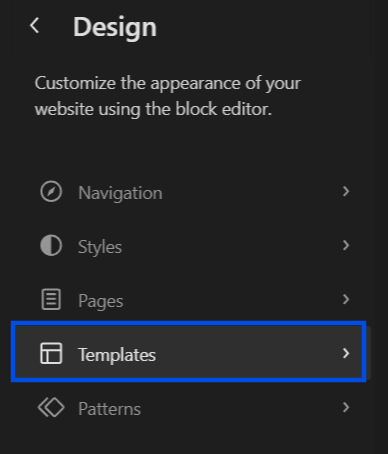
- Log in to your WordPress dashboard and navigate to ‘Appearance > Editor.’
- From the Site Editor, select ‘Templates.’
- Find the Single Post Template (this is where you’ll create a custom header specifically for your blog posts).
- Open the template to view the existing layout.
- In the template editor, click the List View icon to see all the components in your layout.
- Select the current header, click the ellipsis (three dots menu) and choose ‘Remove Header.’
- Click the Block Inserter icon and search for ‘Header Block.’
- Insert the Header Block into your template and customize it as needed. You can add logos, menus and other elements to match the desired look and functionality.
- Once you’re satisfied with the new header design, save your changes. Preview the Single Post Template to ensure the custom header appears only on blog posts, leaving the rest of your site unaffected.
Expanding your options with the WordPress Site Editor
If you want to design and customize WordPress header, the Site Editor offers an impressive range of tools and possibilities.
Whether you prefer using ready-made designs or want to unleash your creativity by building a header from scratch, you have plenty of options to craft the perfect look for your website.
Option 1: Using a premade header pattern
For those seeking a quick and stylish solution, WordPress provides a library of block patterns, including headers. Here’s how you can take advantage of these pre-designed templates to customize WordPress header:
- Open the Patterns tab within the Site Editor.
- Search for ‘Headers’ to explore the premade options, specifically designed for themes like Twenty Twenty-Three.
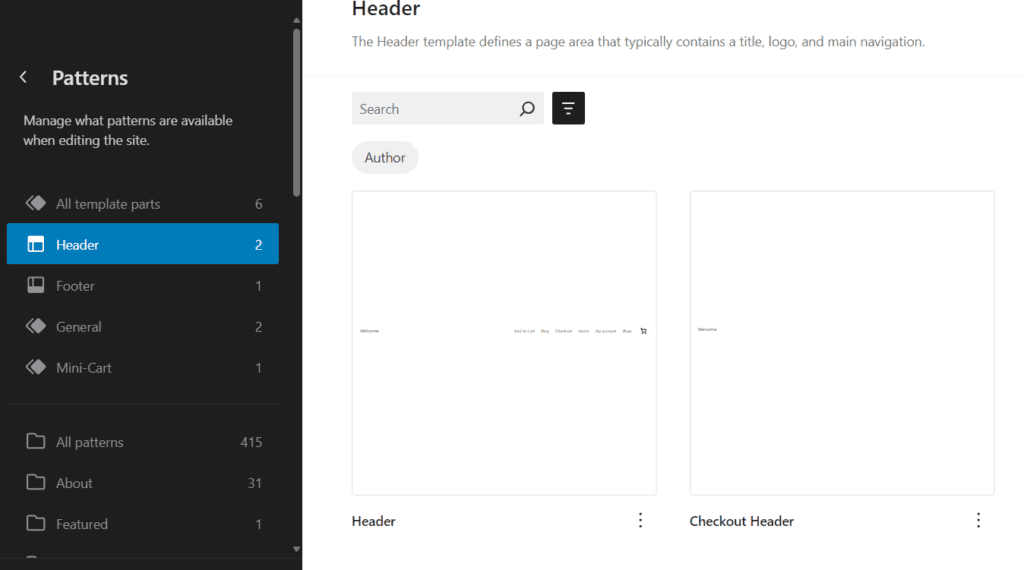
- To browse even more designs, click the ‘Explore’ button to access the WordPress pattern library.
Note: While some header patterns come with navigation elements, others may not. If your chosen pattern doesn’t include a menu, you can either add a navigation menu block separately or use a menu plugin to incorporate the desired functionality.
Option 2: Creating a custom header from scratch
For those who prefer a hands-on approach, the Site Editor allows you to design a completely unique header. Follow these steps to build your header from the ground up:
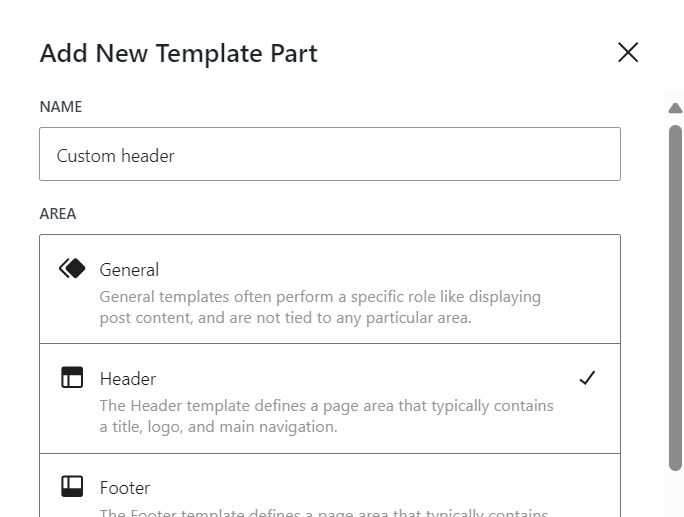
- In the Site Editor, choose ‘Add New Pattern > Add New Template Part.’
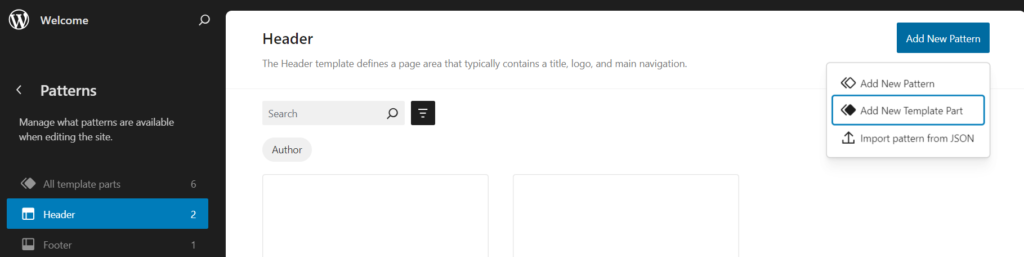
- You’ll be prompted to name your new template part (e.g., “Custom Header”). Enter the name and click ‘Add.’
- Once your new header template is created, you can start customizing it directly in the page editor by adding blocks:
- Add content blocks: Insert logos, navigation menus, images or call-to-action buttons to suit your site’s needs.
- Use the Template editor: For more advanced design options, click ‘Edit’ to access the template editor. Here, you can also structure your header using rows, columns and other blocks to achieve a polished, professional look.
How to add images to your WordPress website’s header
Enhancing your site’s header with a captivating image can significantly improve its visual appeal. However, before proceeding, confirm whether your theme supports custom header images.
If it does, follow these straightforward steps to add or customize WordPress header image:
Themes vary in their features. So, the first step is to identify how your theme handles header images. From your WordPress dashboard, navigate to Appearance and look for one of these options:
- Editor: If you use the Site Editor, utilize the Cover Block to upload and manage your header image.
- Customize: For themes supporting the Customizer, find the Header Image option and proceed from there.
If your theme supports the Site Editor, here’s how to add a header image:
- Go to Appearance > Editor. Select the area where you want the header image, usually above the site title or navigation menu.
- Click the + Block Inserter icon and search for the Cover Block.
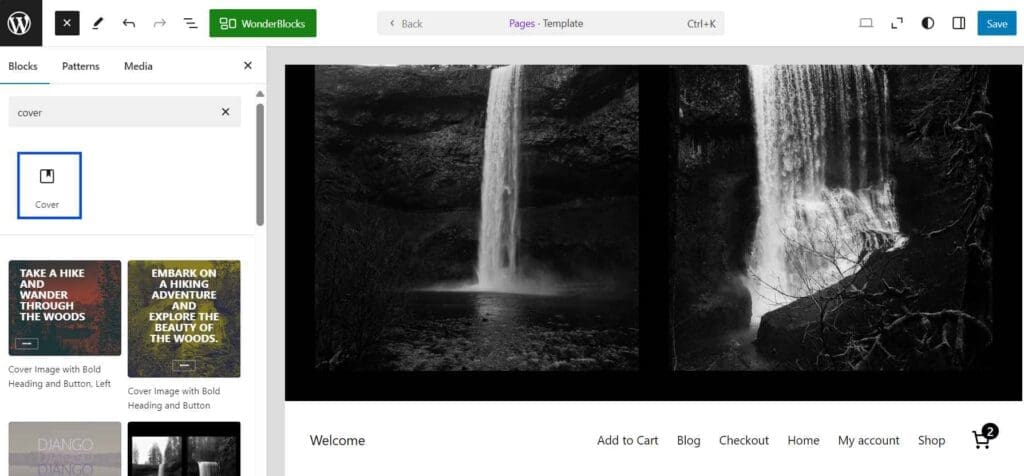
- Choose Upload to add an image from your computer or Select Media to use an image from your media library.
Pro Tip: You can also upload video headers using this method for a more dynamic design.
For themes that use the Customizer, follow these steps:
- Go to Appearance > Customize. Look for Image option in Header section. If it’s unavailable, you can’t create custom headers image with your theme.
- If it’s available, click Add Image.
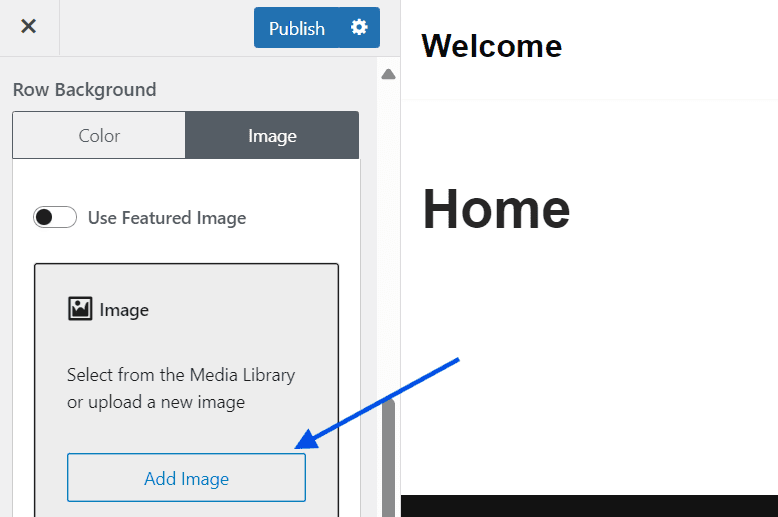
- Select an image from your media library or upload a new one from your computer.
- Selecting the perfect image for your header is essential, as it often creates the first impression of your site. Consider these best practices:
- File formats: Use .jpeg, .gif or .png for optimal results.
- Resolution: A blurry image may require a higher resolution, while a header that doesn’t span the page’s width might need a wider image.
- File size: Compress large images to improve loading speed.
- For best results, use a 16:9 aspect ratio (e.g., 1920 x 1080 pixels). Some themes provide specific dimension recommendations—check your theme’s Quick Specs in the Appearance > Themes > Info section.
How to add videos to your WordPress header
Video headers offer a modern, engaging way to captivate visitors. Whether you’re showcasing properties, promoting destinations or telling compelling stories, videos create a memorable visual experience.
Option 1: Adding local video
You can upload an .mp4 video directly to your media library. But this approach can significantly impact bandwidth, especially if the video auto-plays. We recommend embedding videos instead for better performance.
Option 2: Embedding a YouTube video
- Navigate to the WordPress dashboard and go to Appearance > Customize.
- Select the Header Media section.
- Paste the URL of your YouTube video into the appropriate field.
- Your video header will now display seamlessly, providing an engaging user experience.
Pro Tip: Add a fallback image
To ensure a smooth experience for all visitors, include a fallback image for your video header. If a browser struggles to load the video or doesn’t support it, the fallback image ensures the header still looks professional and complete.
Adding images or videos to your header is a simple yet impactful way to elevate your website’s design. Additionally, it creates a visually appealing and engaging experience for your audience.
SEO optimization for WordPress headers
Optimizing your WordPress headers is crucial for enhancing both user experience and search engine visibility.
Here’s how to effectively implement SEO best practices for your headers:
Proper use of header tags
Utilizing header tags (H1 to H6) correctly structures your content, making it more accessible to readers and search engines.
- H1 tag: Use a single H1 tag per page, typically for the main title, to define the primary topic.
- H2 to H6 tags: Employ these headers for subheadings to create a clear content hierarchy. This further aids in readability and SEO.
Image optimization using ALT tags, file format and responsive design
Optimizing images in your header enhances load times and accessibility.
- ALT tags: Include descriptive image ALT text with relevant keywords to improve SEO and assist visually impaired users.
- File format: Use appropriate formats like JPEG for photographs and PNG for graphics to balance quality and file size.
- Responsive design: Ensure images adapt to various screen sizes to maintain a consistent user experience.
Add primary keywords in headers without overstuffing
Integrate primary keywords naturally into your headers to signal content relevance to search engines.
- Avoid overstuffing: Ensure keywords fit contextually to prevent penalties for keyword stuffing.
- Front-load keywords: Place important keywords at the beginning of headers when appropriate.
Add breadcrumbs in the header for larger websites
Breadcrumbs enhances navigation and provides search engines with a clear site structure.
- Implementation: Use plugins like Yoast SEO or theme settings to add breadcrumbs, aiding user navigation and SEO.
Avoid overly large or complex headers that slow down page load time
Large headers can negatively impact load times and user experience.
- Simplify design: Use clean, minimalistic designs to reduce load times.
- Optimize media: Compress images and limit the use of heavy scripts in the header.
Related Read: Web Design Mistakes to Avoid
Ensure that headers are responsive and navigation menus are easy to use on smaller screens
Responsive headers improve accessibility across devices.
- Responsive design: Use media queries and flexible layouts to adapt headers to various screen sizes.
- Mobile-friendly menus: Implement touch-friendly navigation menus for smaller screens.
Common WordPress website header issues and solutions
Header changes not showing
Solution: Clear cache from WordPress site and browser to ensure you’re viewing the latest version of your site. If the issue persists, check for plugin conflicts by deactivating them one by one and observing any changes.
Header overlaps content
Solution: This often results from CSS conflicts. Use browser developer tools to inspect the header and content sections, adjusting padding and margins as needed. Also ensure your theme is responsive and up-to-date.
Header image not displaying properly
Solution: Verify that the header image is correctly uploaded and assigned in the theme’s customization settings (under Appearance > Customize > Header). Check file permissions to ensure the server can access the images, as incorrect permissions can prevent the image from loading.
Header menu not responsive
Solution: Ensure your theme supports responsive design. If not, you can choose best responsive WordPress theme. Alternatively, use plugins like “Responsive Menu” to enhance mobile navigation.
Errors after adding custom code
Solution: Always back up your site before adding custom code. If errors occur, revert to the backup or remove the problematic code. You can also use plugins like “Insert Headers and Footers” to safely add code snippets.
Header widgets not displaying
Solution: Ensure that your theme supports header widgets. If not, you may need to modify the theme’s code or use a plugin that adds widget areas to the header.
Sticky header not working
Solution: Check if your theme includes a sticky header option. If not, plugins like “Sticky Menu & Sticky Header” can add this functionality. Ensure no conflicting CSS or JavaScript is disabling the sticky behavior.
Fonts and colors not updating
Solution: Clear your site and browser cache. If changes still don’t reflect, inspect the CSS to ensure there are no overriding styles. Additionally, you can use the WordPress Customizer or a plugin to manage fonts and colors effectively.
Enable WordPress debug mode
Solution: To identify issues, enable debug mode by editing the wp-config.php file and setting define (‘WP_DEBUG’, true); . Remember to disable it (false) after troubleshooting. This further prevents displaying errors to visitors.
Customization options missing
Solution: Some themes have limited customization features. Consider using a child theme or a page builder plugin to gain more control over header design.
Related read: How to Create a Child Theme in WordPress
Clear cache and use developer tools for troubleshooting
Solution: Regularly clear your browser and site cache to see the latest changes. Utilize browser developer tools (F12) to inspect elements, monitor console errors and debug CSS or JavaScript issues.
Final thoughts
Customizing website header on WordPress is akin to giving your website a personal touch—transforming it into a unique and engaging space for your visitors.
Whether you choose to use custom code, plugins like Insert Headers and Footers or the built-in WordPress tools, the options are endless.
Beyond aesthetics, your header is also a key area for integrating tracking tools and essential functionalities, enhancing your website’s performance and data insights.
So, are you ready to take the plunge into header customization? Whether you prefer the hands-on approach of editing the header.php file or the simplicity of a plugin, WordPress offers a user-friendly platform to bring your vision to life.
With the right tools, best practices and hosting solution, your dream site is within reach. Explore Bluehost’s WordPress hosting plans and get started today.
FAQs: Editing a header in WordPress
If you edit a global header, the changes will apply to all instances where that header is used across your site. However, WordPress provides flexibility by allowing you to create and manage multiple headers.
For example, you can design a global header for general use and create unique headers for specific templates, such as single post pages or category archives. To do so, simply remove the global header from the specific template and create a custom one tailored to that page.
Template parts are modular building blocks used in WordPress to structure your site. The header and footer are classic examples of template parts.
They can either be global, appearing on every page of your site or specific, designed to appear only on certain pages, such as a custom header for your 404-error page.
This system ensures that you can easily customize your site’s layout to meet its unique requirements.
WordPress headers can include a variety of blocks, offering endless customization possibilities. Popular options include:
Navigation block: For your site’s menu.
Site logo block: To display your brand logo.
Social icons block: For linking to your social media profiles.
Contact info block: To provide key contact details.
Button block: For call-to-action elements, such as “Shop Now” or “Contact Us.”
The WordPress block library is versatile, giving you the tools to create a functional and visually appealing header.
Global site styles set a consistent aesthetic for your website, including your header. These styles dictate the overall look, such as colors, typography and spacing.
However, if needed, you can override these global styles within your header to make it stand out. Customize elements like text sizes, colors and layouts to create a distinct and memorable design.
Yes, WordPress allows you to set different headers for different parts of your site. Using header customization tools or plugins, you can define display conditions to show specific headers on selected pages, posts or templates.
This feature is particularly useful for tailoring the design and functionality of headers to suit the purpose of individual sections of your website.
Absolutely. A responsive header is essential for providing a seamless user experience across all devices.
Most modern WordPress themes and header customization tools come with built-in responsive design options. These features ensure that your header automatically adjusts its layout and styling to look professional and functional, whether viewed on a desktop, tablet or smartphone.
Start by clearing your browser and site cache. If the issue persists, deactivate plugins one by one to identify any conflicts. Also ensure your theme is up-to-date and compatible with your WordPress version.
Yes, many themes offer customization options through WordPress Customizer. Additionally, Bluehost offers in-built page builder WonderBlocks. It provides user-friendly interfaces so you can design headers without coding.

Write A Comment