Key highlights
- Know how to safely edit a footer in WordPress without losing changes after theme updates.
- Learn to add custom menus, widgets or existing text in multiple footer widget areas to improve site navigation.
- Explore plugins like Header Footer Code Manager to insert additional code and boost your site’s performance.
- Understand how to use the WordPress admin dashboard and site’s appearance settings to customize footers without coding.
- Uncover tips to keep your footer mobile-friendly, clutter-free and consistent with your branding.
Editing the footer in WordPress can be frustrating, but it is not a hard task. The challenge is that each WordPress theme has a unique footer layout and achieving your desired design can be time-consuming.
That said, it is important not to overlook your footer credit. It serves several useful purposes. Visitors often scroll to the footer for important info and it also helps your site’s SEO.
This guide will show you how to edit a footer in WordPress. We’ll also share some plugins to make it easier.
Why update your WordPress footer?
Most WordPress themes have a customizable footer area. You can easily edit it according to your website’s needs. Most WordPress themes provide customizable footer options that can include various elements and styling features. Editing the footer isn’t just an SEO tactic, it’s about improving your site’s user experience by making key info easy to find.
The footer is a perfect spot for important details. You can add copyright information, contact info and links to key pages like About, Contact or Blog. Most sites use their footer area to house important links like disclaimers, a privacy policy and other key pages of your site. Including links to your social media accounts is also a must as these basics would be a great start. But update your footer widget areas to highlight your brand’s uniqueness.

Many web users expect to find useful information in a WordPress website footer. Having it easily accessible helps visitors navigate your site and increase engagement.
Here’s why keeping your footer element updated matters
- Update the footer: If your business changes its address, phone or email. This lets visitors reach you with the correct info.
- Updating legal Info: If your Privacy Policy or Terms of Service changes, update the footer links to point to the latest versions. This ensures users can access the latest legal details.
- Adding or removing links: As your site grows, you might need to add or remove links in the relevant footer location to keep it updated. For example, if you launch a new product or service, adding a link to that web page in the footer helps users find it easily.
- Quick design refresh: If a full redesign isn’t on the table, updating your footer (and maybe your header) can give your site a fresh look. Refreshing your footer credits and other elements is a simple way to modernize your website without a complete overhaul.
- Boosting SEO: A well-structured footer with helpful links like a sitemap, can improve your site’s SEO. Search engines use these links to better index your site, which can lead to improved ranking.
An updated, thoughtful footer boosts your site’s SEO and user experience. It helps visitors find what they need quickly. Manage your footer widgets on the WordPress website to keep your site relevant, user-friendly and organized. Learn how to edit the footer in WordPress footer.
In WordPress, the footer content is stored in the footer.php file, which is usually written in HTML or CSS. This file loads with every page of your site, making it a central component of your website’s structure.
However, you don’t have to modify this file directly to customize your site’s footer text. Instead, you can use widgets, the WordPress Customizer or a plugin to make changes easily. You can also use a page builder plugin, like Elementor, to create a custom footer with a visual, drag-and-drop editor.
Quick steps: How to edit footer in WordPress
- Login to Dashboard → yourdomain.com/wp-admin.
- Go to Appearance → Customize → look for Footer settings.
- Edit Footer Widgets → Appearance → Widgets → change or add footer text/menus/social links.
- Theme Builder Users (Elementor, Divi, etc.) → Templates → Theme Builder → Footer → Edit & Update.
- Theme Options → Some themes have footer settings under Appearance → Theme Options.
- Code Edit (Advanced) → Appearance → Theme File Editor → footer.php → edit text (use child theme).
- Use Plugin if Needed → e.g., Elementor or Insert Headers & Footers for custom design or scripts.
Watch our step-by-step video guide on How to Edit Footer in WordPress for a visual walkthrough.
How to edit a footer in WordPress with widgets
Editing your WordPress footer using widgets is one of the simplest methods, as long as your theme includes a WordPress footer widget area. If your theme doesn’t offer this, you’ll need to try another method.
To access the widget section, go to your WordPress dashboard, hover over Appearance and click Widgets

On the Widgets page, you’ll see two sections: Available Widgets and the edit Footer area. Keep in mind that depending on your theme, the number of footer areas may vary.

To customize the footer, simply drag and drop a widget into the footer bar section you want. Once you place the widget, click on it to configure the settings and then hit Save.
To add links to the footer using menus page, follow these steps:
You can add links like pages, posts, categories or custom links to your footer by creating a menu and placing it in the footer widget area. Follow these steps:
Step-by-step instructions
- Go to the menus
- In your WordPress admin dashboard, go to Appearance → Menus (left menu).
- Create a new menu
- Click Create a new menu.
- Give it a clear name (e.g., “Footer Menu”).
- Under Menu Settings, select the option to assign it to the Footer location.
- Click Create Menu.
- Add links to the menu
- From the left-hand column, select the pages, posts, categories or custom links you want.
- Click Add to Menu.
- Drag and drop items to reorder them if needed.
- Click Save Menu.
- Go to widgets
- Navigate to Appearance → Widgets (WordPress admin panel).
- Click the + button and search for Navigation Menu or Footer Navigation Menu block.
- Add menu to footer widget area
- Place the widget in the Footer widget area.
- From the dropdown, select the custom menu you created.
- Optionally, rename the widget title (e.g., “Quick Links” or “Resources”).
- Save & publish
- Click Update to save changes.
- Visit your site’s footer in WordPress to see the new menu displayed. You can create a menu for the footer by selecting the relevant pages and saving it under the ‘Display Location’ for the footer menu.
Now your footer will show a custom navigation menu with links.
Tip: Use this to add contact details, internal links, existing blocks or menu items for easy access.
How to edit the footer via your WordPress themes
You can also edit your WordPress footer using the built-in Customizer, which gives you a live preview of your changes as you make them. To get to the Customizer, head to the “Appearance” section in your WordPress dashboard and click on “Customize.” In newer block-based themes, you can edit the footer using the Full Site Editor available in Appearance > Editor.
In the Customizer, you might find several ways to adjust your footer depending on your theme:
- Theme options: Some classic themes have a footer section. You can tweak the colors, borders or text to match your site’s look and feel.
- Widgets: If your theme supports footer widgets, this is where you can add content, such as text, images or social media links, to your footer.
- Menus: If you want to include navigation links, you can add a menu to the footer through the menu settings here.
Once you’re satisfied with how your footer looks, make sure to click “Publish” or “Save Draft” to apply the changes.
Keep in mind that not all themes offer direct footer customization options. If yours doesn’t, you can still modify the footer by customizing widgets and menus. Some themes may place footer settings in areas like a “Footer Builder” instead of the Theme Options panel. For themes that support Full Site Editing, you can customize the footer by selecting the “Footer” template part in the Site Editor.
How to remove the “Powered By WordPress” footer
Many WordPress themes include a “Powered by WordPress” message in the footer and sometimes even credits to the theme developer, like “Theme by Developer A.” While there’s nothing inherently wrong with this, it might not align with your brand’s image or professionalism. Removing the ‘Powered by WordPress’ message is a common adjustment made to footers.

To remove or edit this message, you can modify the footer.php file in your theme. Before making any changes, it’s a good idea to back up your WordPress website files to avoid any accidental issues.
Once you’re ready, go to your WordPress dashboard and follow these steps:
- Head to Appearance > Theme Editor in the admin panel.
- On the right side, under Theme Files, find and click on Theme Footer (footer.php).
- In the code, look for the section that displays the “Powered by WordPress” message. For example, in the Twenty Twenty theme, it might look like this:
You can delete this part or replace it with your own branding. Once done, hit the Update File button to save the changes and the footer message will be updated on your site.
How to add code to the WordPress footer
Sometimes, you may need to add custom code to your WordPress footer, whether for design tweaks or to connect with external services. There are a few ways to do this, depending on what you’re trying to achieve.

If you’re making simple design changes, like adjusting the footer’s color or spacing, you can use the Additional CSS option in Customizer. For example, to change the footer’s background and border color, add the following code snippet:
.footer-widgets-outer-wrapper, .footer-top {
border-color: #000;
}
.footer-nav-widgets-wrapper, #site-footer {
background-color: #D7BDE2;
}
Or, to adjust the footer’s margins and padding, you could add:
.widget .widget-title {
margin-bottom: 1rem;
}
.footer-widgets a {
padding-left: 5rem;
}
Once you’ve added your code, just hit the Activate and Publish button to apply the changes.
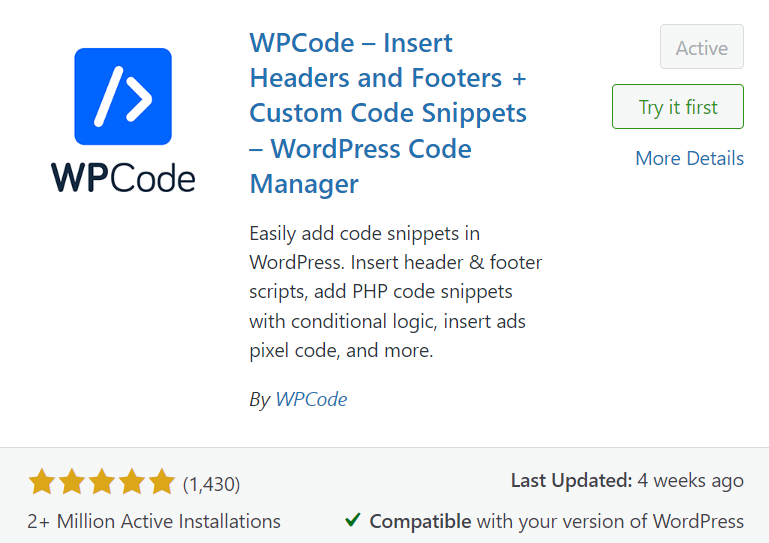
For more complex additions, like inserting custom scripts, the Insert Headers and Footers plugin is the easiest option. After installing and activating it, go to Code Snippets > Header and Footer from your dashboard. Scroll to the Footer section, paste your code there and click Save Changes.
If you’re familiar with coding, you can also manually edit the footer by modifying the theme’s PHP files. This approach requires knowledge of HTML, CSS, JavaScript and basic web development but gives you full control over what’s added to the footer.
Add HTML script to the footer in WordPress
You can customize your WordPress footer by adding HTML. This lets you include elements like code, images or social media icons. Using HTML, you can easily add essential details such as contact info, copyright text or links to your privacy policy and terms of service.
HTML lets you insert tracking codes for analytics. It also lets you make visual changes to your footer. You can adjust font sizes, add images, change colors or modify the layout to match your site’s design.
To add HTML to your footer, go to your WordPress dashboard and navigate to Appearance > Customize. Once in the Customizer, look for the footer section that matches your theme. Select the widget area where you want to place your HTML content.
Next, click Add a Widget, choose Custom HTML from the options and drag it into the selected widget area. Many WordPress themes provide a footer widget area that is easy to edit. Then, paste your HTML code into the widget’s content box. Once you’re done, save your changes and preview your site to see how the new elements look in the footer.
Conduct a site check
After updating the footer on your WordPress site, check the site and make sure everything is working properly. It doesn’t need an in-depth audit. But please review key areas like links, design, layout and site responsiveness. This is to confirm your edits didn’t disrupt anything.
Editing the footer could affect other parts of your site. So, check any important features, like forms and the checkout process on eCommerce sites. It’s smart to check site performance after changes. Some edits might affect a plugin or your site’s theme.
Footer updates rarely cause problems. But a quick double-check ensures your site runs smoothly and gives you peace of mind.
Creating custom WordPress footers
To create custom footers for different sections of your WordPress site, you need more than simple tweaks in the Customizer or Widgets. It requires custom page templates and conditional logic. This will show a unique footer design for specific pages or categories. You can create custom footers for different pages using PHP code for more tailored content.
To get started, you’ll need to create a new page template. First, create a new PHP file in your theme’s directory. Add the following PHP code snippet at the top of this file:
<?php
/*
Template Name: Custom Footer
*/
?>
Replace “Custom Footer” with a name that describes your template. Now, you can add your custom footer code, using HTML, CSS and JavaScript to design it. If you want the default footer to appear as well, include the `get_footer()` function. You can also use `wp_nav_menu()` to display custom menus.
Once you’ve finished coding, save the template file and upload it to your theme’s directory. Next, go to the WordPress editor for the page you want this custom footer to appear on. In the Page Attributes section on the right, select your “Custom Footer” template and save your changes.
You can create multiple custom footers by following the same process. To show different footers based on specific conditions like the page type or category, use conditional logic in your template. For example:
<?php
if ( is_front_page() ) {
// Code for front page footer
} elseif ( is_page( 'about' ) ) {
// Code for about page footer
} else {
// Code for default footer
}
?>
Replace “about” with the slug or ID of the page where you want a custom footer. You can use WordPress conditional tags to create footers for categories, tags or other page types. This gives you full control over your footer’s appearance and behavior across your site.
Common mistakes when editing a footer in WordPress
When learning how to edit footer in WordPress, many users make avoidable mistakes that cause design or performance issues. Here are the most common ones:
- Directly editing theme files
- Ignoring theme limitations
- Overloading the footer in WordPress
- Neglecting mobile responsiveness
- Not backing up before changes
- Misusing widgets and plugins
Let’s discuss in detail how to edit a footer in WordPress safely using the WordPress admin dashboard, footer widget areas, text widget, theme settings and plugins without losing your changes after theme updates.
1. Directly editing theme files
Modifying the footer.php file or similar theme files can lead to issues when the theme is updated. Updates will overwrite your changes, causing you to lose customizations. It’s better to use child themes or a plugin to avoid this.
2. Ignoring Theme Limitations
Some WordPress theme customizers don’t offer much flexibility in the footer and adding unsupported elements or scripts can break the design, especially with drag-and-drop editor like Elementor. Before making changes, always check what your theme allows or consider using full site editing with the site editor for more customization options.
3. Overloading the footer in WordPress
Packing the footer with too much content can overwhelm visitors and negatively impact the user experience. Footers should provide essential links and information in a clean organized way. Limit the number of items to avoid clutter.
4. Neglecting mobile responsiveness
Many users forget to test how their footer looks on different devices. What works on a desktop may not translate well to mobile or tablet screens. Always ensure your footer remains readable and functional across all screen sizes.
5. Not Backing Up Before Changes
Making major changes to your site without backing it up is risky. A misstep in the code or settings can break your entire WordPress website. Always back up your site before making any edits, whether you’re adding custom CSS or altering the footer structure.
Also read: How to Edit Website: Beginner-Friendly Guide
6. Misusing widgets and plugins
Over-relying on widgets or using too many plugins can cause conflicts or slow down your site. Some plugins may add unnecessary bulk or scripts to the footer, affecting load times. Choose lightweight solutions and use widgets strategically.
3 Best WordPress footer plugins
The best way to customize a footer without editing code is by using footer plugins. These plugins let you add scripts, custom HTML or widgets right from the WordPress admin dashboard under Appearance or plugin settings.
- Header Footer Code Manager: Easily insert custom HTML, CSS or JavaScript into your site’s header or footer without editing theme files.
- WP Custom Footer: Quickly add text, images, links or branding in the footer using a simple interface, no coding required.
- Insert Headers and Footers: Add analytics, SEO scripts or ad codes into the footer to boost performance and maintain theme updates safely.
Let’s discuss these plugins in detail so you can pick the right one for your WordPress widgets, newly created menus, contact details or additional code needs.
1. Header footer code manager
This plugin lets you add code to the header or footer of your WordPress site. It supports JavaScript, CSS and tracking pixels. Normally, you would have to manually edit your theme’s files to do this, which can be tricky and risky for beginners. With this plugin, you can add this code without touching your site’s code directly.

How it helps with footers:
- You can place important tracking codes (like Google Analytics or Facebook Pixel) in the footer. This helps to track visitors without slowing your site.
- If you want to add custom styles (CSS) or JavaScript to the footer, you can do it quickly without editing theme files.
- The plugin provides a clean interface to manage all your codes, so it’s easy to see what has been added and where.
- It saves time, reduces errors and keeps your changes after a theme update.
2. WP custom footer
WP Custom Footer is a simple plugin. It lets you add custom content to your website’s footer. You can add text, images, links or HTML. It’s user-friendly and doesn’t require any coding knowledge.
How it helps with footers:
- This plugin lets you add a copyright notice, links or social media icons.
- You can customize the footer to match your branding. For example, add a logo or a mission statement.
- You don’t need to edit the theme’s footer code or stylesheets. The plugin’s interface does everything.
- It makes footer customization easy for beginners. You won’t risk breaking your site’s layout by touching the code. It’s a great option for adding basic but important information to your footer.
3. Insert header and footers
This plugin lets you easily add code to your WordPress website header and footer. You can use it to add scripts, like Google Analytics, Facebook Pixels or verification codes for third-party services.

How it helps with footers:
- You can easily add scripts and code to load in the footer. This will improve your WordPress websites performance. Putting these codes in the footer makes your site load faster. This is great for user experience.
- It supports all kinds of code, from HTML to JavaScript, making it very flexible for various needs.
- It is especially useful for adding SEO code or ad and analytics scripts.
- This plugin is lightweight and easy to use. It’s perfect if you need to quickly add footer code. You won’t have to edit your theme’s files or worry about losing changes when updating it.
Final thoughts
Editing the branded footer of your business website is essential for enhancing user experience and site performance. Whether adding important links, updating contact information or inserting code for SEO and analytics, your footer plays a key role. Using WordPress widgets, the WordPress Customizer or footer-specific plugins can make the process smooth and user-friendly.
Plugins like Header Footer Code Manager, WP Custom Footer and Insert Headers and Footers offer simple solutions to customize your footer without coding knowledge. By keeping your footer updated and well-organized, you boost SEO and improve navigation, making your site more accessible and engaging for visitors.
FAQs
You can edit a footer in WordPress by going to Appearance → Widgets in your WordPress admin dashboard. From there, update the existing text, add a custom HTML widget or use the theme’s footer settings. In many themes, you can also use the Customizer to adjust the footer design.
To add a footer menu in WordPress, go to Appearance → Menus and create a new menu. Then, assign it to the footer location. Next, visit Appearance → Widgets, add a Navigation Menu block to one of the multiple footer widget areas and select your newly created menu.
The best plugins to add custom code to the footer in WordPress are:
Header Footer Code Manager: easily insert CSS, JavaScript or tracking codes.
Insert Headers and Footers: quick solution for analytics or ad scripts.
WP Custom Footer: lets you add custom content without editing theme files.
Yes, You can edit footer WordPress settings without touching code. Simply go to Appearance → Widgets or the Customizer to adjust your footer’s look. You can add menus, text, contact details or social icons using existing blocks and widgets, just simply hover and edit.
To edit the footer in WordPress, log in to your dashboard and go to Appearance → Customize or Appearance → Widgets. Depending on your theme, you can add or remove widgets, menus or existing text. If your theme supports it, you’ll see multiple footer widget areas for extra customization.

Write A Comment