Key highlights
- GZIP compression reduces file sizes and speeds up your WordPress site without affecting functionality.
- It’s essential for better user experience, mobile performance and SEO.
- You can enable GZIP via .htaccess, WordPress plugins or your hosting control panel.
- Tools like GTMetrix and PageSpeed Insights help check if GZIP is already active.
No one likes waiting on a slow website and your visitors are no different. If your WordPress pages take too long to load, people may leave before they read your content, contact you or make a purchase.
GZIP compression helps reduce that load time by shrinking text-based files like HTML, CSS and JavaScript before they travel from your server to a visitor’s browser. The files are smaller, so your site can load faster.
In this guide, you’ll learn how to check whether GZIP compression is already enabled, how to fix “compress components with GZIP” warnings and how to enable GZIP compression in WordPress using your hosting settings, a plugin or your .htaccess file.
Quick answer: How do you enable GZIP compression in WordPress?
You can enable GZIP compression in WordPress in three common ways: through your hosting settings, with a WordPress performance plugin or by adding GZIP rules to your .htaccess file.
The safest option for most site owners is to start with your hosting settings or a trusted plugin. Editing .htaccess can work well on Apache servers, but a small mistake can break your site, so always back up your site before making changes.
After you enable GZIP compression, test your site to confirm it’s working. Look for a Content-Encoding: gzip or Content-Encoding: br response header. Brotli, shown as br, is another compression method and may appear instead of GZIP on some modern hosting or CDN setups.
What is GZIP compression and why does it matter?
When someone visits your WordPress site, their browser has to download files from your server before the page can load. These files often include HTML, CSS and JavaScript. If those files are large, the page can take longer to appear.
GZIP compression helps by reducing the size of those text-based files before they are sent to the browser. The browser then decompresses the files and displays the page normally. Your visitors see the same content, but the browser has less data to download.
How does GZIP compression work?
GZIP uses a type of lossless compression, which means it reduces file size without removing any of the original information. This is different from lossy compression, which reduces file size by removing some data.
Since GZIP keeps the original file information intact, it does not change how your website looks or works. It simply helps your server send smaller files to the browser.
What files does GZIP compress in WordPress?
For WordPress sites, GZIP is commonly used to compress text-based files such as:
- HTML
- CSS
- JavaScript
- PHP
- other web files that use text-based code
GZIP usually does not compress images or videos in the same way. Those files already use their own compression formats and need separate optimization.
Why does GZIP compression matter for WordPress speed?
GZIP compression can help improve WordPress speed because the browser has less data to download. This is especially helpful for visitors using mobile devices or slower internet connections.
Website speed matters because people expect pages to load quickly. A slow site can make visitors leave before they read your content, contact your business or complete a purchase.
Does GZIP compression help with SEO?
GZIP compression can support SEO by improving the technical performance of your site. Google’s Core Web Vitals focus on loading performance, interactivity and visual stability, so reducing unnecessary file weight can help create a better page experience.
GZIP is not a ranking shortcut, but it is a practical part of WordPress performance optimization. For small business websites, that matters because a faster, easier-to-browse site gives visitors fewer reasons to leave.
How to check if GZIP compression is already enabled?
Before you enable GZIP compression in WordPress, check whether it’s already active. Many hosting providers, caching plugins and CDNs enable compression automatically, so you may not need to make any changes.
You can check GZIP compression in a few simple ways:
1. Use an online GZIP compression checker
The easiest option is to use a free GZIP compression checker. Enter your website URL and run the test. If compression is active, the tool should show that your page is being served with GZIP or Brotli compression.
If the tool shows a warning like “compress components with GZIP,” it usually means some text-based files are being served without compression.
2. Check your browser’s developer tools
You can also check compression directly in your browser.
Open your website in Chrome, then go to:
Right click → Inspect → Network → Reload the page → Select the main page request → Headers
Look for the Content-Encoding response header.
You may see:
gzip, which means GZIP compression is activebr, which means Brotli compression is active- no
Content-Encodingheader, which may mean compression is not enabled for that file
3. Run a page speed test
Tools like PageSpeed Insights or GTmetrix can also flag compression issues. If you see a recommendation to enable text compression or compress components with GZIP, your site may need compression configured through your host, plugin, CDN or server settings.
What should you do if GZIP is not enabled?
If GZIP compression is not active, start with the safest option first. Check your hosting settings or ask your hosting provider whether server-level compression is available. If that is not an option, use a trusted WordPress performance plugin. Edit your .htaccess file only if you are comfortable making server-level changes and have a recent backup.
How to enable GZIP compression in WordPress
There are multiple ways to enable GZIP compression in WordPress depending on your server setup, hosting provider or technical comfort level. Below are three effective compression methods you can use:
Method 1: Enable GZIP compression through your hosting settings
Many hosting providers manage compression at the server level. This means GZIP or Brotli may already be active for your WordPress site, even if you have not changed any plugin settings.
If you use Bluehost, log in to your hosting dashboard and check for performance, caching or compression settings. You can also contact support to confirm whether GZIP or Brotli compression is active for your site.
How Bluehost users can check compression settings
- Log in to your Bluehost account and go to cPanel or the advanced settings section.

- Look for the Optimize Website or Compression tool under the Software section.

- Choose Compress All Content or select specific MIME types.

- Click Update Settings to apply the changes.
Why start with hosting-level compression?
Hosting-level compression is often the simplest option because it does not require code changes or extra plugin configuration. Once it is active, your server handles compression before files are sent to the browser.
This can reduce setup time and lower the risk of making changes that affect your site.
Method 2: Use a WordPress GZIP compression plugin
A WordPress performance plugin can help you enable GZIP compression or manage related speed settings from your dashboard. This is a good option if your host does not provide a visible compression setting or if you already use a caching plugin.
Common options include:
- WP Rocket: Useful for beginners who want caching and performance settings in one place. On supported Apache setups, WP Rocket can enable GZIP compression automatically.

- W3 Total Cache: A good fit for users who want more control over browser caching, compression, minification and CDN settings.

- LiteSpeed Cache: Best for sites hosted on LiteSpeed servers. It can manage server-level caching and optimization features, including compression support.

How to configure a GZIP compression plugin?
- Install and activate your chosen plugin from the WordPress dashboard.

- Install and activate your chosen performance plugin.

- Look for a setting such as Enable GZIP compression, HTTP compression, Browser cache or Compress pages.

- Turn on the setting if it is available.
- Save changes and clear your cache.
- Test your site again with PageSpeed Insights, GTmetrix or your browser’s developer tools.
Also read: 12 Best WordPress Plugins To Improve Your Website or Blog
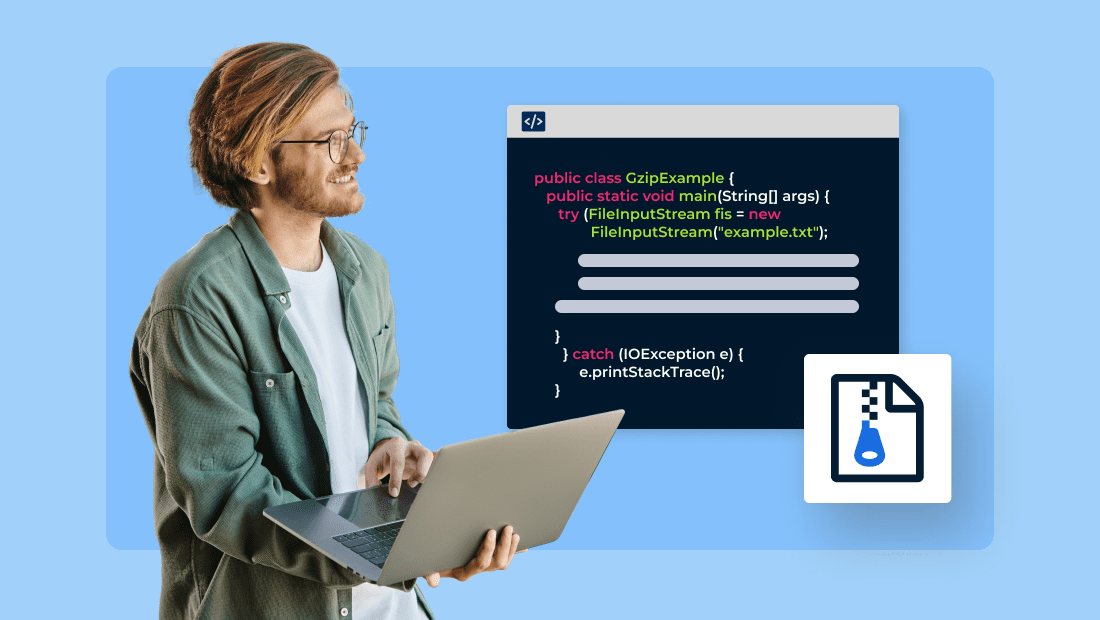
Method 3: Enable GZIP compression via .htaccess (Apache servers)
If your WordPress site runs on an Apache server, you can enable GZIP compression by adding rules to your .htaccess file.
Only use this method if you are comfortable editing server files. Before making changes, back up your site and save a copy of your current .htaccess file. A small error in this file can cause your site to return errors.
Recommended .htaccess code for GZIP compression
Add the following code to your .htaccess file, usually found in the root directory of your WordPress installation:
<IfModule mod_deflate.c>
  AddOutputFilterByType DEFLATE text/plain
  AddOutputFilterByType DEFLATE text/html
  AddOutputFilterByType DEFLATE text/xml
  AddOutputFilterByType DEFLATE text/css
  AddOutputFilterByType DEFLATE application/xml
  AddOutputFilterByType DEFLATE application/xhtml+xml
  AddOutputFilterByType DEFLATE application/rss+xml

  # Remove browser bugs (only needed for really old browsers)
  AddOutputFilterByType DEFLATE application/javascript
  AddOutputFilterByType DEFLATE application/x-javascript
</IfModule>
This code tells Apache to compress supported text-based files before sending them to the browser.
Precautions before editing .htaccess
- Back up your website before making changes.
- Save a copy of the original .htaccess file.
- Use your hosting file manager or an FTP client.
- Do not edit .htaccess if you are unsure what server your site uses.
- Clear all caches after saving your changes.
How to roll back if something breaks?
If your site shows an error after editing .htaccess, remove the code you added and restore your backup copy of the file. Then clear your cache and test your site again.
Which GZIP compression method should you choose?
For most WordPress site owners, this is the safest order:
- Start with your hosting settings if compression is available there.
- Use a WordPress performance plugin if you prefer a dashboard-based setup.
- Edit .htaccess only if your site runs on Apache and you are comfortable making server-level changes.
After enabling compression, test your site again. If you see Content-Encoding: gzip or Content-Encoding: br in the response headers, text compression is active.
Performance comparison: Before vs after enabling GZIP
GZIP compression can reduce the size of text-based files such as HTML, CSS and JavaScript. When those files are smaller, the browser can download them faster and load the page more efficiently.
The exact improvement depends on your site. A content-heavy page with large CSS or JavaScript files may see a bigger difference than a small page that is already optimized.
What changes after enabling GZIP?
After enabling GZIP compression, you may notice improvements in:
- Page size: Text-based files become smaller before they are sent to the browser.
- Load time: Smaller files can reduce the time it takes for a page to load.
- Mobile performance: Visitors on slower mobile connections may get a smoother experience.
- Page speed reports: Tools like PageSpeed Insights or GTmetrix may stop showing warnings such as “enable text compression” or “compress components with GZIP.”
Example: Before and after GZIP compression
| Metric | Before GZIP enabled | After GZIP enabled |
| Homepage size | 1.8 MB | 600 KB |
| First Contentful Paint (FCP) | 2.7 seconds | 1.2 seconds |
| Time to Interactive (TTI) | 3.8 seconds | 1.6 seconds |
| PageSpeed score | 64/100 | 90/100 |
| Bounce rate | 52% | 34% |
Source: Enable compression | GTmetrix
These results are based on a test using GTMetrix and Google PageSpeed Insights after activating GZIP on an Apache-hosted WordPress site.
How GZIP can support Core Web Vitals
GZIP compression can support better page performance by reducing the amount of data a browser needs to download. This can help with load-related performance signals, especially when combined with caching, image optimization, a CDN and clean site code.
GZIP alone will not fix every Core Web Vitals issue. If your site still feels slow after enabling compression, check for large images, render-blocking scripts, unused CSS, slow server response times and heavy plugins.
How Bluehost helps with WordPress speed optimization
GZIP compression is one part of a faster WordPress site. Your hosting setup also affects how quickly your pages respond, how static files are delivered and how easy it is to manage performance settings.
At Bluehost, our plans include performance tools that can help reduce manual setup, including caching, CDN options and compression support. These features can make it easier to improve site speed without editing server files or adding multiple plugins.
Performance features that can help your site load faster
- Caching support: Helps store and serve frequently requested files more efficiently.
- CDN options: Helps deliver static files from locations closer to your visitors.
- Compression support: Helps reduce the size of text-based files such as HTML, CSS and JavaScript.
- Performance settings in one place: Lets you manage key speed features from your hosting dashboard.
- Support when you need it: If you are not sure whether GZIP or Brotli compression is active, you can contact Bluehost support for help checking your setup.
If you want a simpler way to manage WordPress performance, explore our WordPress hosting plans with built-in tools for speed, security and site management.
More ways to speed up your WordPress site
Enabling GZIP compression is a good first step, but it works best alongside other WordPress speed optimization practices.
- Choose hosting that supports performance: Your hosting setup affects speed, caching and file delivery. Bluehost includes performance tools such as caching, CDN options and compression support to help manage these settings more easily.
- Enable browser caching: Store static files in visitors’ browsers so repeat visits load faster. You can manage this through a caching plugin or your hosting settings.
- Minify HTML, CSS and JavaScript: Remove unnecessary characters from code to reduce file size. Plugins like WP Rocket, W3 Total Cache and LiteSpeed Cache can help with this.
- Use a lightweight WordPress theme: Choose a theme that loads quickly and only includes the features your site needs.
- Optimize images: Compress images before uploading them, use the right file format and enable lazy loading for images below the fold.
- Use a CDN: A content delivery network serves static files from locations closer to your visitors, which can help improve load times.
- Review your plugins: Remove plugins you no longer use and avoid running multiple plugins that handle the same performance tasks.
Final thoughts
Enabling GZIP compression in WordPress is a simple way to reduce file size, improve load times and support a better user experience. You can enable it through your hosting provider, a trusted plugin or your .htaccess file, depending on your setup.
Pair it with other optimization tips like caching, minifying code and using a CDN for even better results.
If you want to manage these settings without extra manual setup, Bluehost gives you performance tools, security features and site management options in one dashboard.
Want a simpler way to manage WordPress performance? Explore Bluehost WordPress hosting for built-in speed tools, CDN options and support when you need help optimizing your site.
FAQs
GZIP compression reduces the size of text-based website files, such as HTML, CSS and JavaScript, before they are sent from your server to a visitor’s browser. The browser then decompresses the files and displays the page normally.
You can enable GZIP compression in WordPress through your hosting settings, a WordPress performance plugin or your .htaccess file if your site runs on Apache. Start with your hosting settings or a trusted plugin before editing server files manually.
No. WordPress itself does not enable GZIP compression by default. Compression is usually handled by your hosting provider, CDN, caching plugin or server configuration.
Yes. Many WordPress performance plugins and hosting dashboards let you enable compression without editing code. If you are not comfortable changing server files, avoid editing .htaccess manually.
“Compress components with GZIP” means some text-based files on your site may be loading without compression. To fix it, enable GZIP or Brotli through your host, CDN, caching plugin or server settings, then clear your cache and test the page again.
GZIP compression should not change how your website looks or works when it is configured correctly. It can support SEO by improving page speed and user experience, but it is not a ranking shortcut on its own.
GZIP and Brotli both reduce file sizes before files are sent to the browser. Brotli can offer stronger compression in many cases, while GZIP remains widely supported across browsers and servers.
Check your hosting documentation, dashboard or support team. You can also test your site in your browser’s developer tools and look for Content-Encoding: gzip or Content-Encoding: br in the response headers.
Yes. Incorrect .htaccess changes can cause site errors. Always back up your site and save a copy of the original .htaccess file before making edits. If you are unsure, use your hosting settings or a plugin instead.

Write A Comment