Key highlights
- Learn how to add theme to WordPress through the admin dashboard using step-by-step installation and activation procedures.
- Discover methods to safely upload premium themes without losing existing content or website customizations.
- Understand different WordPress installation options from automatic theme directory to manual ZIP file uploads.
- Know troubleshooting techniques for resolving common theme installation errors and compatibility issues effectively.
- Explore post-installation customization options to optimize theme settings and appearance for maximum impact.
Want to give your WordPress website a fresh new look? Learning how to add theme to WordPress is one of the quickest ways to transform your site’s appearance and functionality without any coding knowledge.
Whether you’re eyeing a sleek free theme from the WordPress directory or investing in a premium design, installing a WordPress theme is a straightforward process that can dramatically enhance your online presence.
Here’s what makes WordPress theme installation so powerful: you can experiment with multiple themes by adding them to your WordPress Dashboard and switching between them anytime.
You can explore and preview multiple themes from your WordPress Dashboard using Live Preview before activation, allowing you to test designs without impacting your live site until you’re ready to switch.
How to install a new WordPress theme?
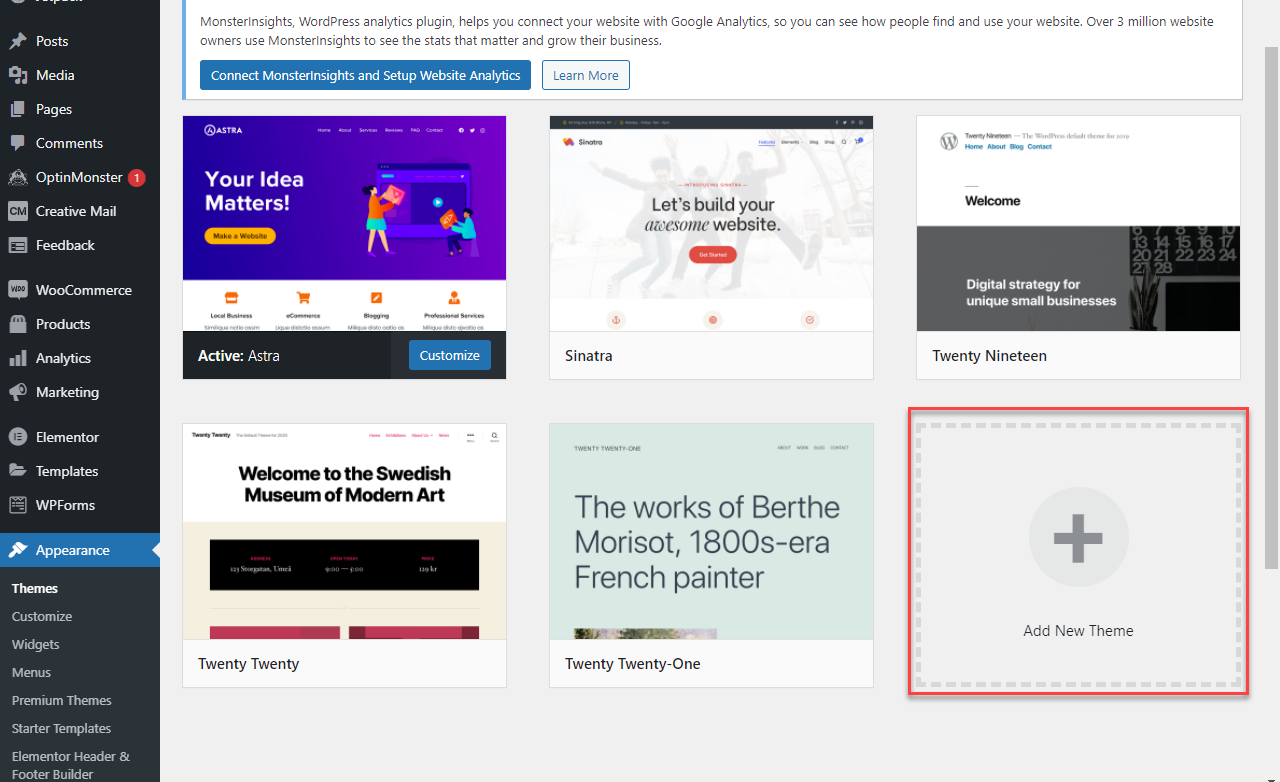
- Once logged in to your WordPress Dashboard, click Appearance in the main menu located on the left side.

- This directs you to the Appearance section, where you can search for a new theme. Choose Add New Theme, which is at the bottom of your current themes.

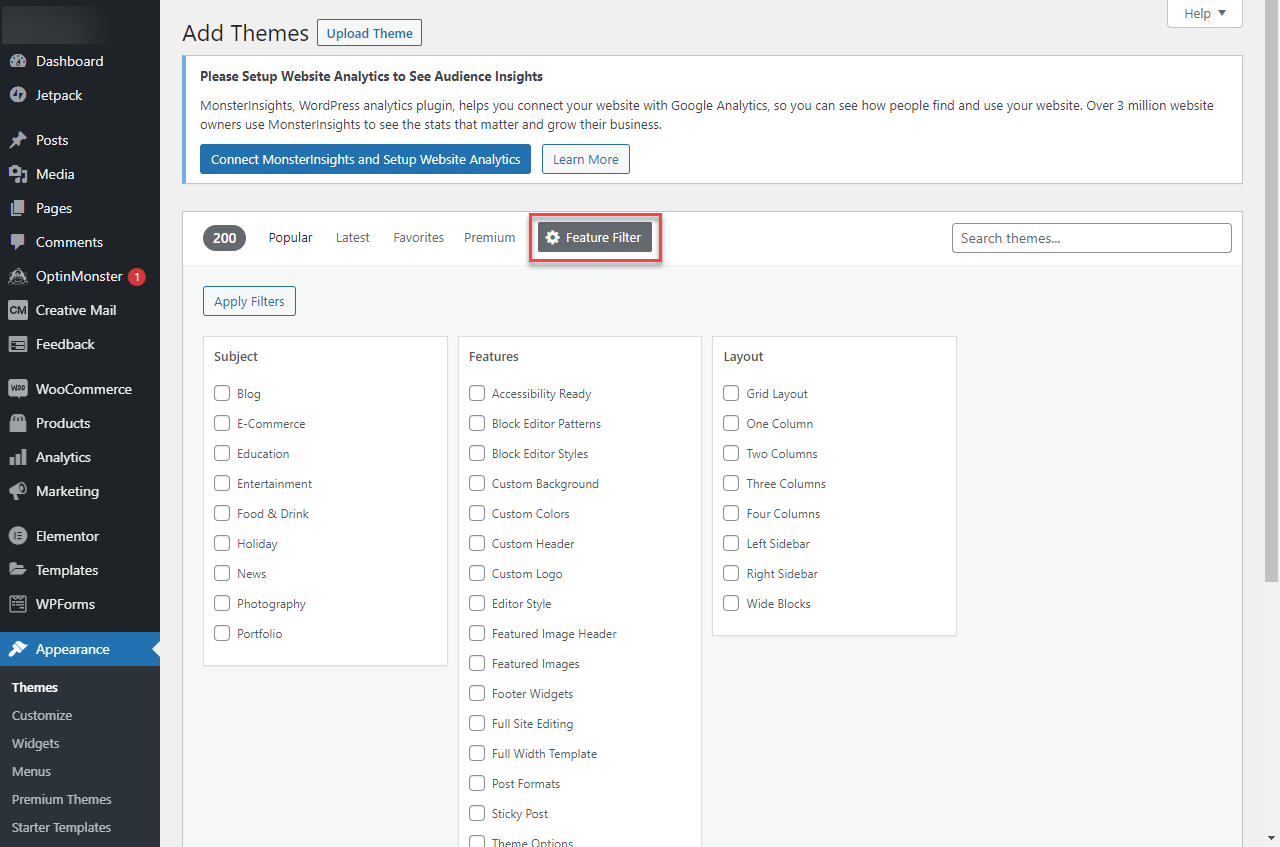
- Click Feature Filter to browse themes based on specific features. And sorting through the themes by color scheme, layout, features and more.
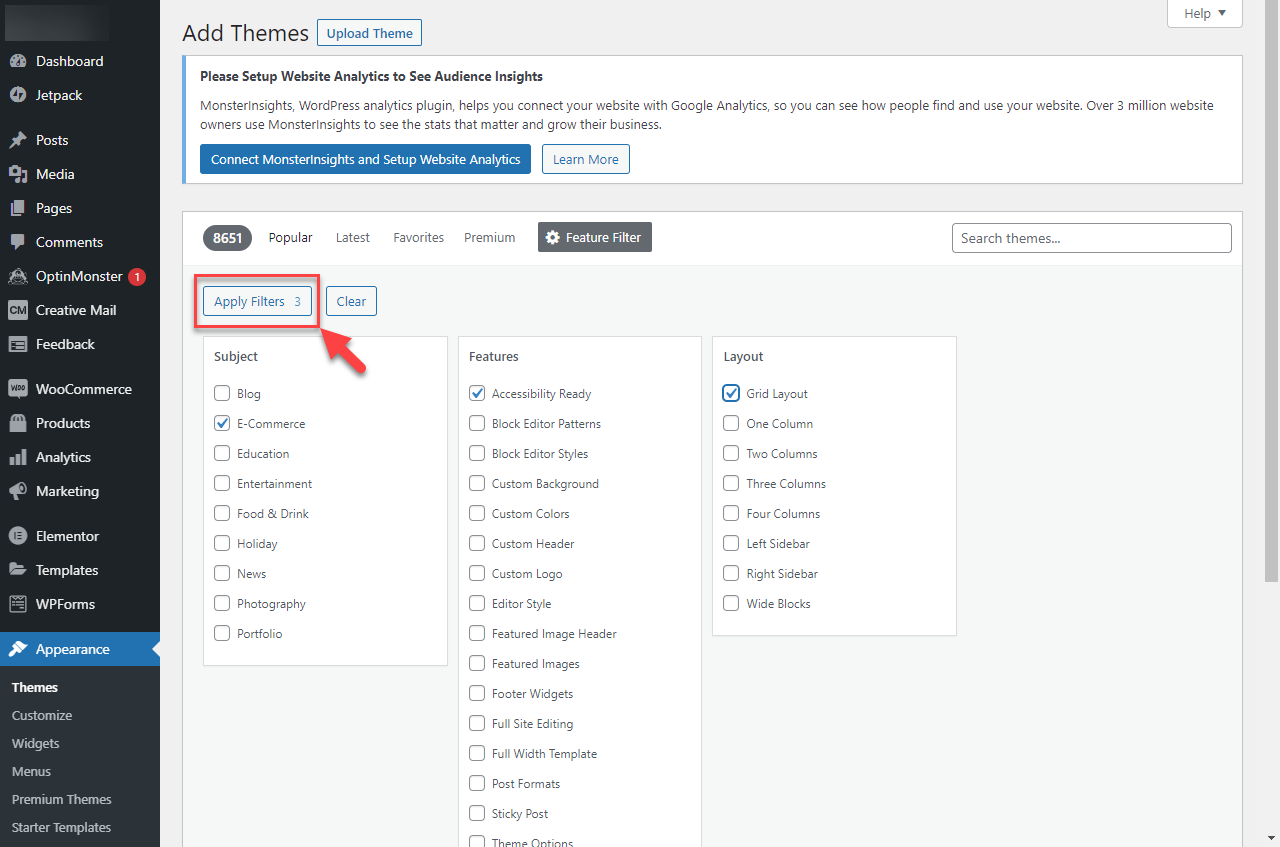
- Ensure to click Apply Filters after sorting the Subject, Features and Layout.
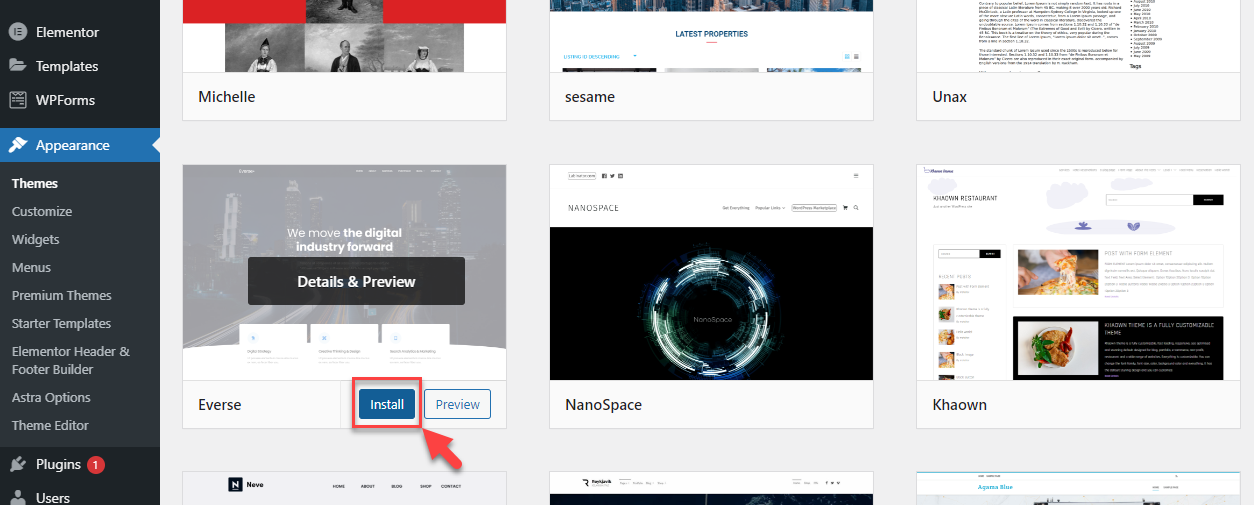
- Once you choose a theme, click the Install button by hovering your mouse over the theme.
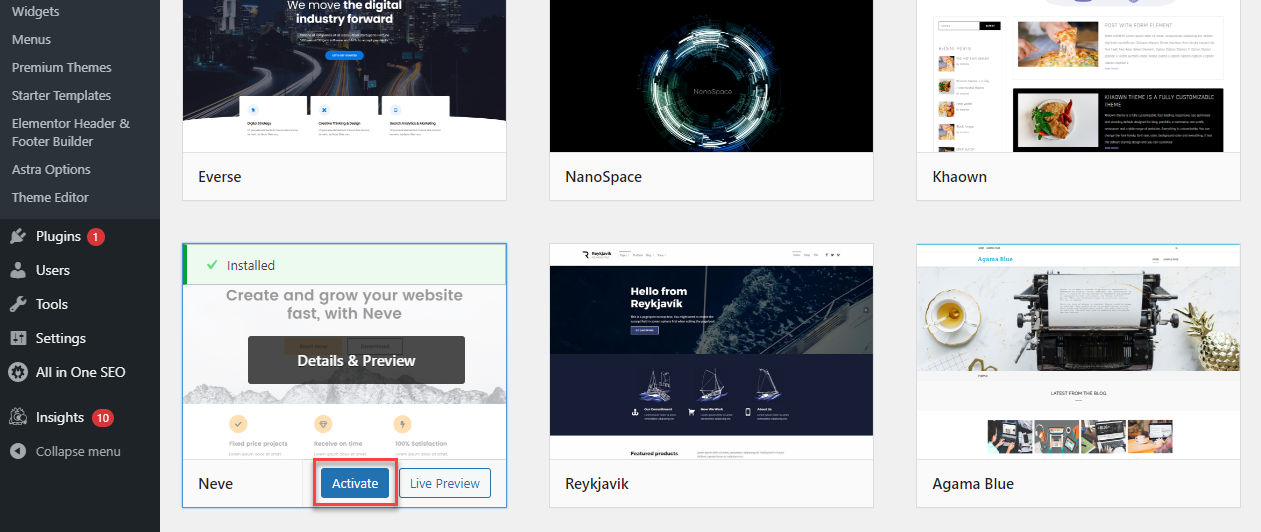
- After installation, you can click Activate to start using the theme and make your site use this theme immediately.

Preparation steps before you add theme to WordPress
Before installing any WordPress theme, taking a few essential preparation steps will protect your site and ensure a smooth transition.
- Create a complete backup of your website files and database to ensure you can restore everything if something goes wrong during the installation process.
- Verify that your new theme is compatible with your current WordPress version, PHP settings and active plugins by checking the theme documentation for system requirements and any required plugins.
- Consider using a staging site to test the theme first or enable maintenance mode during installation to avoid website downtime.
- Confirm that your user account has administrator privileges to install and activate themes.
- Review potential risks including broken layouts, lost SEO rankings or plugin conflicts that could disrupt your site’s performance and ensure you’re prepared to address them if they occur.
Different ways to install a WordPress theme
When you’re ready to add theme to WordPress, several reliable installation methods are available to suit different experience levels. The simplest way to add theme to WordPress is by installing directly from the WordPress theme directory through your admin dashboard, perfect for free themes with zero technical expertise required.
If you’ve purchased a premium theme, you can add theme to WordPress by uploading the theme’s .zip file through your admin panel, where the system automatically completes the installation in just a few clicks.
More advanced users might prefer manual installation via FTP or hosting file managers, especially useful when troubleshooting or working with custom themes. Some hosting providers also offer one-click WordPress theme installation tools that streamline the process further.
For developers, WP-CLI provides command-line installation options. Each method for installing WordPress theme serves specific needs, from quick setup to advanced customization.
The detailed step-by-step guides below will walk you through each approach, helping you add theme to WordPress confidently regardless of your technical background.
Add a WordPress theme using WP-CLI command line
WP-CLI provides an advanced command-line method for installing WordPress themes, ideal for technical users managing multiple sites.
Prerequisites include SSH access and WP-CLI installed on your server. Essential commands include wp theme search [keyword] to find themes, wp theme install [theme-name] --activate to install and activate themes directly and wp theme install [zip-url] for remote theme files.
Always backup your site, verify the correct site path and test on staging environments before running commands. This method excels for automation, bulk management and troubleshooting dashboard upload issues.
How to install a purchased theme from your WordPress admin dashboard?
If you previously purchased a theme, you can install it automatically on your WordPress site, like the one above or manually in your Hosting account.
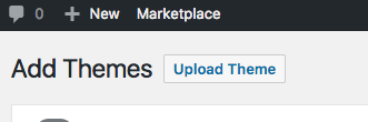
- When you reach the Appearance section and click Add New, choose Upload Theme.

- The theme folder must have a .zip extension. Choose Browse and locate the theme on your computer. Then click Install Now.
- Success! You have installed the theme; you can now click Activate and your site will use this theme.
How to manually install a purchased theme from your hosting?
If you have issues with the automatic update or do not have access to the Admin Dashboard, you can manually update your site’s theme.
Upload theme files
Be sure to note which folder your domain is pointing to, as this will determine where you upload it.
- First, you will need to upload the Theme files. Connect to your hosting account with FTP. Upload the extracted theme folder (not the .zip file) to the /wp-content/themes directory so WordPress can properly detect and load the theme.
- Once the upload has been completed, log in to your Bluehost Account Manager.
- Click on the File Manager icon in the Files section. If you do not see a Files section, you will need to click the Advanced option first.
- If prompted, choose the Home Directory and submit. A list of files will be displayed.
- Navigate to the folder you uploaded to and select the zipped folder.
- Click Extract.This will unzip the folder so that WordPress can access the files. Copy the name of the theme folder after it has been extracted.
Update database
Be sure to note which database your site is using. This will determine which database needs to be updated.
- Make sure you are in the correct website folder in the File Manager.
- Website files for your main websites reside only in the public_html folder.
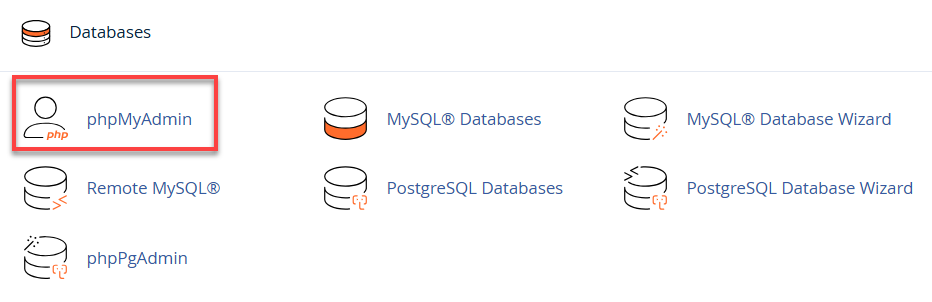
- Navigate to Databases and then click on phpMyAdmin.

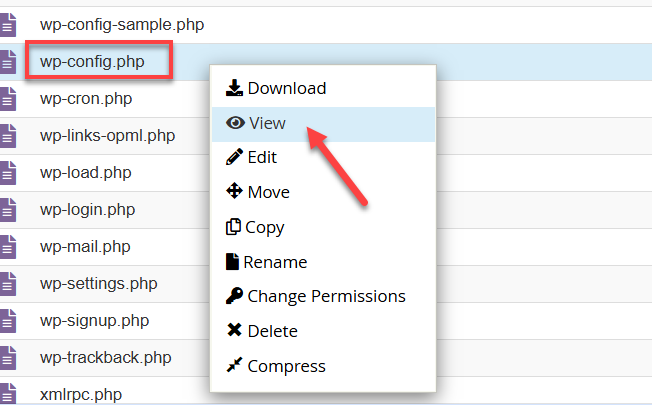
- Inside the file manager, locate the wp-config.php, right-click and select View.
- Scroll down and locate the define(‘DB_NAME’, under the Database settings section.

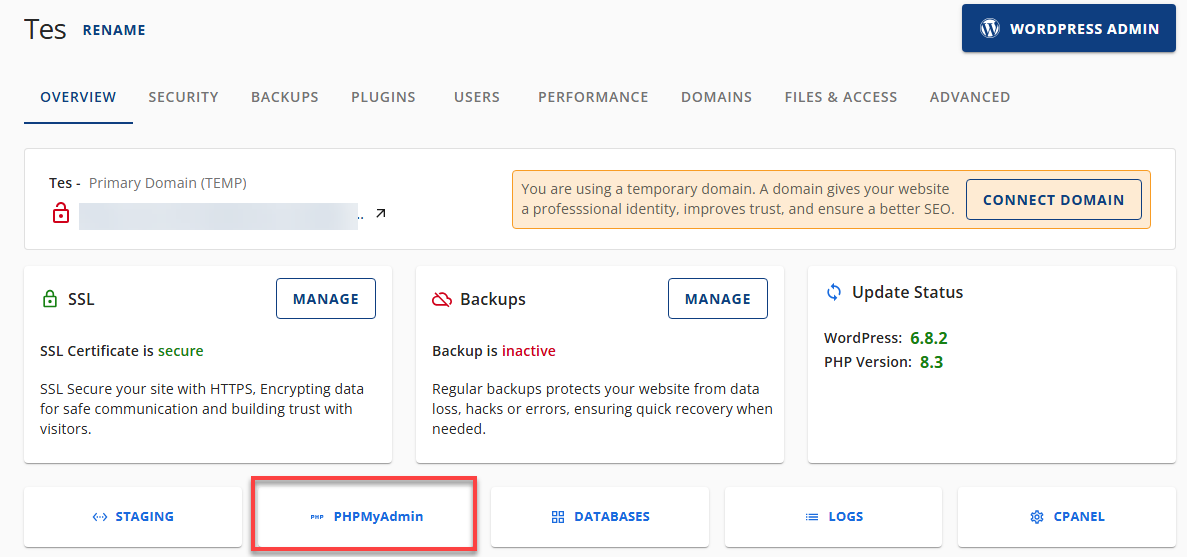
- Once you have your Database name, open your phpMyAdmin to update your Database.To open your phpMyAdmin, follow the steps below:
- From the horizontal menu, select the Overview tab and then click on phpMyAdmin.
- It will open a new tab and click on Tools.
- From the horizontal menu, select the Overview tab and then click on phpMyAdmin.
- Once you are inside the phpMyAdmin, click on the Databases section. This will load a list of current databases.
- Choose the database that needs to be updated. You should see some tables populated.
- Click on the wp_options table, then click Browse.The table name will differ depending on the database prefix.
- Scroll down to the bottom of the page and set the Number of Rows to 100.

- Replace the current theme with the theme you copied from the File Manager.
- To save, click Go next to Save. Success! Your theme is now activated on your site.


What’s a WordPress theme for?
WordPress themes let you create a professional-looking website quickly and affordably, without knowing how to code. Whether you’re starting a blog, business site or online store, there’s a theme for you.
Here are some key aspects of WordPress’ themes:
- Professional designs: WordPress themes provide professional templates that help users create a unique and attractive online brand. From personal blogs to business websites, these designs accommodate various industries and goals, guaranteeing a style that meets every need.
- Customization options: Themes offer customizable design options, such as colors, fonts and layout, so that users can match their site to their brand without coding.
- Responsive design: WordPress themes focus on mobile-first design principles and are built to ensure that websites look and function seamlessly across all devices. This responsiveness guarantees users a positive viewing experience, whether they access the site on a smartphone, tablet or desktop.
- SEO friendly: Many WordPress themes are built with SEO best practices in mind, such as clean code, fast loading and mobile responsiveness. While a good theme supports SEO, search rankings ultimately depend on content quality, performance optimization and ongoing SEO efforts.
- Cost-effective: WordPress offers a wide selection of themes, including both free and premium options. Free themes are an excellent solution for those on a tight budget, providing a cost-effective way to create a professional-looking site. Premium themes may be pricey, but you get superior functionality, expert support and frequent enhancements.
- Regular updates: Theme developers provide regular updates for their products. These updates introduce new features and aesthetic improvements, address security vulnerabilities and work seamlessly with the latest WordPress version and widely used plugins. This ongoing support keeps websites secure and functioning smoothly over time.
If this is your first time hearing about WordPress themes or it’s been a while and you forgot, you don’t need to worry! We will give you a guide on WordPress-Getting Started with Themes.
What types of themes are there?
Whether you’re preparing to add theme to WordPress for the first time or simply exploring your options, understanding the different types of themes available will help you make the right choice. WordPress offers various theme categories, each designed to serve specific purposes and user needs.
Categories of WordPress themes
- Free themes: Available through the WordPress.org theme directory, these themes offer basic functionality and are perfect for beginners learning to add theme to WordPress
- Premium themes: Paid options with advanced features, dedicated support and regular updates
- Multipurpose themes: Versatile designs that work for various industries and website types
- Niche-specific themes: Specialized designs tailored for particular industries like restaurants, photography or eCommerce
- Block themes: Built using WordPress’s Full Site Editing (FSE) technology for complete design control
- Classic themes: Traditional themes that use the customizer and widgets for site building
WordPress theme comparison
Before you add theme to WordPress, compare these popular theme types to find your best match:
| Theme type | Best for | Customization level | Cost |
| Free themes | Beginners, blogs, simple sites | Basic to moderate | Free |
| Premium themes | Business sites, advanced features | High | $30-$200+ |
| Multipurpose themes | Any website type | Very high | $40-$100 |
| Block themes | Modern, flexible designs | Very high | Free or paid |
| Niche themes | Specific industries | Moderate | Varies |
Pro tip: Start with a free theme if you’re new to WordPress. You can always upgrade later and this approach helps you learn how to add theme to WordPress without financial commitment.
Popular WordPress theme frameworks
- Genesis Framework: SEO-optimized foundation for building custom themes
- Divi: Drag-and-drop visual builder with extensive design options
- Astra: Lightweight, fast-loading theme perfect for any website
- OceanWP: Feature-rich multipurpose theme with WooCommerce integration
- Neve: Modern, speed-focused theme ideal for businesses and bloggers
Understanding these theme categories will streamline your decision when you’re ready to add theme to WordPress. Each type serves different needs, budgets and skill levels, ensuring there’s a perfect match for your website vision.
Keeping your WordPress theme updated is just as important as installing it in the first place. Regular theme updates ensure your website remains secure, performs optimally and stays compatible with the latest version of WordPress. Whether you’re new to WordPress or need a quick refresher, updating your theme is a straightforward process that takes just a few minutes.
Pro tip: Always create a backup of your site before updating themes, especially if you’ve made custom modifications. You can also enable automatic theme updates from the Themes page by clicking the “Enable auto-updates” option. If you’re using a child theme, make sure to update both the parent and child themes to avoid compatibility issues.
Final thoughts
Learning how to add theme to WordPress is one of the simplest yet most powerful ways to transform your website. With thousands of themes available, you can completely revamp your site’s appearance and functionality without writing a single line of code.
The best part? When you add theme to WordPress, the entire process takes just a few clicks. From browsing the theme directory to activating your chosen design, WordPress makes customization accessible to everyone. You can preview themes before going live, switch between designs whenever you want and update your site’s style as your brand evolves.
Now that you know how easy it is to add theme to WordPress, you’re ready to give your website the stunning, professional look it deserves. Take your time exploring different options, test them on your site and don’t be afraid to experiment until you find the perfect match for your vision.
FAQs
To activate a new WordPress theme from your admin dashboard, navigate to Appearance > Themes to view your installed themes, hover over your desired theme to reveal the action buttons, click Live Preview to test it with your existing content and once satisfied, click Activate to make it live, keeping in mind that some customizer settings, widgets and menus may need reconfiguration after activation.
Several common issues can prevent WordPress theme installation from the admin dashboard. File upload size limits set by your hosting provider often block larger theme files, contact your hosting support to increase these limits or use your hosting control panel’s file manager instead. Ensure your theme file is in .zip format and contains the proper WordPress theme structure with a style.css file.
Yes, you can add a theme to WordPress manually using FTP (File Transfer Protocol) or your hosting provider’s file manager. To manually add a theme to WordPress, download the theme .zip file, extract it to reveal the theme folder, then connect to your website via FTP client or access your hosting control panel’s file manager. Navigate to the wp-content/themes directory on your WordPress installation and upload the extracted theme folder directly into this location. Once uploaded, the theme will appear in your WordPress dashboard under Appearance > Themes, where you can activate it.
When you add a new theme to WordPress, your content remains completely safe and unchanged. WordPress themes control only the visual presentation and layout of your site, not the actual content stored in your database. All your posts, pages, images, comments and other content will remain intact when you install and activate a new WordPress theme. However, the way your content displays may change based on the new theme’s design, layout structure and styling options.
You can install multiple WordPress themes on your site, but only one can be active at a time. To maintain performance and security, it’s best to remove unused themes once you’ve finished testing.


Write A Comment